
I don’t know about you, but I have always been intrigued by the thought of creating my own designs in Silhouette Studio®. Don’t get me wrong, I am obsessed with everything in the Design Store, but if you ever decide you want to use a design for profit you’ll need to purchase a commercial license.
That is, unless you design your own from scratch!
Today I’m going to show you how to do basic point editing and welding to transform an ellipse into a flower. This is a very basic tutorial but hopefully it will lay the groundwork so that you can begin creating your own simple designs—and eventually move on to the more complicated ones! Let’s jump right in!
Draw A Basic Shape With The Ellipse Tool
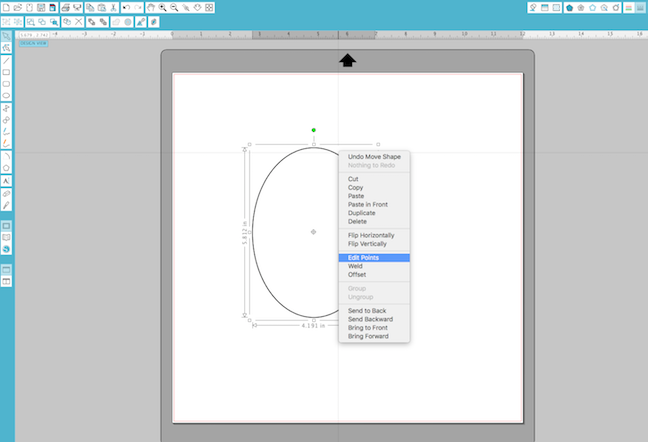
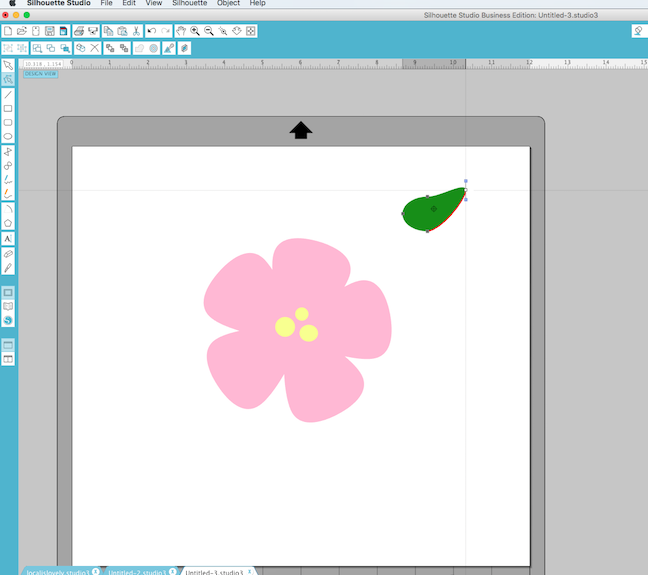
- Start by drawing an oval or circle using the ellipse tool. The shape you choose really just depends on the shape you want your finished flower petal to be).
2. Right click on the shape and select “edit points.” A series of points should show up along the cut line.
Use Software Tools To Alter & Design Your Flower
Using The Point Editing Feature
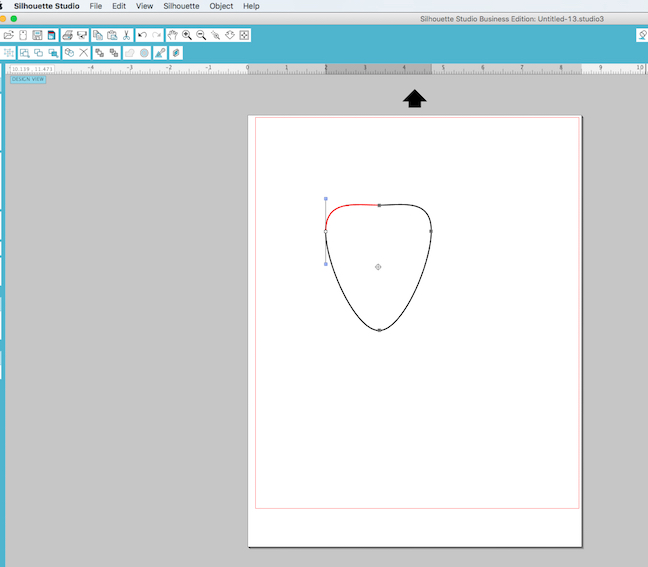
This feature lets you edit specific points of a shape. You can right click on a point and select an option in the Point Editing panel, such as “make curve,” to create a clean curve between the two points.
- Drag the points up or down on the oval until you are satisfied with the shape and it somewhat resembles a flower petal.
Don’t be afraid to play around! You can click anywhere along the line to add a new point.
Duplicating & Welding Your Design
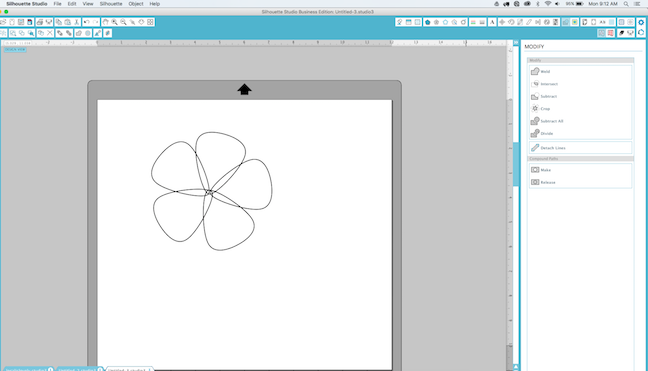
- Duplicate your petal design, using copy and paste or the duplicate option in Silhouette Studio®.
- Rotate the petals and place them so that the lines are overlapping and they form a flower shape.
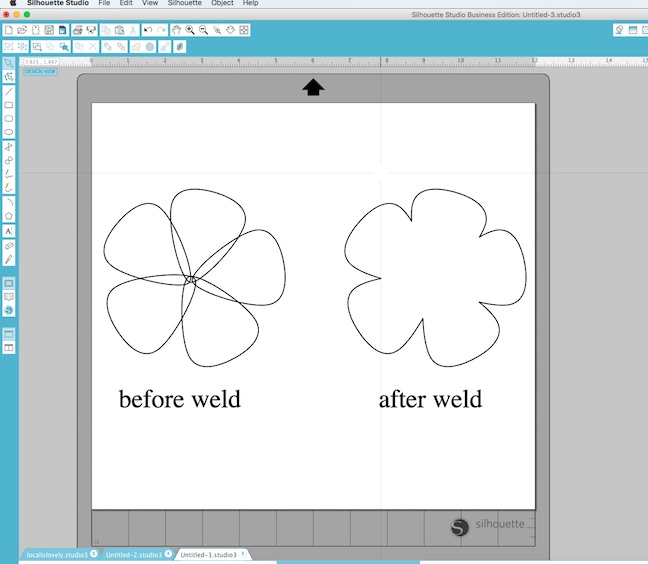
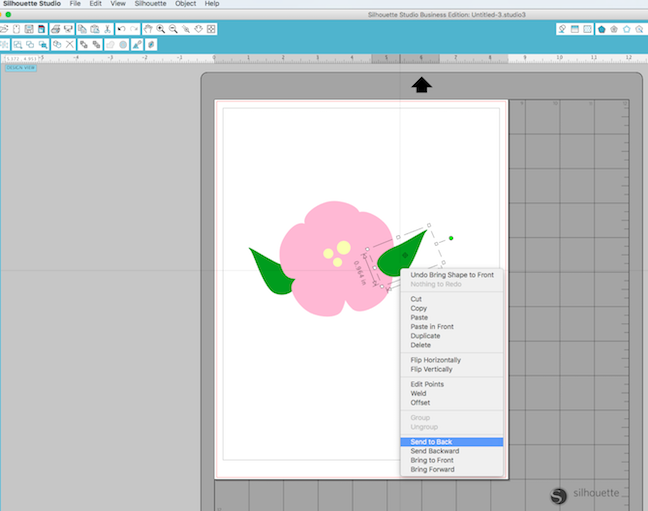
Note: The lines must be overlapping in order for the weld function to work properly. Welding takes multiple shapes and combines them into one with a single cut line as you can see in the image below.
3. Make sure all of your shapes are selected at once, then right click and select “weld.”
Adding Color & Other Details
1. Add color to your flower with the fill tool. (Everything looks better in color!)
2. Add details such as circles for the center of the flower and, if you want, repeat the steps above to create leaves.
Arranging Design Elements On Workspace
The final thing you need to do to finish your flower design is send the leaves behind the flower so that they appear to be on the bottom, below the petals. To do this:
- Place your leaf where you want it to appear on the flower then right click and select “send to back”.
You now have a completed flower!
I used the steps above to create all of the flowers you see in the image below. It’s really fun to see how you can transform a simple shape into something totally new just by editing a few points here and there.
I turned my design into a printable image, but the flowers can also be separated and cut out of paper for a cute layered look.

There truly are so many things you can do with the tools in Silhouette Studio® and I hope you will keep coming back to the blog to learn more!
What other types of designs would you like to learn how to create from scratch?
Nasze Naturalne
September 3, 2025
Your authentic voice really shines through in everything you create and share
Naszenaturalne
September 2, 2025
Really love your style
Kelly Wayment
June 28, 2024
You can use it with vinyl as long as it is smooth and flat to allow the static charge to hold on to it. Rolled vinyl that wants to go back to its rolled shape will not necessarily work well, and it would need to be trimmed to fit the ES mat cutting area.
Kelly Wayment
June 28, 2024
Yes, you can use the heat pen while using the ES mat. 🙂
Yurii
March 2, 2024
Hello. May it be used with heat pen?
Thanks
Jerome
February 24, 2024
Hi, works this with the normal vinyl foils or only with printer papter etc?