
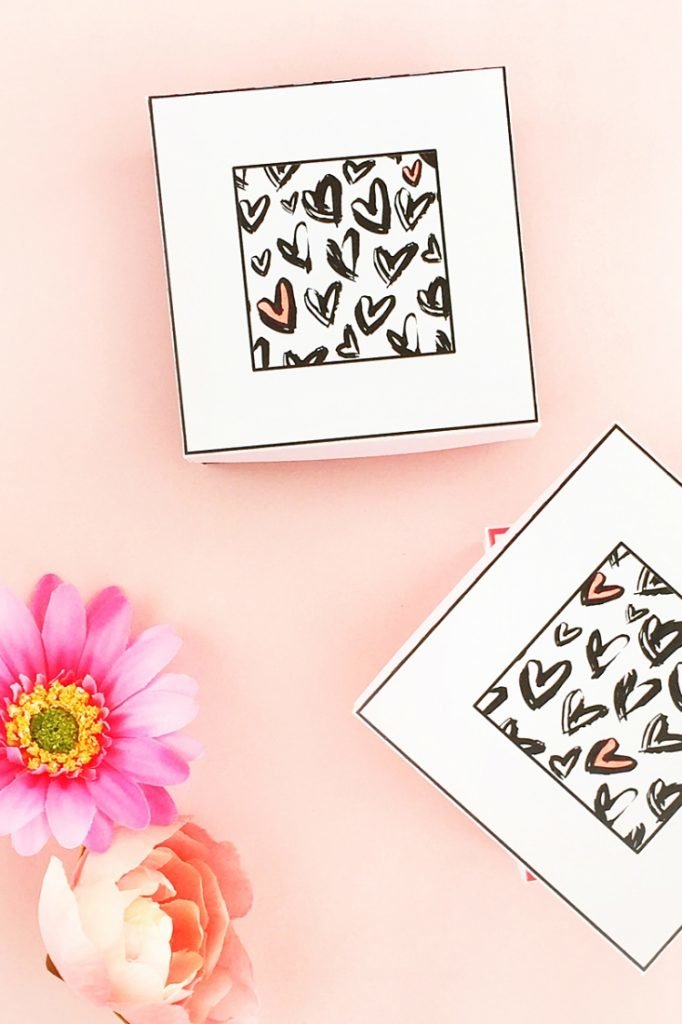
If you need a creative break, come on over and make pretty things with us. These DIY Heart Patterned Gift Boxes would be a great packaging idea for your beloved ones. You can leave it as black and white or color in a couple of hearts. Read on for the full tutorial!
Supplies Needed:
- Silhouette CAMEO® or Silhouette Portrait® or Silhouette Curio™
- Silhouette Cutting Mat
- Silhouette Cutting Blade
- Silhouette Studio®
- Cardstock
- Glue
- Printer
- Optional – Colored Pencils
- Design ID #59832
- Design ID #171499
Step One: Prepare the Design
- In Silhouette Studio®, open your Box design (Design #59832). Delete the flower, circle, and “thanks” design. Put the bottom of the box aside and place the top of the box (the top of the box is the one with the smaller tabs) in the print/cut area.
- Use the rectangle tool to draw a square the same size as the top of your box. And a smaller square that is approximately 1.8 in. x 1.8 in.
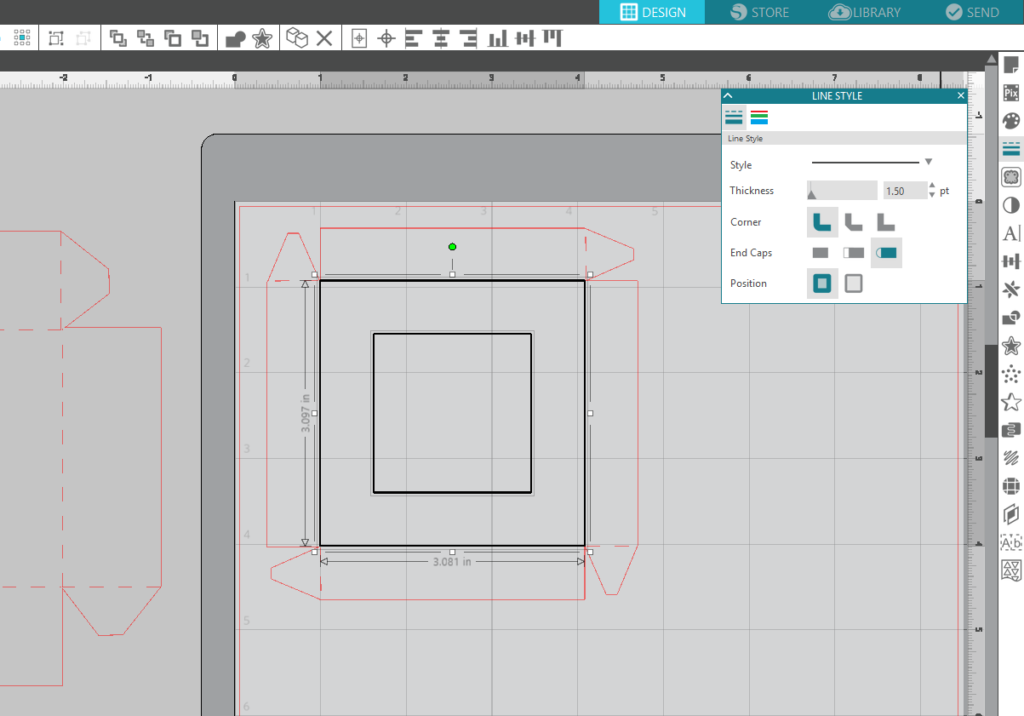
- Change the squares’ line color to black and thicken the lines to 1.5 pt. To change the thickness and color of the line, go to the Line style panel by clicking on Line Style icon, which is located on the right side of the screen.
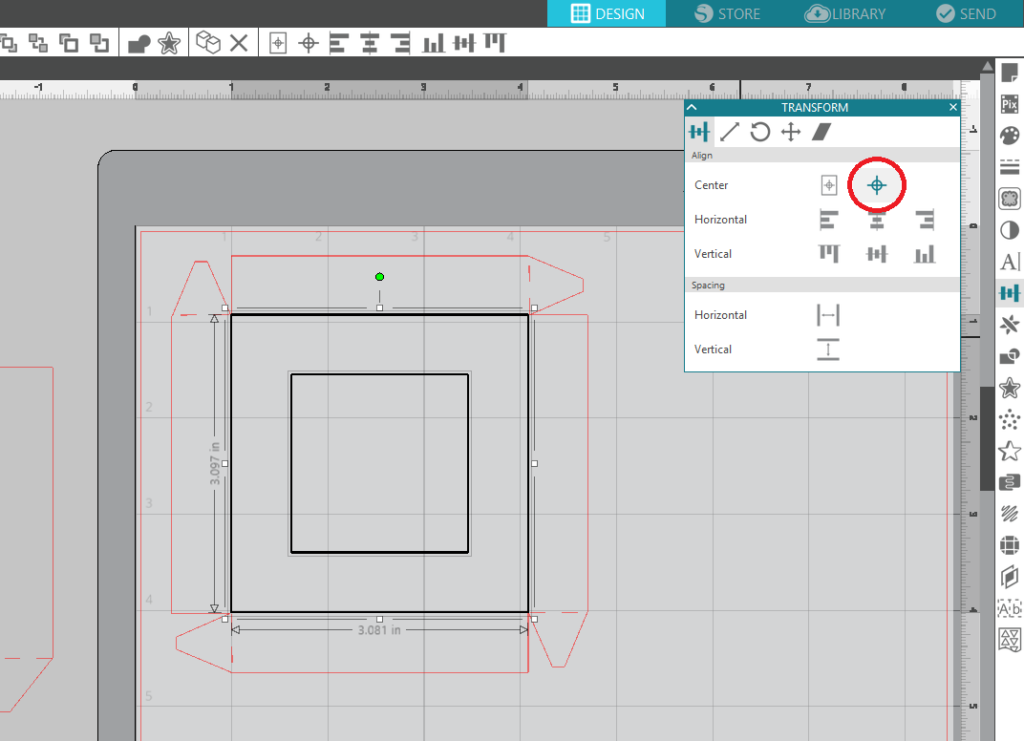
- To center the smaller square within the bigger one, you need to go to Transform panel by clicking on the Transform button, which is located on the right side of the screen. Select both squares and click on the target icon in the Transform panel.
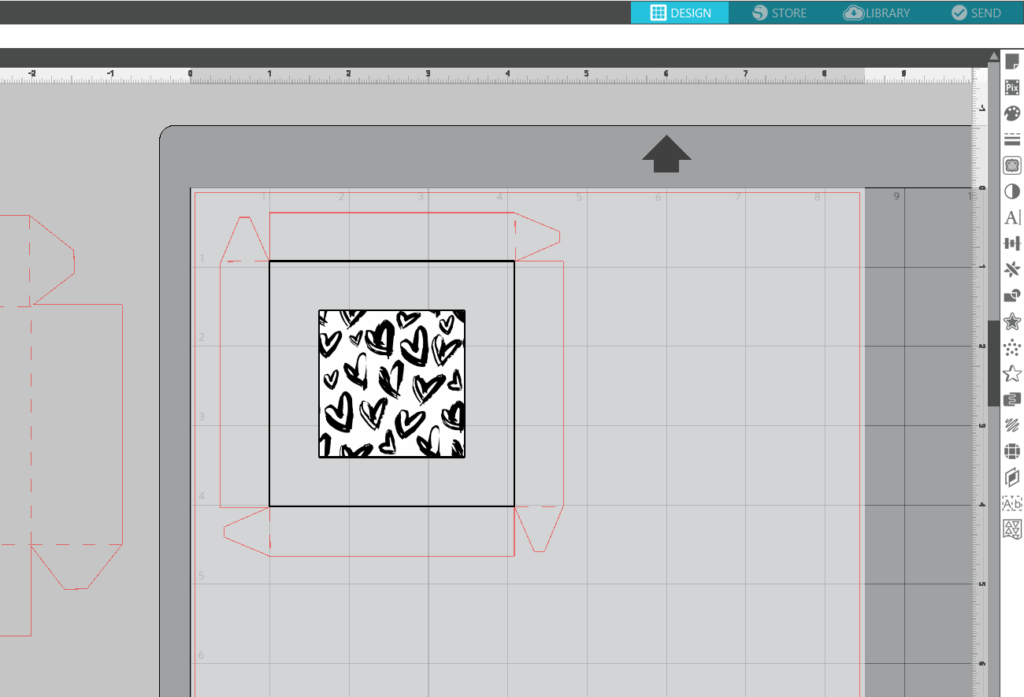
- Open the hand-painted heart pattern design (Design #171499) and resize it so that it sits in the smaller square.
Step Two: Cut Out the Box
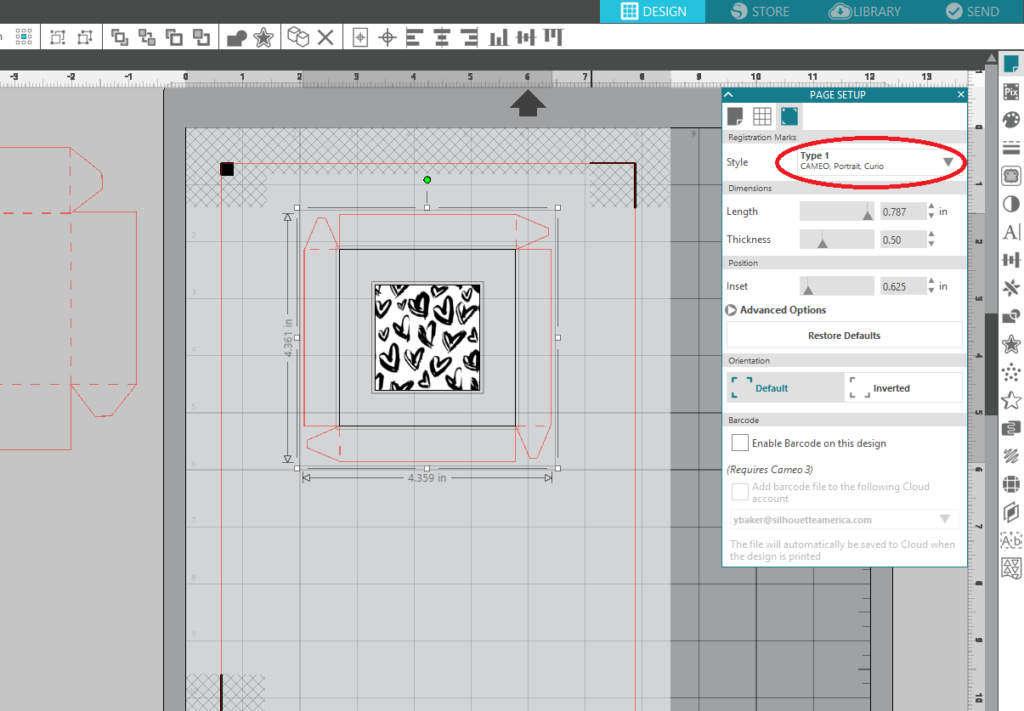
- Click on the Registration Mark icon located along the top of the Page Setup panel and select the style of registration marks. You will note that there are now crosshatched areas on three corners of your work space. Make sure that your design does not overlap into the crosshatched area or else your Silhouette will have trouble reading your registration marks.
- Once your design is ready to go, print your job to your regular printer by clicking on the Print icon in Silhouette Studio®.
- Load your printed material onto a cutting mat and load the mat into your Silhouette. Select “Cardstock, Plain” from the material list in the Send panel and adjust your blade accordingly (unless you use Cameo 3 or Portrait 2 with the Autoblade, which adjusts automatically).
- Choose Action by: Line, and check to cut only the red lines.
- Click “Send,” and your Silhouette will begin scanning the page for the printed registration marks. After the registration marks are found, the Silhouette will proceed to cut as usual.
- Unload your material and remove from the cutting mat.
- In Silhouette Studio®, move aside the top of the box design and place the bottom of the box design on the page.
- Turn off the registration marks.
- Load your cardstock into your Silhouette using a cutting mat. Select “Cardstock, Plain” from the material list in the Send panel and adjust your blade accordingly (unless you use Cameo 3 or Portrait 2 with the Autoblade, which adjusts automatically).
- Click “Send,” and your Silhouette will begin scanning the page for the printed registration marks. After the registration marks are found, the Silhouette will proceed to cut as usual.
- Unload your material and remove from the cutting mat.
Step Three: Assemble the Box
- Optional – color some of the hearts with colored pencils.
- Assemble your box by folding at the dashed lines and gluing the tabs.
And there you have it. You’re now set for packaging some gifts! What colors did you use for your hearts?
This blog post was originally posted on the Maritza Lisa blog. It has been edited and republished with permission from the author.
Kelly Wayment
June 28, 2024
You can use it with vinyl as long as it is smooth and flat to allow the static charge to hold on to it. Rolled vinyl that wants to go back to its rolled shape will not necessarily work well, and it would need to be trimmed to fit the ES mat cutting area.
Kelly Wayment
June 28, 2024
Yes, you can use the heat pen while using the ES mat.
Yurii
March 2, 2024
Hello. May it be used with heat pen?
Thanks
Jerome
February 24, 2024
Hi, works this with the normal vinyl foils or only with printer papter etc?
Kelly Wayment
February 16, 2024
Once you’ve pushed the mat up against the rollers, just press the “Load” arrow button (bottom right on the display). Does a regular sticky mat load into the machine for you?
Michelle a goodall
January 24, 2024
Hello! I just got my new electrostatic mat and have watched every video i can find on it. However, what i can t find is why it wont feed into my cameo 5/ it slides right up the rollers but wont go any further. and yes- iam pushing the into button. help!