Typing text in Silhouette Studio® on a straight line is as easy as clicking the text tool and typing. But after a while, you want to get a little fancy. If you’re like me, you will run into a problem I call the Text Dance. You try to move the text from a straight line to a curve and it jumps around like a toddler in a bounce house.
Never fear. I’ve written this blog post to help eliminate the Text Dance.
First, we will practice placing text along a simple path.
Placing Text Along A Simple Path
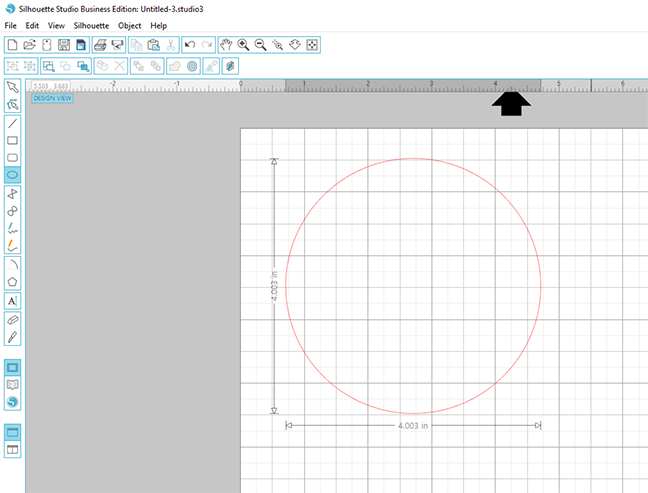
- Select the ellipse tool from the left toolbar in Silhouette Studio®. Hold Shift as you click and drag the mouse to draw a perfect circle.
Did you know, clicking and dragging holds the ellipse at a fixed ratio?
- Select the Text Tool from the left toolbar and choose a font. I’ve selected Arial, but only to demonstrate. (I mean, I love Arial, but there are so many other fabulous fonts too!)
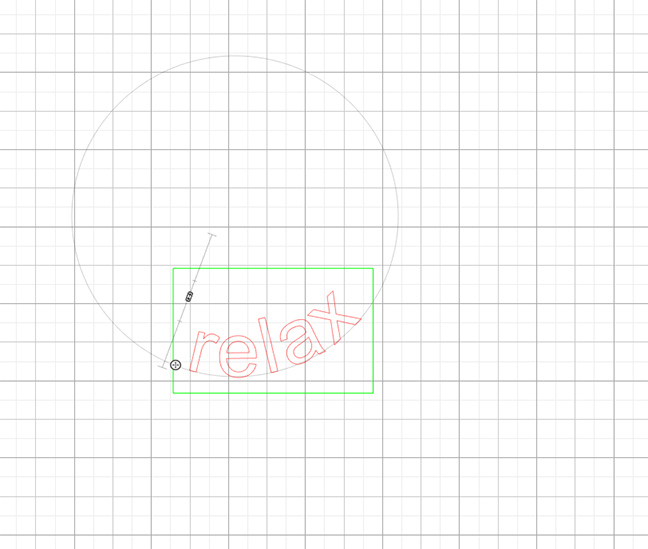
3. Click on your workspace to create a text box and type a word. As you type, note the tiny circle (the Control Point) on the left side.
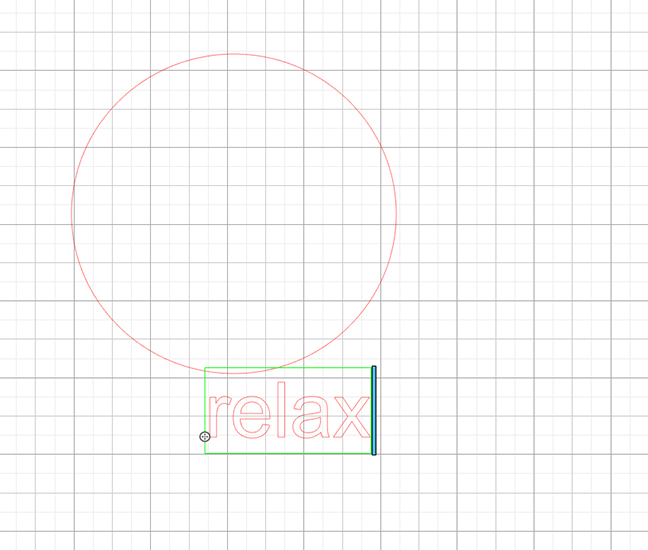
- Click on the Control Point and drag your text over the shape you drew.
This action can be tricky. The text will now jump to the outside the circle, like this:
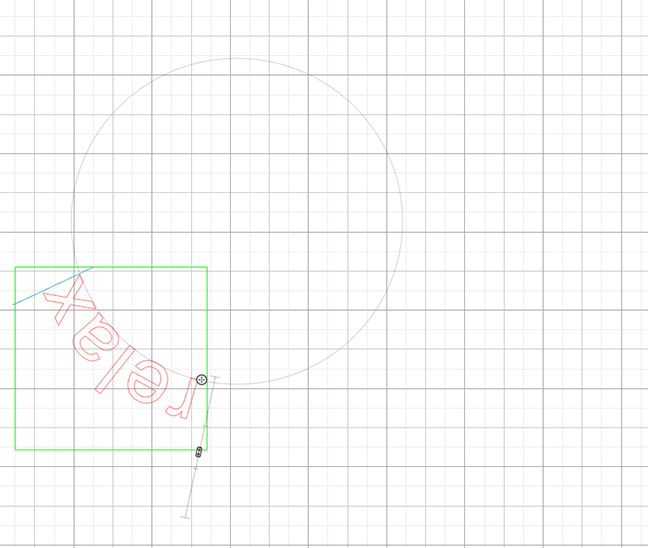
- Keep dragging slowly inside the circle and your text should follow.
From here you can again edit the text and adjust the size and spacing using the prompts in the Text Style menu. You can also select Character Spacing to get the letters to not touch one another or to squeeze them tighter.
When the text jumps inside the circle onto a path, you will also see a vertical slider. This slider allows you to adjust the text above or below the path line. If, for example, you were going to cut this circle shape out, you wouldn’t want the text sitting on the cut line!
Okay, now let’s take it a step further and get some text on a real shape from the design store.
I’ve chosen a banner shape because it best illustrates an odd issue that you may have run into if you’ve tried this before. Are you ready?
Placing Text Inside A More Complex Design
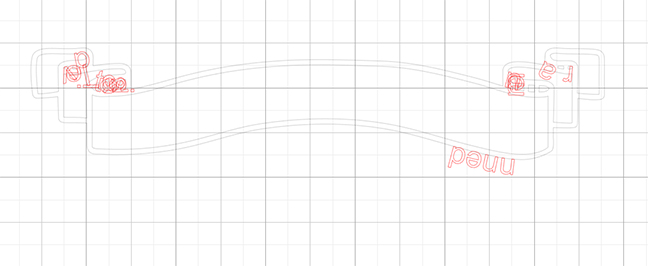
I’ve chosen to work with Banner Set, Design ID #72809 for this. I’ve opened the third banner down (the set has four total). There are a lot of cut lines here. If you try to follow the directions for adding text to a simple path, you’re going to be frustrated. Typing text and dragging it onto this shape will result in this kind of mess. Hello Text Dance!
Instead, you want to isolate the curved line that you DO want the text to sit on.
Isolate The Curved Line For Your Path
- Click the Object menu and then select “Release Compound Path.”
- Select the line you want to use for the curve and move it away from the rest of the banner shape.
Just as before, type the text you’d like to use, select the font and size and drag it to the curve.
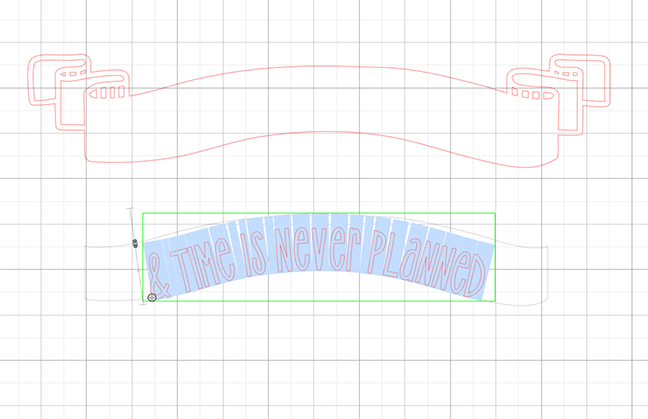
Don’t forget to adjust character spacing and slide the vertical slider up and down to get the text exactly where you’d like it to sit.
Group Text And Design
When you deselect the text, the bounding box around it will turn gray. To edit that text again (if you need to adjust something and forgot), just right click and select “Edit Text.”
1. Select the banner shape and text and Group them. Now you can slide both shapes back into place in the design.

That’s it!
Combining Fonts And Shapes For A Project
Let’s talk text and fonts. I studied design, and typography was my favorite class. I remember spending hours and hours sketching out a word, one letter at a time. It was painstaking and fun. I’m such a type-nerd!
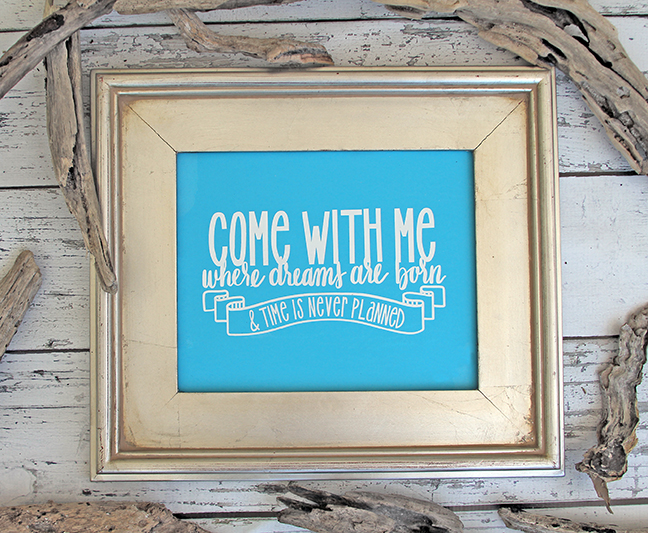
So for my final design (which you can see at the top of this post), I used LW Simple Font, Design ID #70190, and combined it with my own hand lettering to make this cute quote from Peter Pan. I’m hanging it here at home, so I won’t add a citation. Look at me, breaking all the rules!
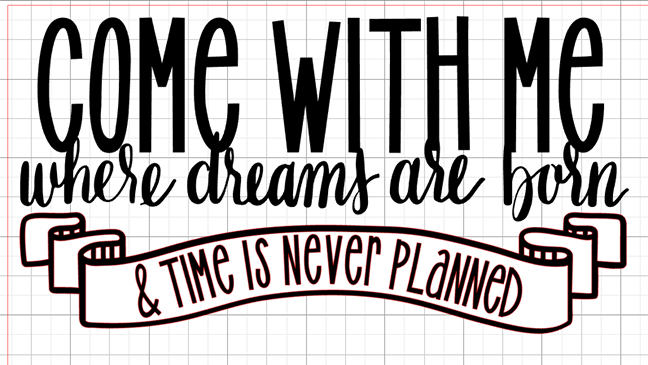
After that, I cut the design on the CAMEO in white adhesive vinyl and transferred onto thick cardstock.
(Okay, scratch that. I transferred it onto uncoated cardstock first, forgot that the transfer tape would tear the cardstock, and then recut it and applied to COATED cardstock. I’m not immune to the occasional Pinterest fail, my friends!)
Nasze Naturalne
September 3, 2025
Your authentic voice really shines through in everything you create and share
Naszenaturalne
September 2, 2025
Really love your style
Kelly Wayment
June 28, 2024
You can use it with vinyl as long as it is smooth and flat to allow the static charge to hold on to it. Rolled vinyl that wants to go back to its rolled shape will not necessarily work well, and it would need to be trimmed to fit the ES mat cutting area.
Kelly Wayment
June 28, 2024
Yes, you can use the heat pen while using the ES mat. 🙂
Yurii
March 2, 2024
Hello. May it be used with heat pen?
Thanks
Jerome
February 24, 2024
Hi, works this with the normal vinyl foils or only with printer papter etc?