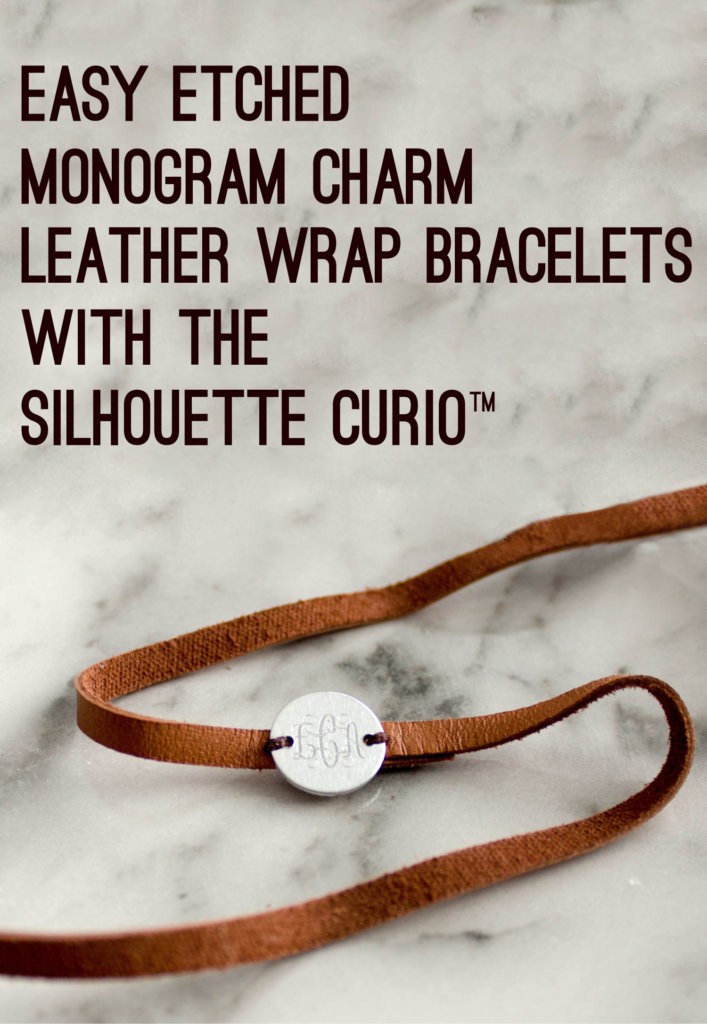
Ahh Valentine’s Day . . . a holiday you either love or dread. Not everyone has a special partner in their lives to make gifts for BUT I’m sure we all have amazing girlfriends. My husband is not really the “make me a special craft” type so when I go to make pretty things for people, the first in line are my ladies who’ve been there with me through everything.
I have been wanting to master etching metal charms with my Curio™ for awhile now and figured now is the time. I already did the trial and error, and error—did I mention error? Here is the BEST way to get that engraved look on metal charms. It’s actually very simple!
The Supplies List:
- aluminum metal charms
- Silhouette Curio™
- Curio Stippling/Etching tool
- strong tape
- leather band
- needle and thread
- Monogram Script Circle font
STEP ONE: DESIGN YOUR CHARM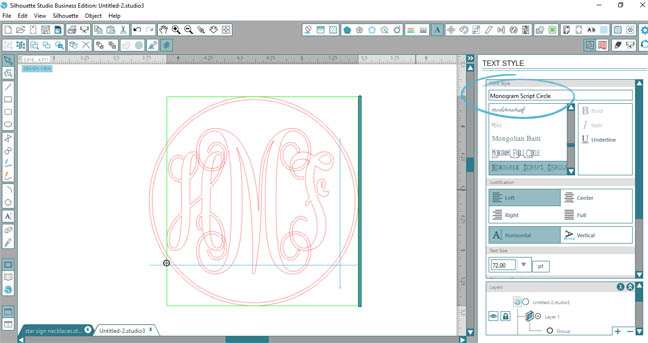
If you’ve never worked with a monogram font before, here’s the quick lesson: lower case first name letter<upper case last name letter<lower case middle name letter. For example, my initials would be ‘cCa’. The uppercase adds the circle around the design.
STEP TWO: PREPARE THE DESIGN FOR THE ETCHING PATTERN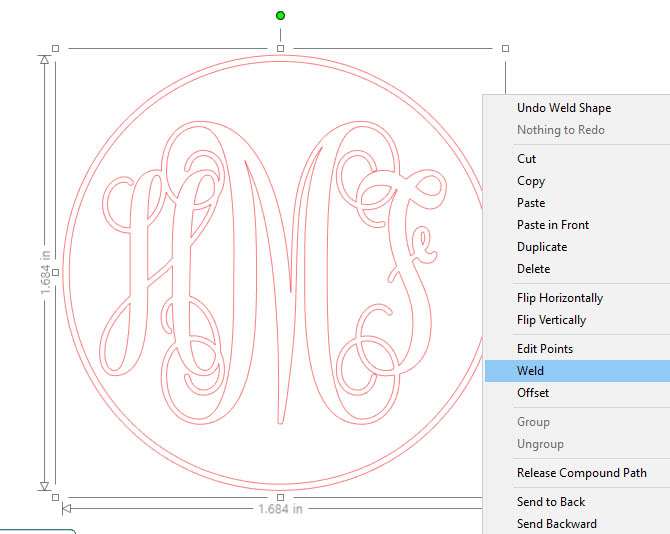
I didn’t want the circle portion of the monogram because I’m using a circle charm. To delete the circle yet keep the correct properties of the design for when you go to add the etching pattern, there are a few simple steps.
1. Weld the letters: Right click<Weld
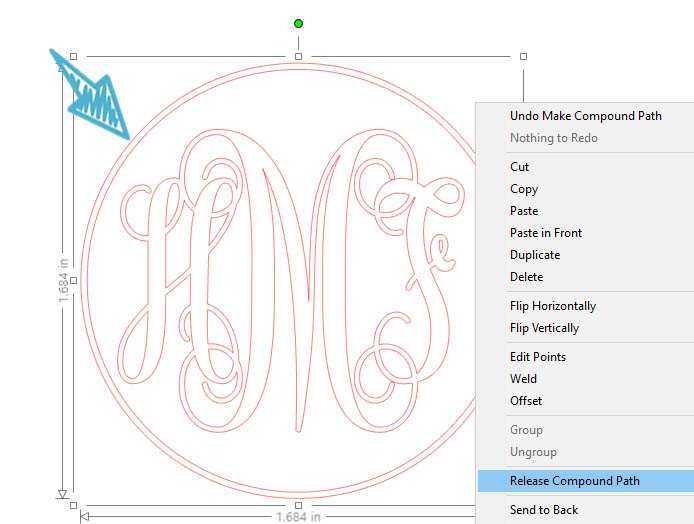
2. Release Compound Path and delete the outer circles
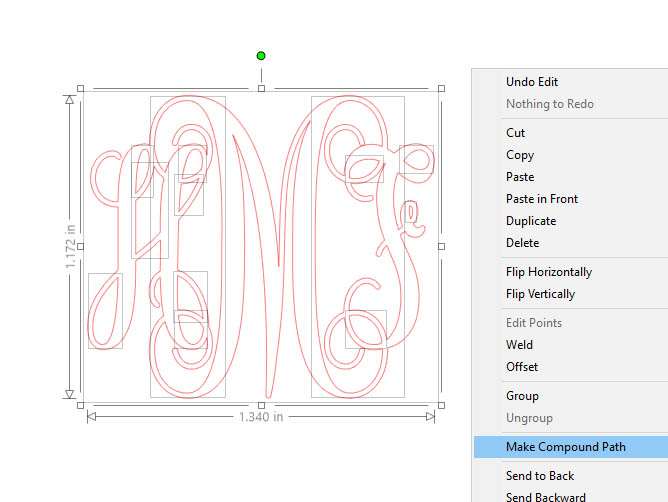
3. Make it a Compound Path again, otherwise the pattern will fill all those little ‘holes’ too.
STEP THREE: FILL THE DESIGN WITH THE ETCHING PATTERN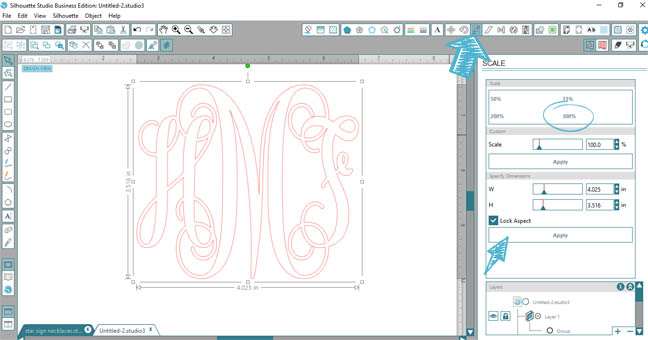
Here is where the trial and error part came in. I tried several different methods and this was my favorite for getting a nice clean etch. (You should see my pile of sad non-pretty somewhat etched charms)
Increase your scale to 300%
In the Embossing/Debossing window, pick the parallel lines effects and slide the spacing all the way to the left, so it’s as small as possible. We are trying to get it to look like a solid fill.
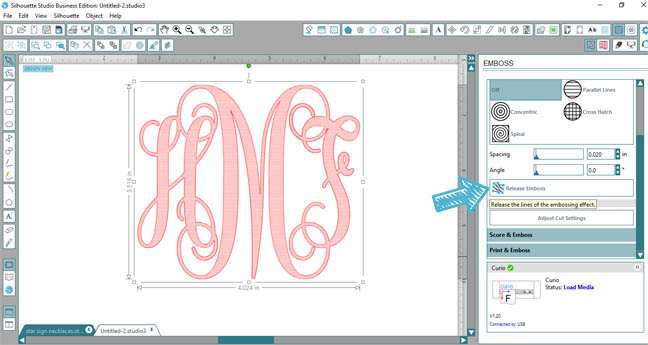
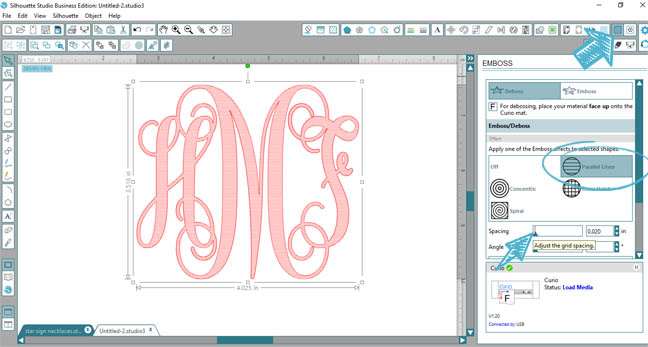
Now select “Release Emboss.” This breaks the link between the scale of the shape and the scale of the pattern.
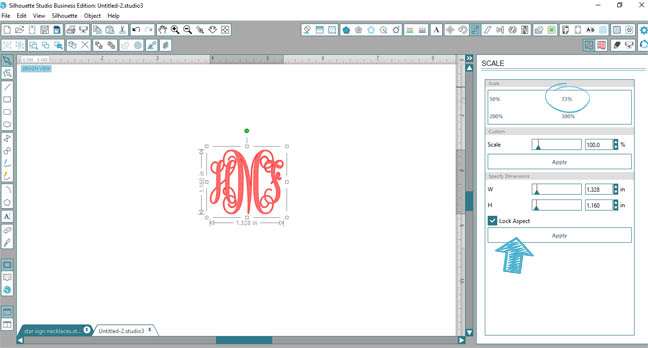
Re-scale the shape back to the original size you wanted.
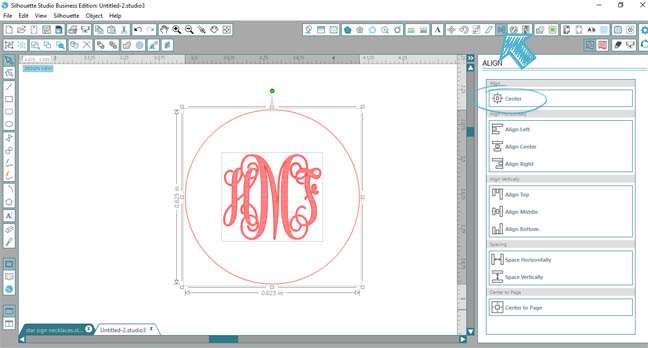
Do you see how nice and tight that pattern is now? My charms are 5/8 in. diameter so I drew the circle so I could make sure I centered it. I used this placement trick to make sure I lined everything up correctly on my mat.
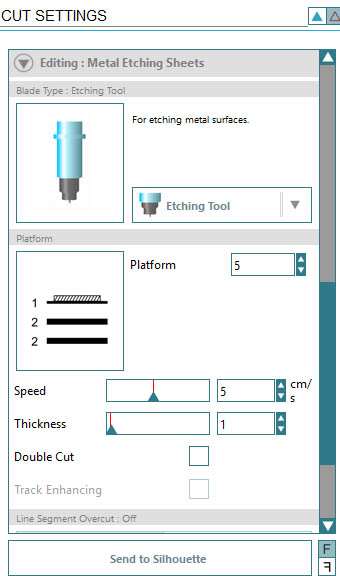
STEP FOUR: THE ALL IMPORTANT CUT SETTINGS!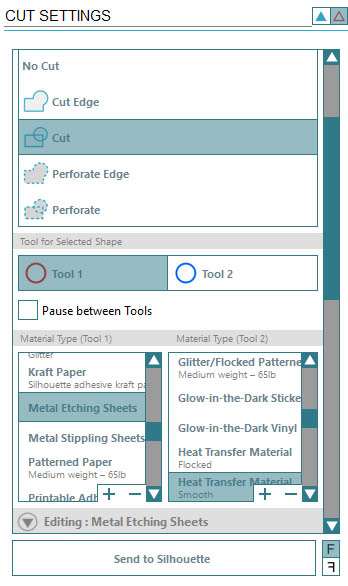
I selected the metal etching sheets as my material and played with the cut settings from there.
The biggest change I made was reducing the thickness setting to “1” so the blade gently scraped the surface. I found if I went deeper it would catch too much and jam my machine (never a good sound to hear by the way).
STEP FIVE: ETCH THE CHARMS
This is where your project can go sideways quickly . . . literally! First, pull out that strong tape and make sure your charms are securely adhered to the mat. The mat is not sticky enough to hold them in place so that little bit of extra hold helps you get a great etch.
I wanted to save time and cut multiple charms at once. I also made one template for all of the metal charm sizes I had on hand so please ignore the extra shapes shown.
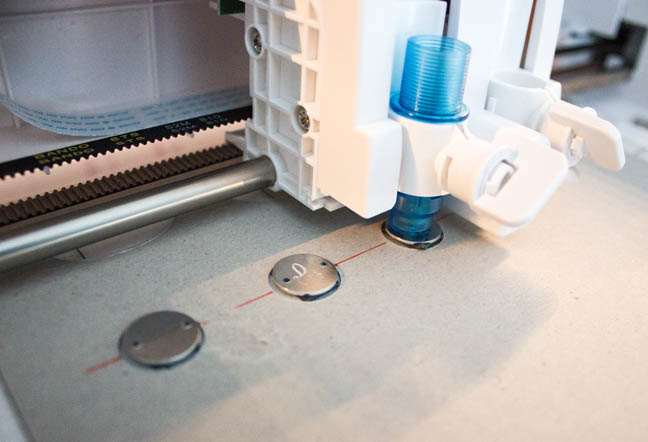
Once you’re all loaded properly go ahead and send the design to cut.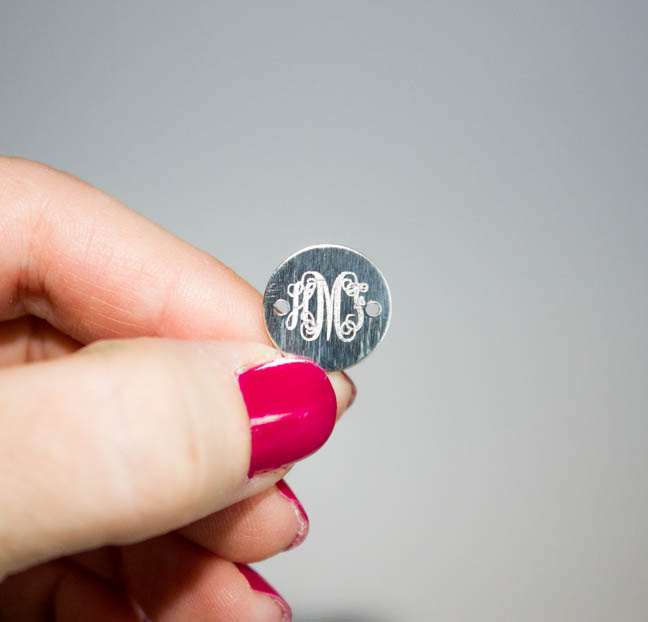
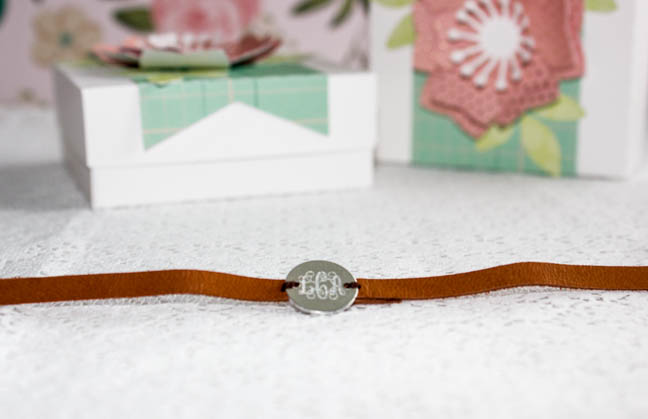
The newly etched charm! Because it’s a photo you can’t hear me squealing with joy but trust me, a happy dance and noise were made when I saw this for the first time.
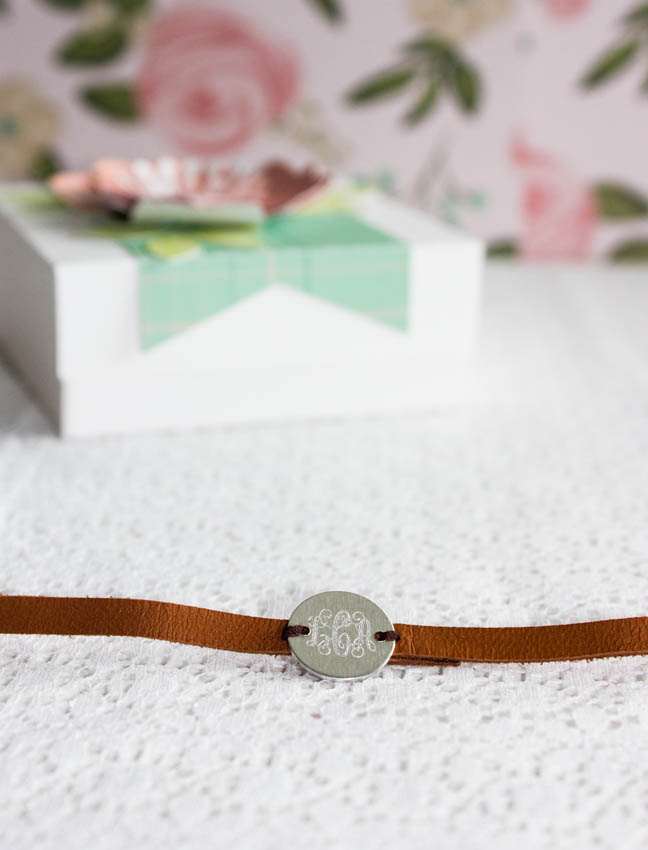
STEP SIX: MAKE THE BRACELET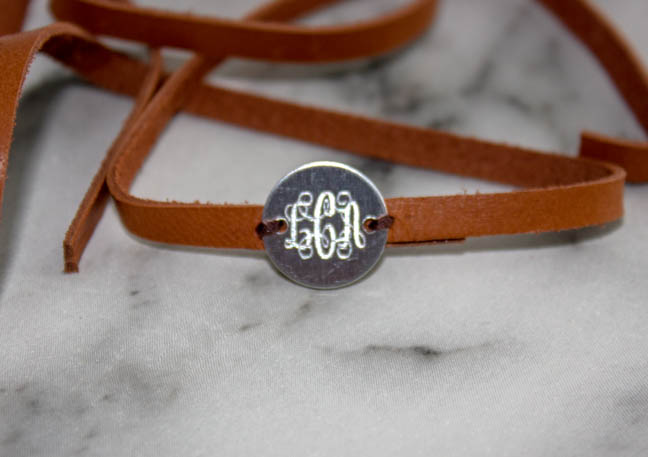
I cut a 24 in. length of the leather cord and attached the charm in the center using my needle and thread. A simple knot is all you do to hold it together on your wrist.

Because these are gifts, I made adorable gift boxes with my CAMEO® 3 too!
Who are you going to make custom jewelry for?