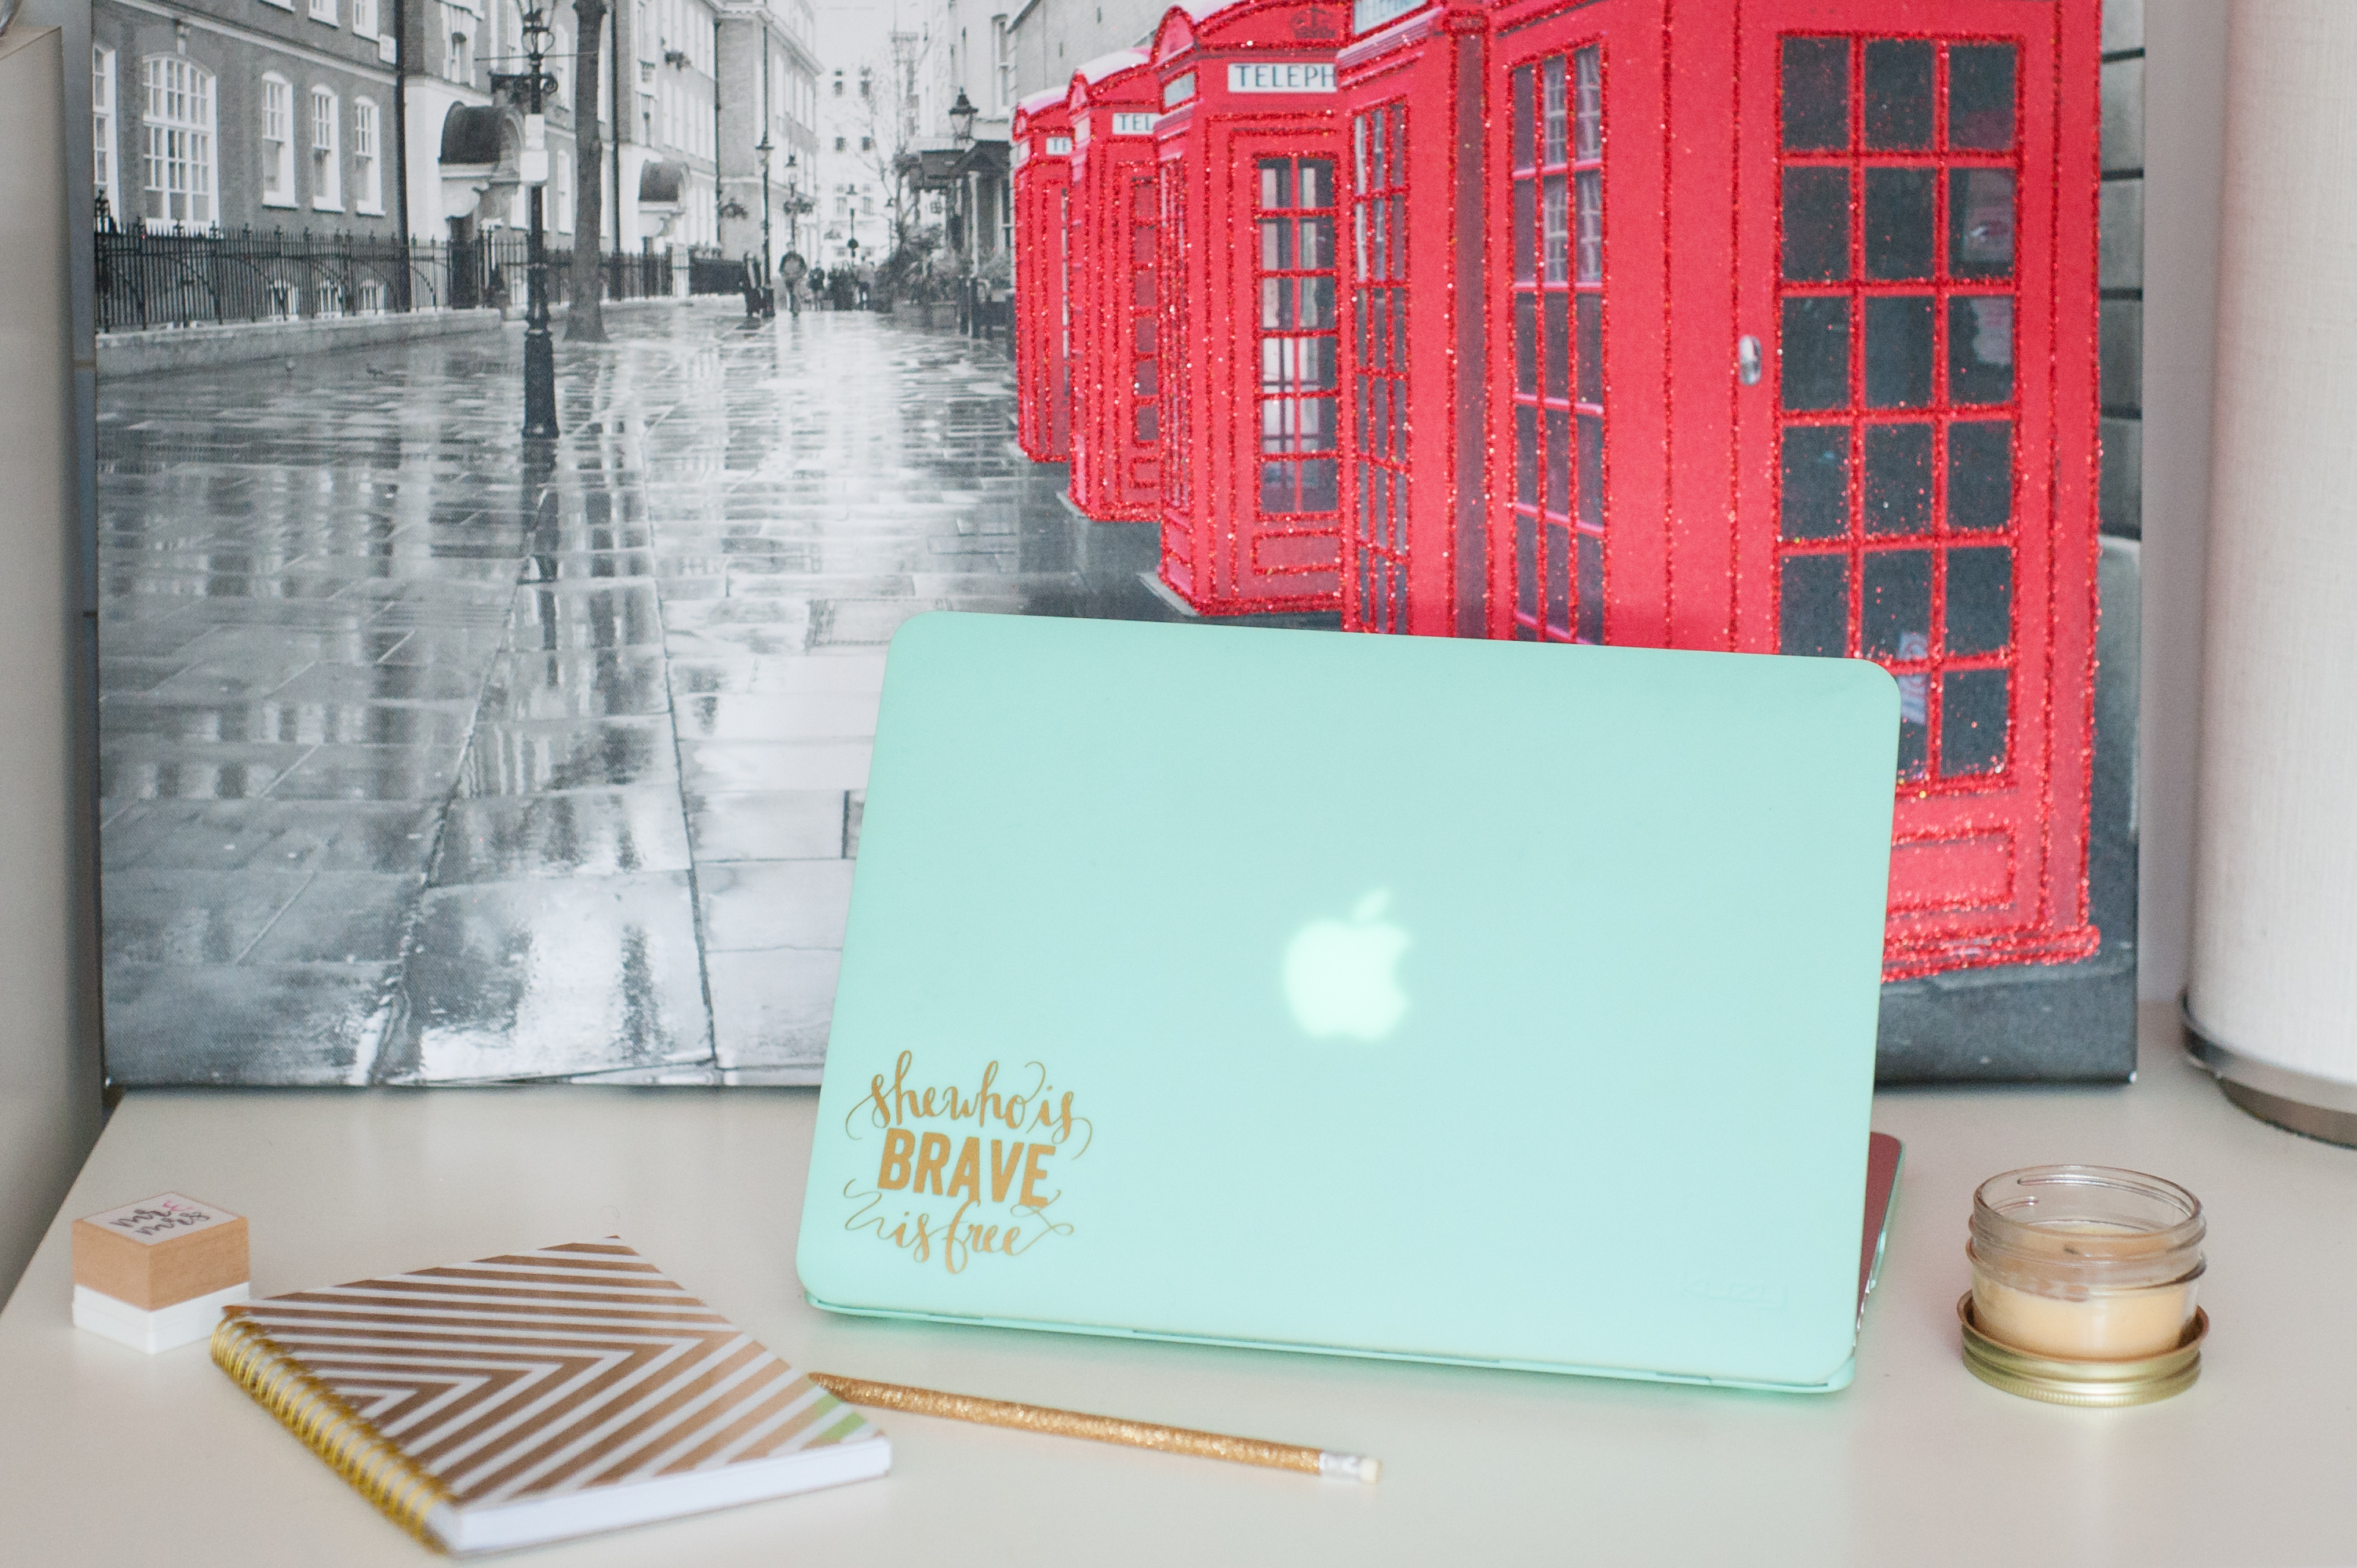
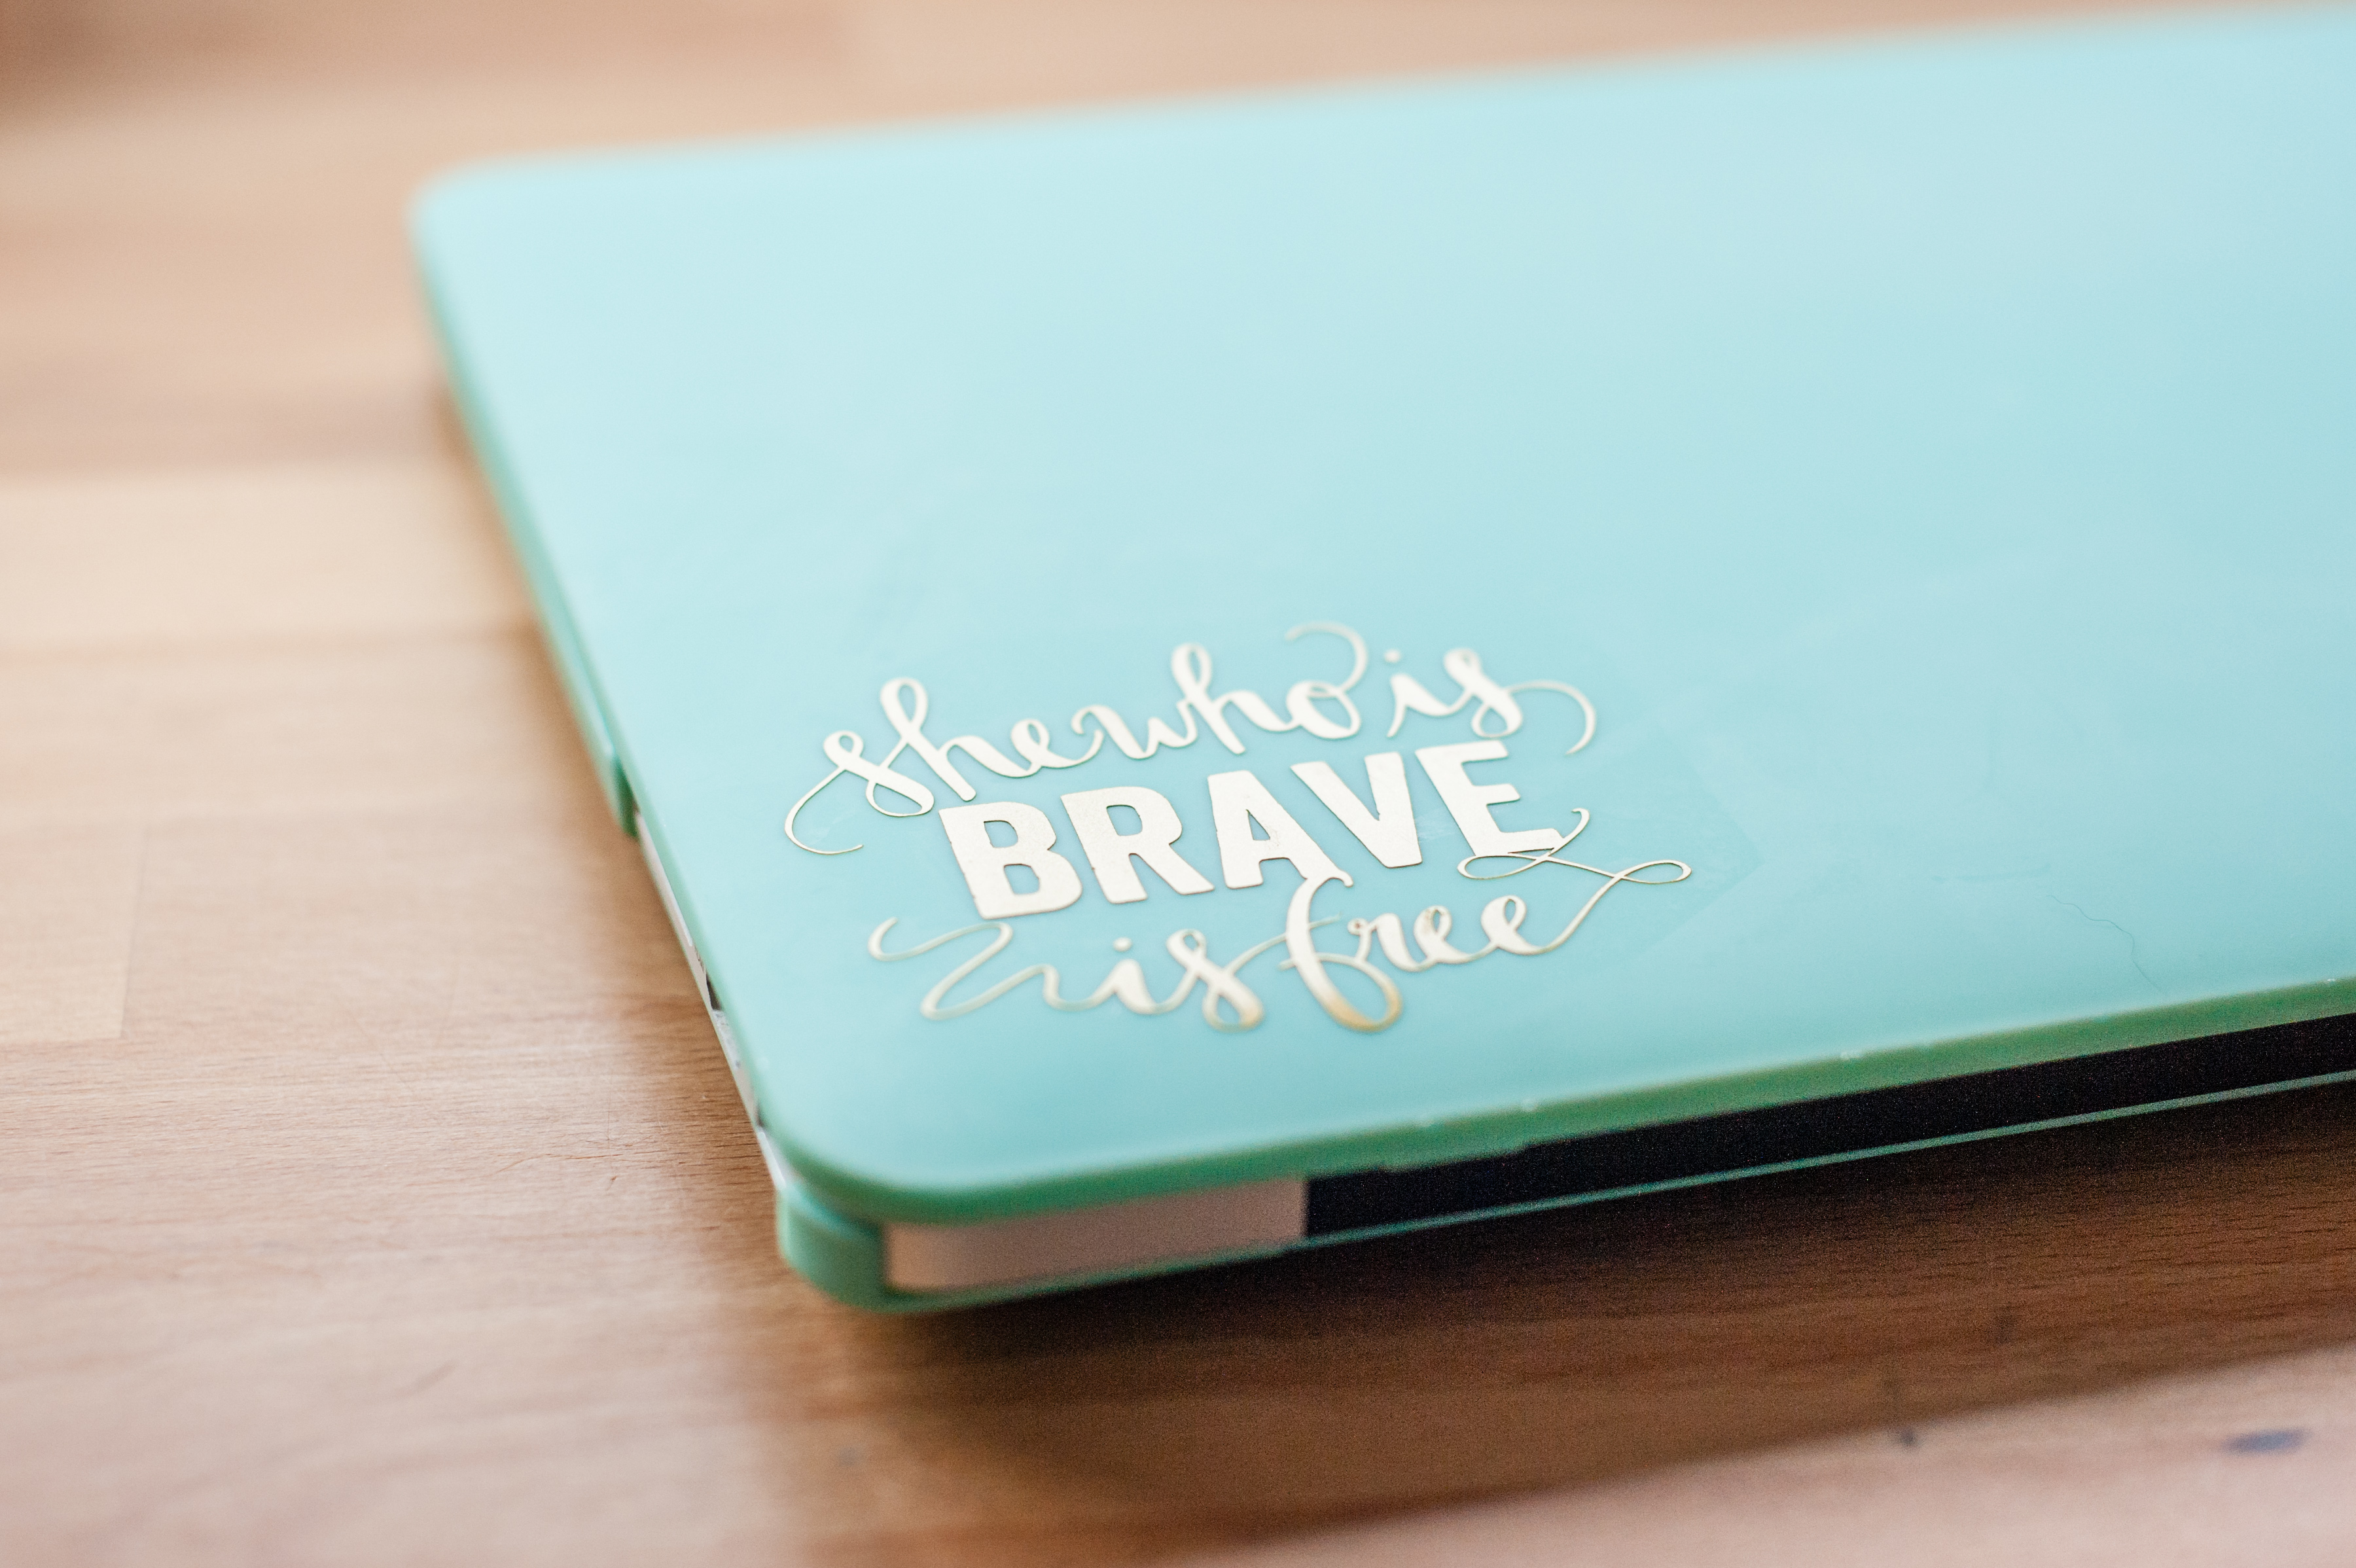
Laptops are one of our most prized personal possessions. We work on them, we play on them, we communicate with loved ones on them—laptops are extremely important to our everyday lives. So why not personalize yours to reflect a little bit of who you are and inspire yourself every time you open your laptop up? I decided to add a ‘She who is brave is free’ decal to my laptop to remind me to be brave and take risks when it comes to my goals and dreams!
What you’ll need:
- Silhouette CAMEO®
- Silhouette Studio®
- 9-inch shiny adhesive vinyl in Gold
- Hook
- Scraper
- Transfer tape
- Scissors
Step One
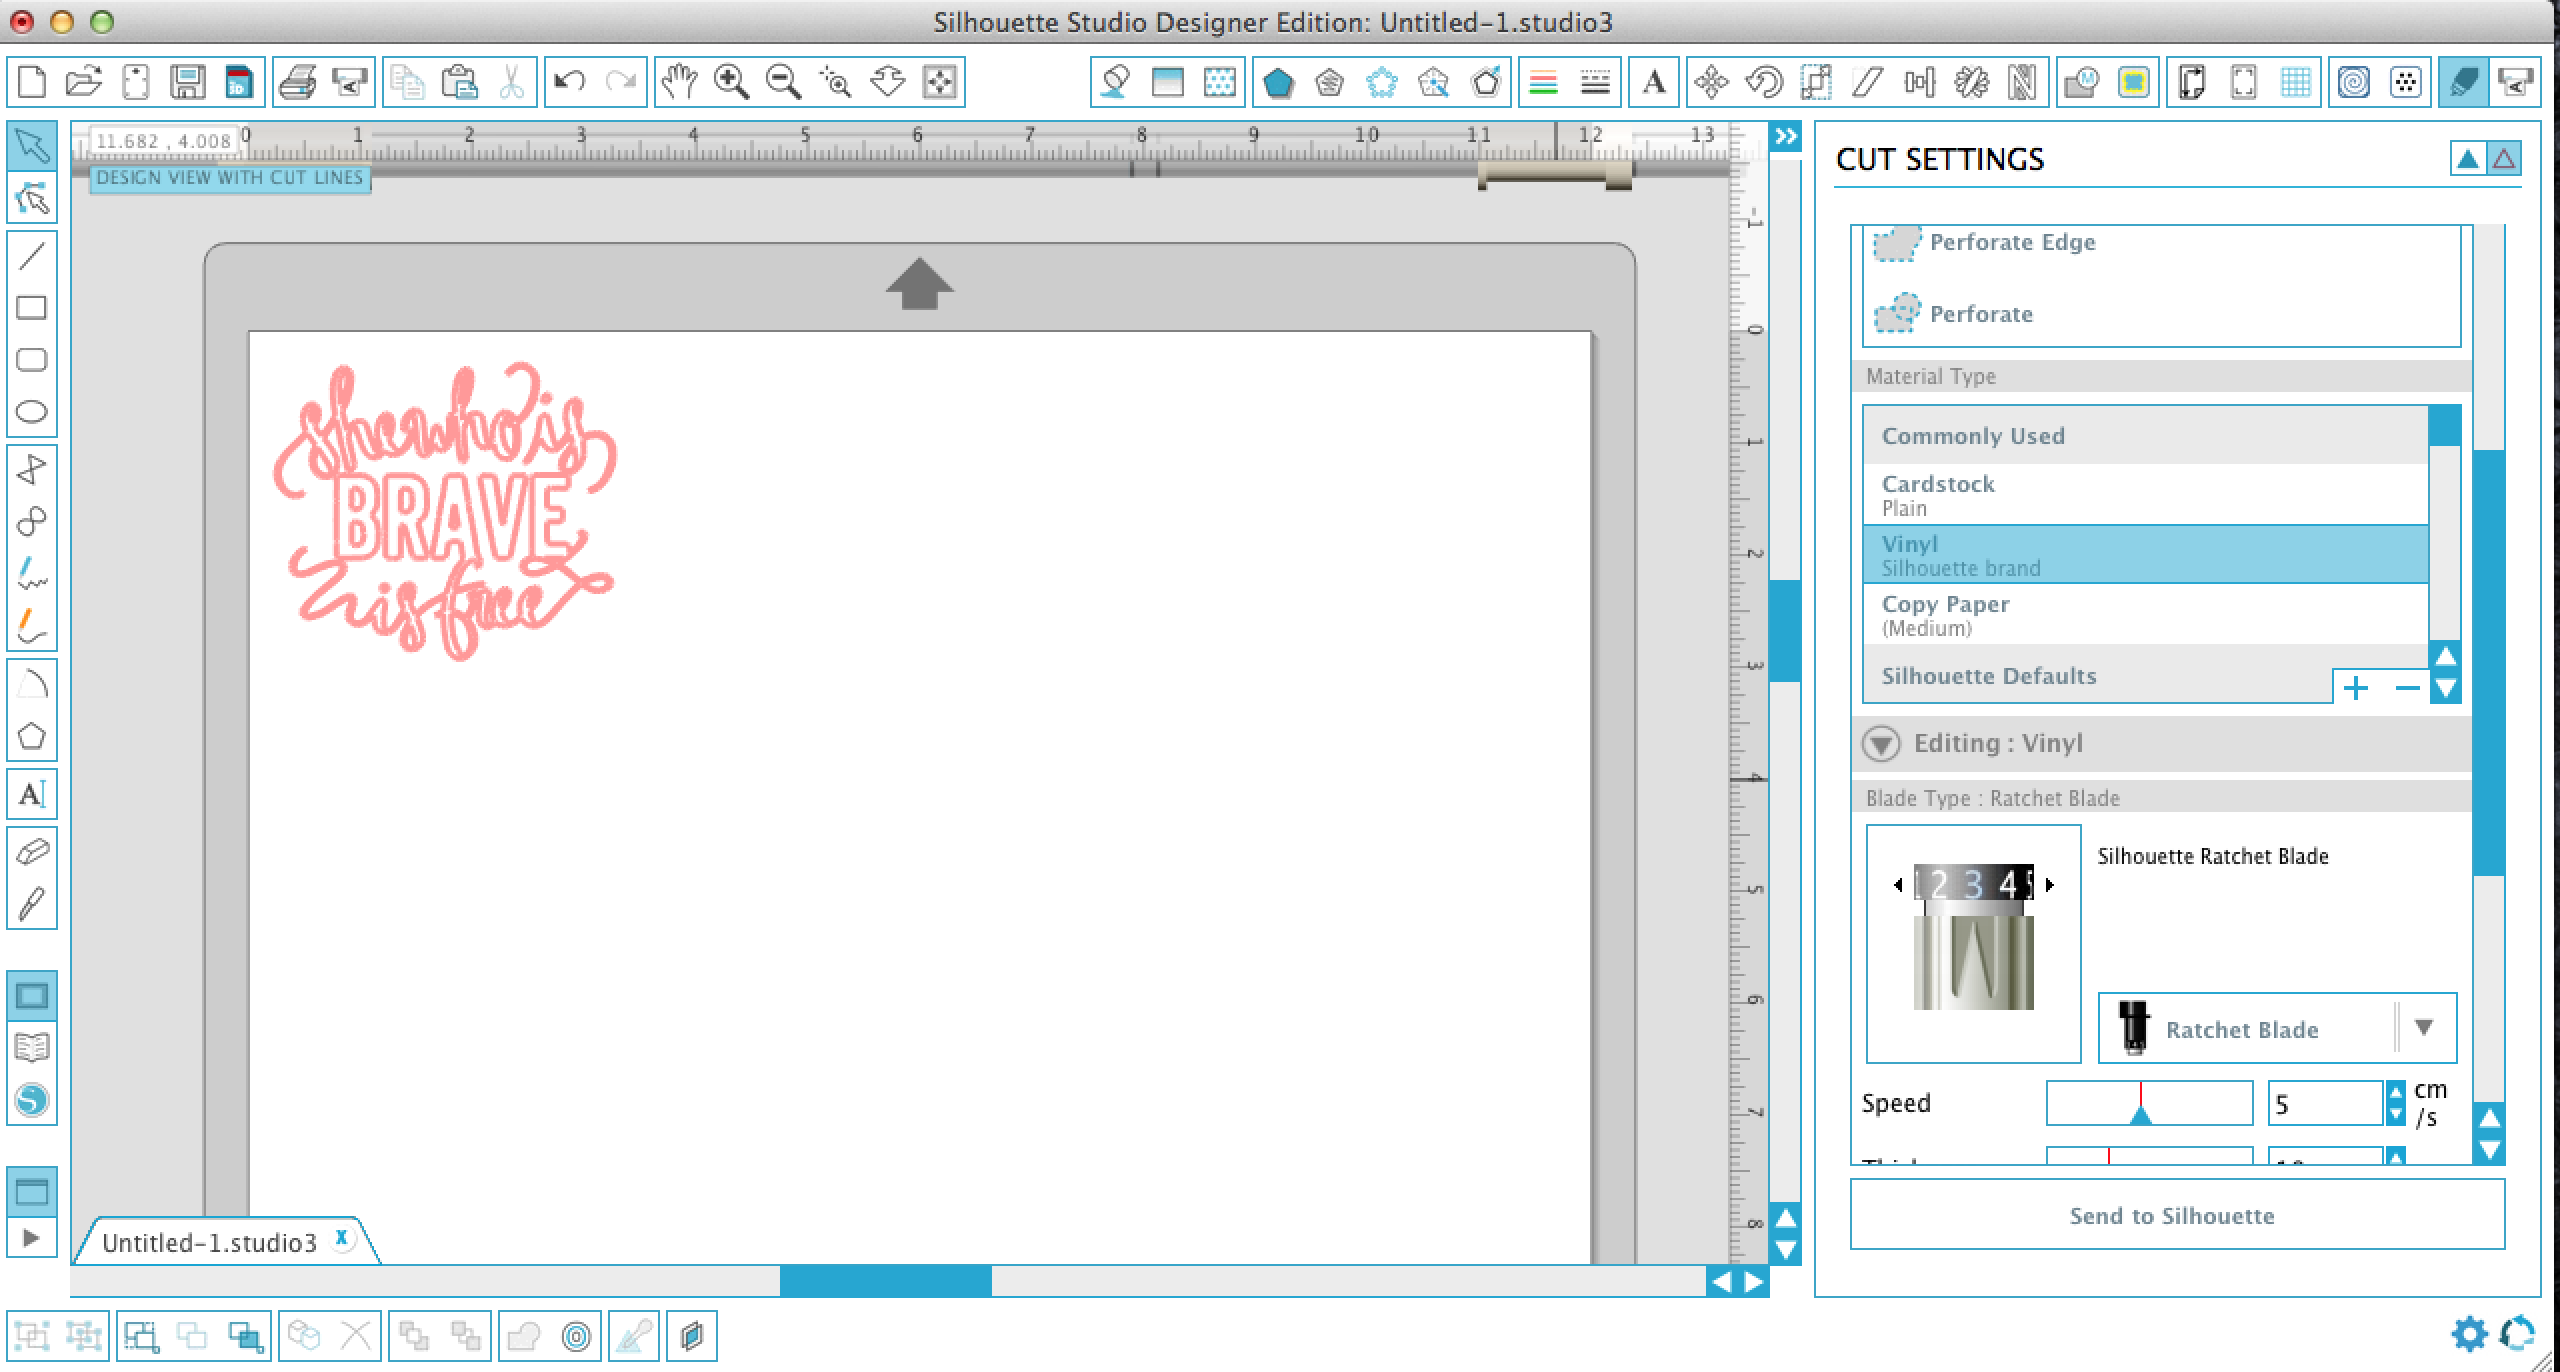
Open up your desired design in Silhouette Studio® and size it to fit the front of your laptop. Make it as big or as small as you want it! Then head on over to the Cut Settings menu, which you can access by clicking on the little Silhouette blade icon in the top right corner. Set your material type to ‘vinyl’ and your ratchet blade depth to 3.
Step Two
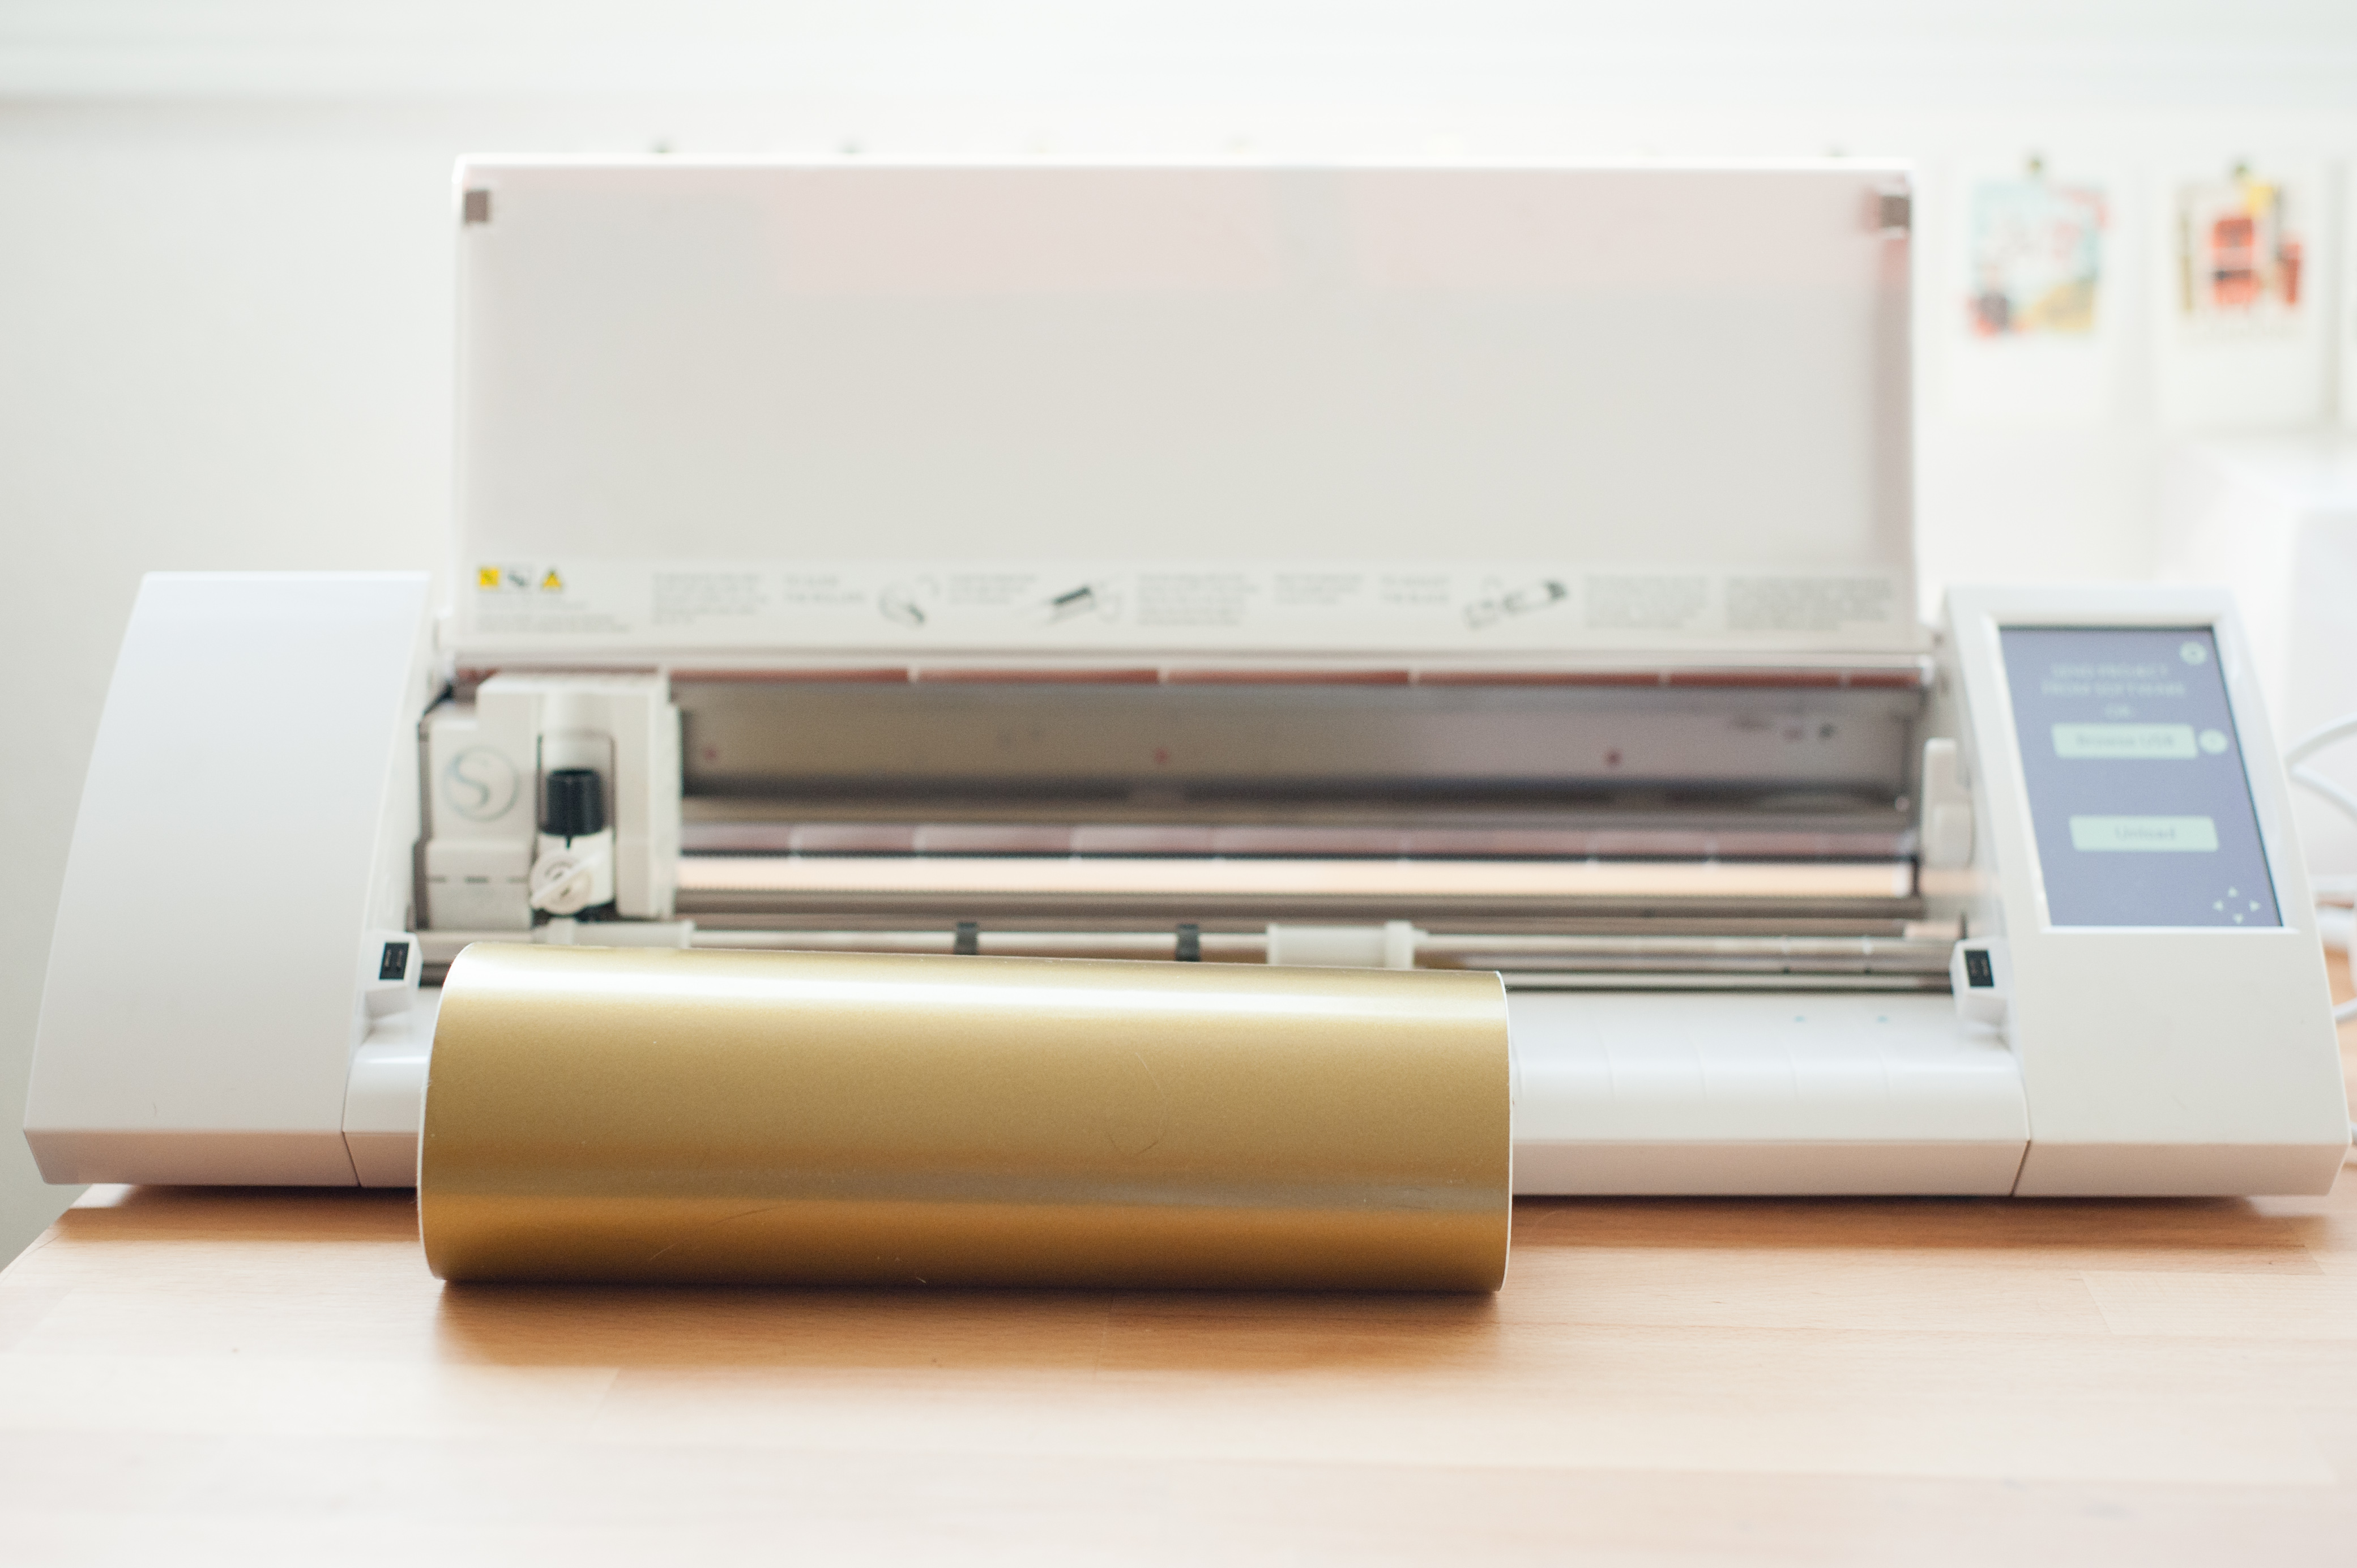
Once you have all your settings correct, load your vinyl into your CAMEO. Do this by moving the rollers to the 9-inch setting, inserting the edge of the vinyl roll into the CAMEO and hitting ‘Load Media’ on the CAMEO’s touchscreen. You don’t need a mat for cutting vinyl! Then hit ‘Send to Silhouette’ back in your design software.
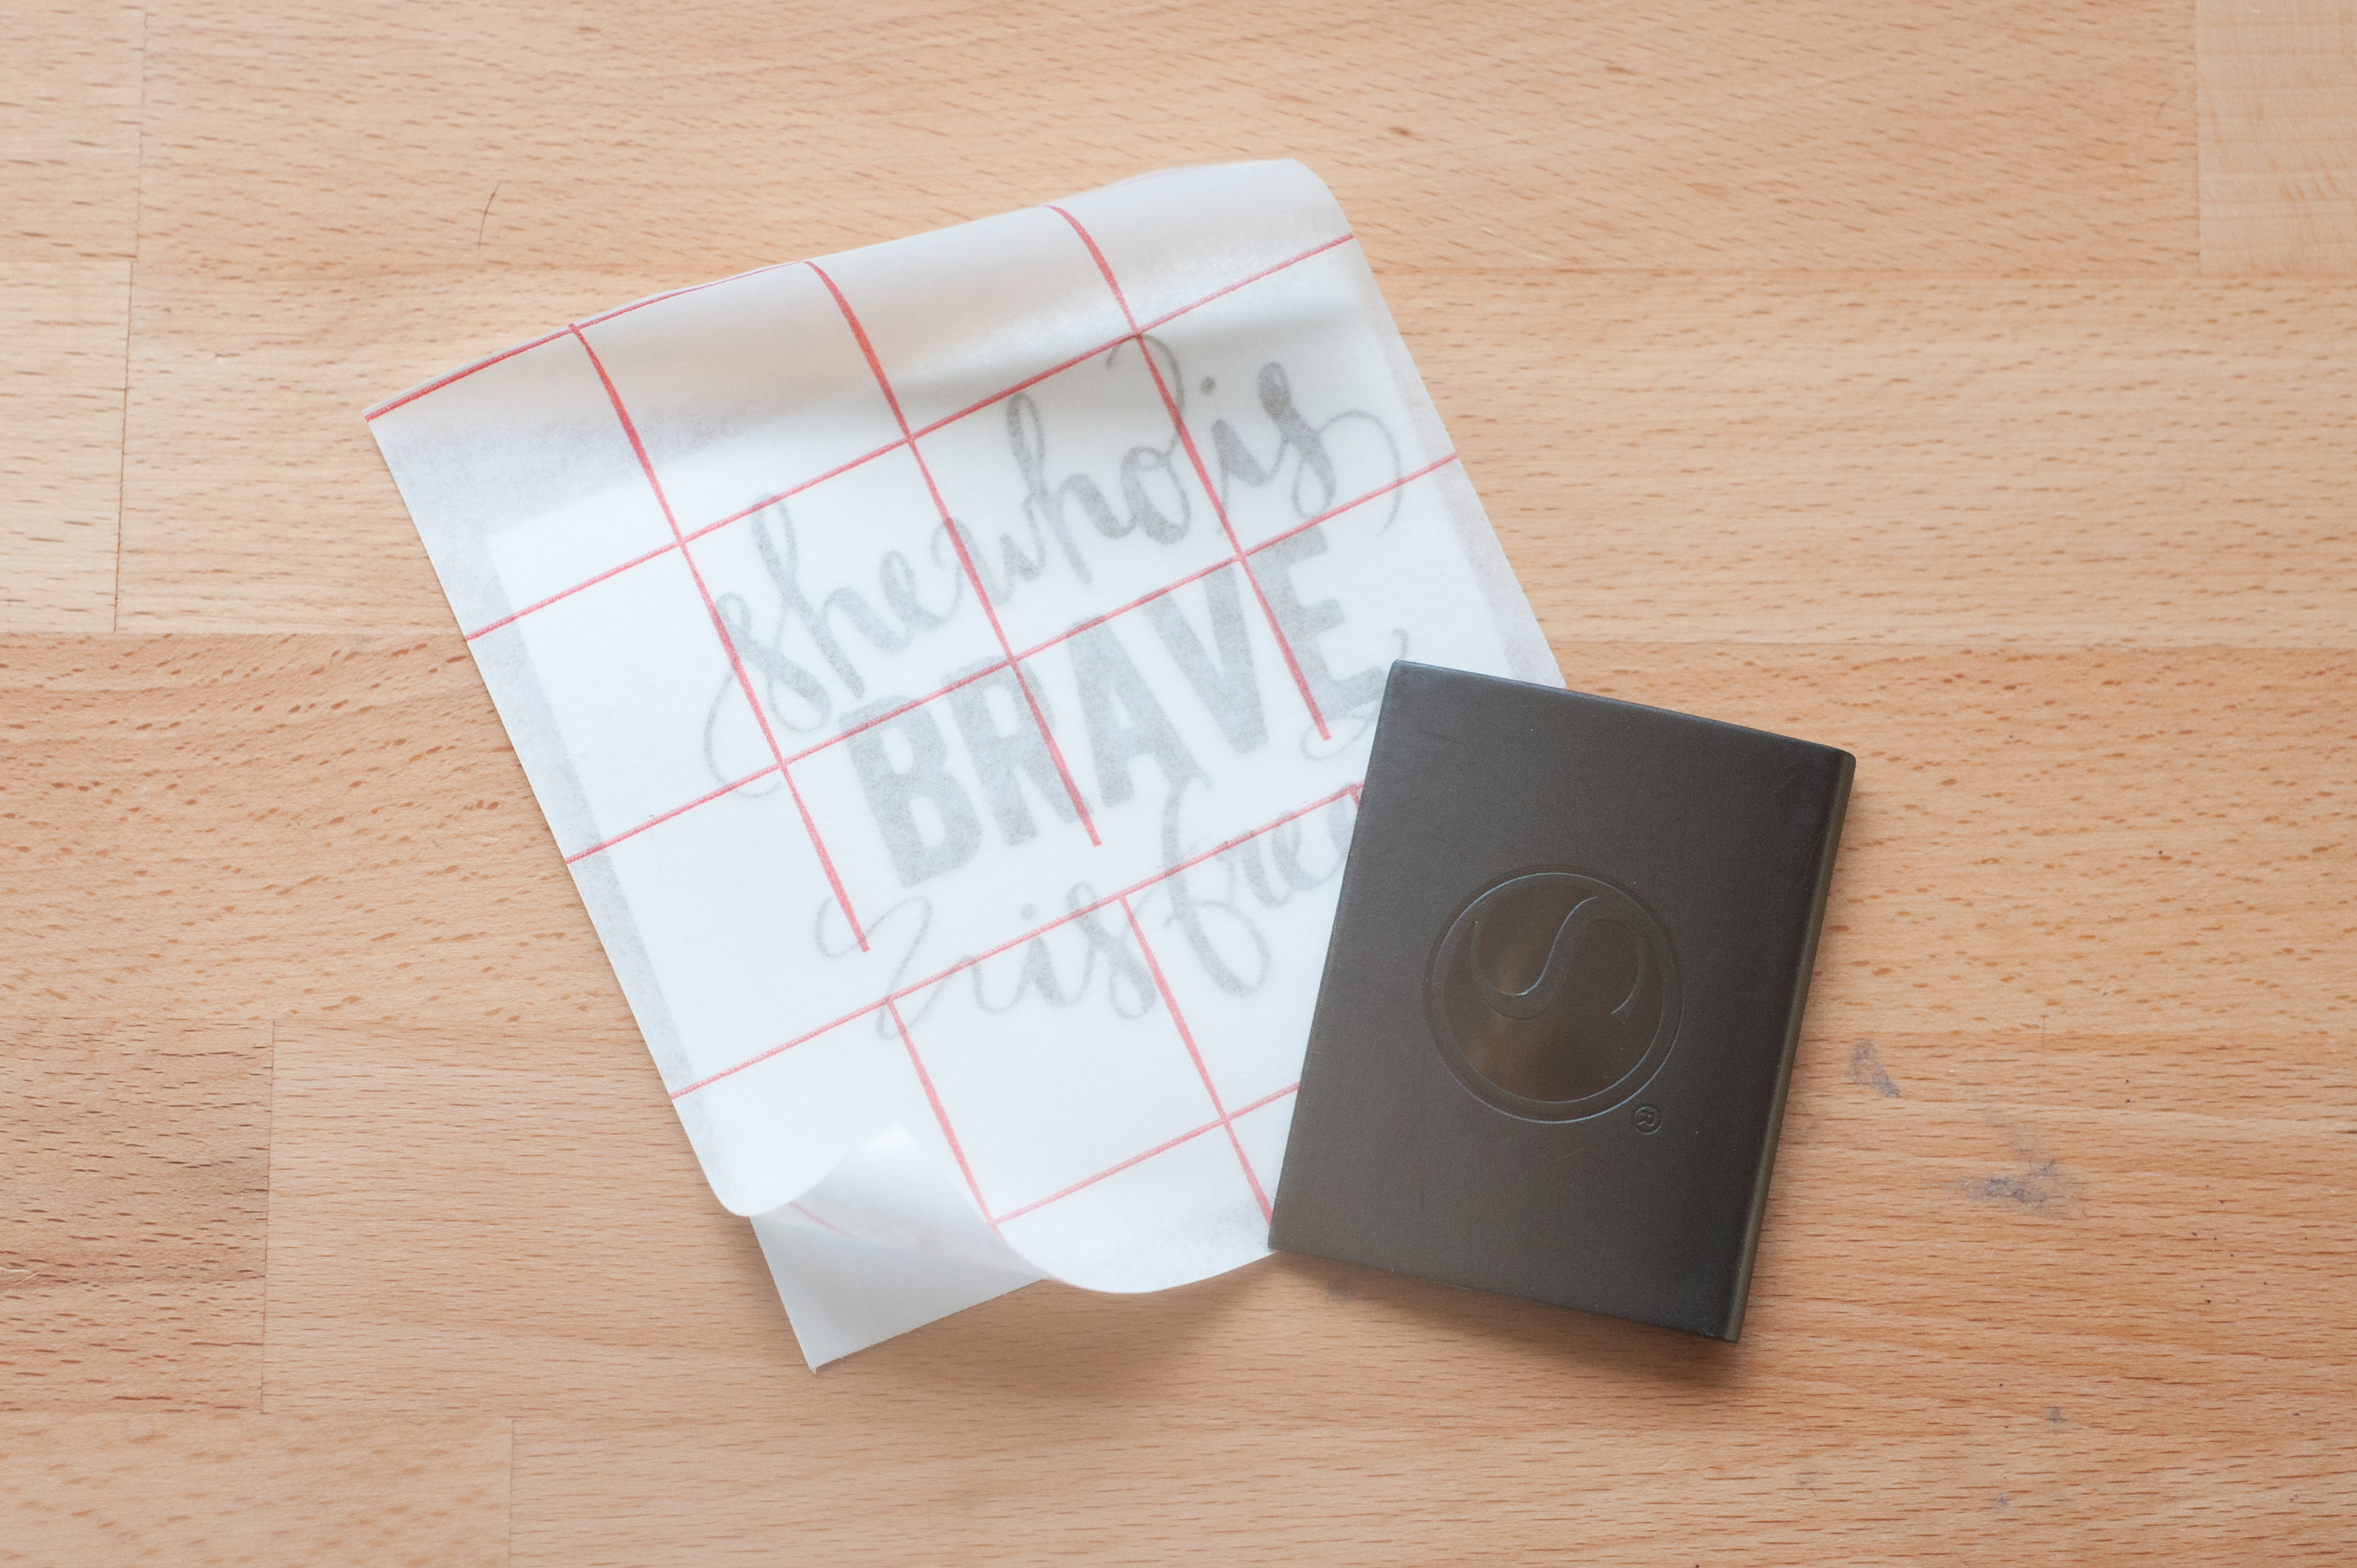
Step Three
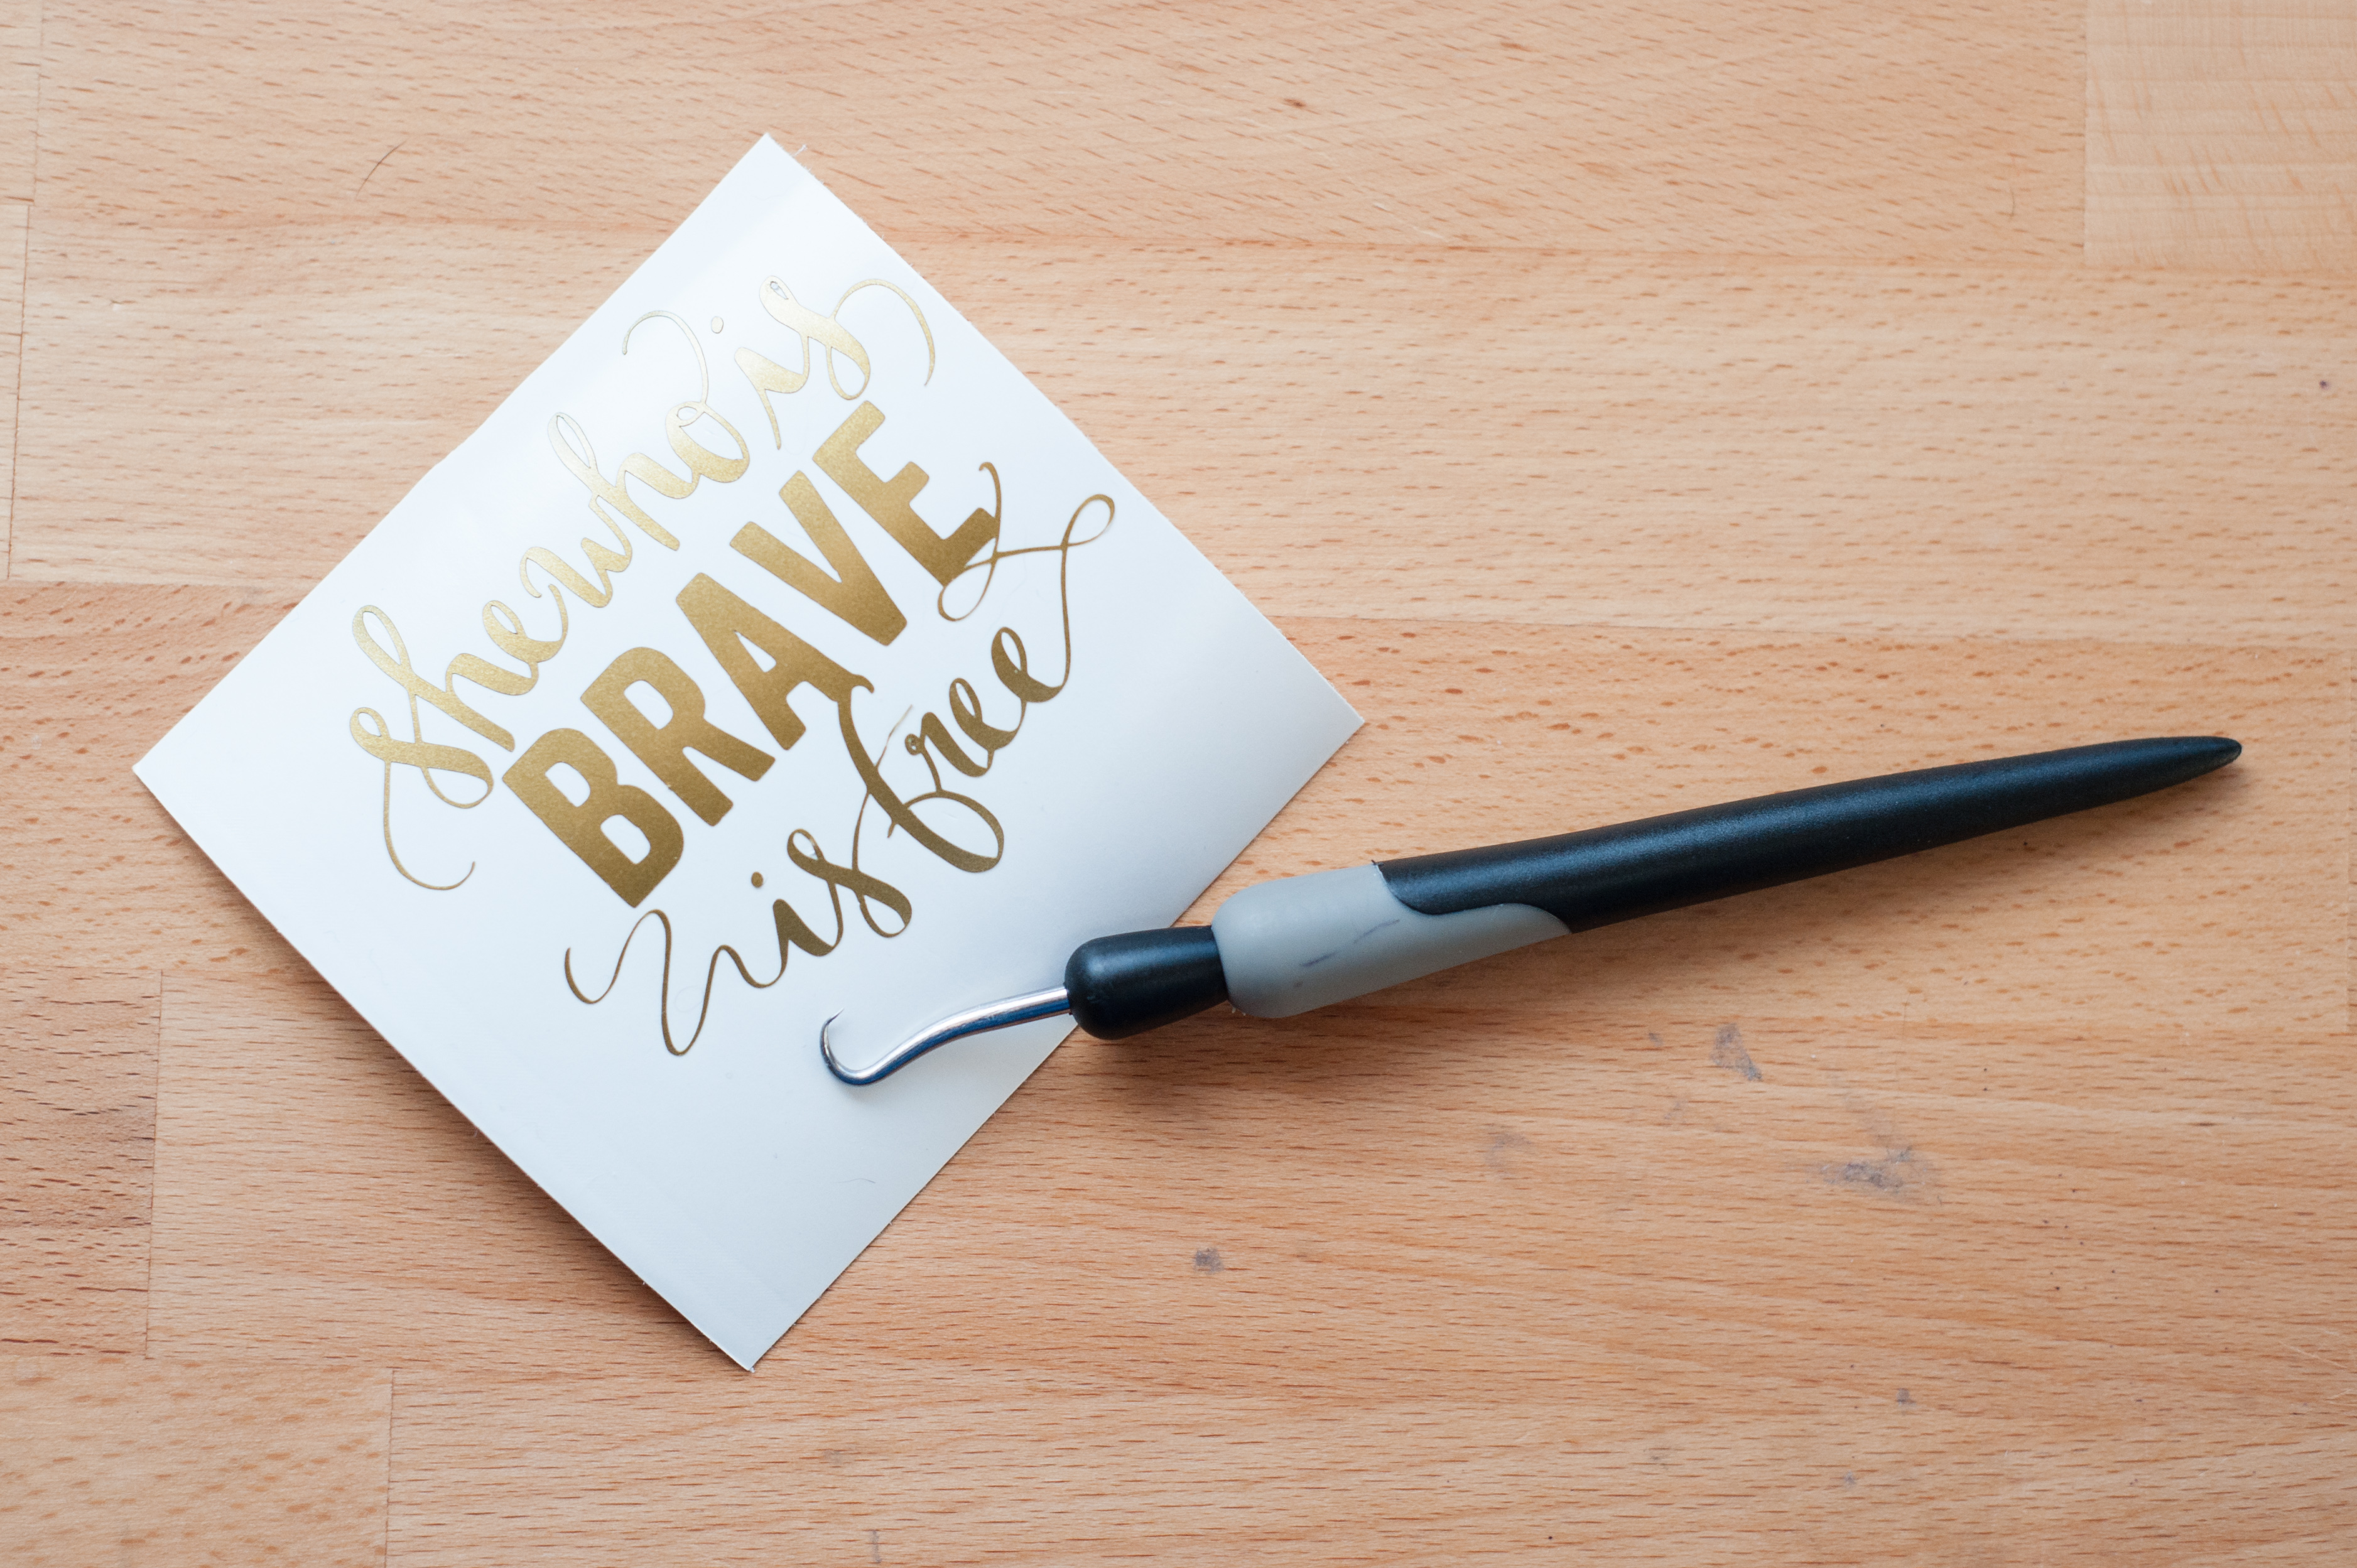
Once your design has been cut by the CAMEO, hit ‘Unload’ on the touchscreen to remove your vinyl. Cut around your design with some scissors and then weed your design with a hook. Gently pull up the extra pieces of vinyl you don’t want and discard until you are left with your revealed design.
Step Four
Cut a small piece of transfer tape, remove the paper backing, and then smooth over your design. Use the scraper to really adhere your design to the transfer tape—you don’t want to leave anything behind when you move it to your laptop!
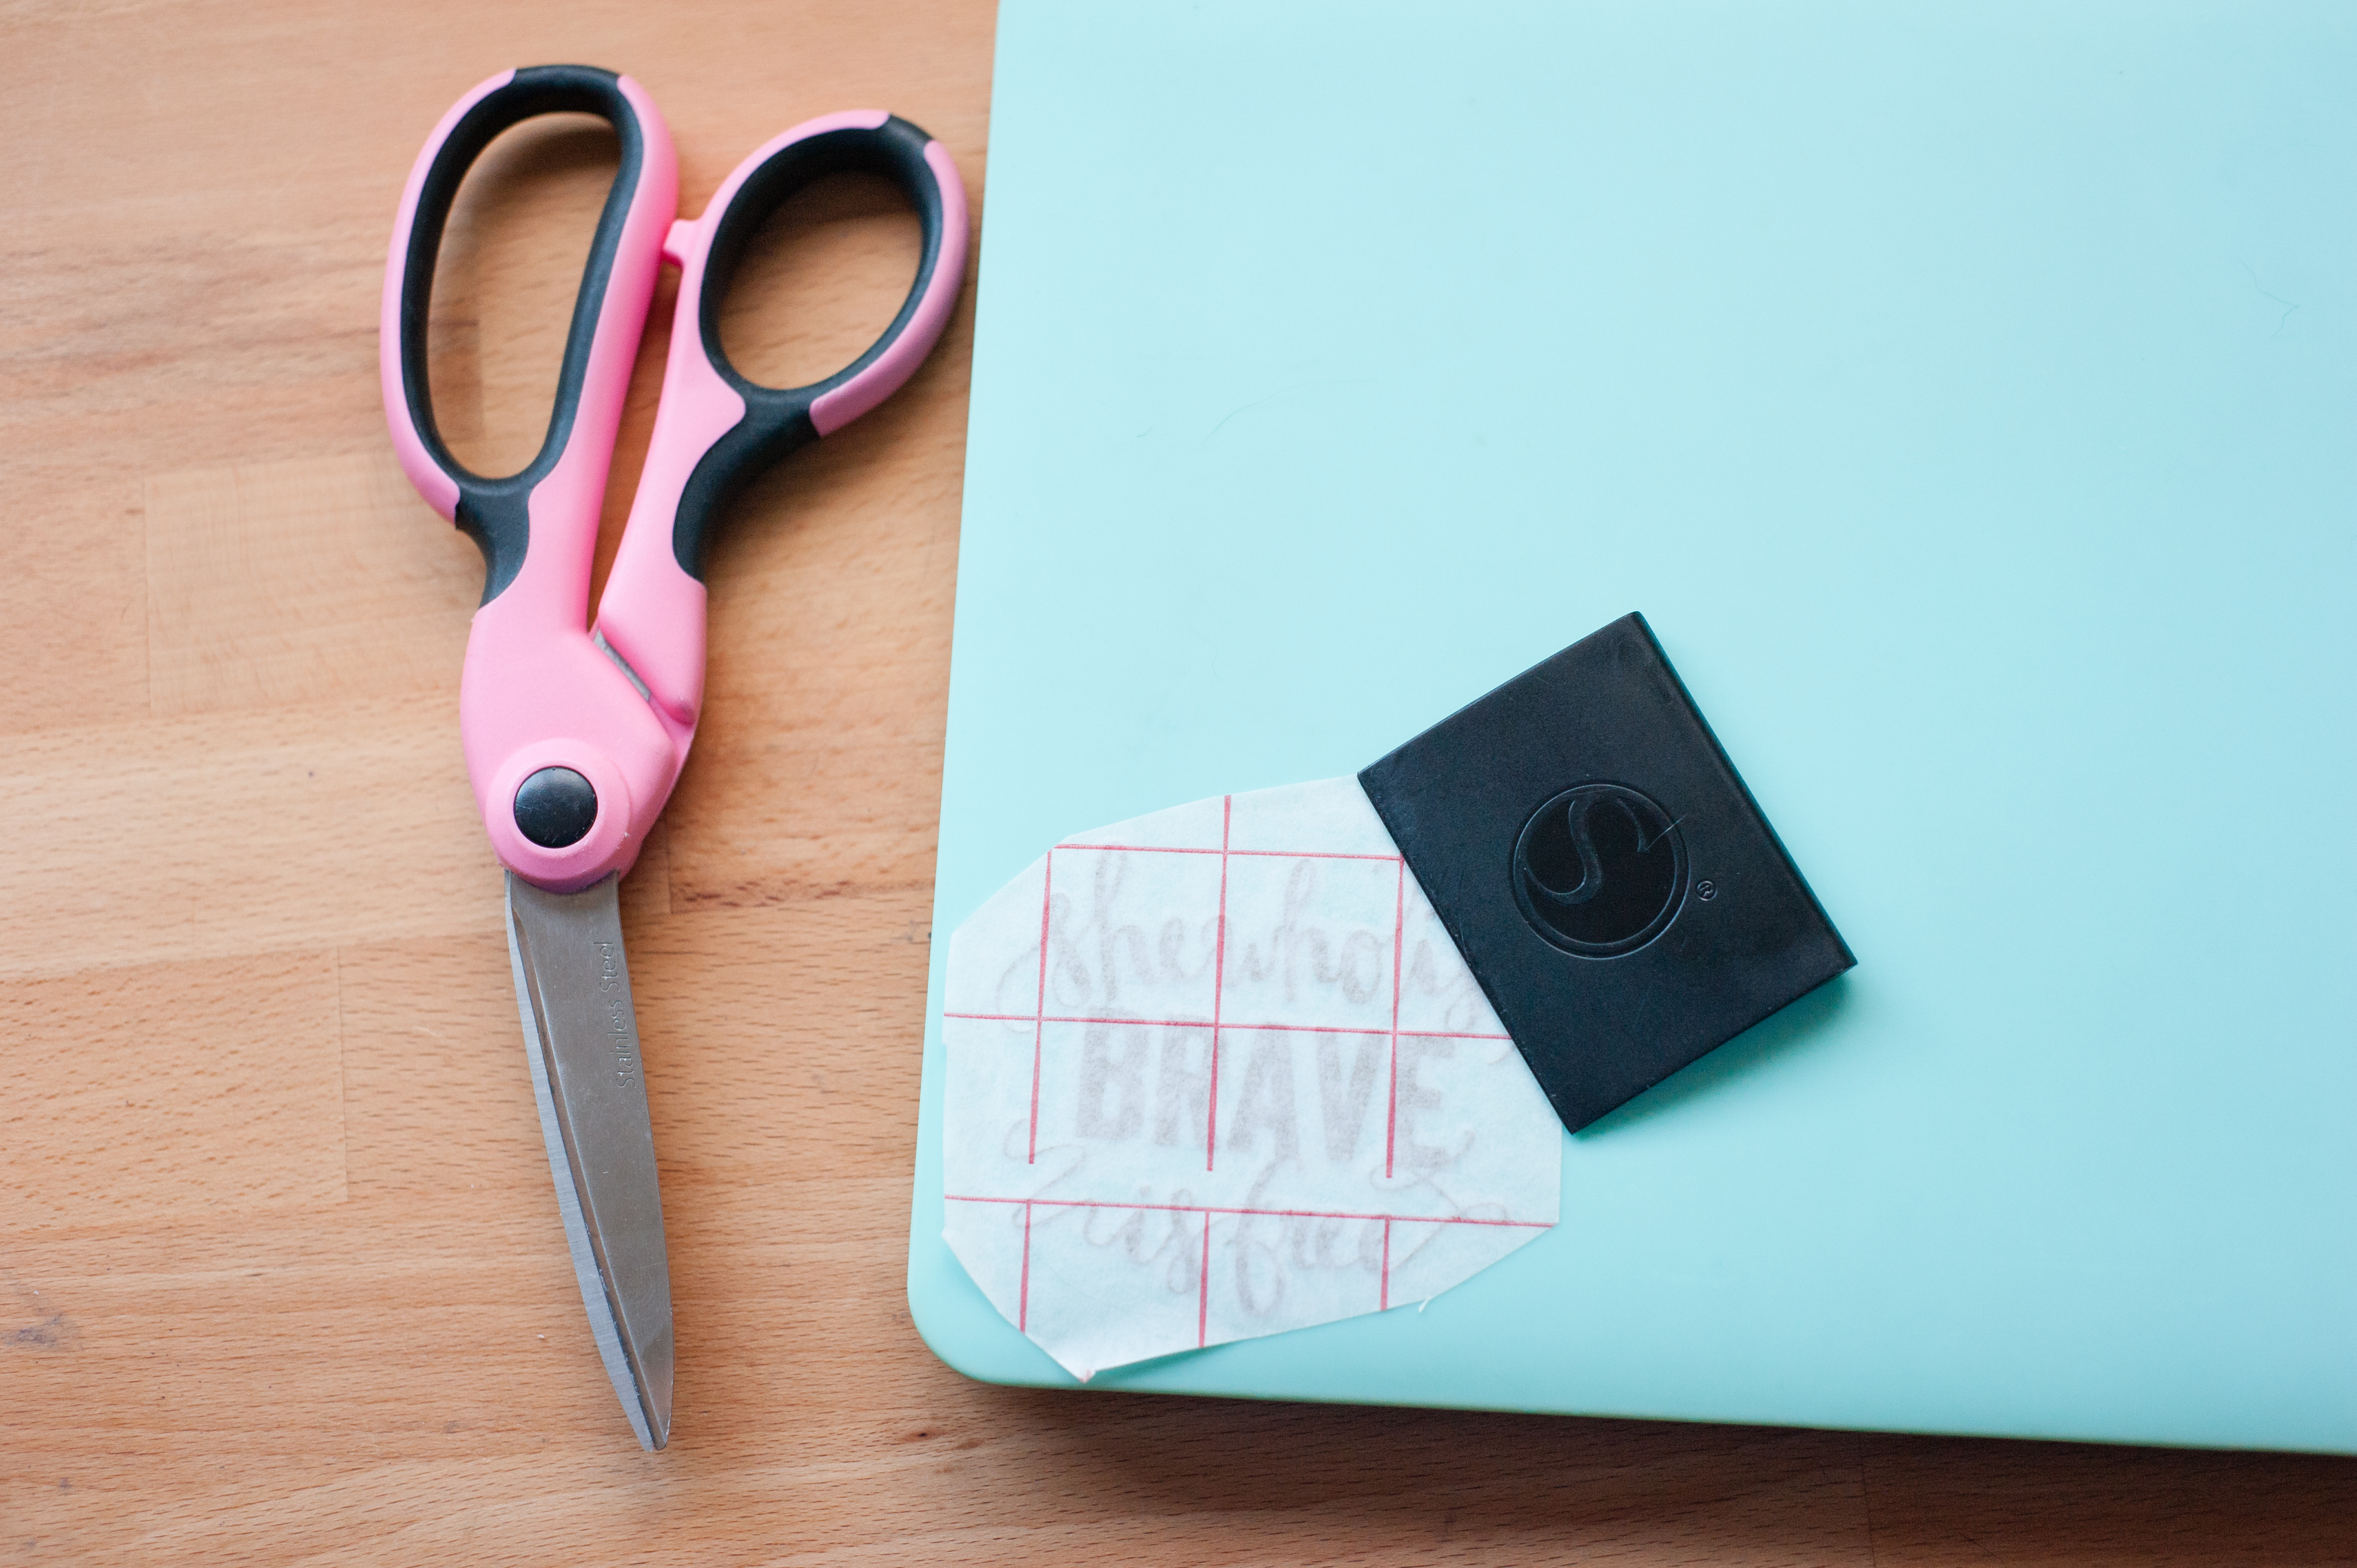
Step Five
Peel up the transfer tape, which should have all of your design on the sticky checkered tape. If it doesn’t all come up, carefully replace the tape and do some more rubbing with your scraper! Move your transfer tape with design to your laptop cover. I cut around my design a little more so I could fit it on my laptop case easier. Once you have it centered and where you want it to be, use the scraper once more to smooth the design onto your laptop.
Carefully peel back the transfer tape and voila! A beautiful gold, shiny, fun laptop decal. It’s a great reminder to be brave and work towards my dreams and goals!
Nasze Naturalne
September 3, 2025
Your authentic voice really shines through in everything you create and share
Naszenaturalne
September 2, 2025
Really love your style
Kelly Wayment
June 28, 2024
You can use it with vinyl as long as it is smooth and flat to allow the static charge to hold on to it. Rolled vinyl that wants to go back to its rolled shape will not necessarily work well, and it would need to be trimmed to fit the ES mat cutting area.
Kelly Wayment
June 28, 2024
Yes, you can use the heat pen while using the ES mat. 🙂
Yurii
March 2, 2024
Hello. May it be used with heat pen?
Thanks
Jerome
February 24, 2024
Hi, works this with the normal vinyl foils or only with printer papter etc?