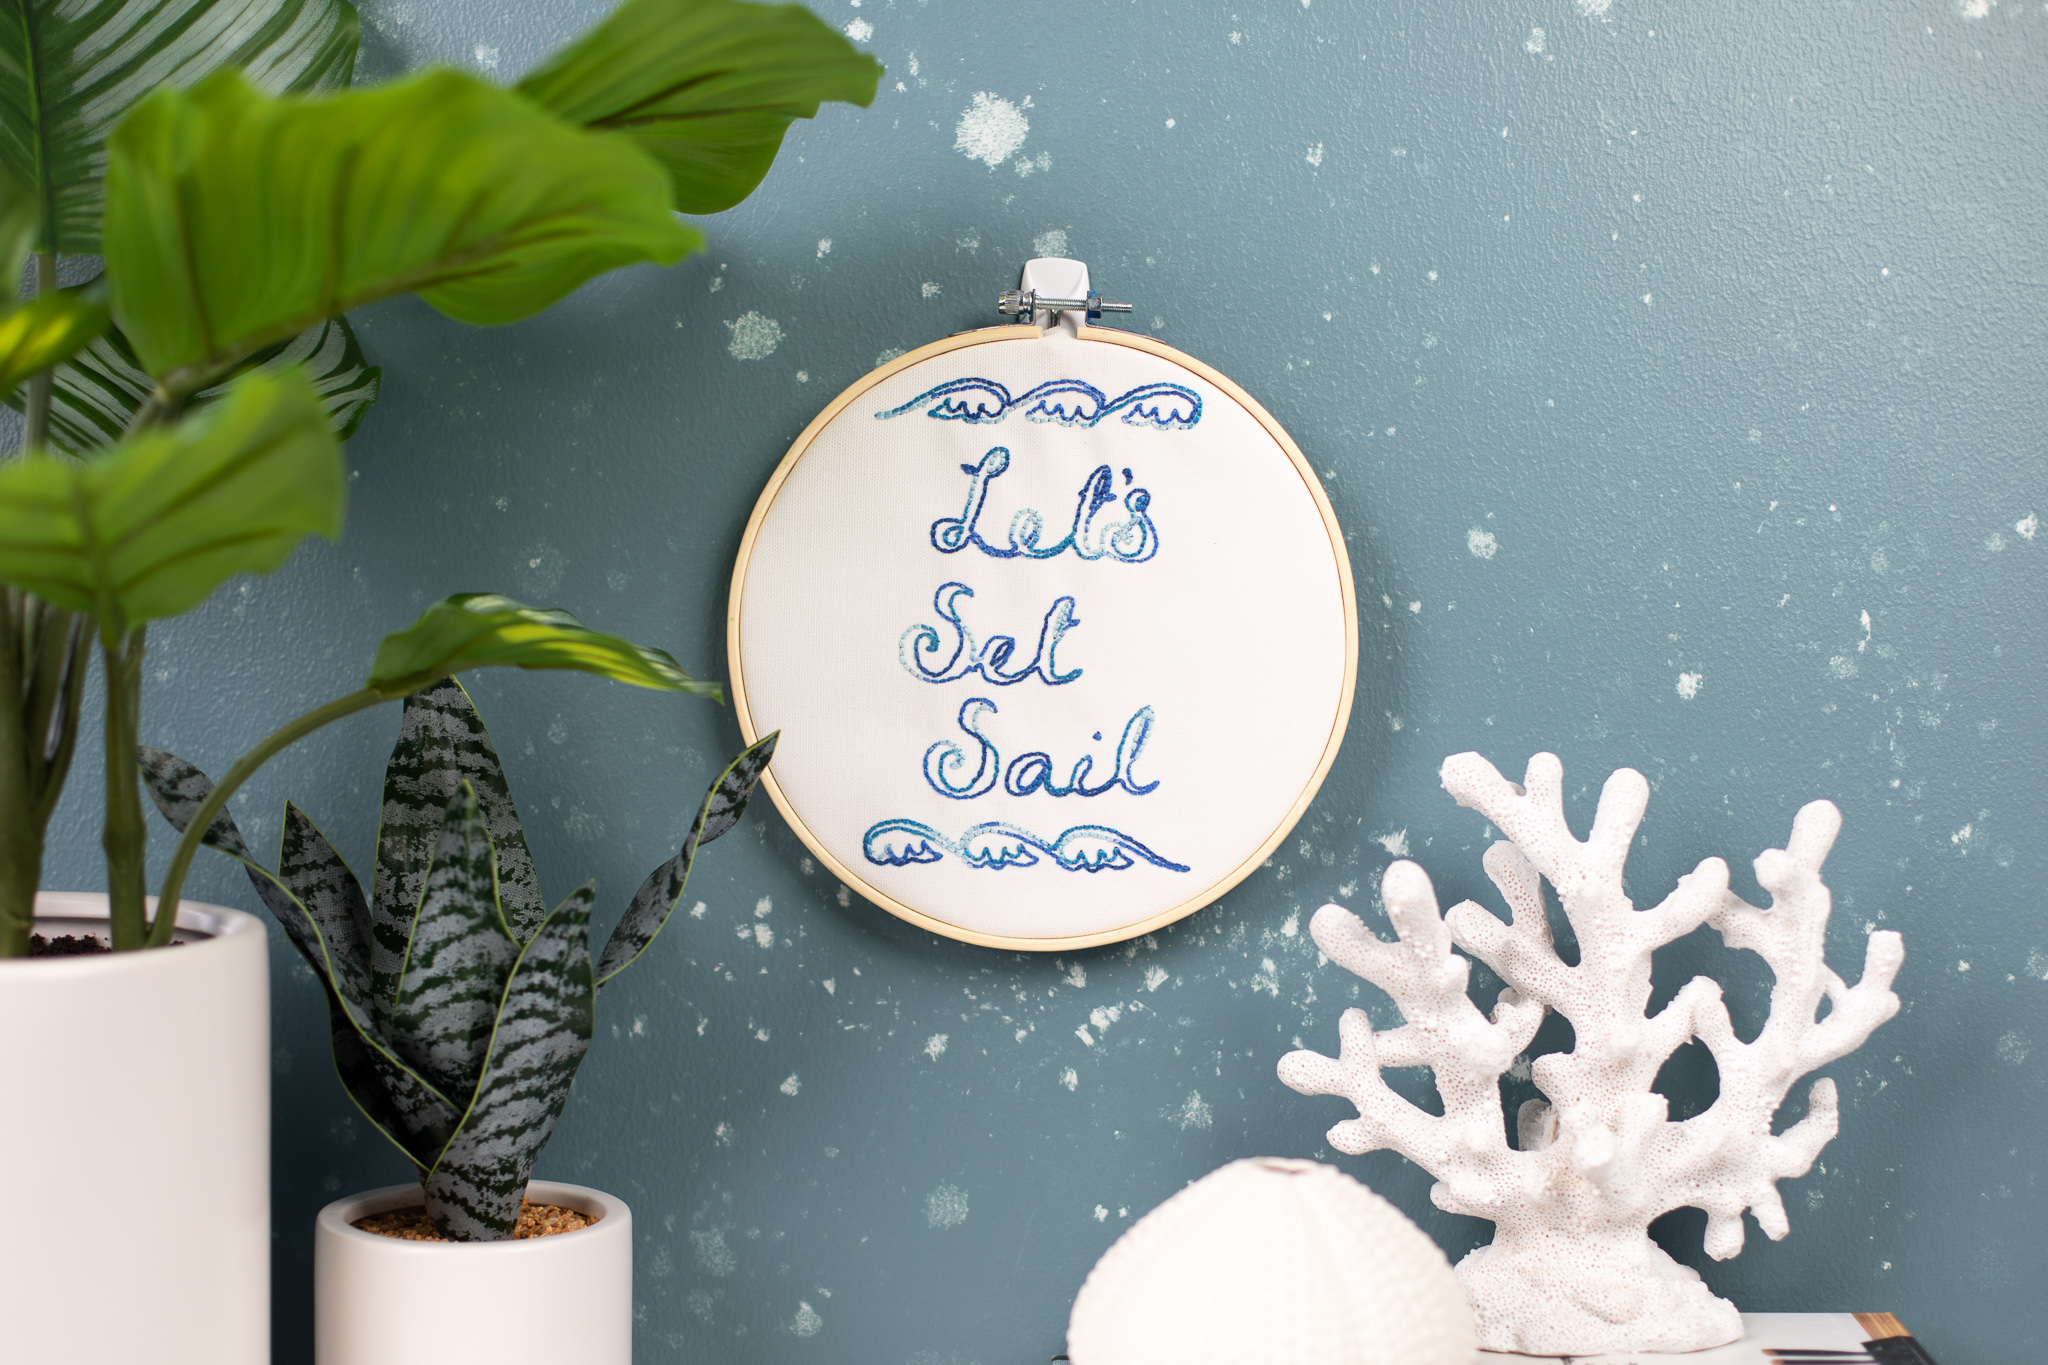
If you have a Cameo 3 or Curio, Silhouette Studio has a stipple feature that allows you to turn any design into a series of dots. This is helpful for rhinestone designs, but it also creates great embroidery templates! You can turn most design files into embroidery templates with the stipple feature and stitch to your heart’s content! Here we’ve done a fun and easy phrase, perfect for summer.
Supplies Needed:
- Silhouette CAMEO® or Silhouette Portrait®
- Silhouette Studio®
- Printer
- Printable Cotton Canvas
- Embroidery Floss
- Needle
- Embroidery Hoop
- Scissors
- Design ID #92310 and #269762
Step One: Prepare Your Design
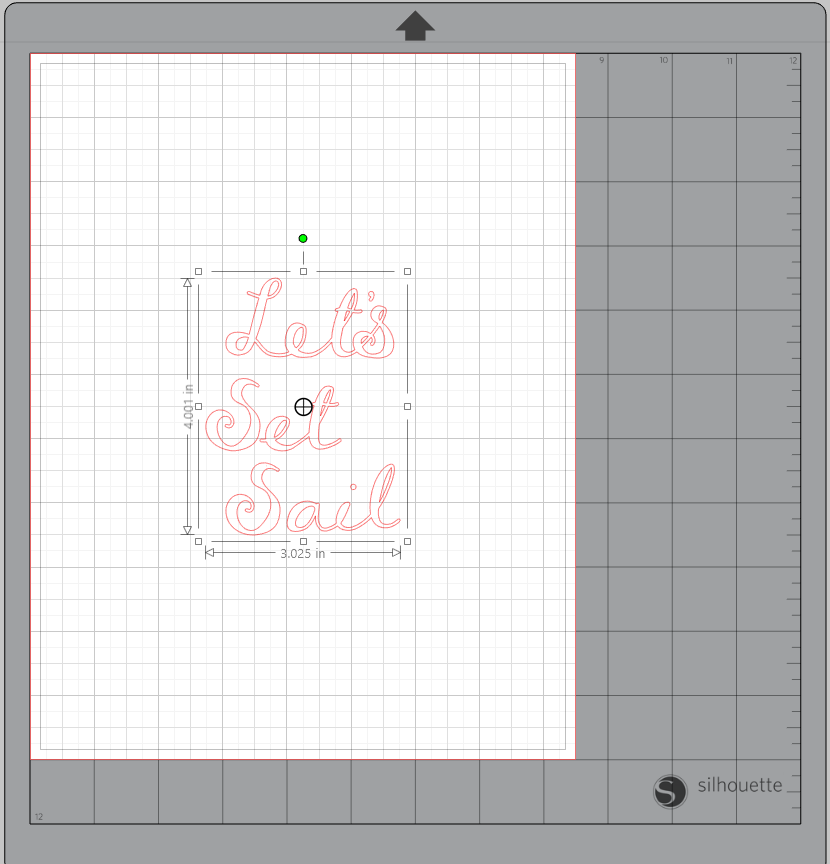
1. Insert Design #92310 into Silhouette Studio®, resize it to fit your desired dimensions (we sized ours to 4 inches tall), and position it in the center of the page.
2. Then insert Design #269762 and Ungroup it (right-click the design and select Ungroup). Delete the 1- and 2-wave designs, only keeping the 3-wave design.
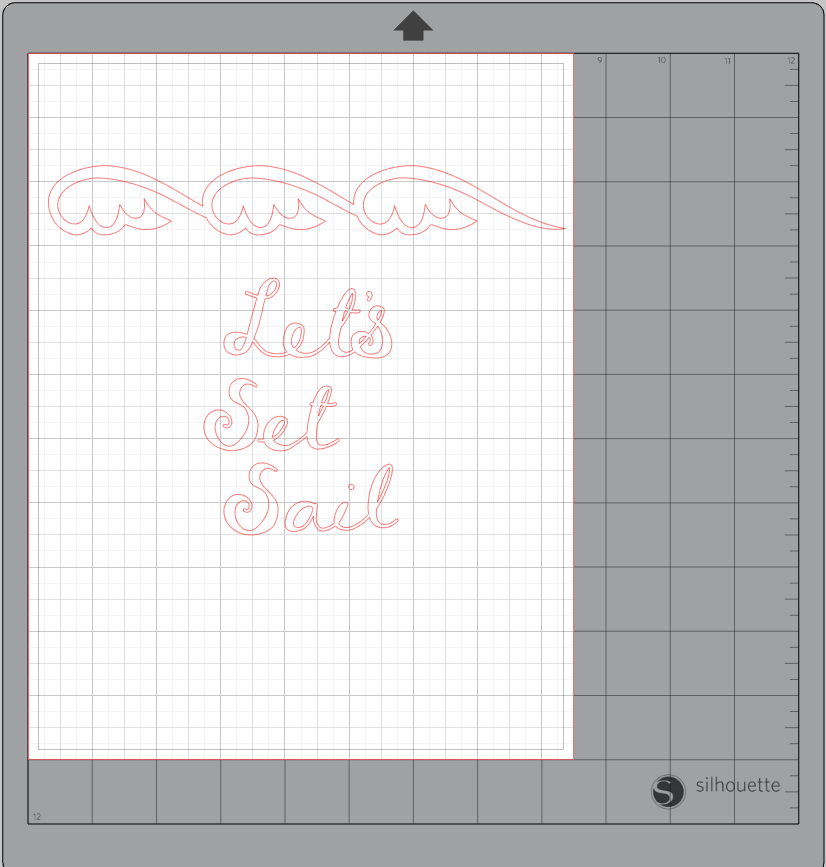
3. Size the waves to match the width of the phrase or slightly longer. Then Duplicate and Flip the waves horizontally using the Replicate panel and place below the phrase. Center all three components using the align tools in the Transform panel.

4. Now select your entire design, open the Stipple Panel, and select “Stipple Edge.” This will turn your design into small black dots.
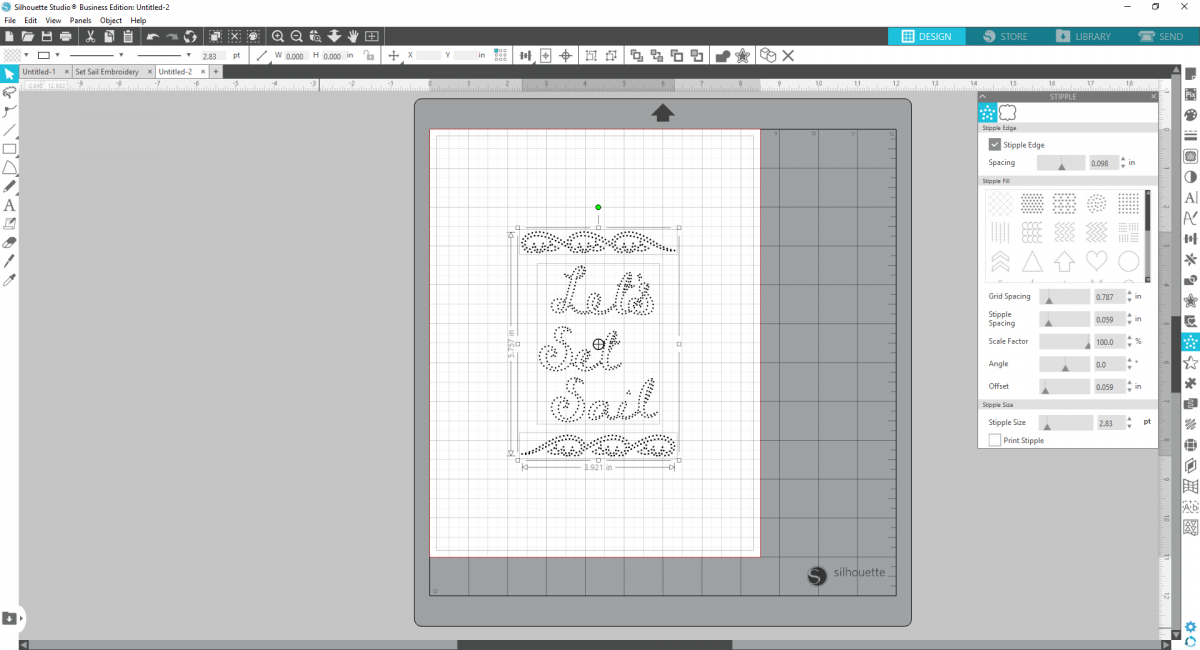
5. Change the Spacing of the stipple to 1.00 and the Stipple Size to 2.00. Check the “Print Stipple” box.
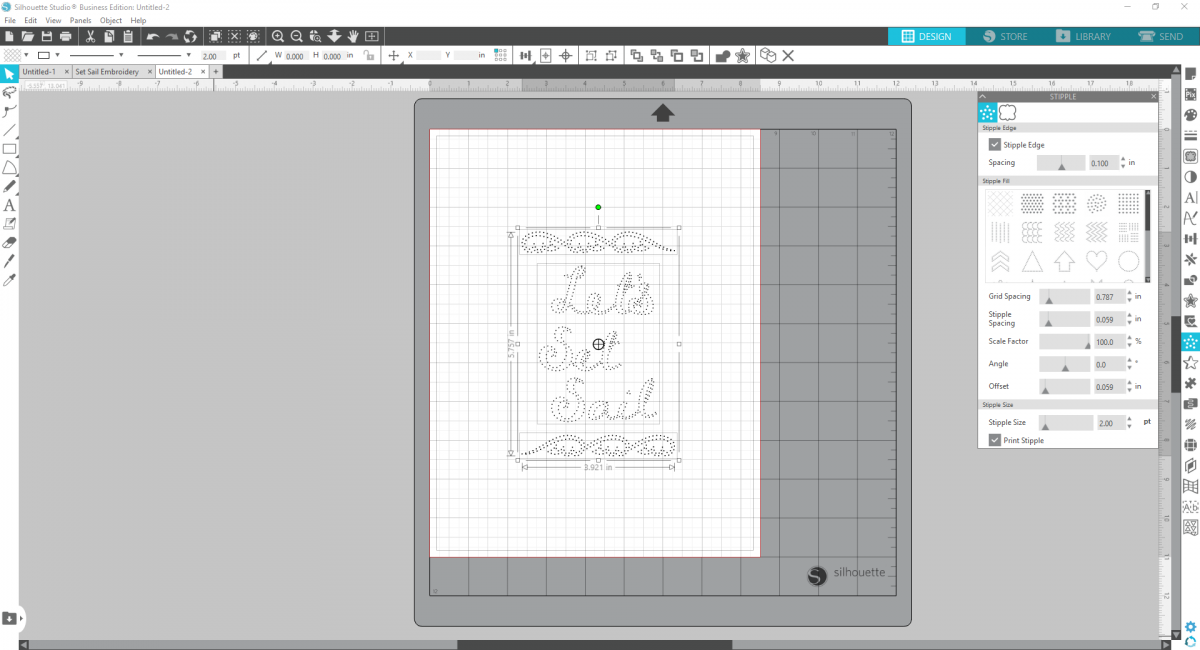
6. Now you’re ready to print! Load your Printable Cotton Canvas into your printer, select your cut settings, and click Send.
Step Two: Embroider Your Pattern
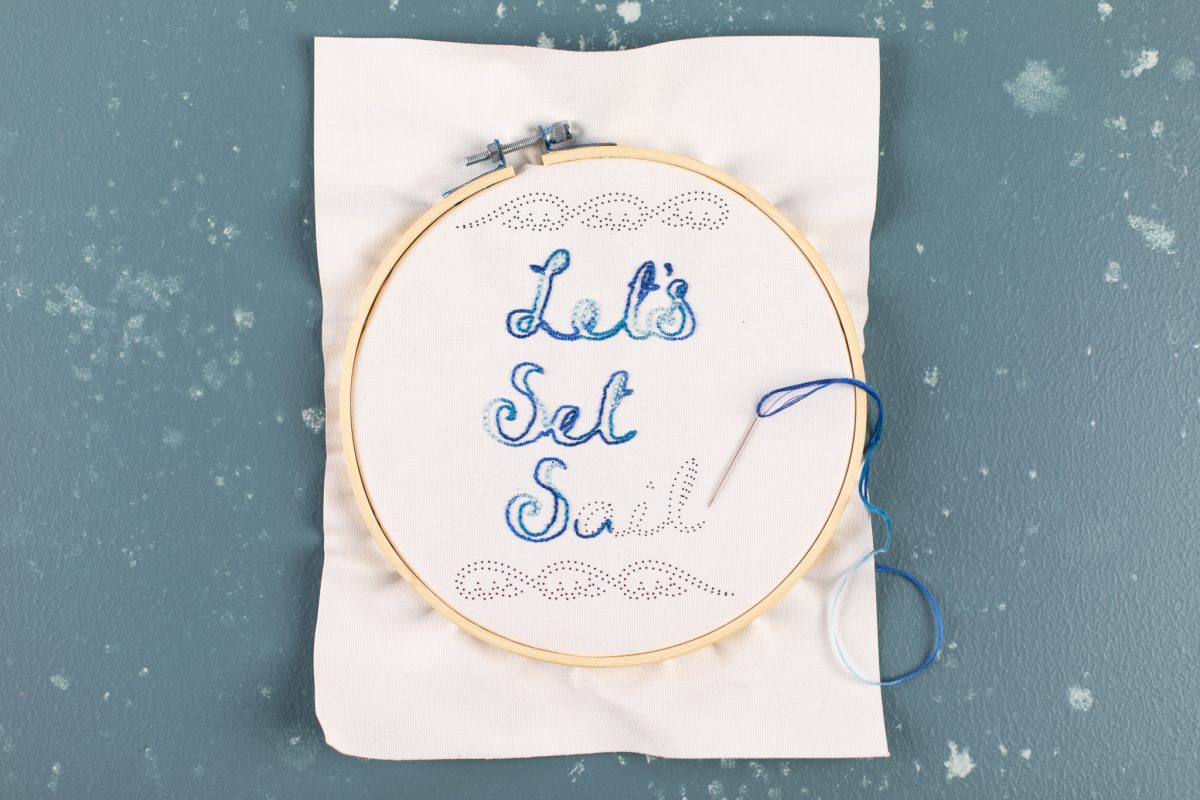
1. Place your printed cotton canvas in an embroidery hoop. Now you’re ready to start stitching!

2. Thread your needle and tie a knot at the end of your string. Thread your needle up through the cotton canvas, using the printed dots as your guide.
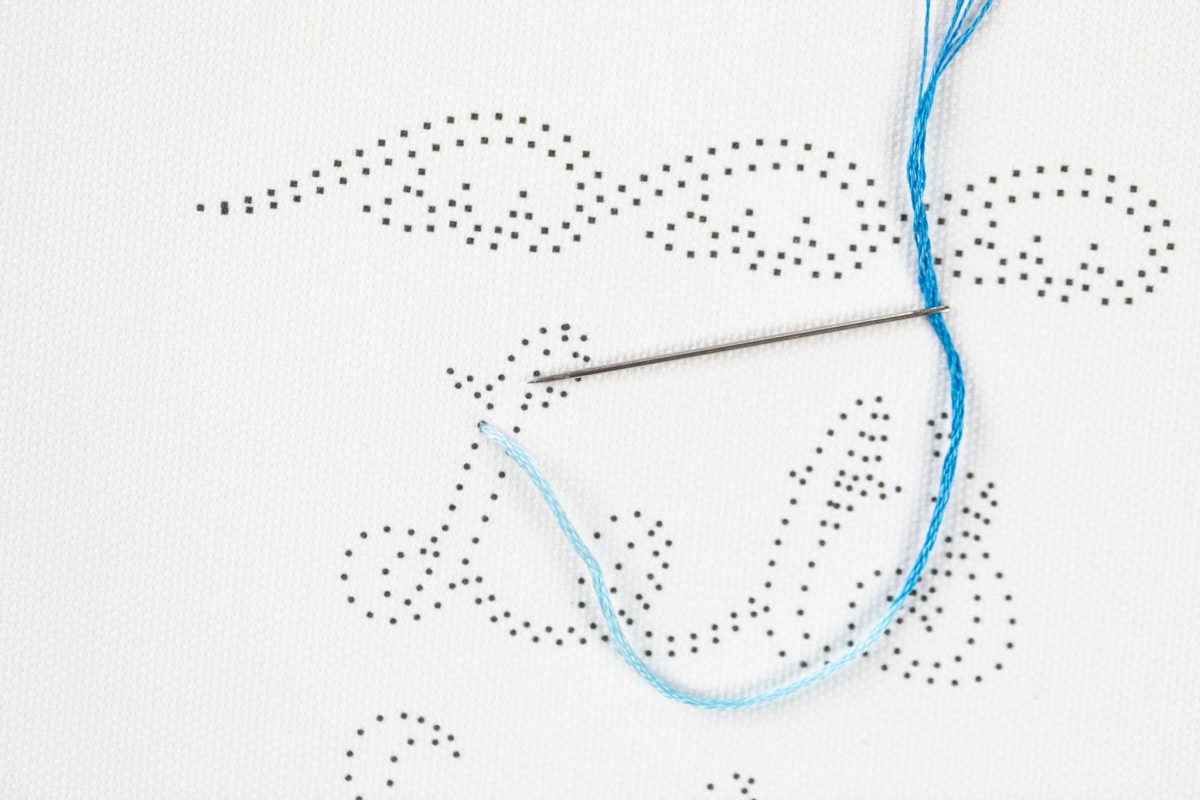
3. To do a backstitch, push your needle down through the fabric on the dot directly behind where your needle came up first.
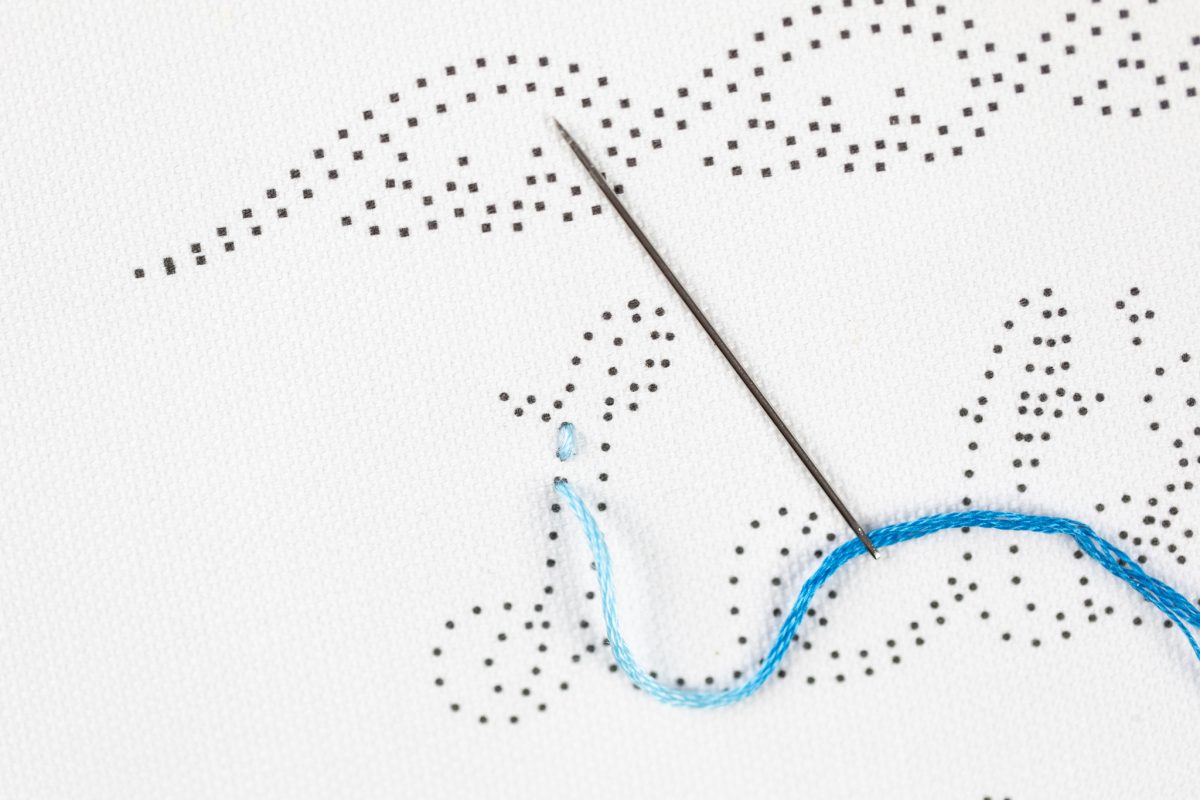
4. Then come up through the dot directly in front of your first stitch, and back down into the very same hole of your first stitch. This will make the stitches appear connected, which is great for this cursive font!
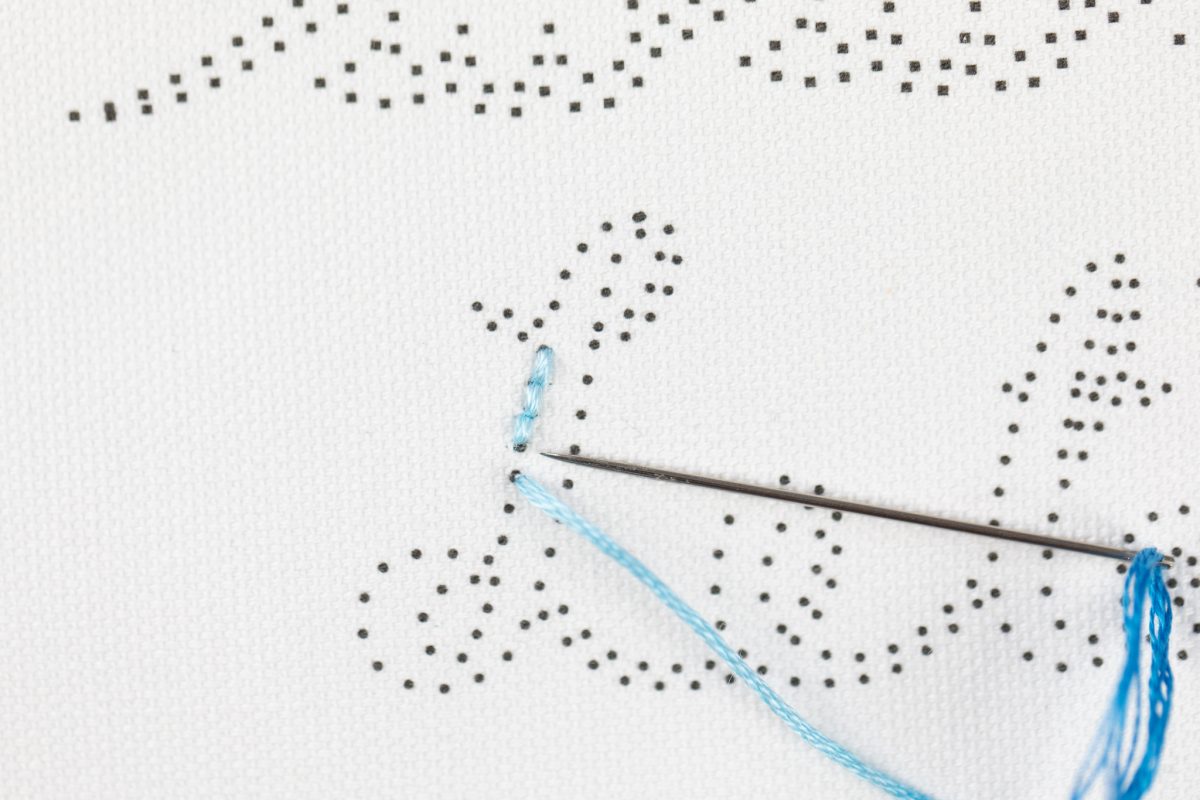
5. Continue this motion for the entire embroidery process. When you run out of thread, tie a knot on the underside of the embroidery and begin again with new thread.
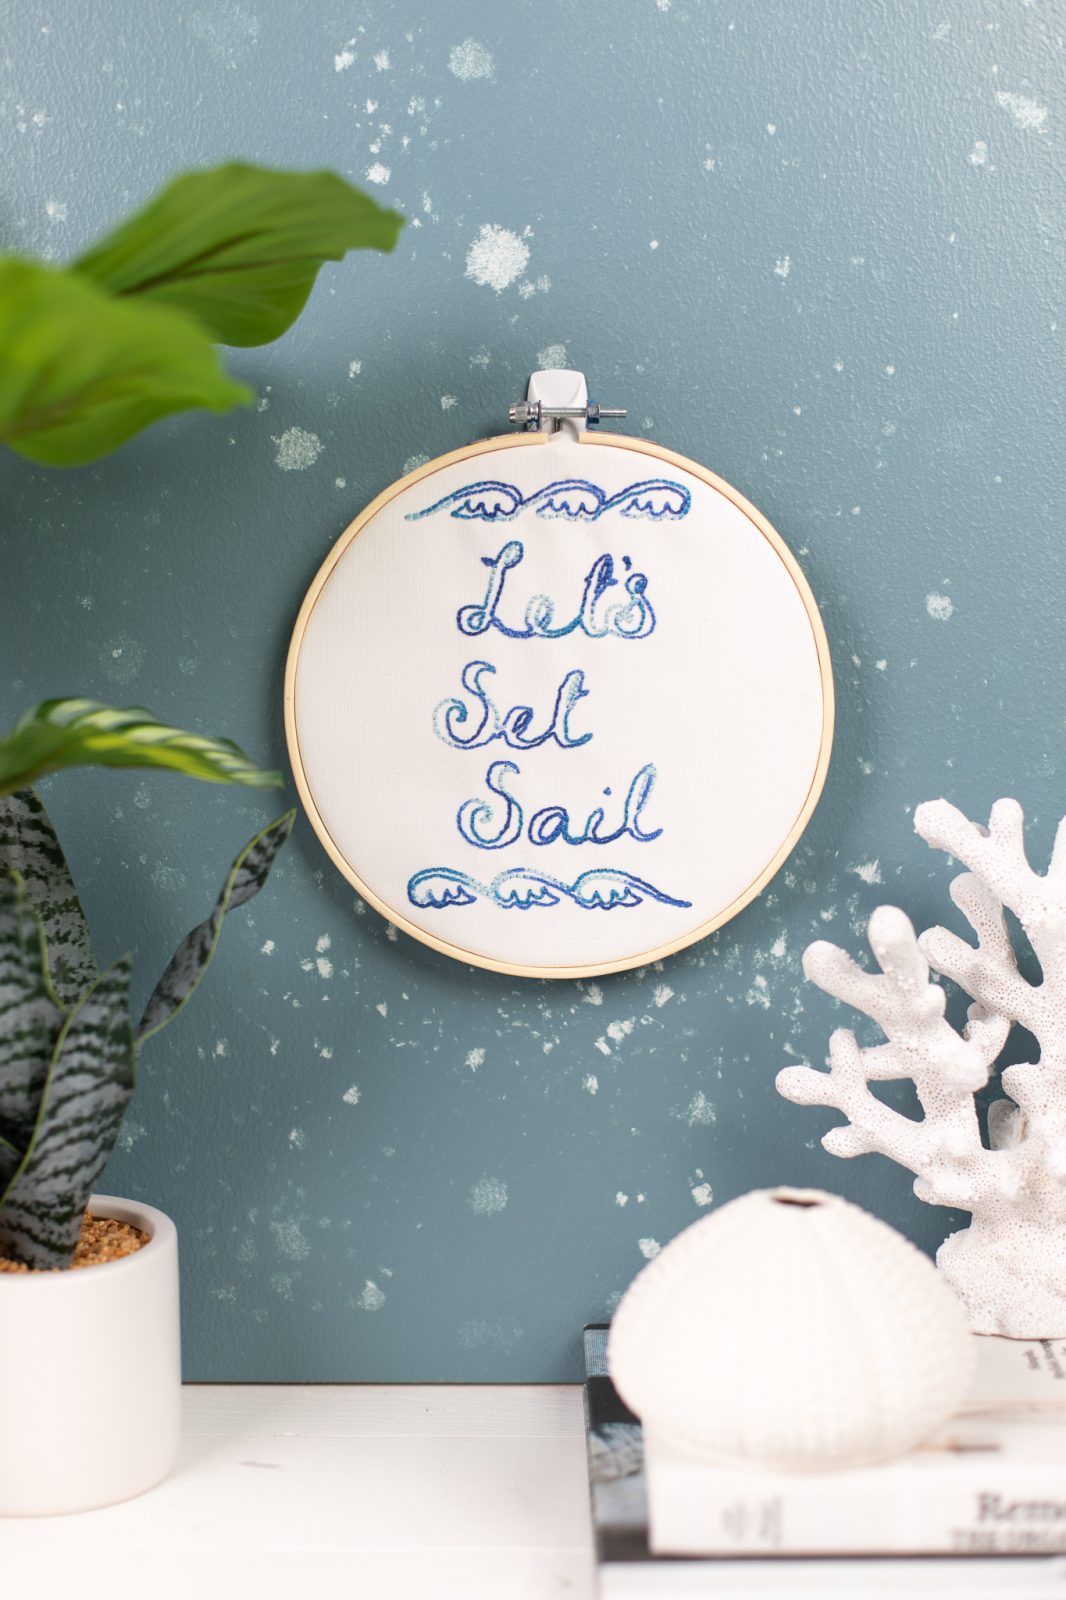
6. Trim your canvas around your embroidery hoop to hang, or you can release it from the hoop and frame it. Either way, it will look lovely!
Nasze Naturalne
September 3, 2025
Your authentic voice really shines through in everything you create and share
Naszenaturalne
September 2, 2025
Really love your style
Kelly Wayment
June 28, 2024
You can use it with vinyl as long as it is smooth and flat to allow the static charge to hold on to it. Rolled vinyl that wants to go back to its rolled shape will not necessarily work well, and it would need to be trimmed to fit the ES mat cutting area.
Kelly Wayment
June 28, 2024
Yes, you can use the heat pen while using the ES mat. 🙂
Yurii
March 2, 2024
Hello. May it be used with heat pen?
Thanks
Jerome
February 24, 2024
Hi, works this with the normal vinyl foils or only with printer papter etc?