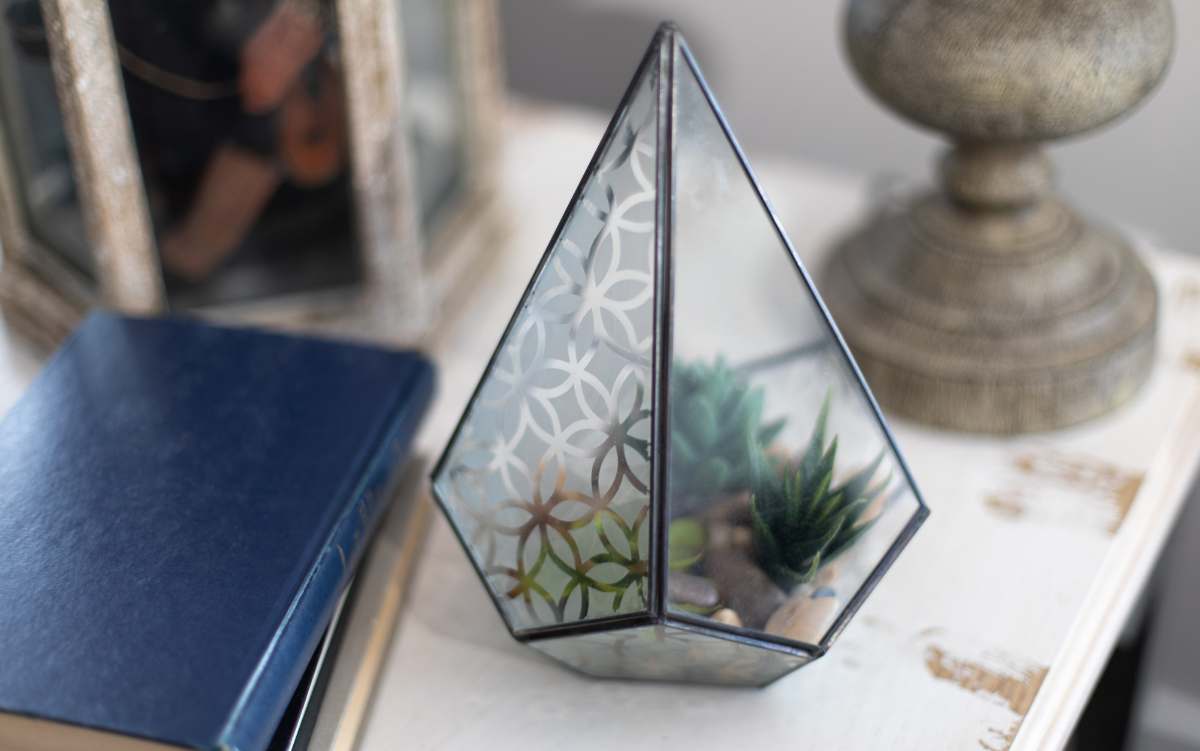
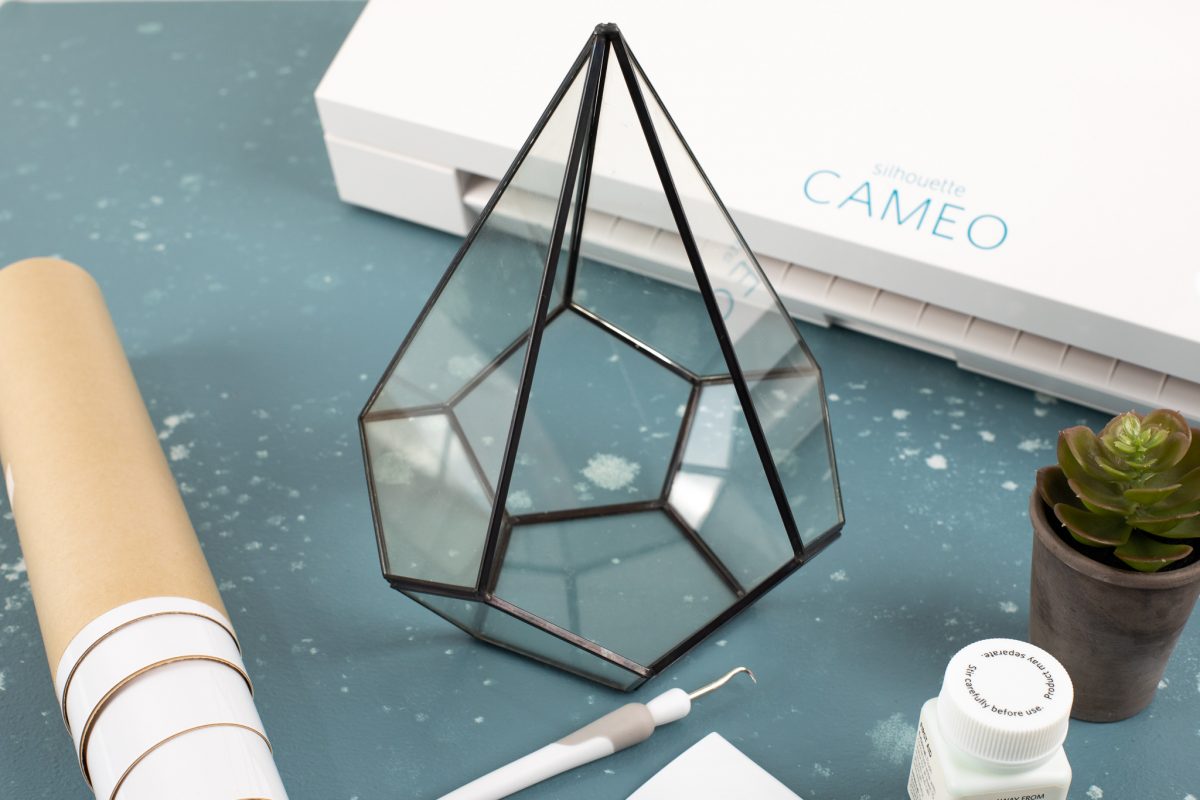
Terrariums are all the rage right now. We are going to make ours look a little more custom with Silhouette’s Glass Etching Kit. Follow along if you’d like to see how you can make your own!
Supplies Needed:
- Silhouette CAMEO® or Silhouette Portrait®
- Silhouette Studio®
- Silhouette Cutting Mat
- Silhouette Cutting Blade
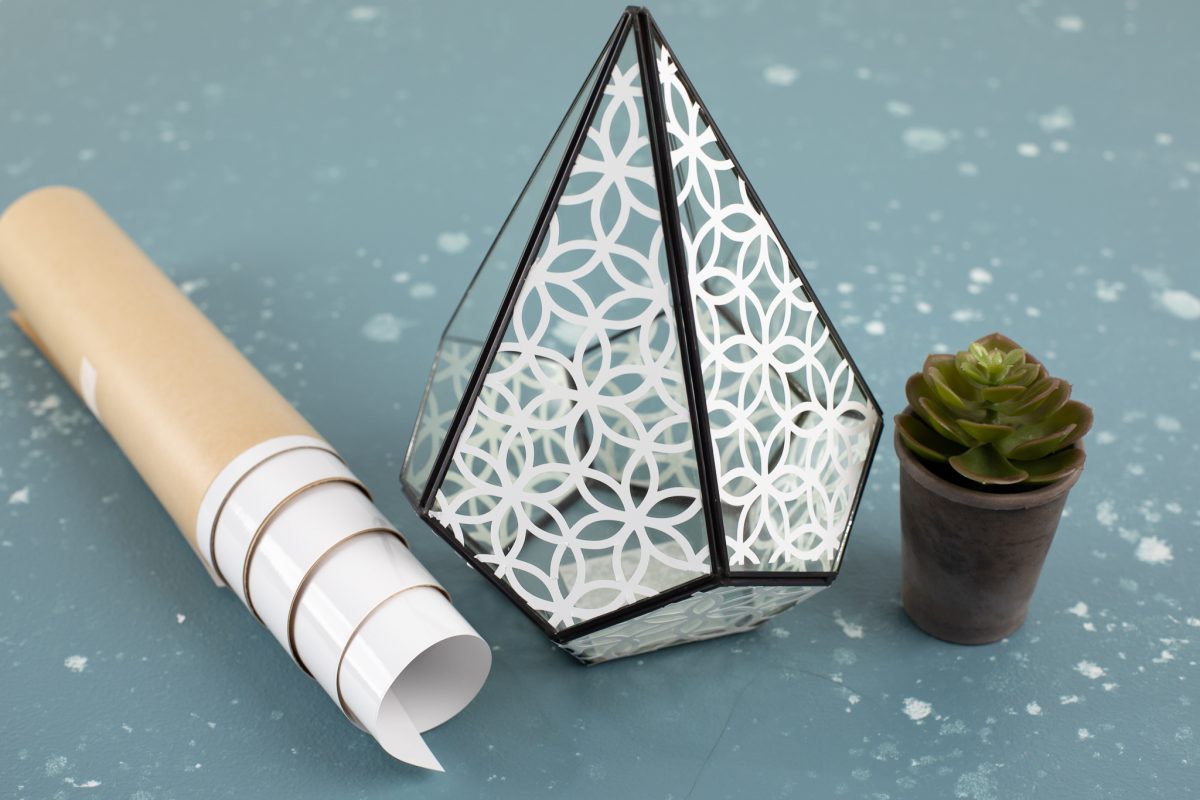
- Silhouette Glass Etching Kit
- Terrarium
- Design ID #268654
Step One: Prepare the Design in Silhouette Studio®
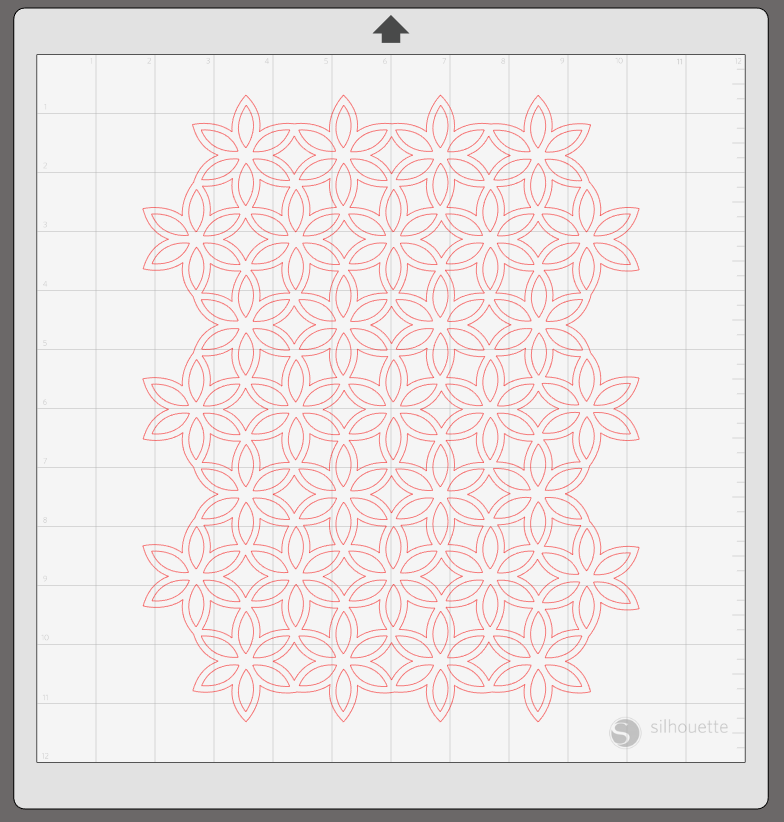
1. After taking the measurements of your terrarium, open the design (ID #268654) in Silhouette Studio®.
2. Click and drag down from the top or right ruler and set your guides. Line them up according to your terrariums measurements.
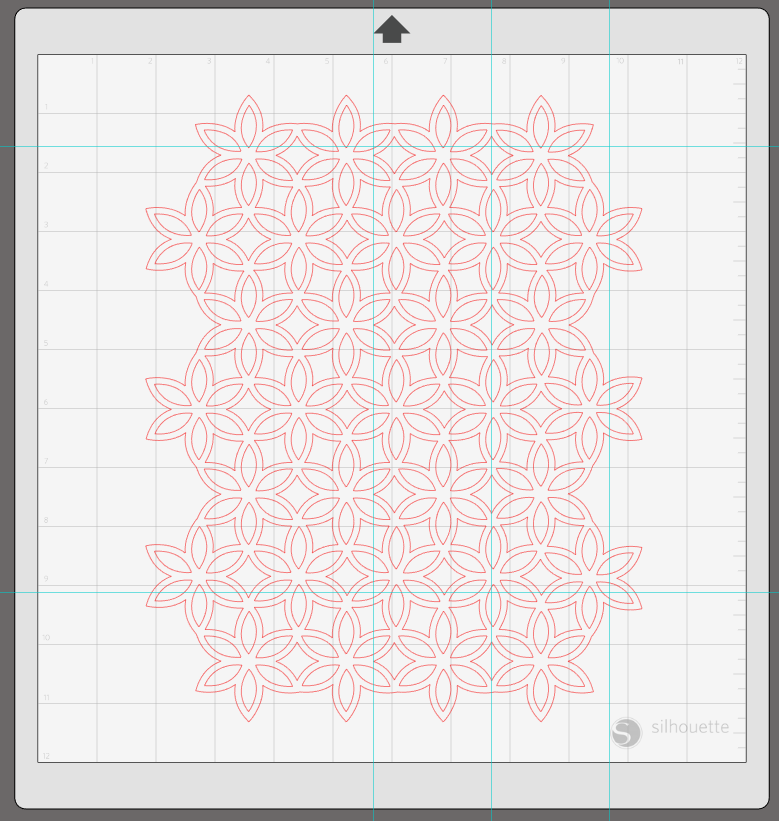
3. Once your guides are all in place choose the knife tool from the left hand menu. Make sure tat the Solid Tab is selected for cut type. Following your guides use the knife tool to slice through your design.
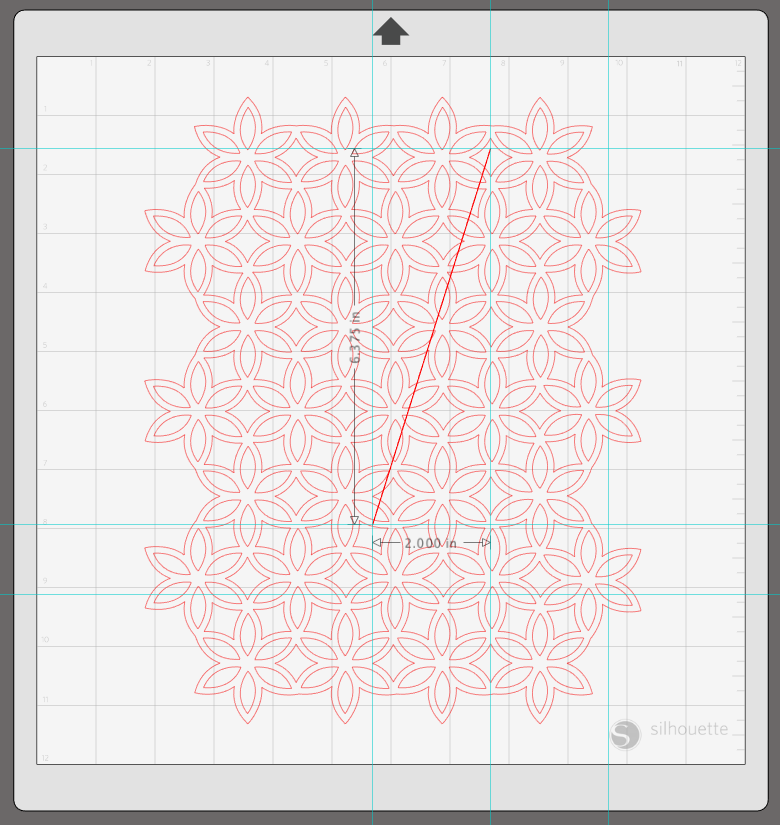
4. Connect all the points of your guides and you should have a solid selection cut from your design.
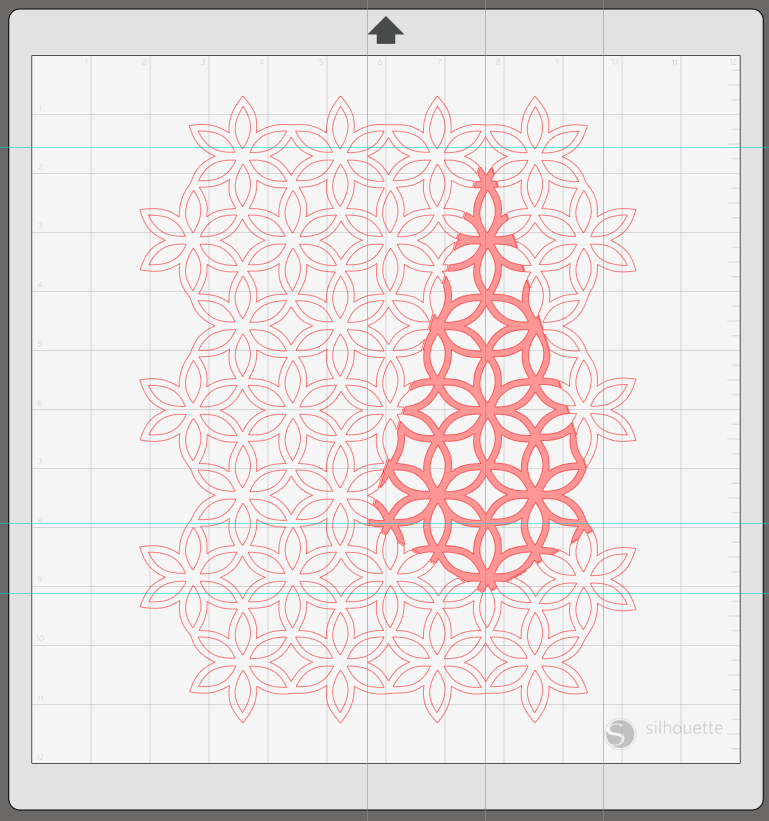
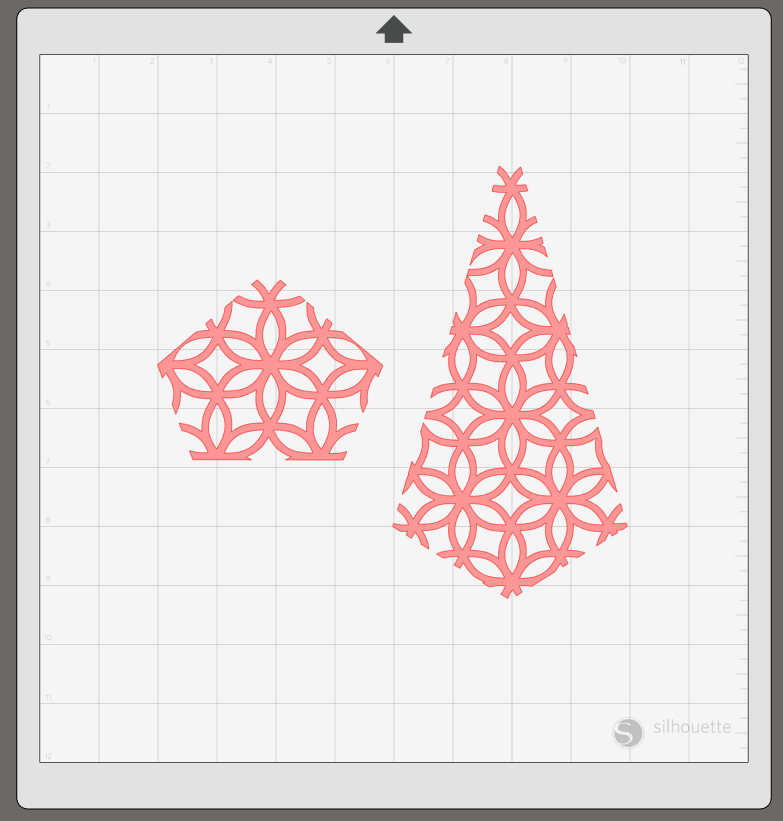
5. Remove the excess design and repeat for all the different shapes of your terrarium.
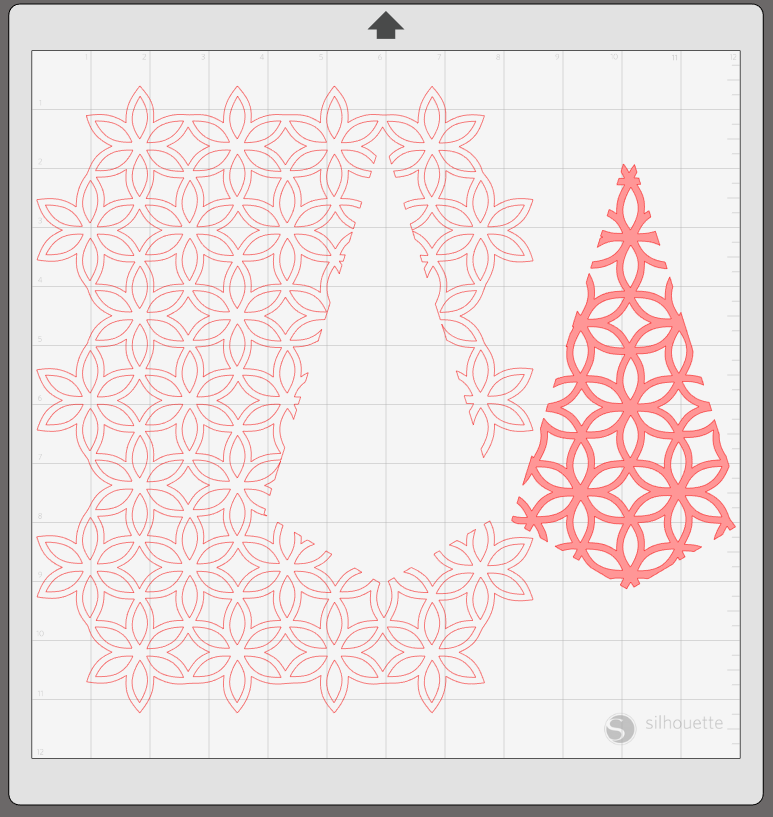
6. Now take your stencil material and load it onto your cut mat and send to your machine using the stencil cut settings in the Send panel.
Step Two: Apply Stencil Material
1. When the stencil material has been cut, weed the design, and apply it to the terrarium using transfer tape or simply peel and stick the material depending on your design.
2. When the stencil is on your glass, apply the glass etching cream to the glass. Stir it before applying it, and be careful to not get it anywhere you don’t watched the glass to be etched.
3. Let the cream set and then scrap the excess cream off and rinse the surface with water.
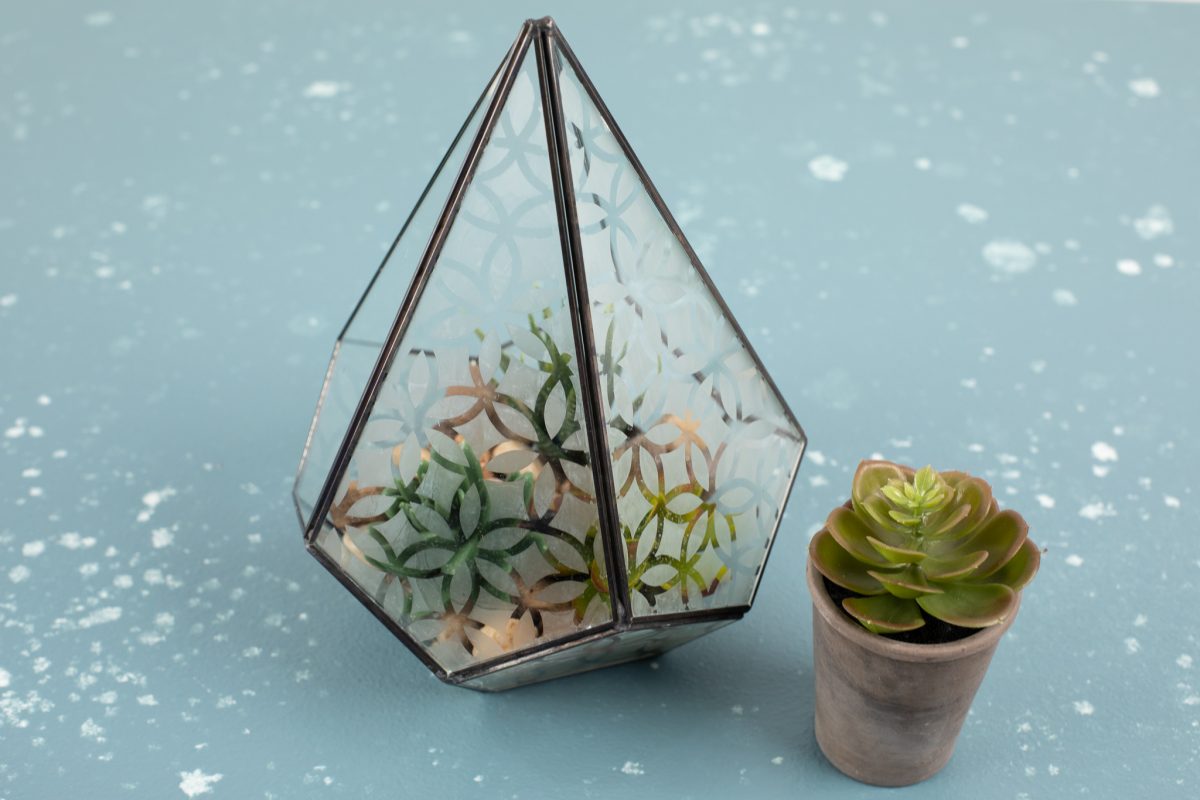
4. Carefully remove the stencil material from the terrarium.
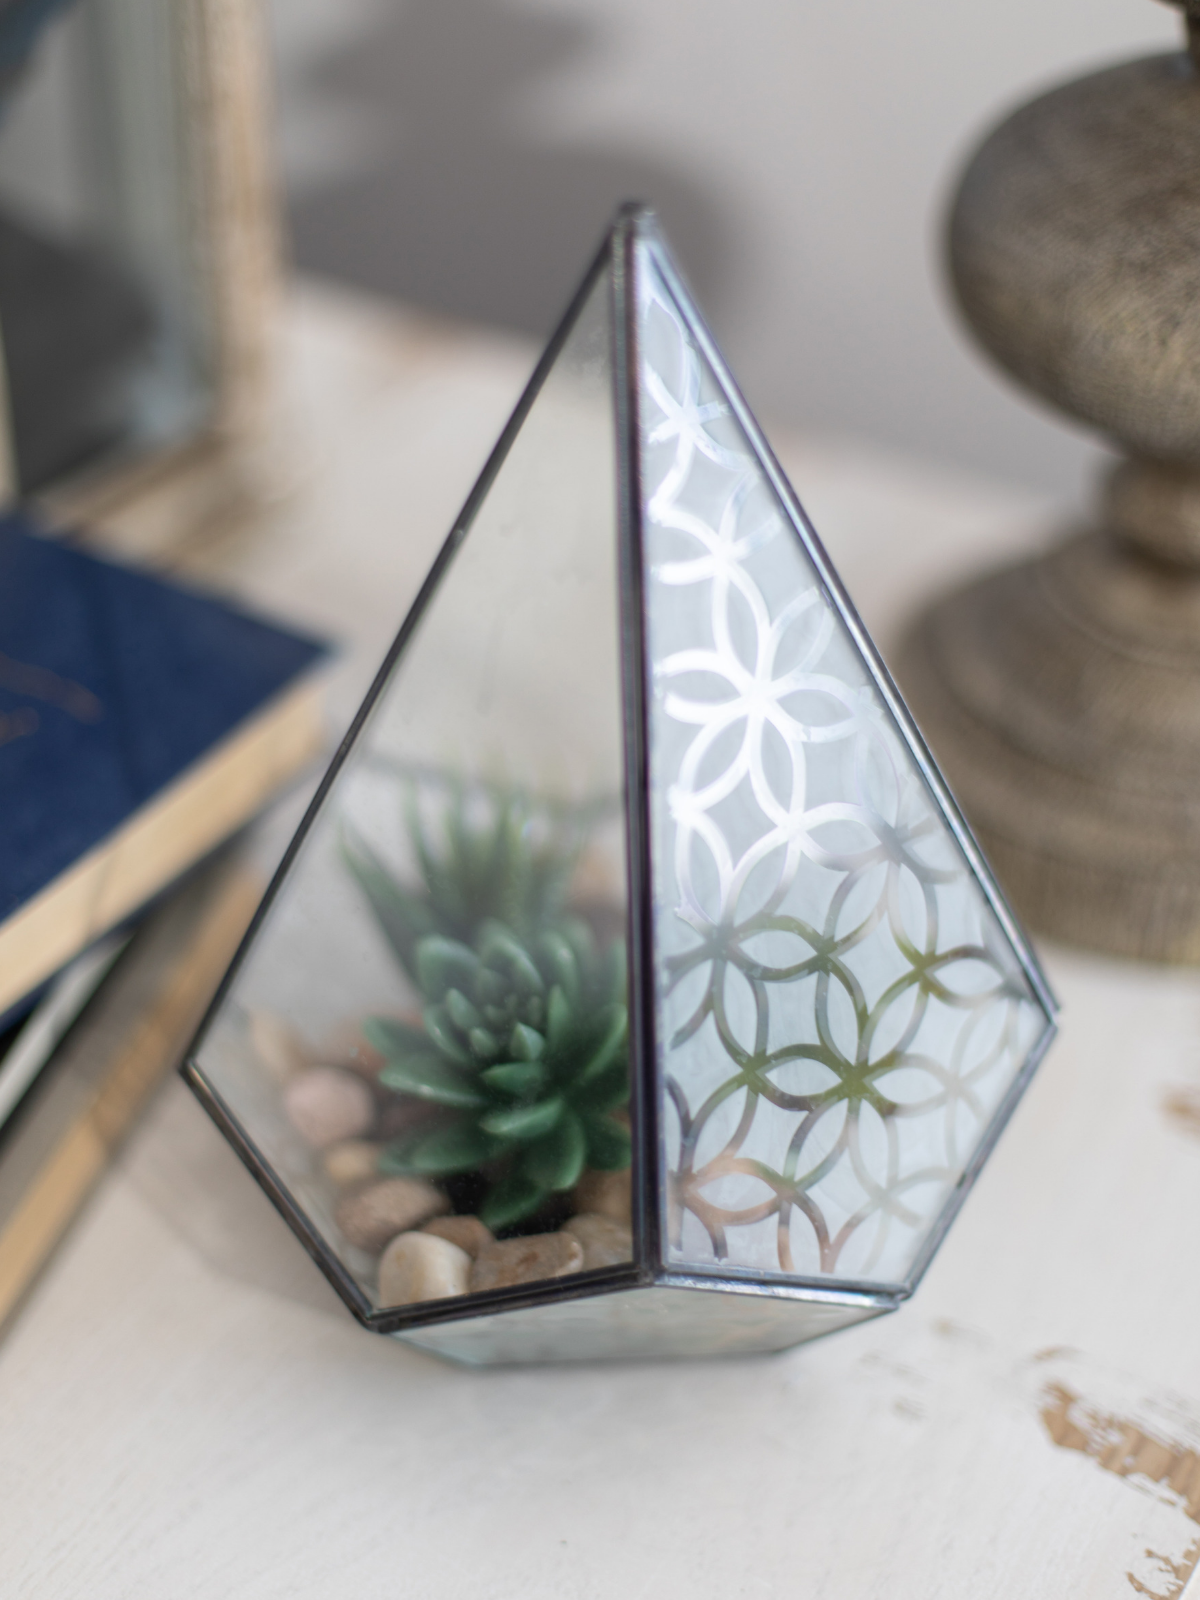
Now you have a darling custom terrarium to dress up your office, mantle, or end table. How will you customize your terrarium? Add a monogram? Different designs for different panes of glass? We would love to hear!
Nasze Naturalne
September 3, 2025
Your authentic voice really shines through in everything you create and share
Naszenaturalne
September 2, 2025
Really love your style
Kelly Wayment
June 28, 2024
You can use it with vinyl as long as it is smooth and flat to allow the static charge to hold on to it. Rolled vinyl that wants to go back to its rolled shape will not necessarily work well, and it would need to be trimmed to fit the ES mat cutting area.
Kelly Wayment
June 28, 2024
Yes, you can use the heat pen while using the ES mat. 🙂
Yurii
March 2, 2024
Hello. May it be used with heat pen?
Thanks
Jerome
February 24, 2024
Hi, works this with the normal vinyl foils or only with printer papter etc?