My favorite phrase to describe the Silhouette machine is “Swiss Army Knife.” Not only does it cut a variety of materials but there are also so many crafting project possibilities! This month, I tried out a new project type (glass etching) that honestly seem a little daunting, but oh my gosh folks, it is SO easy!
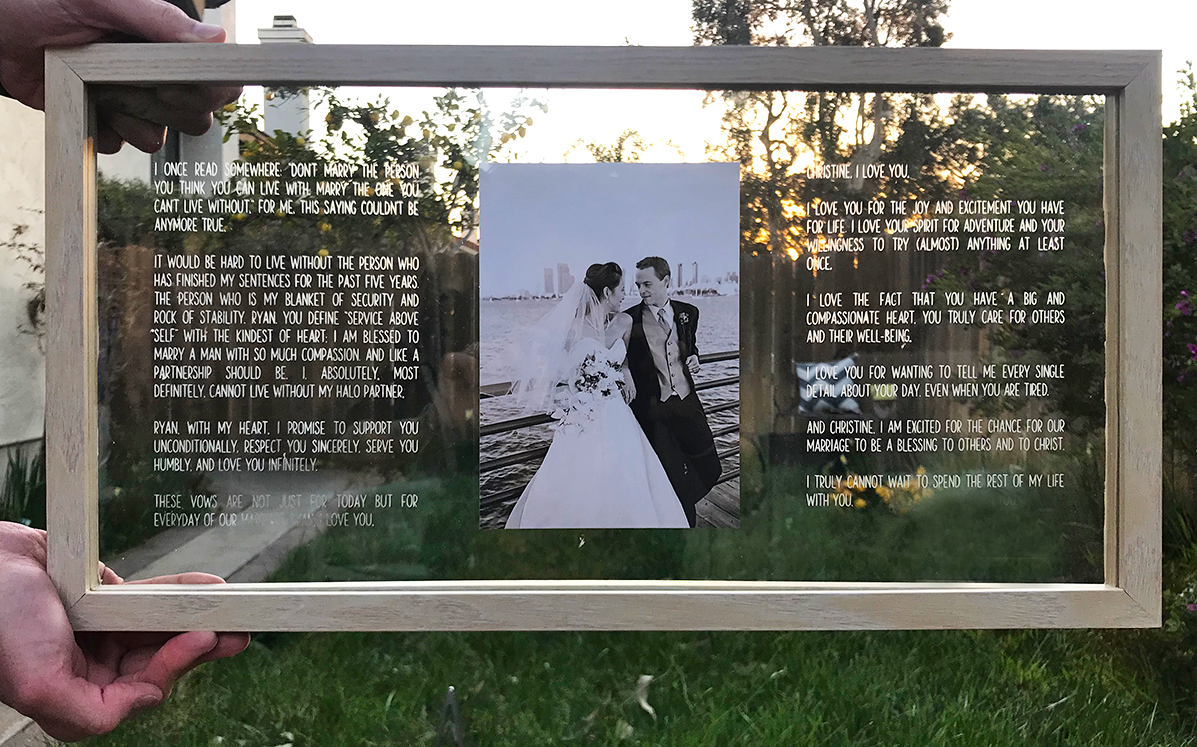
While I was cleaning out our photo/memory drawer (thanks Marie Kondo!), I came across my and my husband’s wedding vows. They were folded and a little worn-looking, so they are certainly not something I want displayed in our house. Then light bulb! I created this project featuring our vows glass-etched on both sides of one of our favorite wedding photos!
Supplies Needed:
- Silhouette CAMEO® or Silhouette Portrait®
- Silhouette Cutting Blade
- Silhouette Cutting Mat
- Silhouette Studio®
- Silhouette Etching Cream
- Silhouette Scraper
- Silhouette Hook
- Tweezers
- Silhouette Transfer Tape
- Silhouette Vinyl
- Masking or Painter’s Tape
- Paintbrush
- Disposable Gloves
- Paper Towel
- Picture Frame (For my project, I used a floating frame.)
- 5-inch-by-7-inch Photo
- Adhesive Dots
- Design ID #268700
Step One: Prepare the Text Design
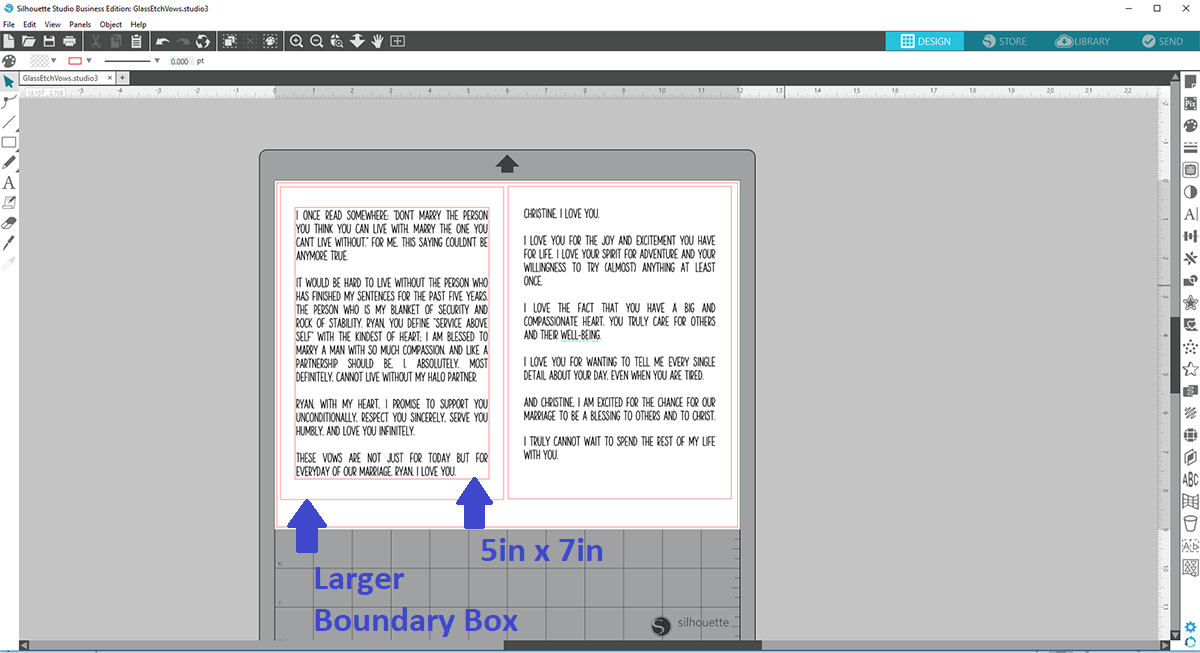
1. In Silhouette Studio®, draw a 5-inch-by-7-inch rectangle. This will be your boundary box for your text.
2. Insert text and type up vows using the font of your choice. NOTE: I used Design ID #268700 because it would be fairly easy to weed compared to a script font.
3. In the Text Style panel, select Full Justification. NOTE: Of course, this step is optional. Pick whatever justification that you prefer.
4. Once you are happy with the layout of your text, change the
5-inch-by-7-inch boundary box to a larger boundary box so that there is a margin on all sides of the text.
5. Next, place your vinyl on the cutting mat, load your cutting mat into your Silhouette machine, and Send the design to your Silhouette with the proper cut settings. TIP: I recommend doing a test cut first.
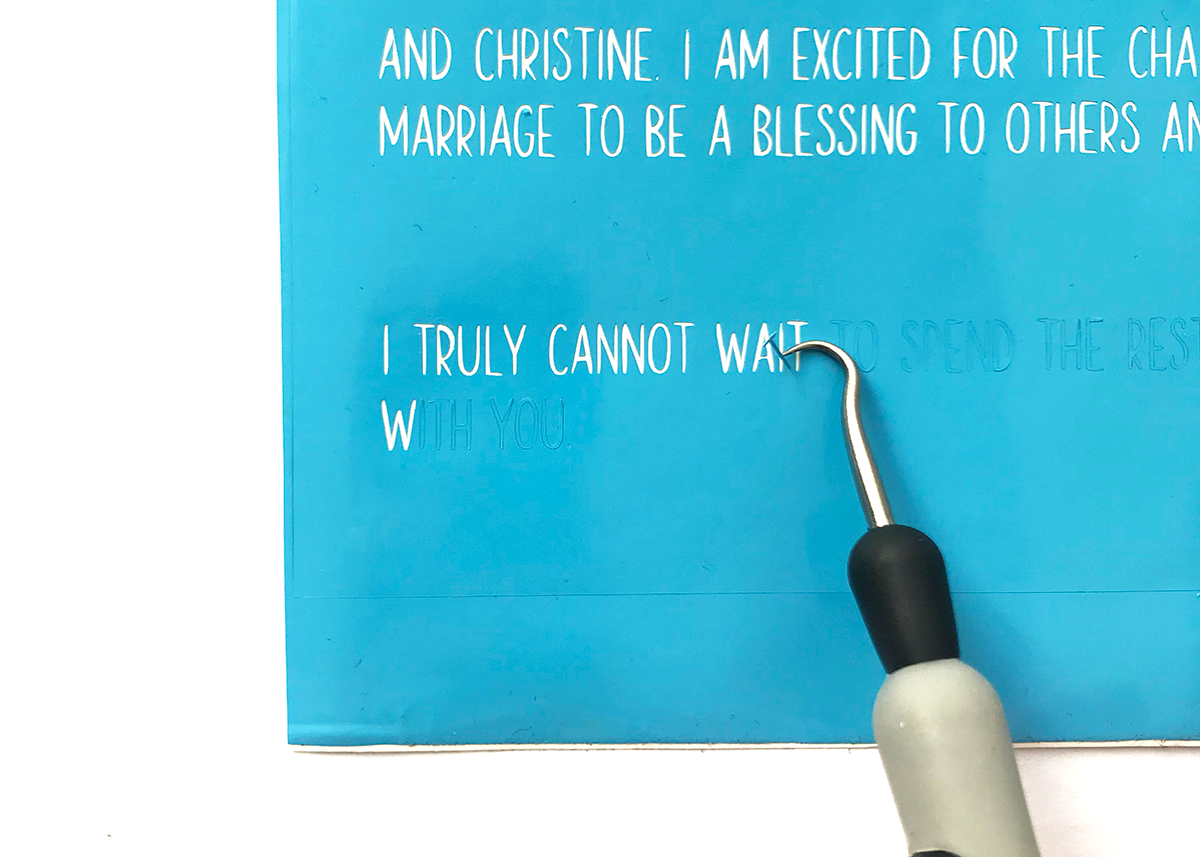
Once the vinyl is cut, remove it from cutting mat. Using the Silhouette hook tool and tweezers, remove the vinyl border and letters. Be careful not to remove the small pieces inside the letters. Remember, we are using the vinyl as a stencil for glass etching, so you need to remove the positive space, not the negative space.
6. After weeding, cut a piece of transfer tape that is slightly larger than the piece of vinyl.
Place the cut transfer tape over the weeded vinyl and burnish it with the scraper tool.
7. Carefully peel away the vinyl backing so that the weeded vinyl is now on the transfer tape.
Step Two: Set Up the Picture Frame
1. Remove the glass from the picture frame
2. Carefully place the transfer tape and weeded vinyl piece where you want on the glass.
3. Tear off strips of masking or painter’s tape to give you extra border protection (from the etching cream).
Step Three: Etch Your Design
1. Before opening the etching cream container, shake it well. TIP: I suggest even giving it a good stir with a craft stick or bamboo skewer.
Put on disposable gloves for your protection.

2. Dip your paintbrush into the etching cream and then brush it lightly, carefully, and generously over the weeded vinyl.
3. Move your brush in various directions to make sure the etching cream makes complete contact with the glass surface.

4. Let the etching cream sit for a minute before you remove any painter’s or masking tape and rinse off the etching cream. You may need to gently rub off the etching cream under running water to remove it.
4. Dry the glass with a paper towel.
5. Remove the vinyl to reveal the etched design.
Step Four: Assemble the Project
1. Insert a 5-inch-by-7-inch picture how you would like to see it in the picture frame. Secure it to the glass with adhesive dots.
2. Place the glass back into the picture frame and tighten or turn fasteners to secure the glass.
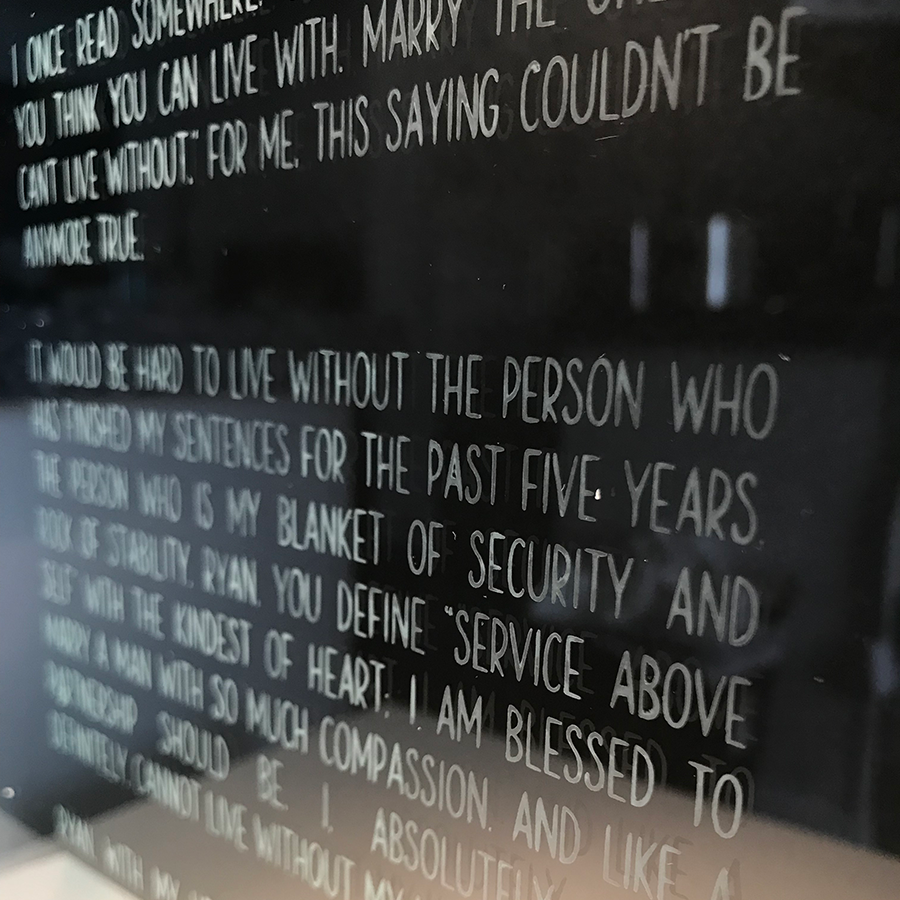
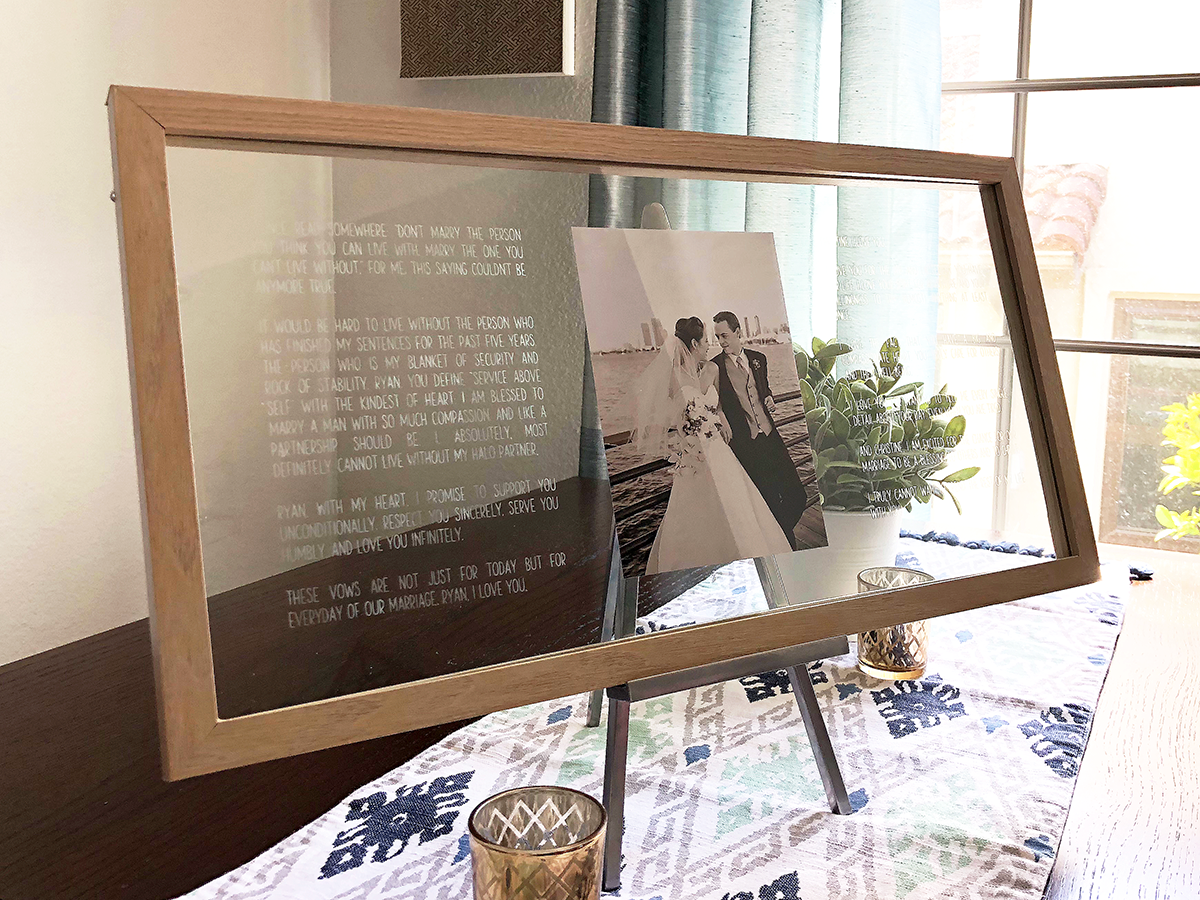
Wouldn’t this be such a great anniversary gift?! Honestly, I almost gave up on this project! I didn’t think our vows would fit on the picture frame I bought, and I wasn’t going to buy a larger frame because, um, weird couple shrine-like photo?! No thanks! BUT my heart and crafting moxie told me otherwise, and I’m SO glad I carried through with this project. It is beautifully hanging on our bedroom wall, and I truly love waking up every day and re-reading our promises to each other!
Nasze Naturalne
September 3, 2025
Your authentic voice really shines through in everything you create and share
Naszenaturalne
September 2, 2025
Really love your style
Kelly Wayment
June 28, 2024
You can use it with vinyl as long as it is smooth and flat to allow the static charge to hold on to it. Rolled vinyl that wants to go back to its rolled shape will not necessarily work well, and it would need to be trimmed to fit the ES mat cutting area.
Kelly Wayment
June 28, 2024
Yes, you can use the heat pen while using the ES mat. 🙂
Yurii
March 2, 2024
Hello. May it be used with heat pen?
Thanks
Jerome
February 24, 2024
Hi, works this with the normal vinyl foils or only with printer papter etc?