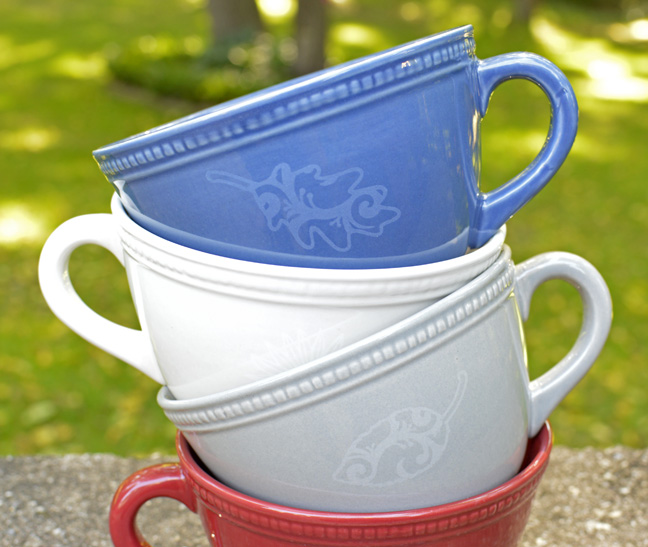
Did you know that you can use your Silhouette Etching Cream to etch more than just glass? I picked up this cute set of mismatched cappuccino mugs at the store and wanted to dress them up a bit for autumn. Since the glaze used on stoneware like this is glass-based, I thought I might be able to stencil a custom design into the side of each one…and I love the subtle effect I was able to achieve!
What You’ll Need:
- Ceramic mugs
- Stencil Vinyl
- Etching Cream
- Silhouette CAMEO®
- Hook Tool
- Scraper Tool
Designs Used:
- 3 Flourished Leaves (ID: #21307 and #21308)
- Sunflower Papercut (ID: 88489)
STEP ONE: OPEN YOUR DESIGN IN SILHOUETTE STUDIO®
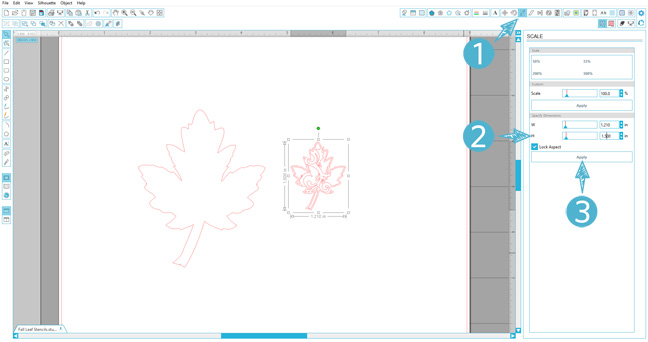
Open one of the flourished leaves design in Silhouette Studio®. There will be a set of two cut lines for each leaf—a simple outline and a flourished shape. Move the outline aside and resize the flourished shape:
- Open the Scale Window.
- Enter an appropriate value in the “height” and “width” boxes.
- Click “Apply.”
STEP TWO: CREATE A STENCIL
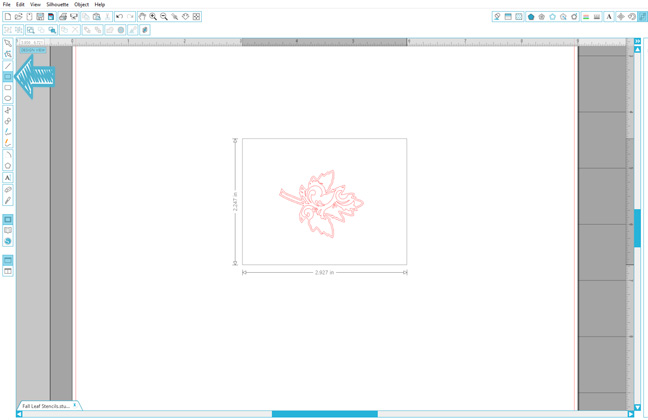
In order to create a reasonably-sized stencil out of the design, you will need to:
- Draw a rectangle around the resized shape using the Rectangle Tool.
Leave enough room around the leaf to prevent etching cream from touching any part of the mug you don’t want to etch, but make the stencil small enough to handle easily.
STEP THREE: SEND TO SILHOUETTE

When you have finished creating each of your stencils:
- Insert your stencil vinyl into your Silhouette CAMEO®.
- Adjust your blade to the recommended setting of 1.
- Send your project to the machine to cut.
STEP FOUR: WEED AND APPLY STENCIL
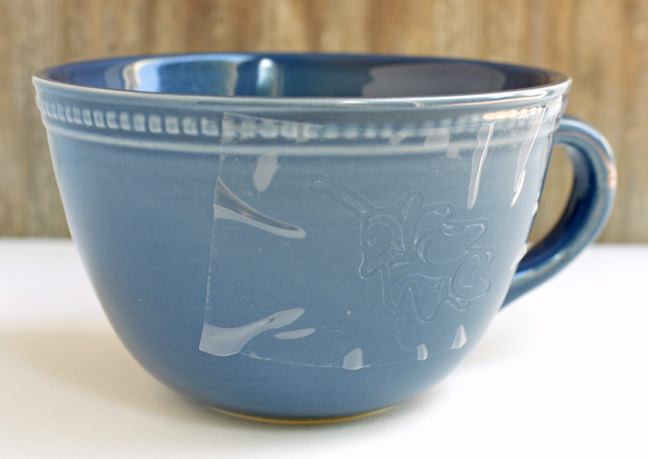
- Once cut, use your hook tool to weed each stencil.
- Apply transfer paper and move the stencil to your ceramic mug, pressing firmly with the scraper tool to ensure that all of the intricate vinyl bits are adhered well.
For oddly-shaped objects like this, it helps to begin applying the stencil from the center and slowly smooth it onto the object towards the edges. Ripples in the vinyl near the outer edges of the stencil are okay (and hard to avoid if the surface is not perfectly flat), as long the border around your actual design is unbroken.
STEP FIVE: ETCH THE DESIGN
- Apply a thin coat of etching cream over the stencil, being careful not to get cream elsewhere on the piece.
- Allow to sit for a minute or two, scrape off any excess cream, and rinse the piece to remove the remainder.
- Remove the stencil and admire the beautiful, subtle pattern on your custom autumn cappuccino mugs!
In addition to ceramic and glass, etching cream will also work on mirrors and porcelain.
Nasze Naturalne
September 3, 2025
Your authentic voice really shines through in everything you create and share
Naszenaturalne
September 2, 2025
Really love your style
Kelly Wayment
June 28, 2024
You can use it with vinyl as long as it is smooth and flat to allow the static charge to hold on to it. Rolled vinyl that wants to go back to its rolled shape will not necessarily work well, and it would need to be trimmed to fit the ES mat cutting area.
Kelly Wayment
June 28, 2024
Yes, you can use the heat pen while using the ES mat. 🙂
Yurii
March 2, 2024
Hello. May it be used with heat pen?
Thanks
Jerome
February 24, 2024
Hi, works this with the normal vinyl foils or only with printer papter etc?