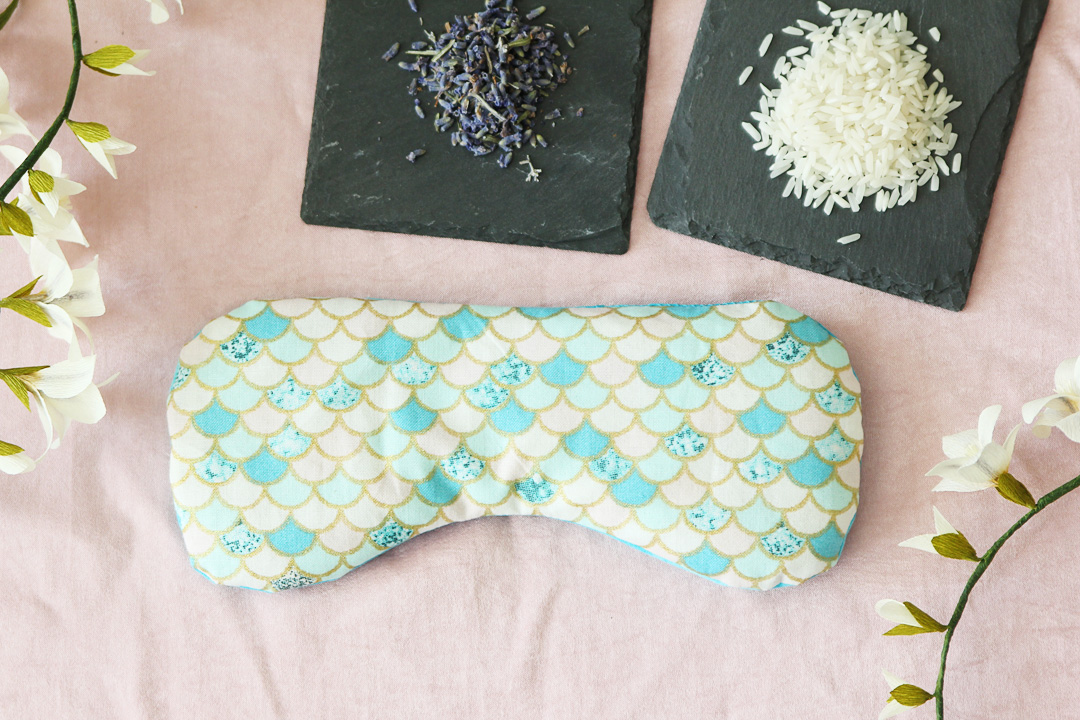
This fabric eye pillow is a great project to cut with your Cameo 4 Rotary Blade! This is eye pillow is also called a meditation mask. You can add lavender and your favorite essential oil to the rice filler for a soothing scent, or leave it out for just a weighted mask.
Supplies:
- Silhouette Cameo® 4 – I used the Cameo 4, but you may also use the Cameo Plus or Cameo Pro
- Silhouette Studio® – Basic Edition or higher
- Cutting mat – a new, sticky standard tack mat or a strong tack mat
- Rotary Blade
- Sewing machine
- Fabric scissors
- Fabric pins or clips
- Small mixing bowl
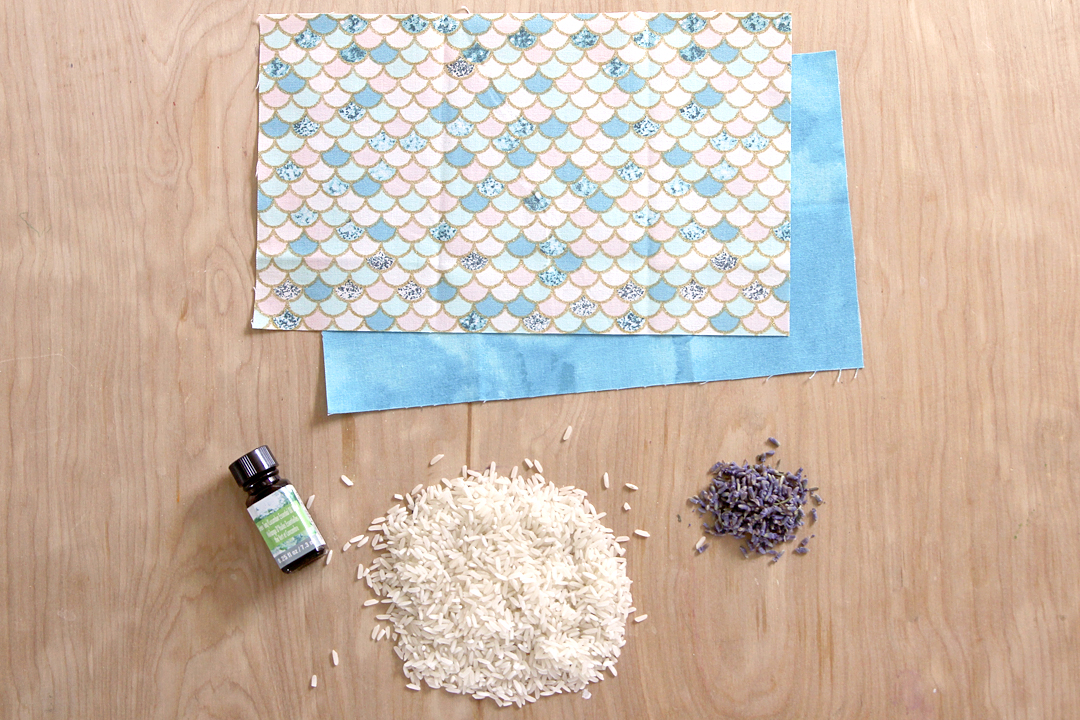
- Cotton fabric – two pieces that are at least 6 in. x 10 in. each
- All-purpose thread in a matching color
- 1 c. rice or whole flax seeds
- Lavender flowers (optional)
- Essential oils (optional)
- Design ID #405849 by Silhouette
Step One: Set Up Design
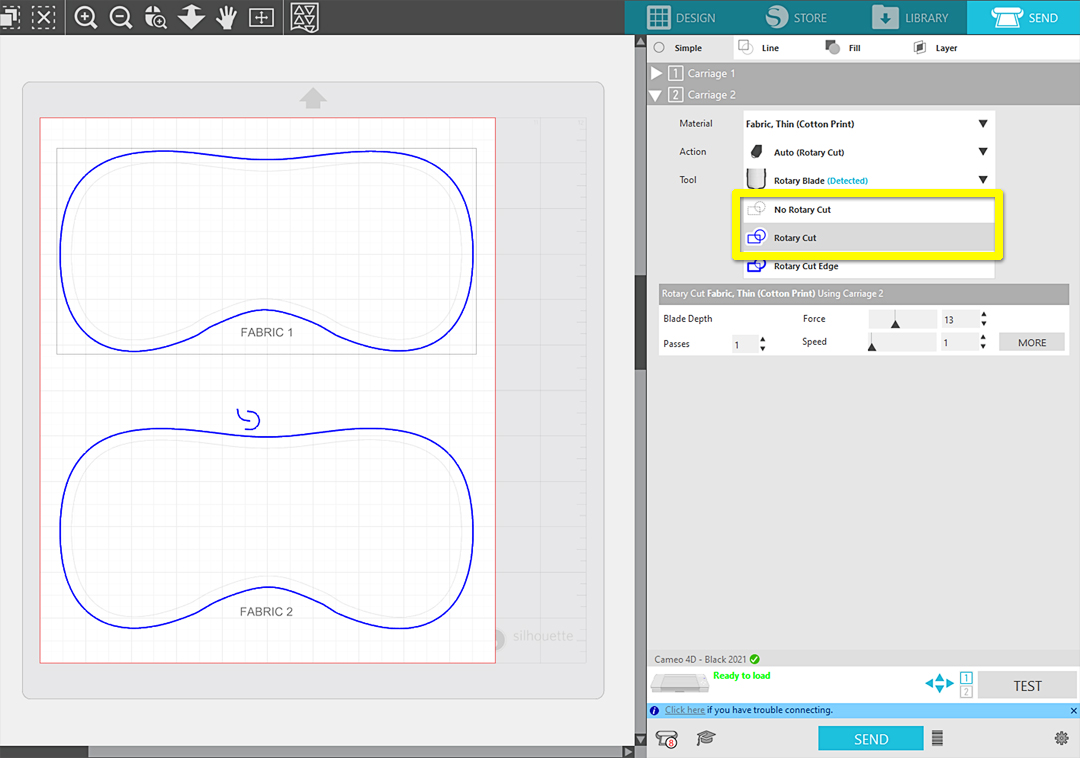
In Silhouette Studio®, open the fabric eye pillow design. For each piece, you’ll see two lines for the design: a red line on the outside and a gray line on the inside. The outer red line is the shape we’re going to cut and includes a 1/4 in. seam allowance for sewing. The inner gray line is the guide for where you’ll sew the pieces together later.
Set up your Page Setup Panel media size to match the size of fabric you’ll be placing on the cutting mat. These are my settings:
- Machine = Cameo
- Cutting Mat = Cameo (12 x 12 in.)
- Media Size = Custom (10 x 12 in.)
Note: I’m using two pieces of 10 in. x 6 in. fabric, so I’ve set my media size to 10 in. x 12 in. to cut both parts in the same cut job.

Rotate the design vertically or horizontally, depending on your fabric size and pattern orientation. You can cut both mask pieces from the same fabric or cut separately from two different fabric pieces.
Insert an exposed Rotary Blade into Tool Chamber 2, the right slot in the tool carriage, and lock it into place.
In the Send Tab, collapse the Carriage 1 settings and expand Carriage 2 by clicking on their dropdown arrows. We will only use Carriage 2 for this job.

For Carriage 2, choose “Fabric, Thin (Cotton Print)” as the material type. If your Cameo 4 is connected and you’ve placed the Rotary Blade in place, it should automatically set the Action to Rotary Cut and Tool to Rotary Blade.
Verify your cut lines are set as follows:
- Inner stitch line does not cut (“No Rotary Cut”)
- Outer line cuts with Tool Carriage 2 (“Rotary Cut” – Carriage 2)
- The text should also be “No Rotary Cut” or can be deleted
- The preview should look like mine below, with bold blue outer lines, some extra blue “hooks” for Smart Cut blade orientation, no bold red lines, and no text or inner cut line in bold of any color.
Note: If you do need to change any cut lines between “Rotary Cut” and “No Rotary Cut”, then you’ll need to Ungroup the design and select each line as you designate its cut properties.
Step Two: Prepare Fabric
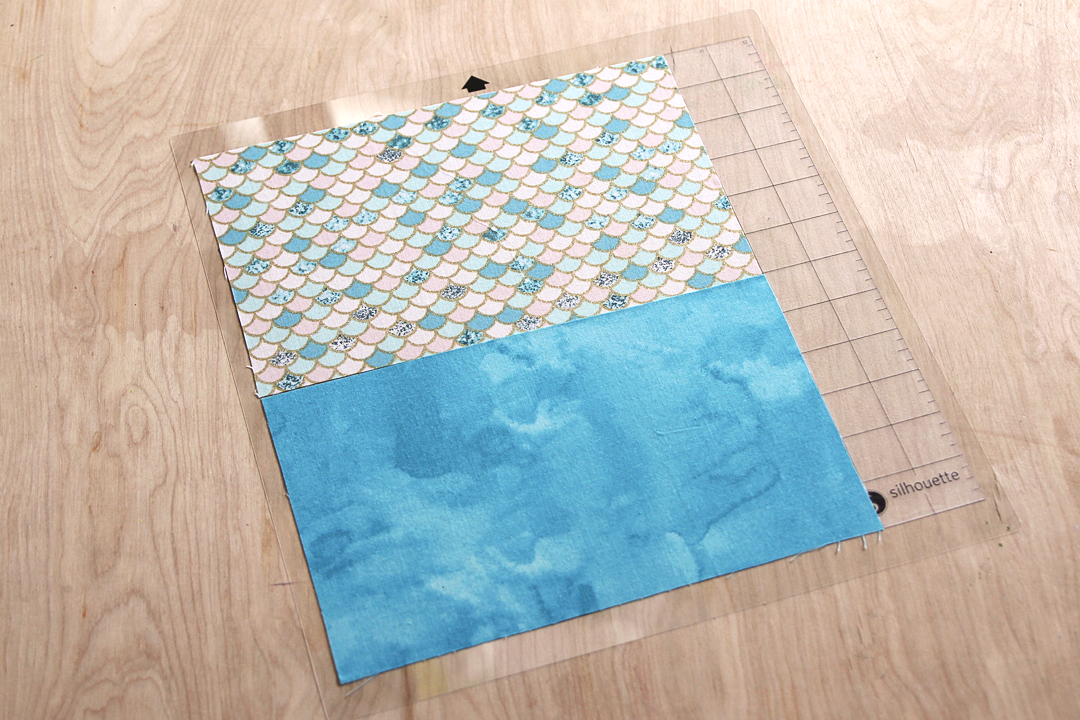
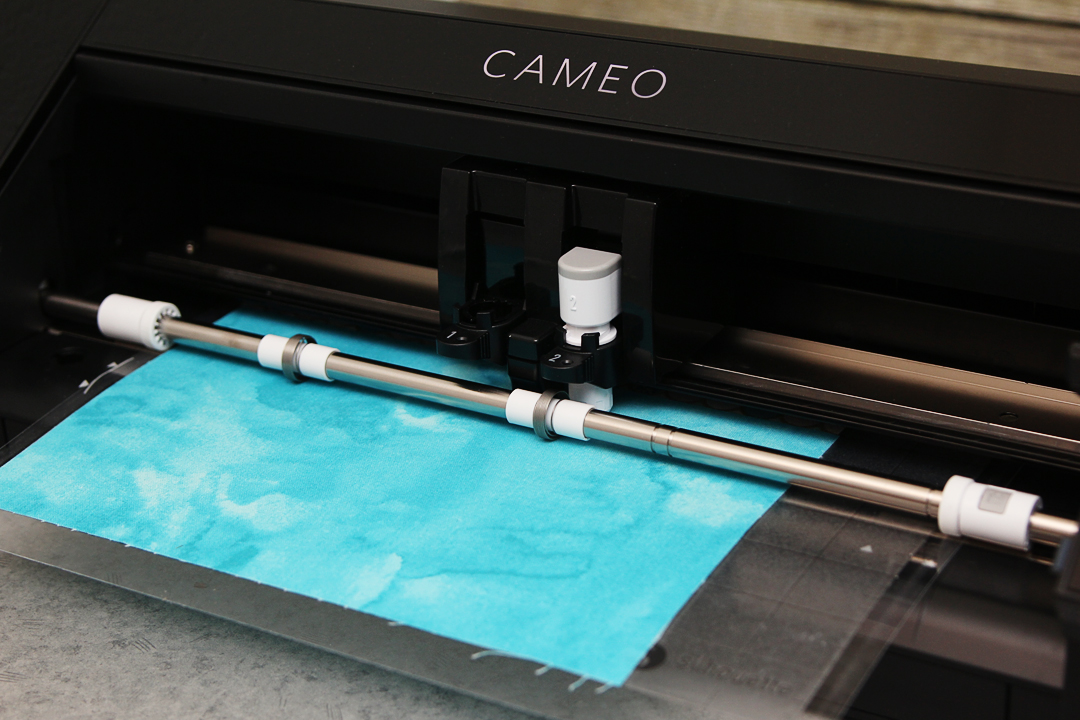
Iron your fabric and trim it down to size if necessary. The size of your fabric should be large enough to accommodate the cut lines and any hooks and loops for Smart Cut as shown in the Send Panel cut preview.
Verify in Silhouette Studio® that the Page Setup’s Media Size matches your fabric size before placing your fabric onto a cutting mat. If you’re using a standard tack mat like I am, make sure that the mat is sticky for best results. Or, try using a strong tack mat, which has a stronger adhesive designed for fabric and other thick materials.
Load the mat with the fabric in place and Send to cut in Silhouette Studio’s Send Panel.
Note: The Rotary Blade’s cut quality is affected by several factors, including your fabric quality, the condition of your blade and cutting mat, and the complexity and orientation of the design. For more information on how to get the most out of your Rotary Blade, check out Silhouette’s Rotary Blade Guide.
Step Three: Sew Mask
When your fabric has finished cutting, unload the mat and carefully remove your fabric cutouts from the mat so they don’t stretch or tear. You may need to trim any uncut bits with small scissors as necessary. Remove extra fibers from your cutting mat with tweezers or a lint roller. Try not to leave much debris on your mat, which can interfere with future cuts.
To assemble your eye pillow, place the right sides of your pieces together and pin or clip them to keep them secure.
Tip: The right side of the fabric is the side the design is printed onto. We’ll be turning the pillow right-side out once we’ve finished sewing the pieces together.

Thread your sewing machine using thread that matches your fabric. I’m using a bright teal thread. Sew the mask together with a 1/4-inch seam allowance to match the guide on the original design.
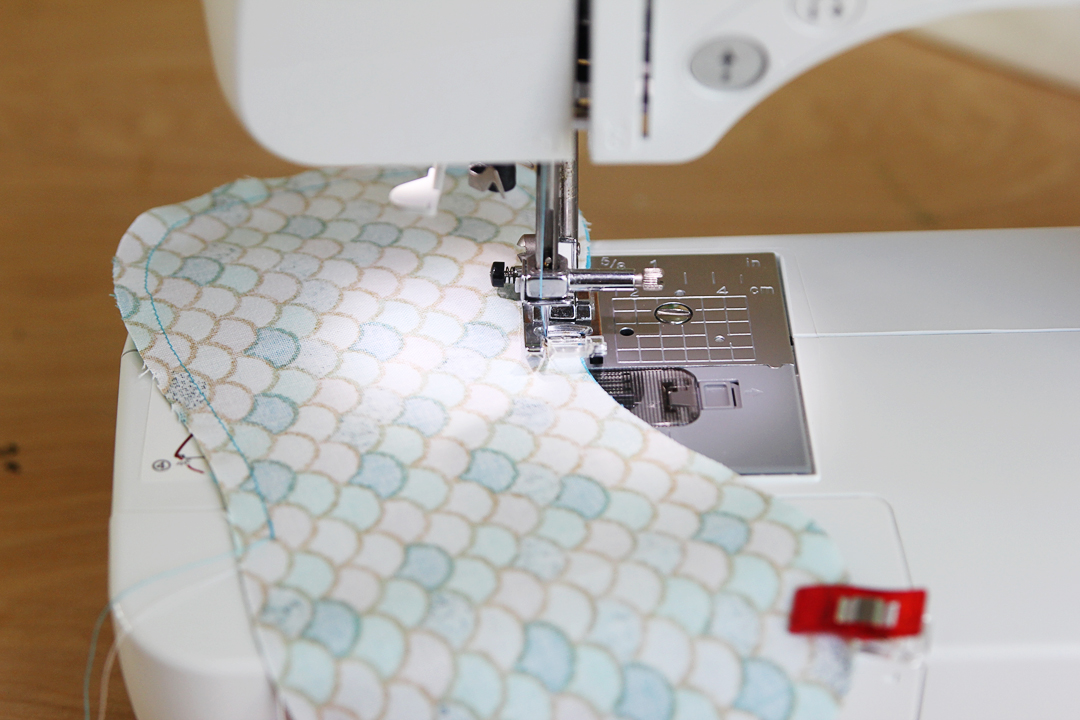
Don’t sew the entire mask shut. Instead, leave an opening that’s about 2 in. wide in a flat area of the design. You’ll use this opening to flip the mask right-side out and fill it with rice or flax seeds. Creating this opening on a flat portion of the design will make it easier to flip right-side out.
Backstitch the beginning and ending points of the opening to keep the seam secure. Then, trim notches or slices at the curves and corners of the mask so the curves lay flat.
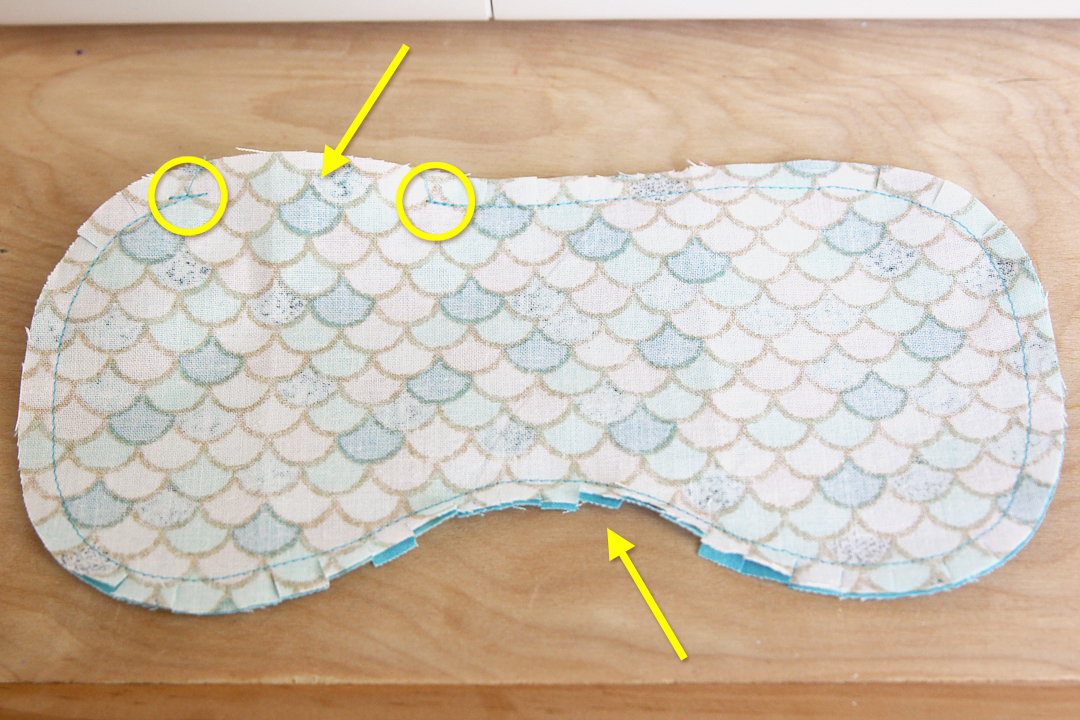
Now, use the opening to turn the mask right-side out.
Step Four: Fill Mask
In a small mixing bowl, mix 1/2 to 1 cup rice or flax seeds, about 1 tbsp. of lavender flowers, and a few drops of your favorite essential oil.
Note: If you don’t want a scented eye mask, you can leave the lavender and essential oils out and pour the rice or flax seeds directly into the mask.

Use a plastic or paper funnel to fill the mask through the opening. Stitch the opening closed with your sewing machine or by hand.
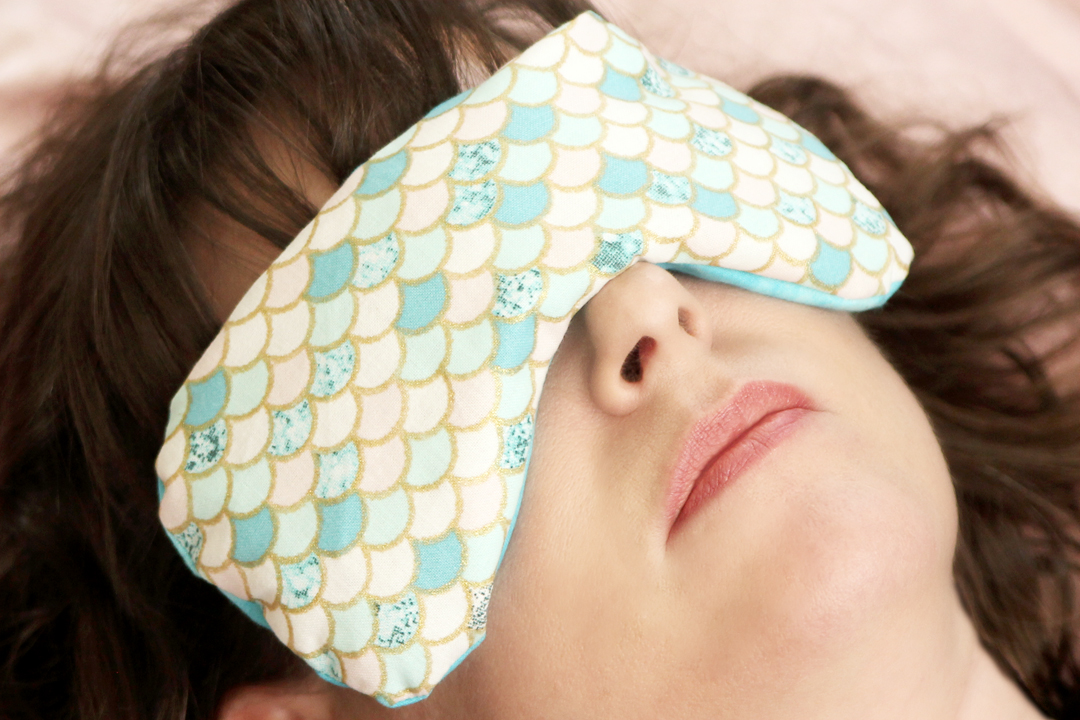
This eye pillow can be placed in the freezer or microwave for a cooling or heating effect. Wouldn’t this be a great gift for your mother or friends? Now enjoy your project by taking a break with your soothing fabric eye pillow!
 Free Class - Father's Day Apron Set
  Free Class - Custom Graduation Tumbler
Naszenaturalne
September 2, 2025
Really love your style
Kelly Wayment
June 28, 2024
You can use it with vinyl as long as it is smooth and flat to allow the static charge to hold on to it. Rolled vinyl that wants to go back to its rolled shape will not necessarily work well, and it would need to be trimmed to fit the ES mat cutting area.
Kelly Wayment
June 28, 2024
Yes, you can use the heat pen while using the ES mat. 🙂
Yurii
March 2, 2024
Hello. May it be used with heat pen?
Thanks
Jerome
February 24, 2024
Hi, works this with the normal vinyl foils or only with printer papter etc?
Kelly Wayment
February 16, 2024
Once you’ve pushed the mat up against the rollers, just press the “Load” arrow button (bottom right on the display). Does a regular sticky mat load into the machine for you?