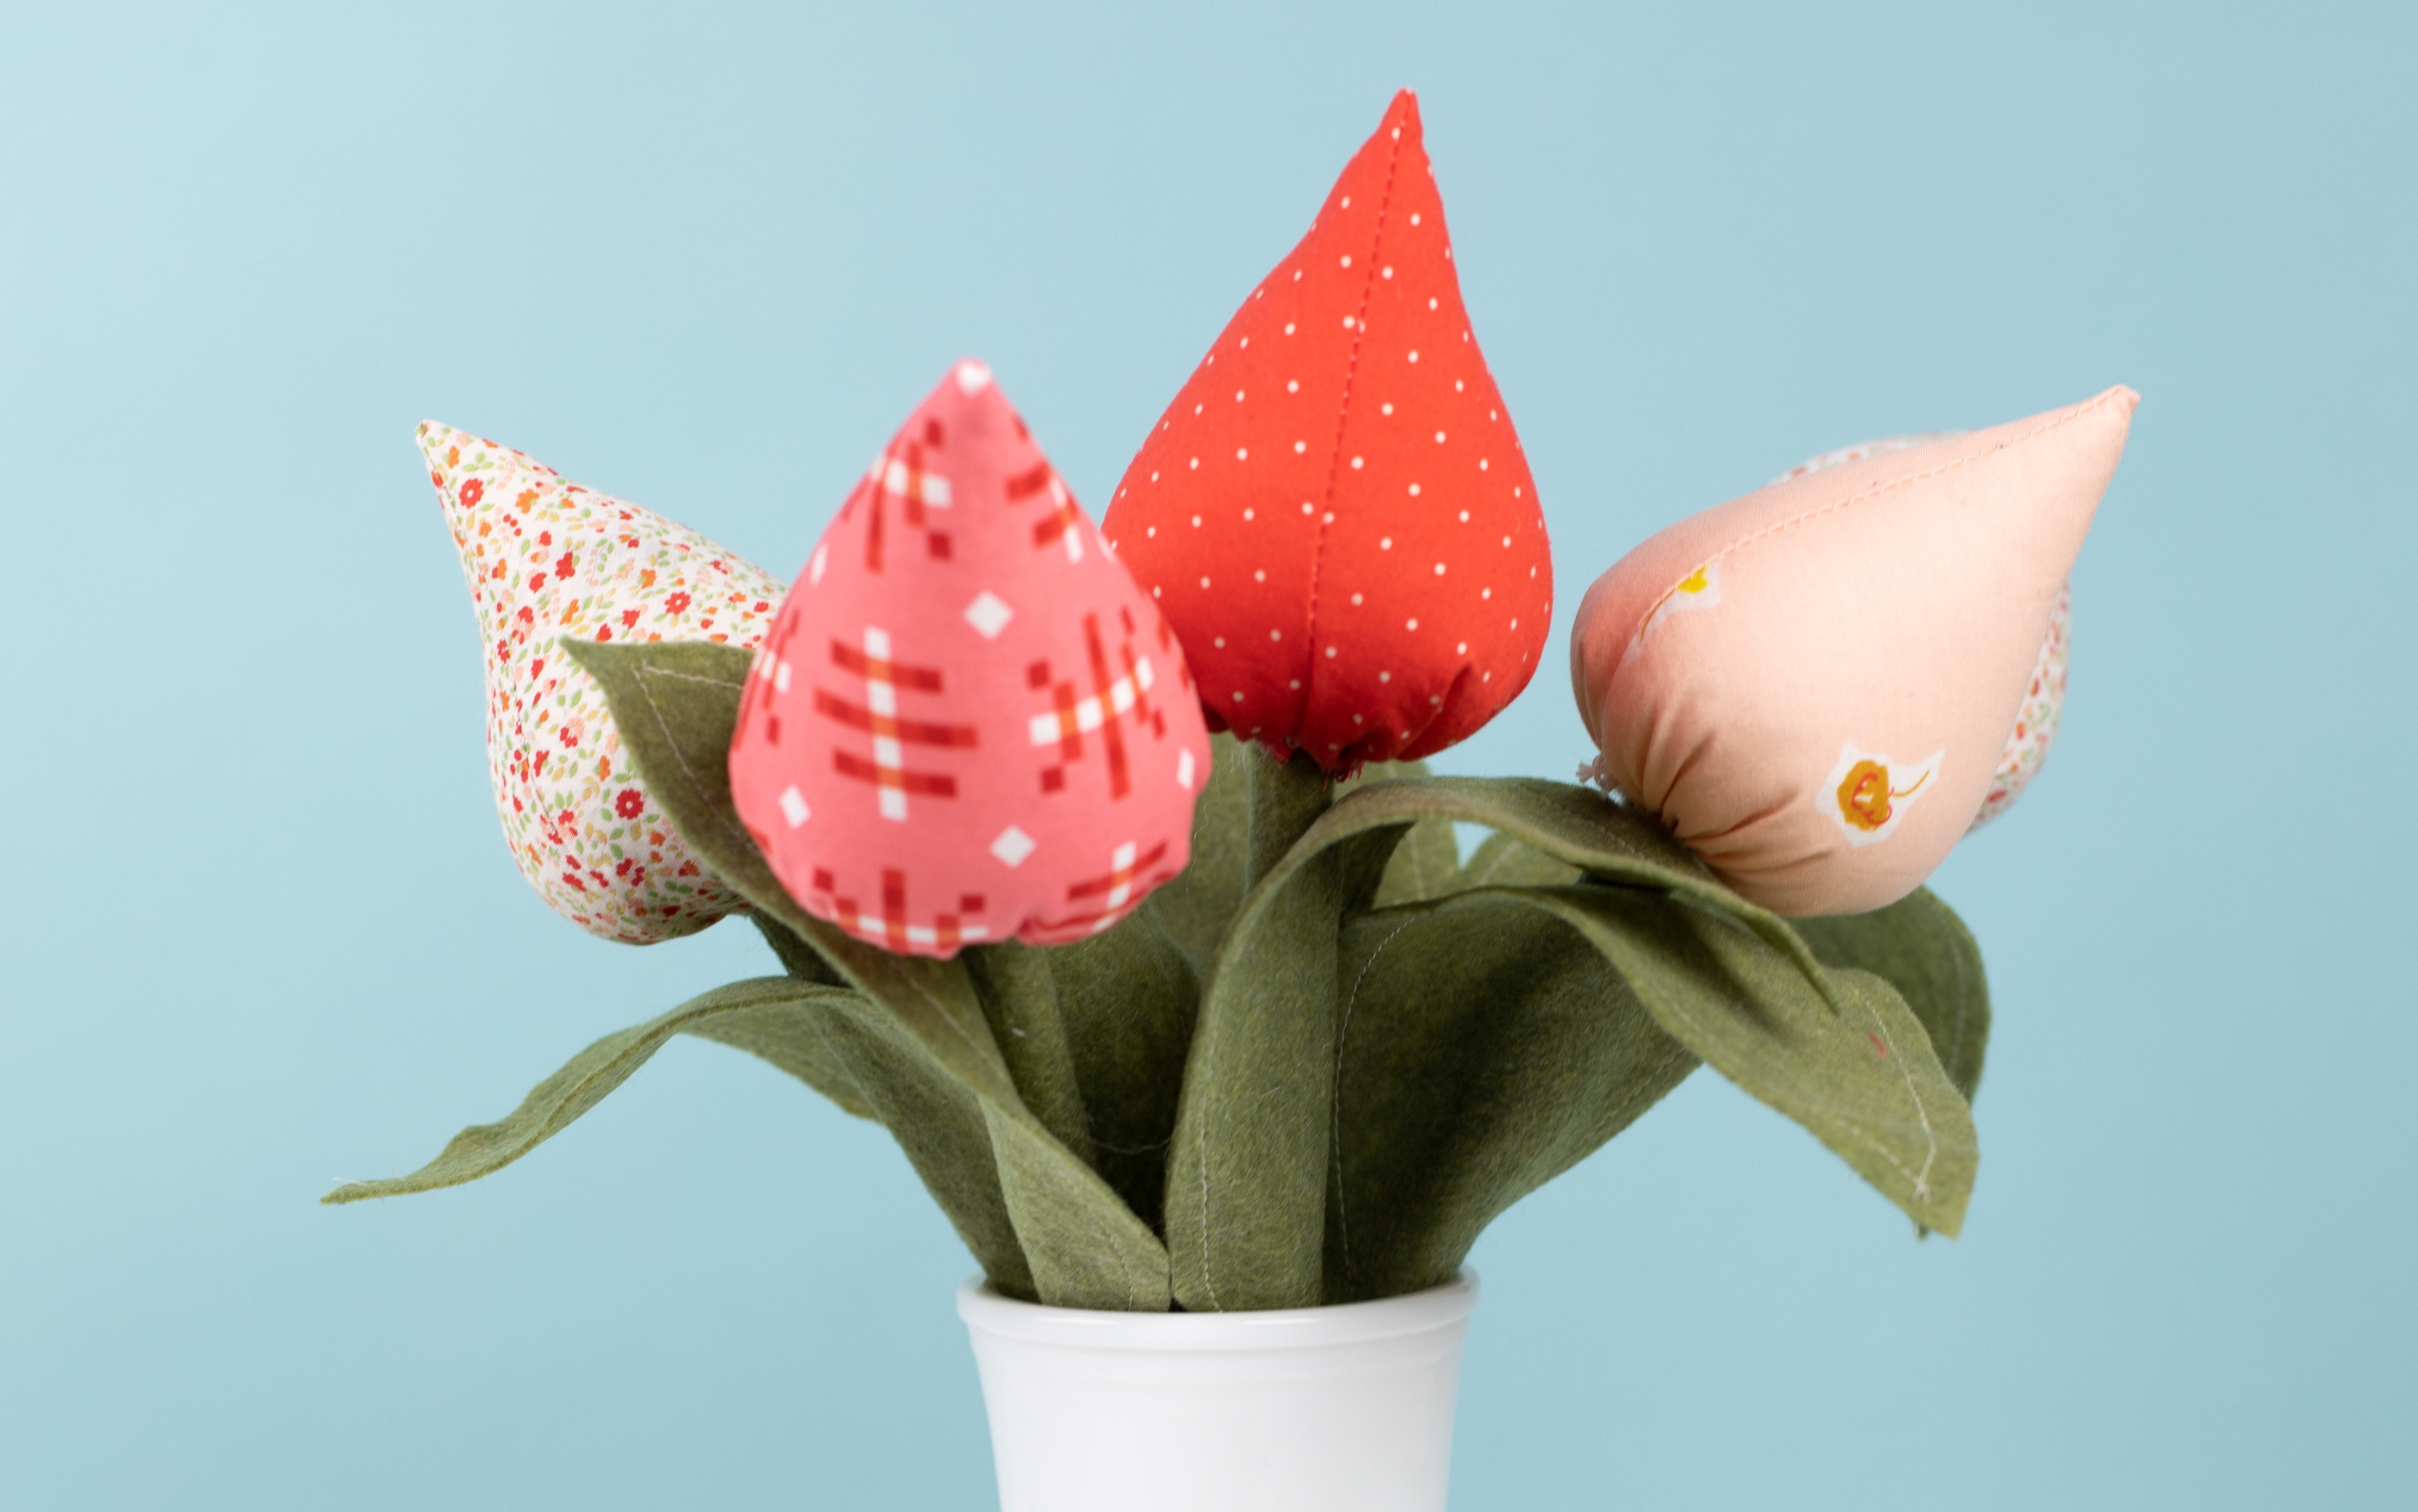
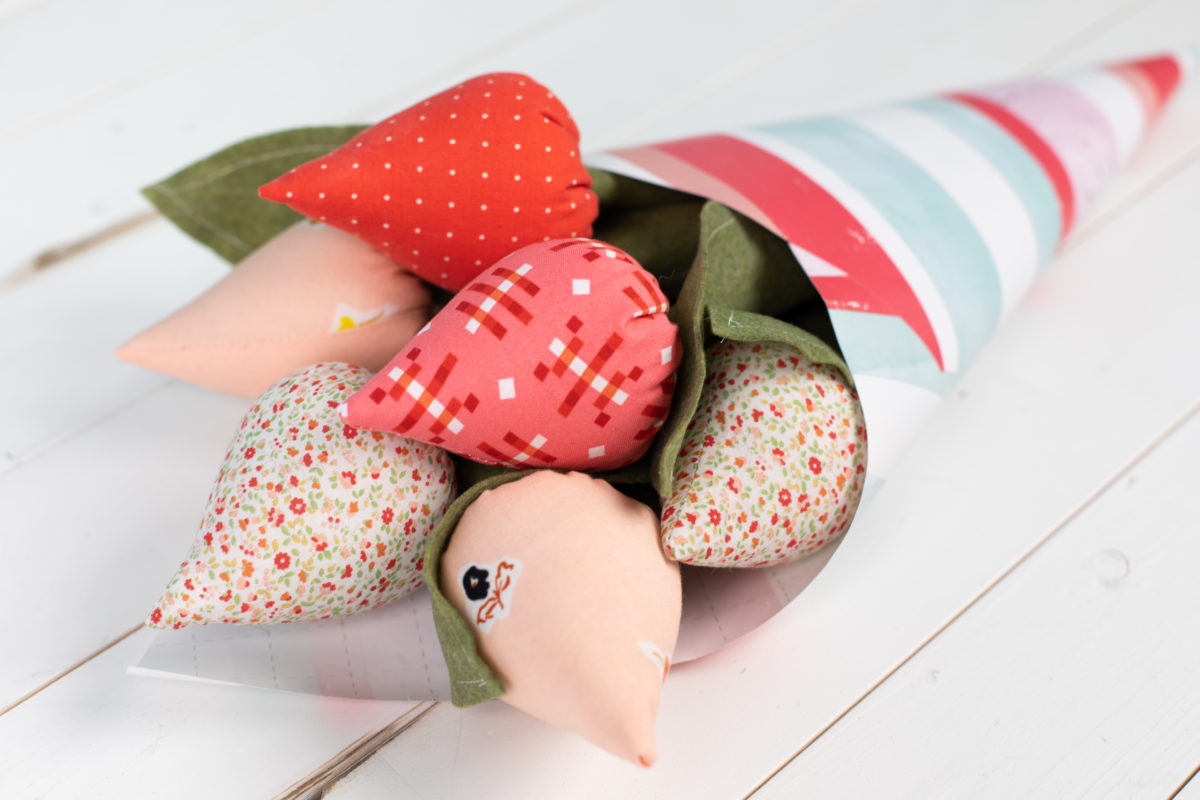
Spring is here. Hallelujah! So of course we are going to celebrate with some flowers. But the great thing about these flowers is that they’ll never die. Keep reading if you’d like to know how you can make your own.
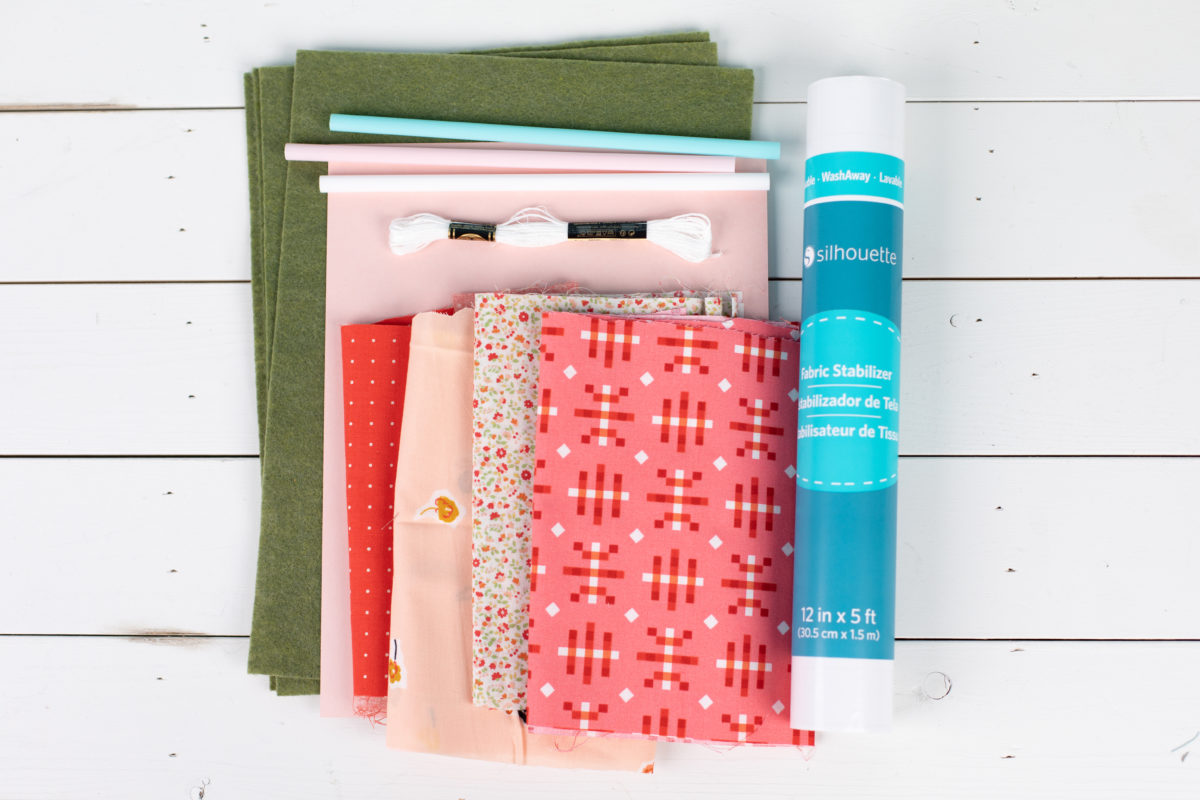
Supplies Needed:
- Silhouette CAMEO®
- Silhouette Studio®
- Silhouette Cutting Mat
- Silhouette Fabric Blade
- Fabric Stabilizer – Wash Away
- Fabric
- Felt
- Pipe Cleaners
- Straws
- Embroidery Floss
- Embroidering Needle
- Hot Glue gun
- Glue Sticks
- Polyester Stuffing (like Poly-fil)
- Sewing Machine
- Design ID #193690
Step One: Preparing the Fabric
1. Cut a square of fabric the size of your mat (12 inches by 12 inches).
2. Then cut a square of Fabric Stabilizer – Wash Away to the same size.
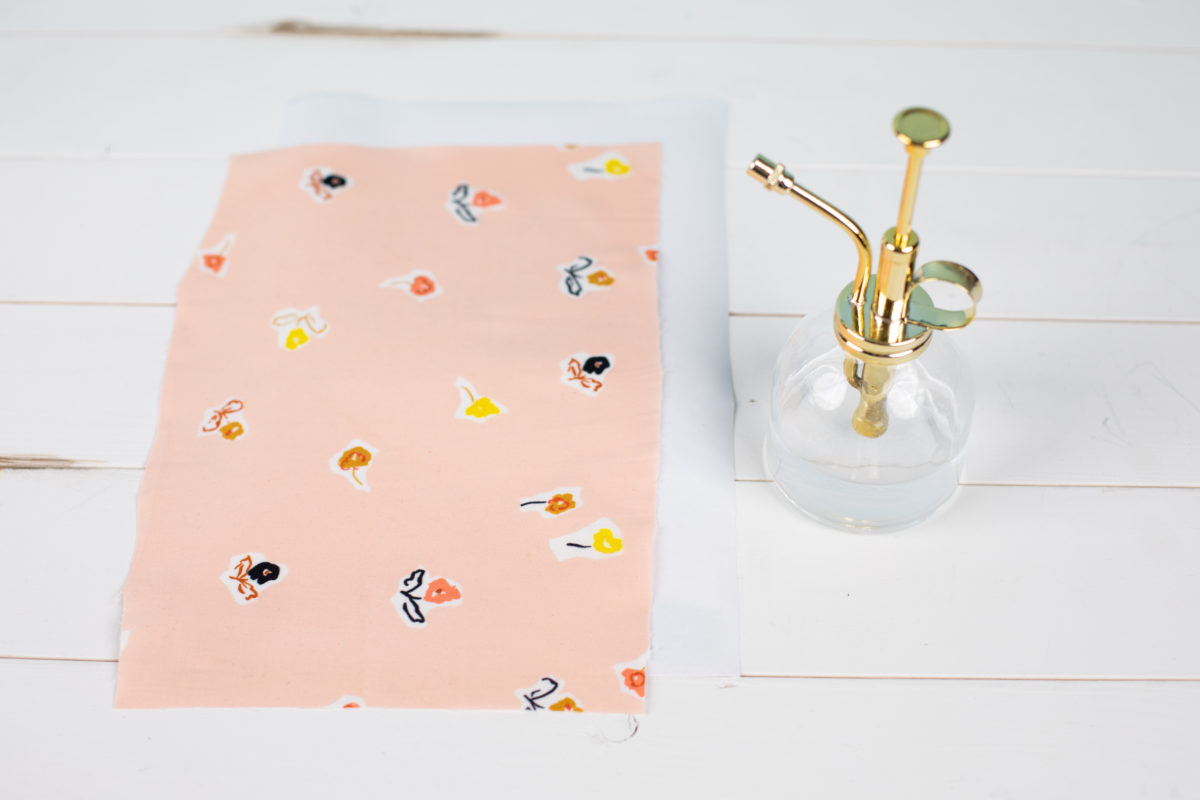
3. Spray the back of the fabric stabilizer with a water spray bottle.
4. Press the fabric to the damp stabilizer. Let the fabric and the stabilizer dry together before pressing them onto your cutting mat.
Step Two: Preparing the Flower Design
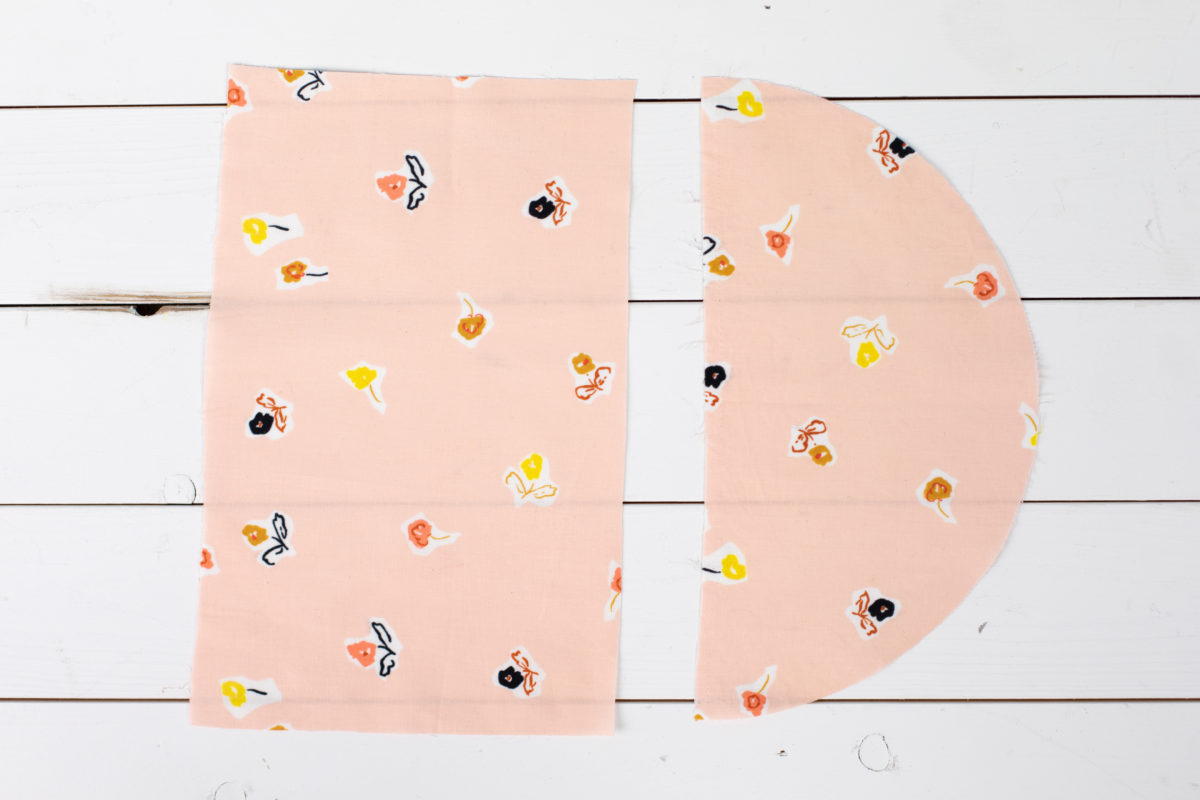
1. Start with a circle that spans across the mat. Then draw a line down the center to cut two half circles.
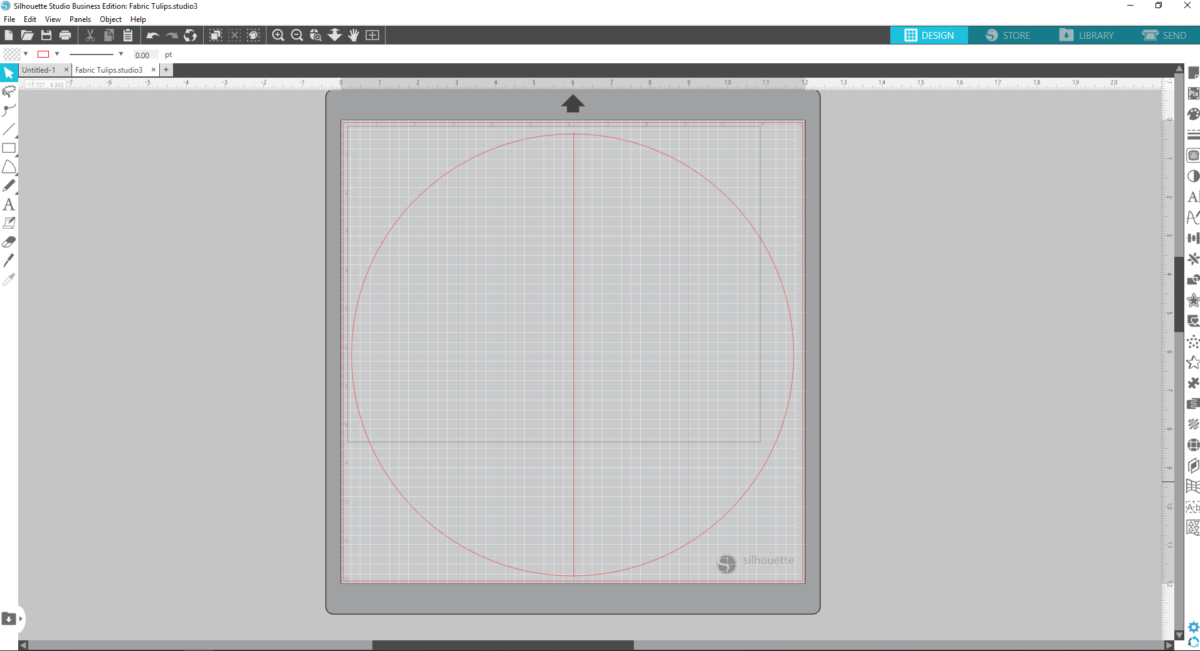
2. Send the design to your CAMEO with the following settings: Material: “Cotton Fabric”; Action: Cut; and Tool: Fabric Blade (or whichever blade you’re using).

3. Once the circles are cut out, peel the fabric and stabilizer off the mat. Wash away the fabric stabilizer in water and let the fabric set out to dry.
Step Three: Preparing the Leaf Design
1. Now for the leaf. Select your leaf design from the Library. You can use whatever leaf you like, but we liked the shape of the Leaf by Echo Park (Design ID #193690).
2. Resize the leaf to the size desired. We liked a thinner size.
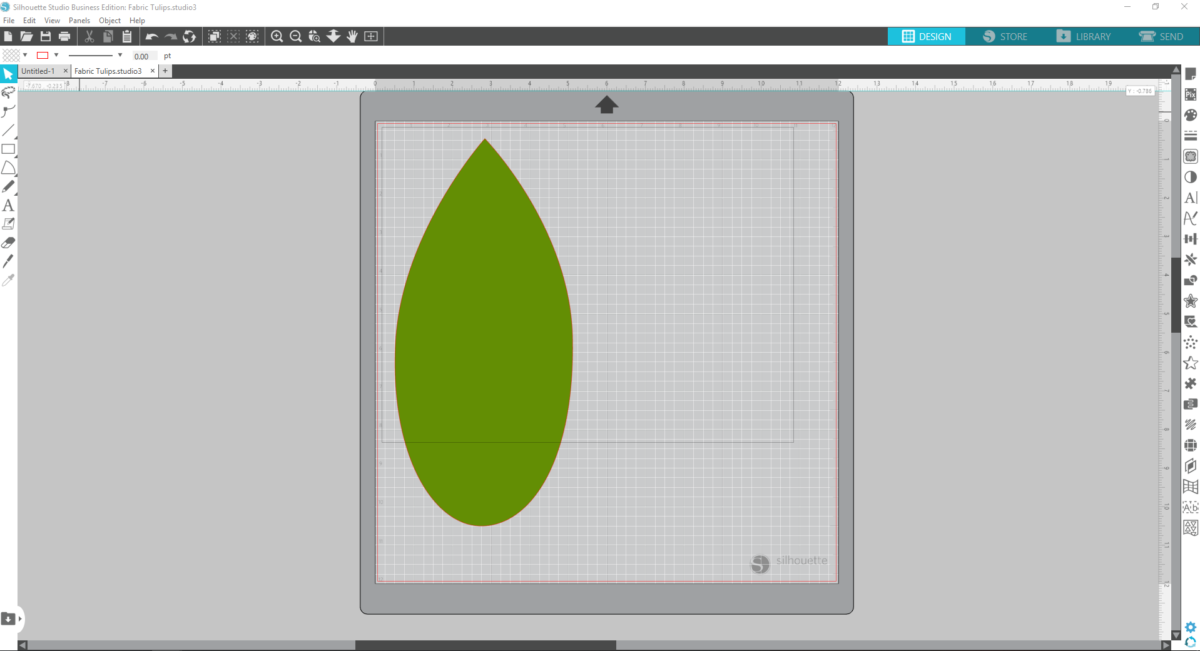
3. You’re going to be making a stencil with the shape so that you can draw an outline on the felt and cut it out. So you’ll want to choose the following settings: Material: “Cardstock”; Action: Cut; Blade: AutoBlade or ratchet blatde (whichever blade you are using). Keep the blade you cut fabric with separate from the blade you cut paper with.
Step Four: Making the Stems
1. Cut out your square of felt to the width and length desired for a stem.
2. Pin the felt together to prepare to sew.
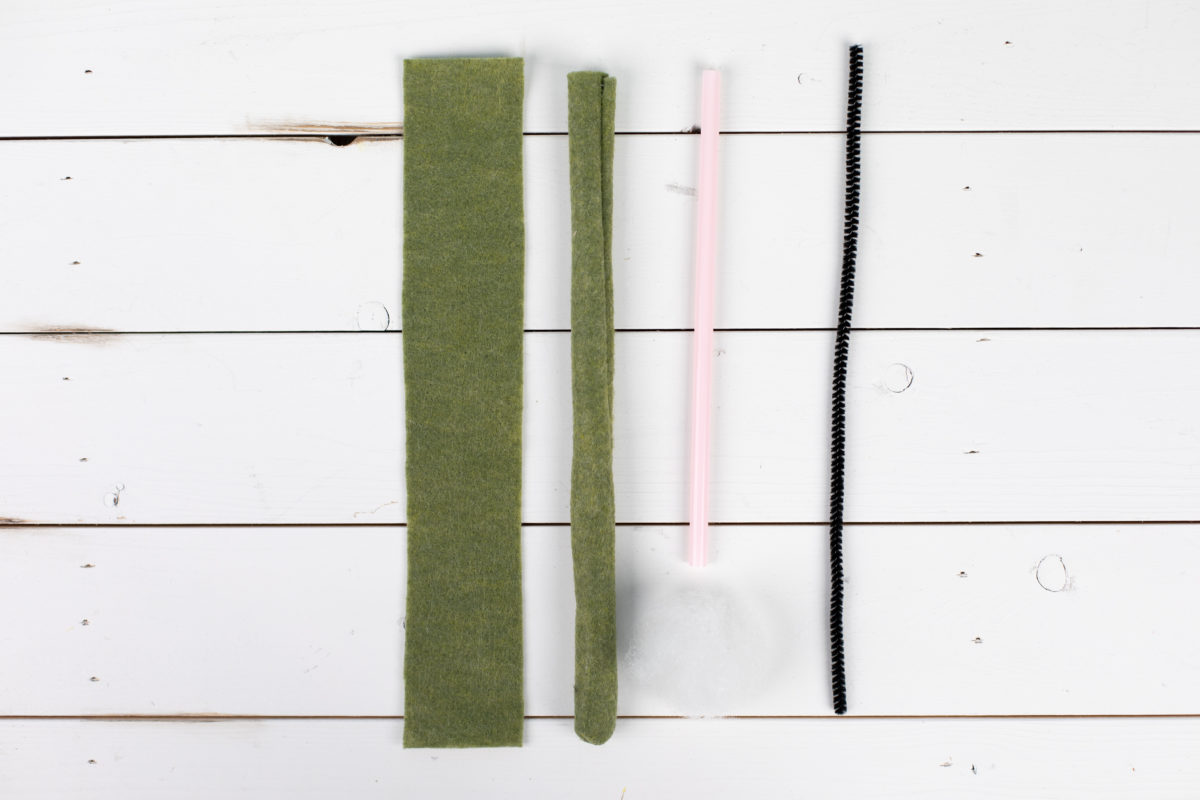
3. Sew the felt to the desired width.
4. Flip the stem to put the stitching inside using a chopstick or a straw. Stuff with polymer to the desired size and place a straw or a pipe cleaner in to maintain the shape and to be used to connect the flower bulb to the stem.
5. Using your cardstock leaf stencil, cut around the felt to make the leaves, cutting off the stem.
6. We liked the finished look of sewing around the leaf, so we sewed around the leaf next, but you don’t have to do that. You could also use flannel or another fabric of choice.
Step Four: Making the Flowers
1. Once the fabric is dry, fold the fabric inside out to sew the insides. You might have to angle your stitches, depending on which shape you want the bulb to take. Sew the edges together.
2. Flip the fabric inside out and stuff with Poly-fil, using the chopstick again to get the inside corner.
3. Take your embroidery floss, thread the needle, and start stitching and cinching the bottom of the bulb.
4. Once you’ve embroidered around the circumference, cinch the fabric to the desired shape. Add or take away Poly-fil as needed.
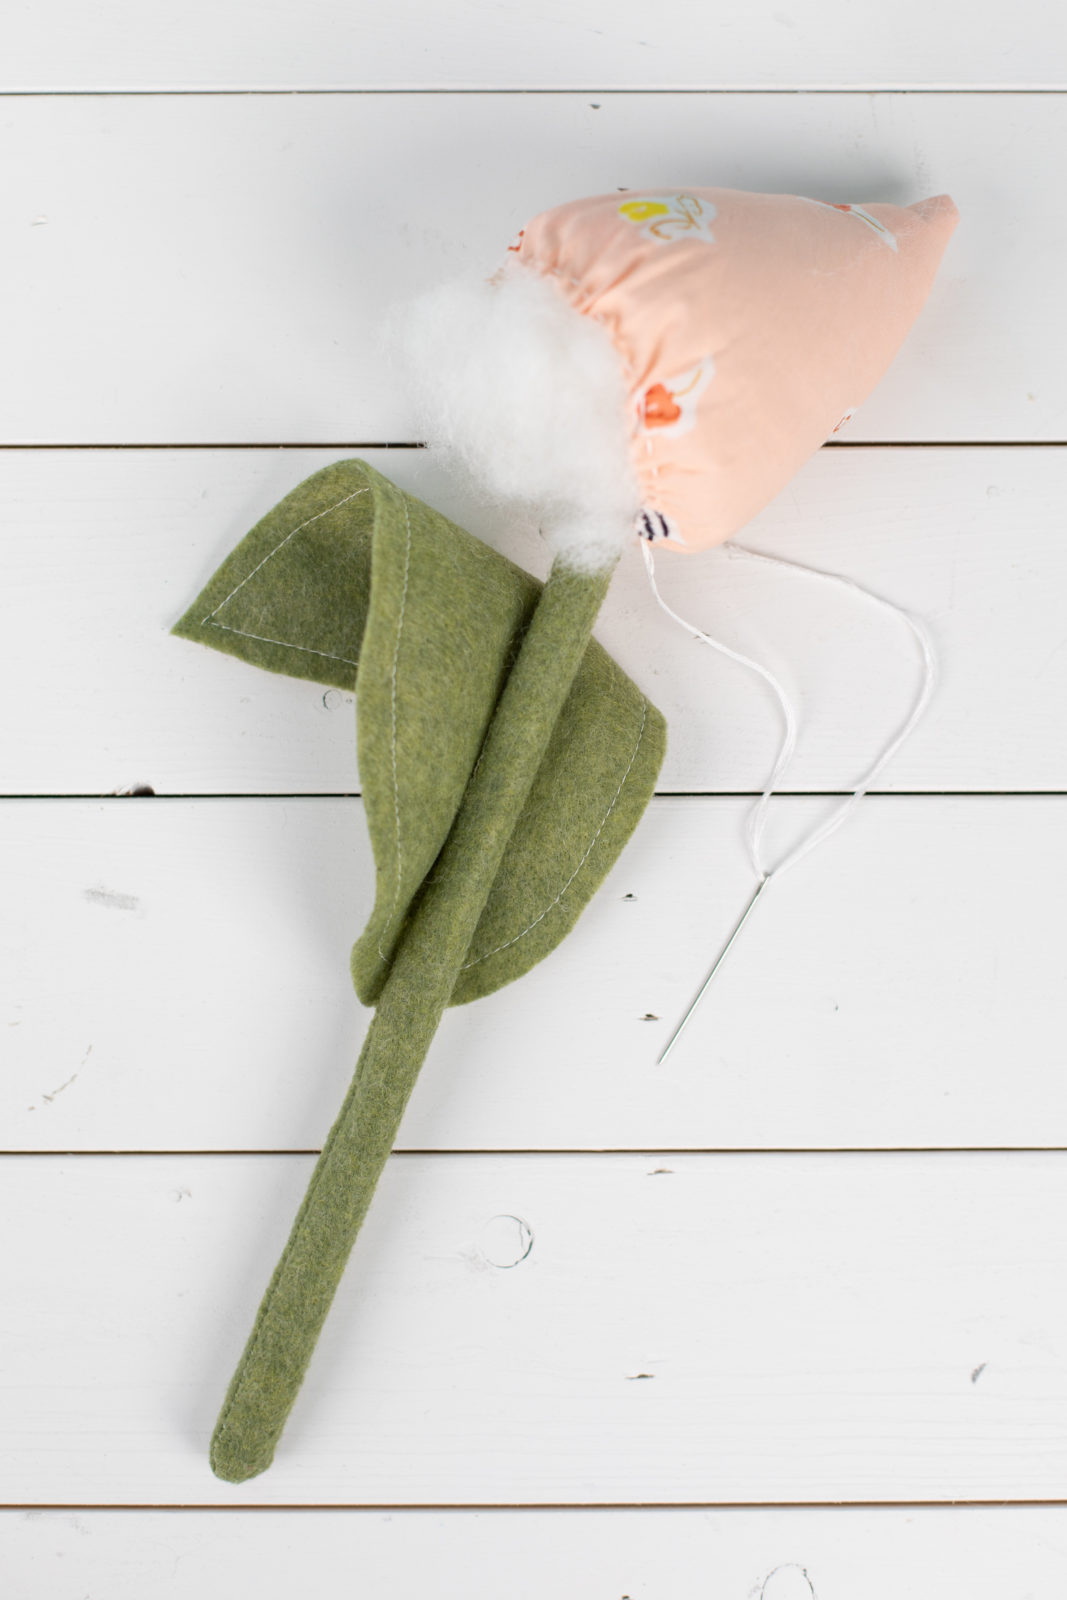
5. Now stick the bulb on top of the stem and stitch the bulb to the stem. Make a knot and hide it to finish the flower.
6. Hot glue the leaf to the stem by gluing the sides to make a shapely flower stem.
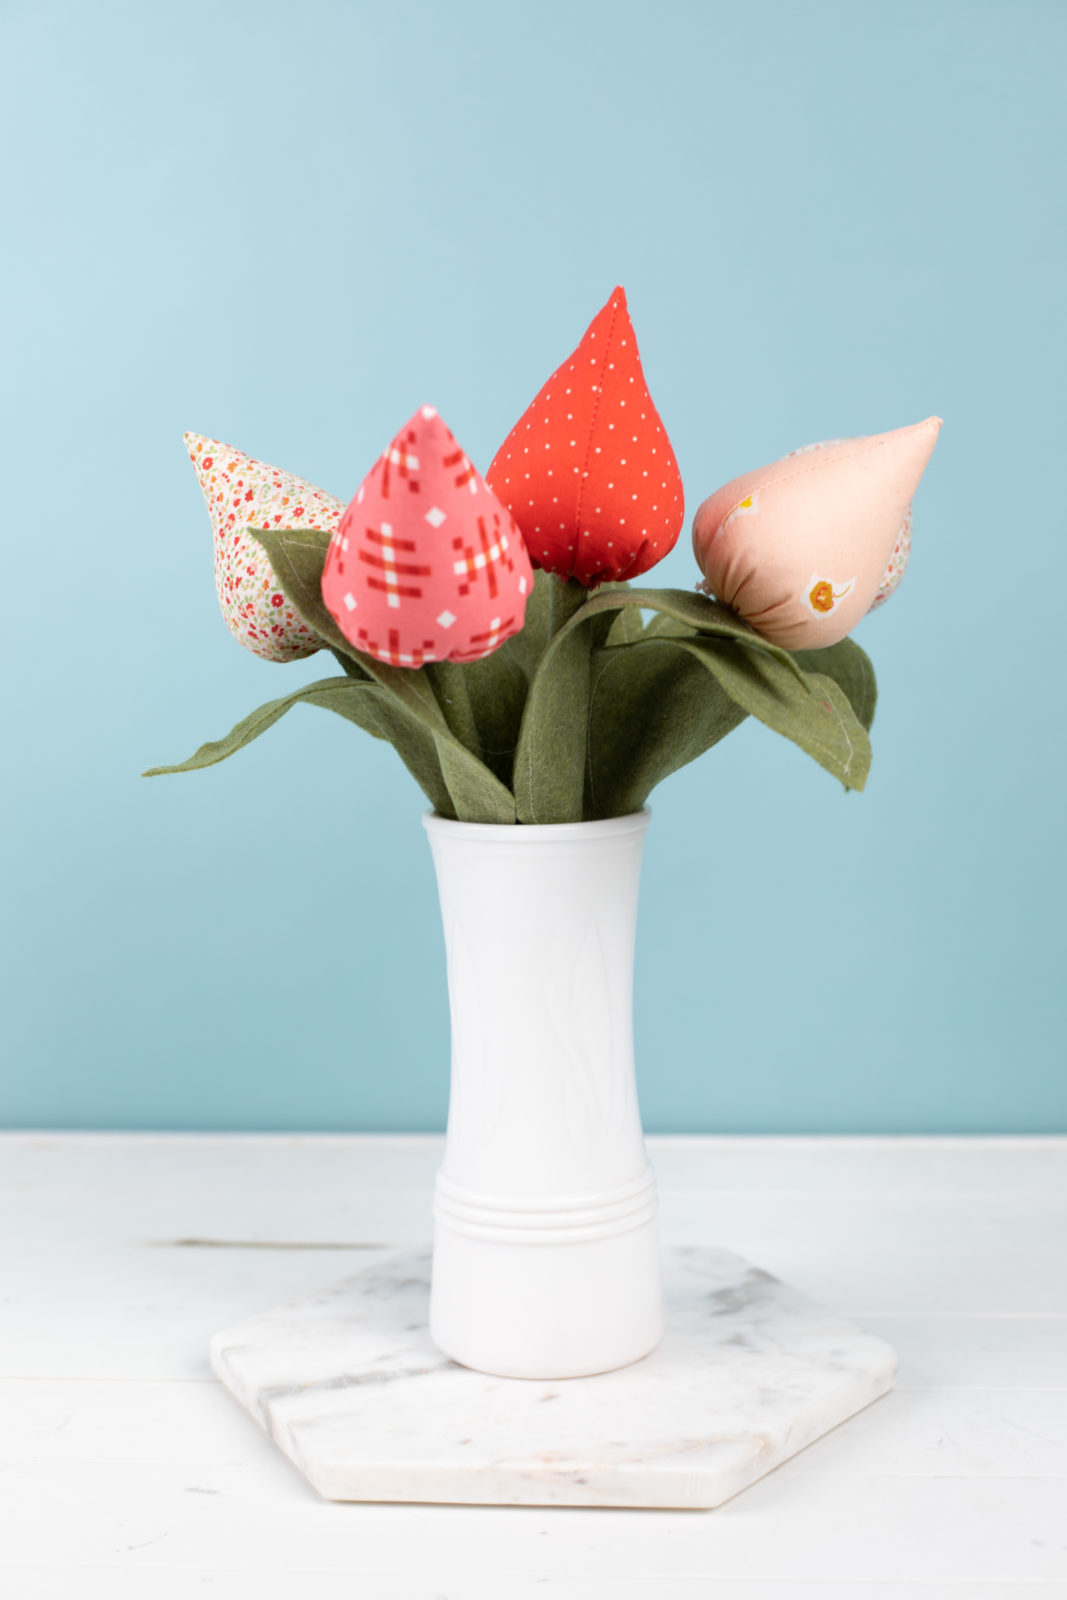
And that’s it. We hope you enjoyed this fabric project and that it inspires you to make even more springtime projects!