
The year has just started, and we are already thinking about Valentine’s Day! So here is a cute little love sign I made using removable vinyl as a stencil. But with this project, we will paint over the actual vinyl design!
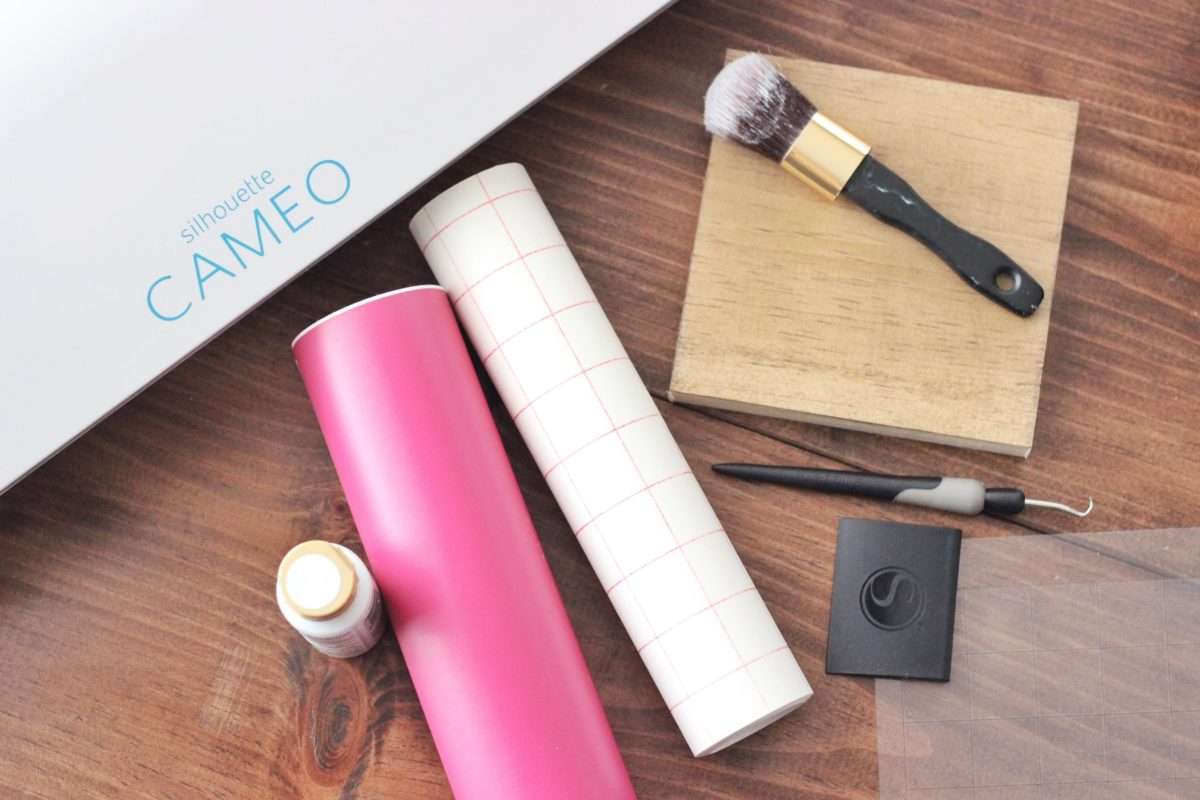
Supplies Needed:
- Silhouette CAMEO® or Silhouette Portrait®
- Silhouette Cutting Mat
- Silhouette Cutting Blade
- Silhouette Matte Removable Vinyl or Stencil Material
- Silhouette Transfer Tape
- Silhouette Hook Tool
- Silhouette Scraper Tool
- White Paint
- Stained Wood Piece
- Wood frames (optional)
- Paint Brush or Sponge
- Sandpaper or Sanding Block
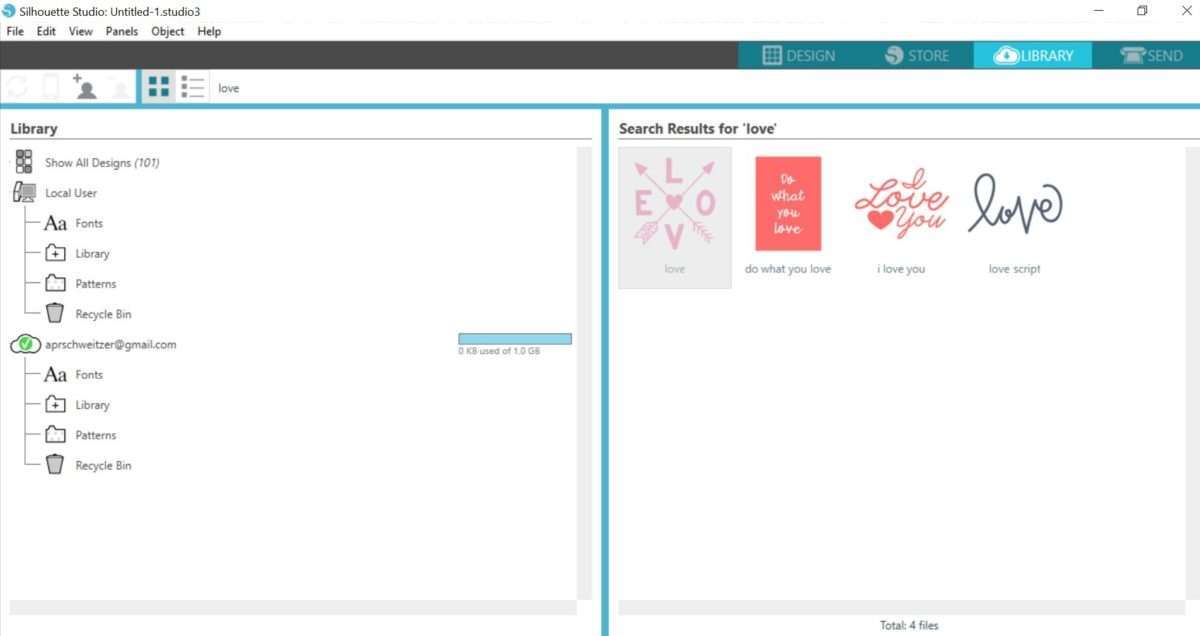
- Design ID #248797
Step One: Prepare the Design
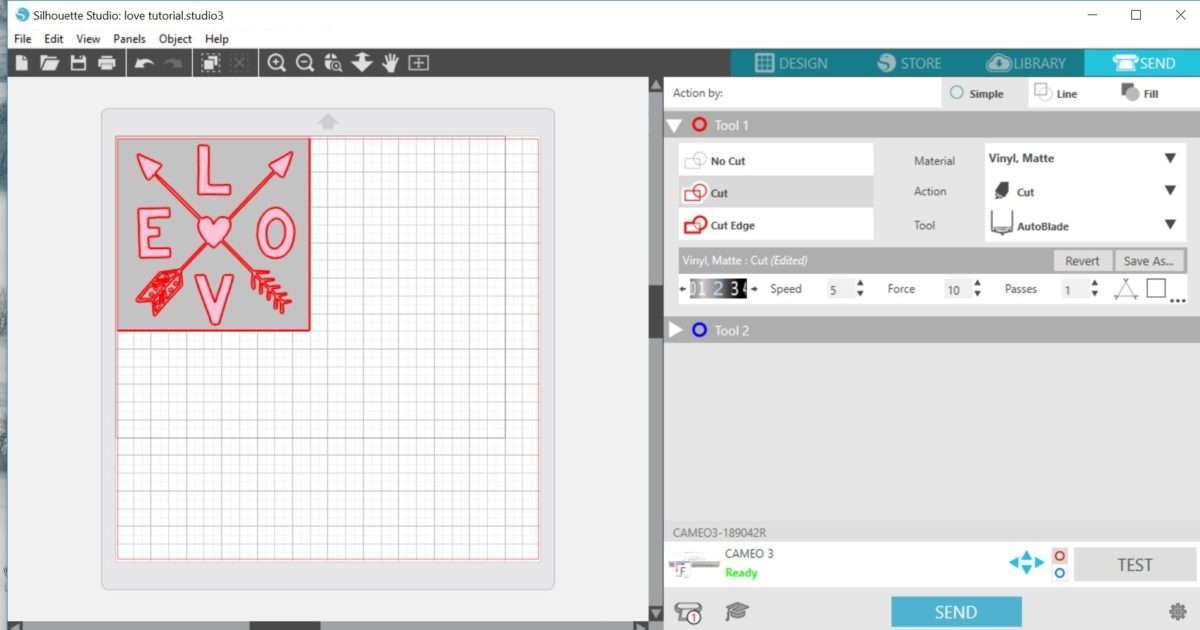
1. Open the design (Design ID #248797) you purchased from the Design Store by locating it in your Silhouette Library.
2. Double-click to add it to your design space and resize it so that it will fit your wood piece.
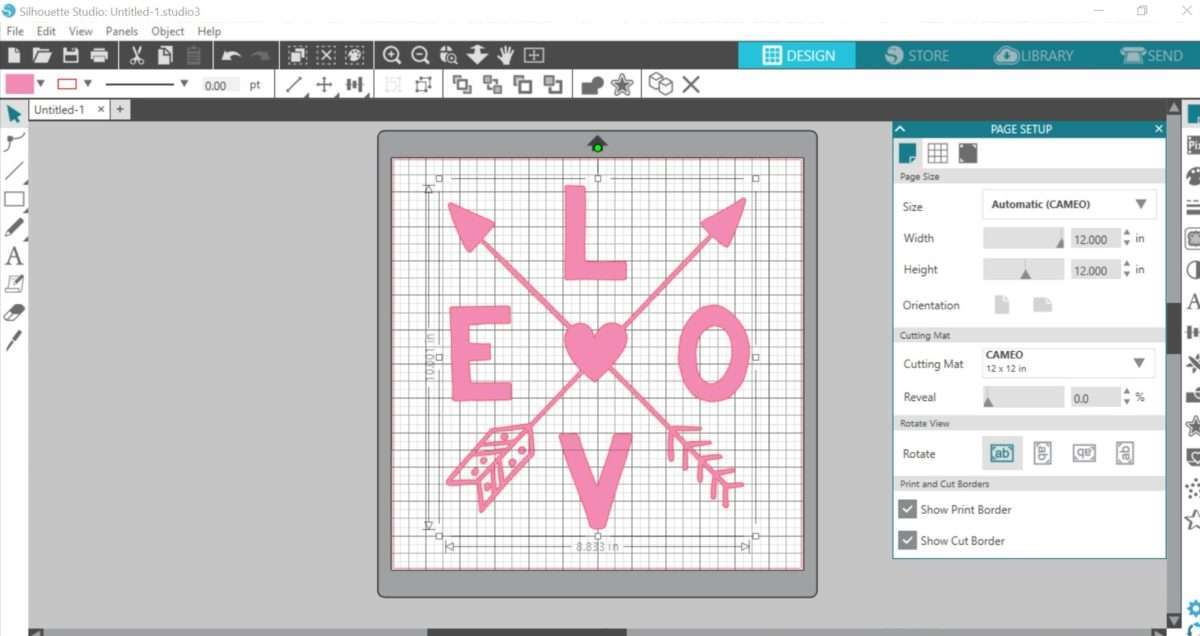
3. Although you will be painting over the actual vinyl design to leave the stained wood exposed as the font, you might want to add a square that is about the same size as your wood piece to help you center the design on the wood. The piece in this project is 5.5 inches by 5.5 inches. You also might want to fill it the square with a solid color to make it easier to center your design.
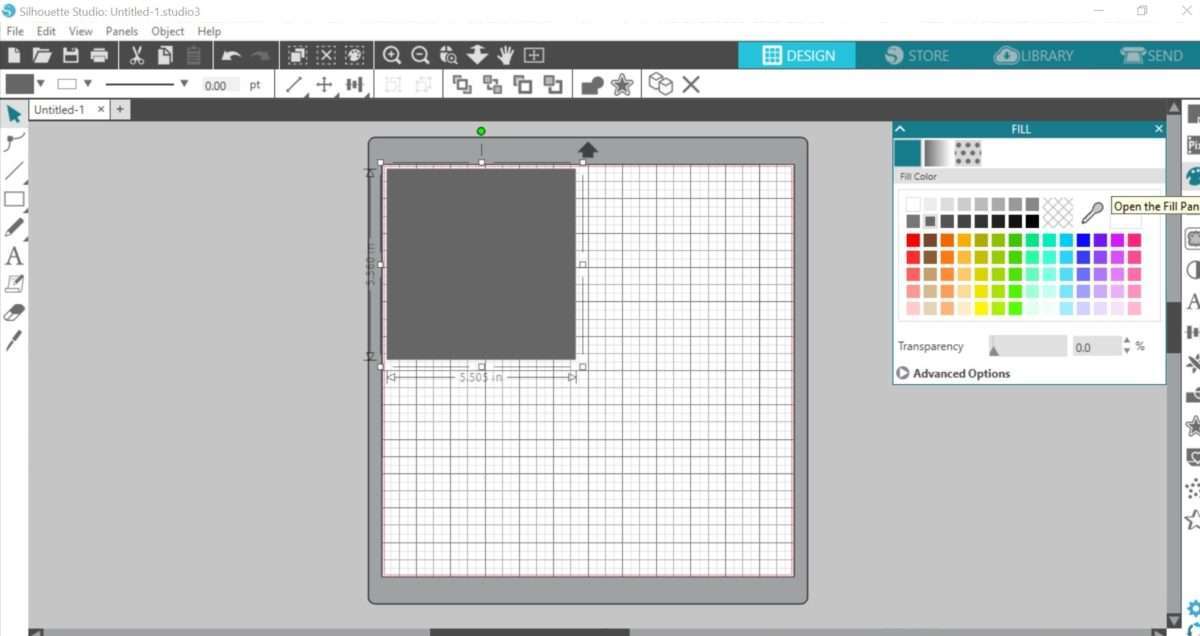
4. Send shape to back of the resized design (right-click the square and select “Send to Back” from the drop-down menu) and make any centering adjustments as needed (you can do this by opening the Transform panel or by using the centering options located on the top toolbar). On the edit tab click Select All and group both designs as one (right-click and select Group from the drop-down menu).

5. Place a piece of the removable vinyl or stencil material on the cutting mat in the same spots you placed the design on the working space in Silhouette Studio®. Make sure the pieces of vinyl are not smaller than your design. Adjust the rollers if needed and feed the cutting mat into the machine.
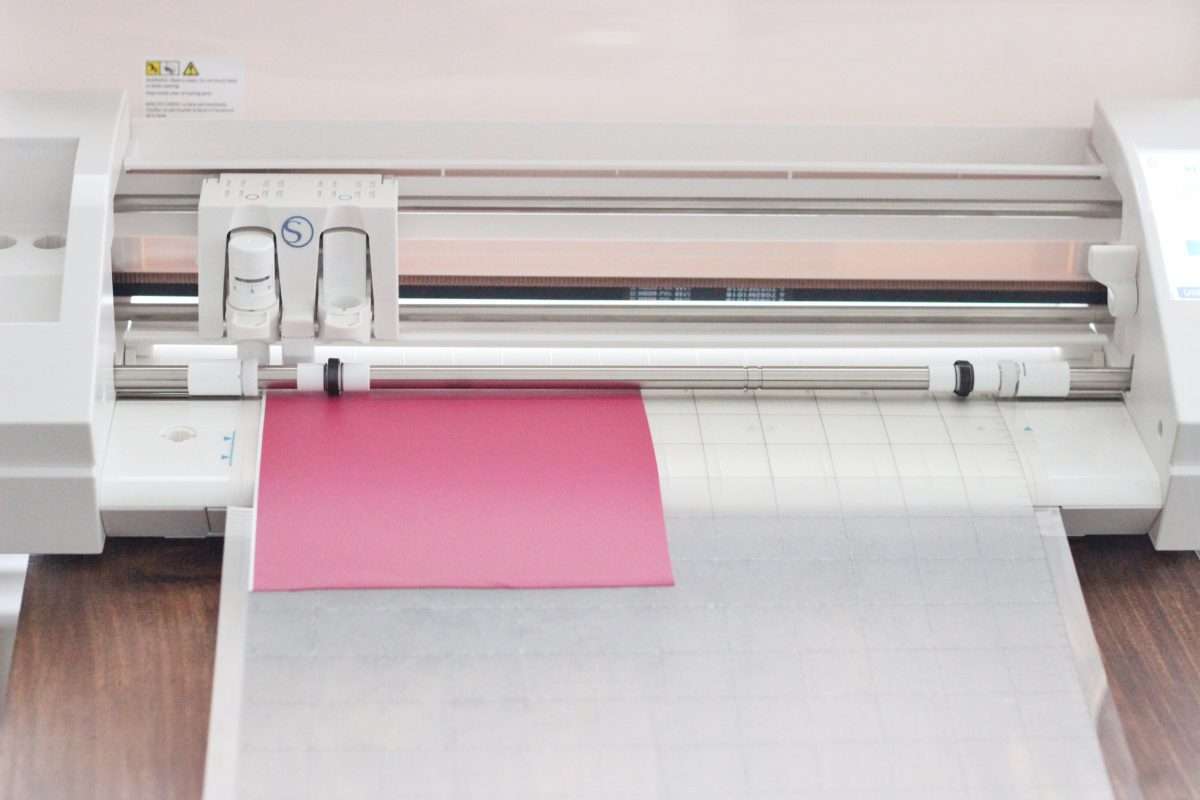
6. Under the Send panel, select “Vinyl, Matte” as your material type and click Send.
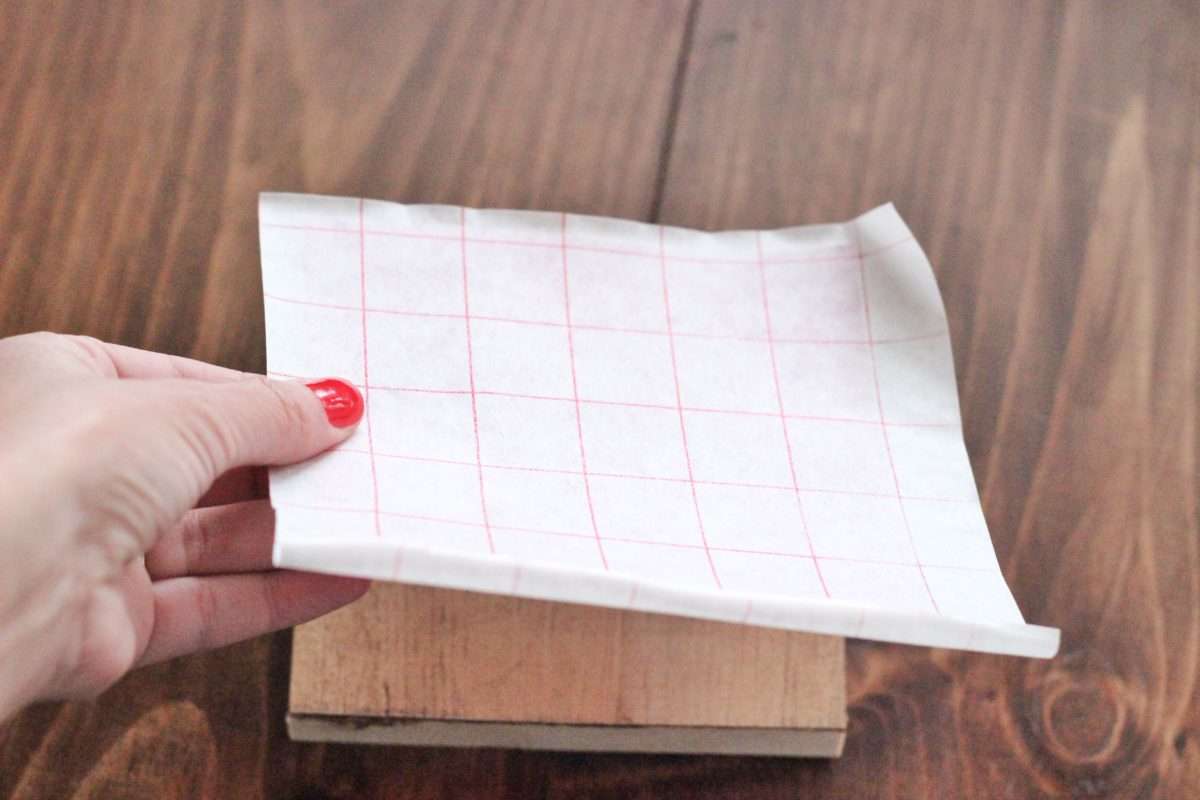
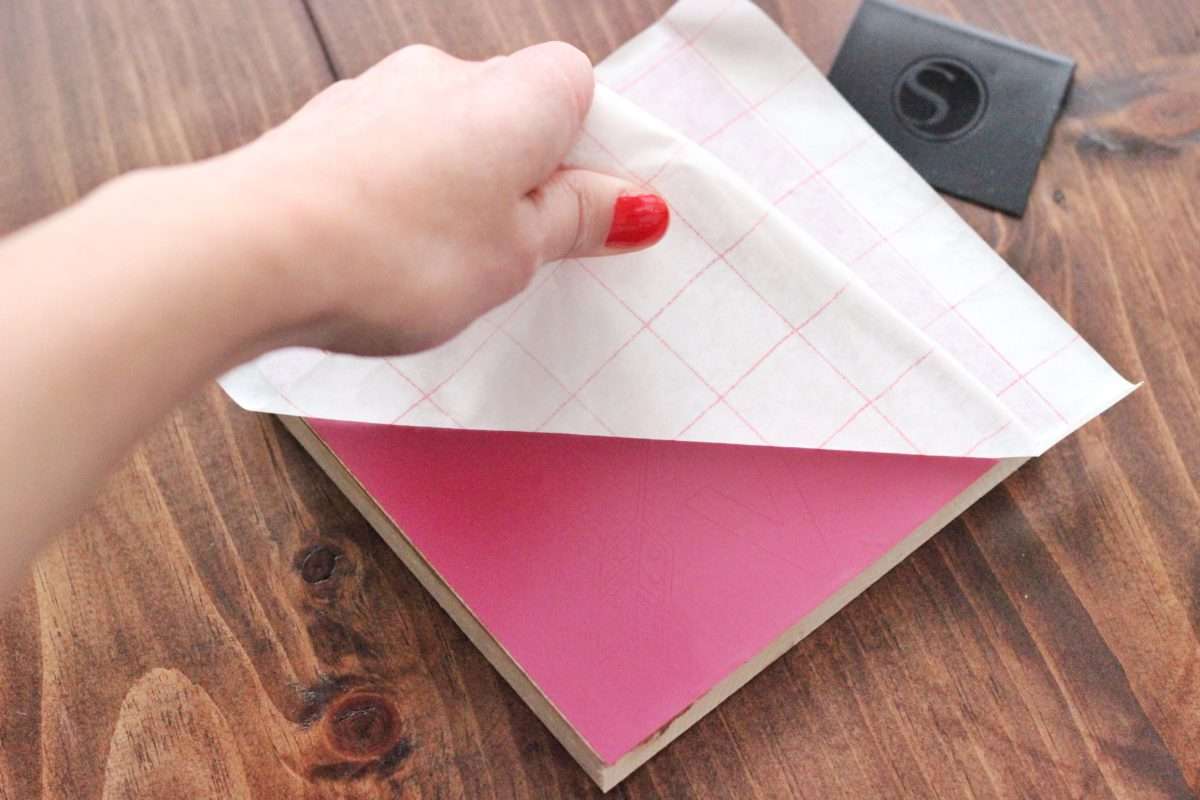
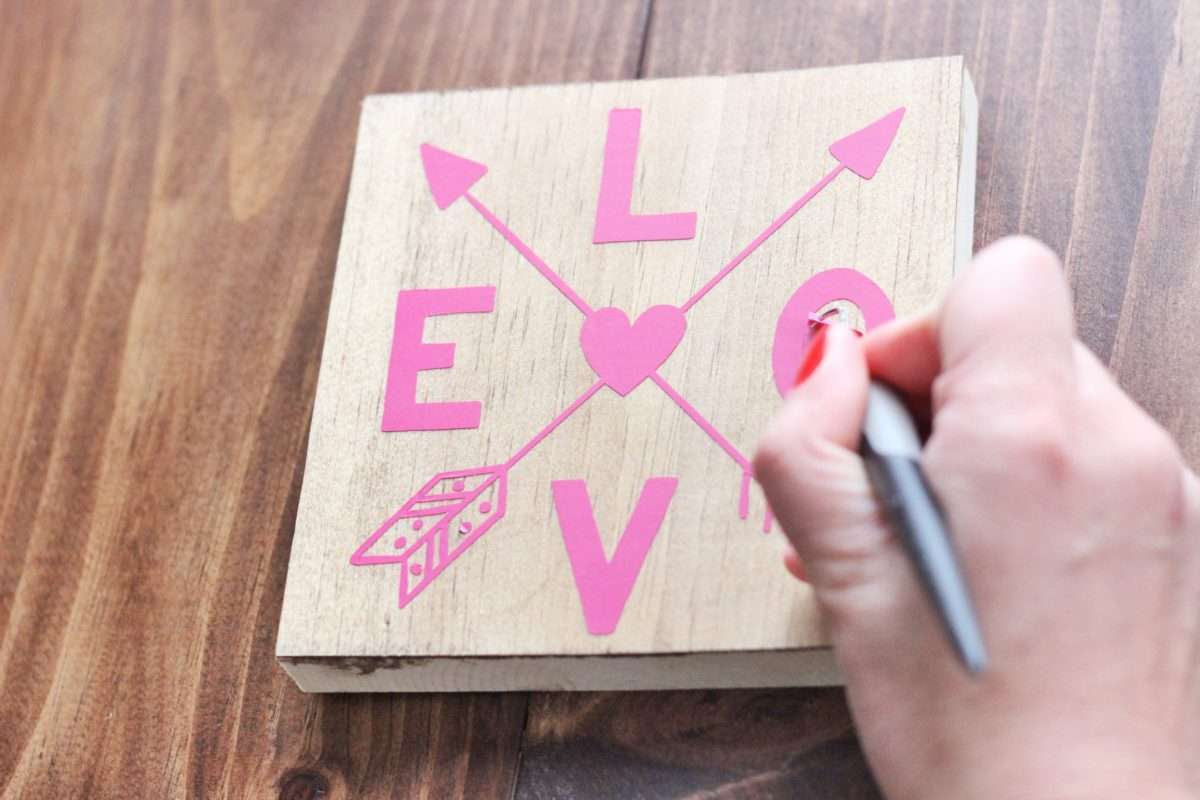
7. Remove the border from the cut square shape and place the transfer tape over the design. Rub the transfer tap over the design with the scraper tool to create a secure bond, and then remove the transfer tape and the vinyl from the vinyl backing.

8. Place the vinyl onto your wood carefully and rub over it again to bond the vinyl to the wood. Then remove the transfer tape and rub the vinyl in place one last time.
9. After removing the transfer tape and rubbing over it, weed the negative spaces carefully with the Silhouette hook tool. Note: We are not weeding the DESIGN before applying the vinyl to the piece; we will actually leave it on the wood. I find that this way is better because it makes it easier to adjust the vinyl, gives you more control, and helps you avoid any wrinkles in the design as well as any bleeding after you add paint.
10. We are actually weeding the negative space so the exposed wood will be the font of your design after we apply the paint.
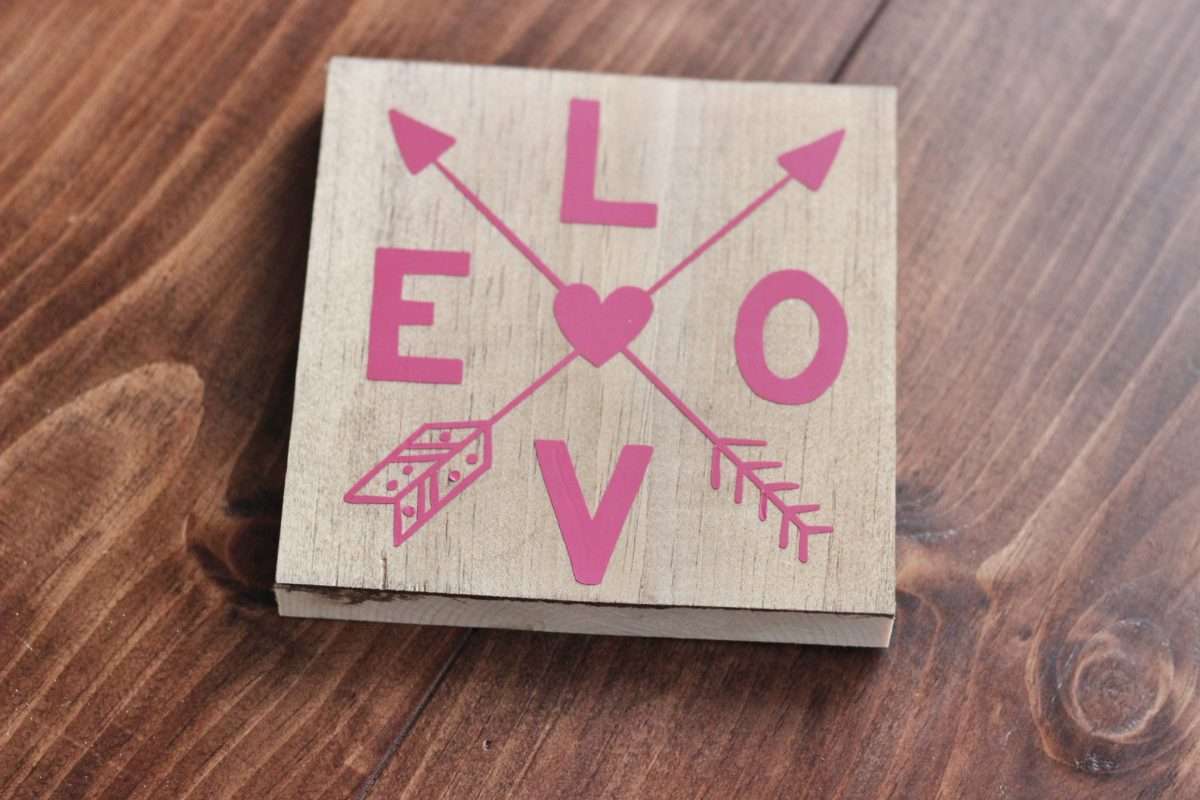
Step Two: Applying the Paint
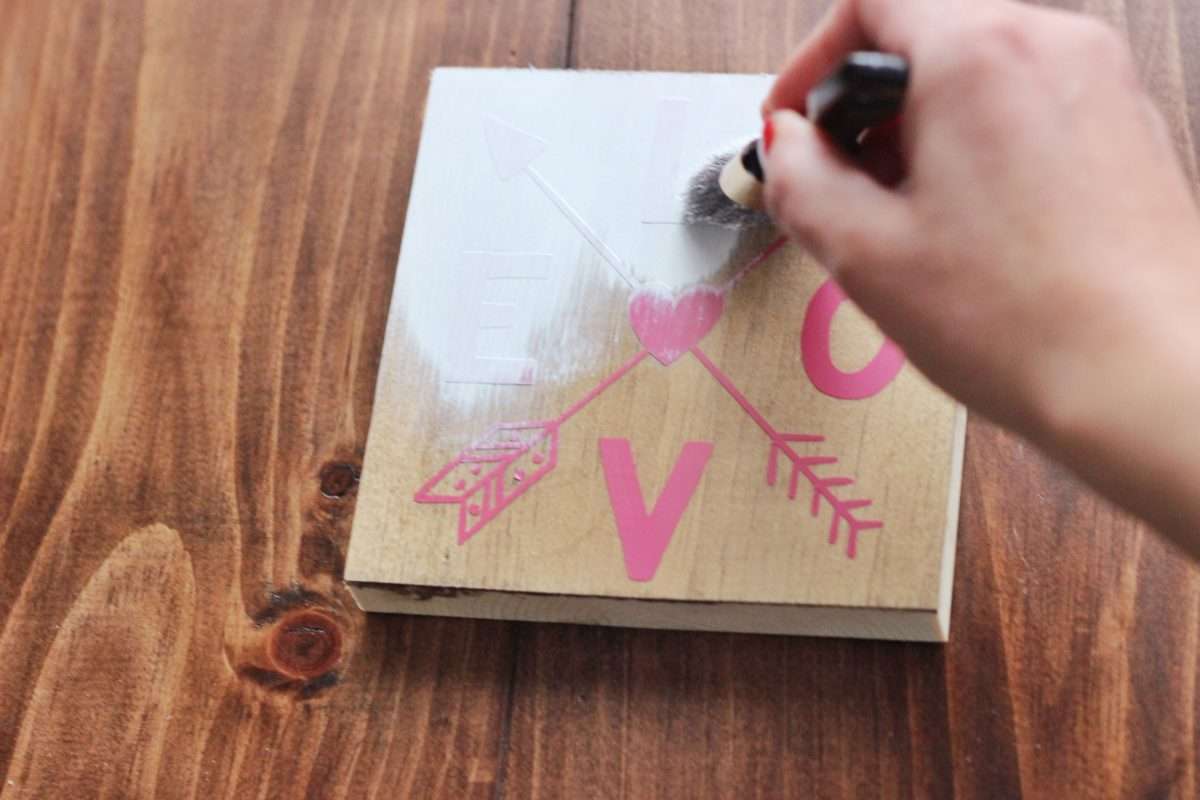
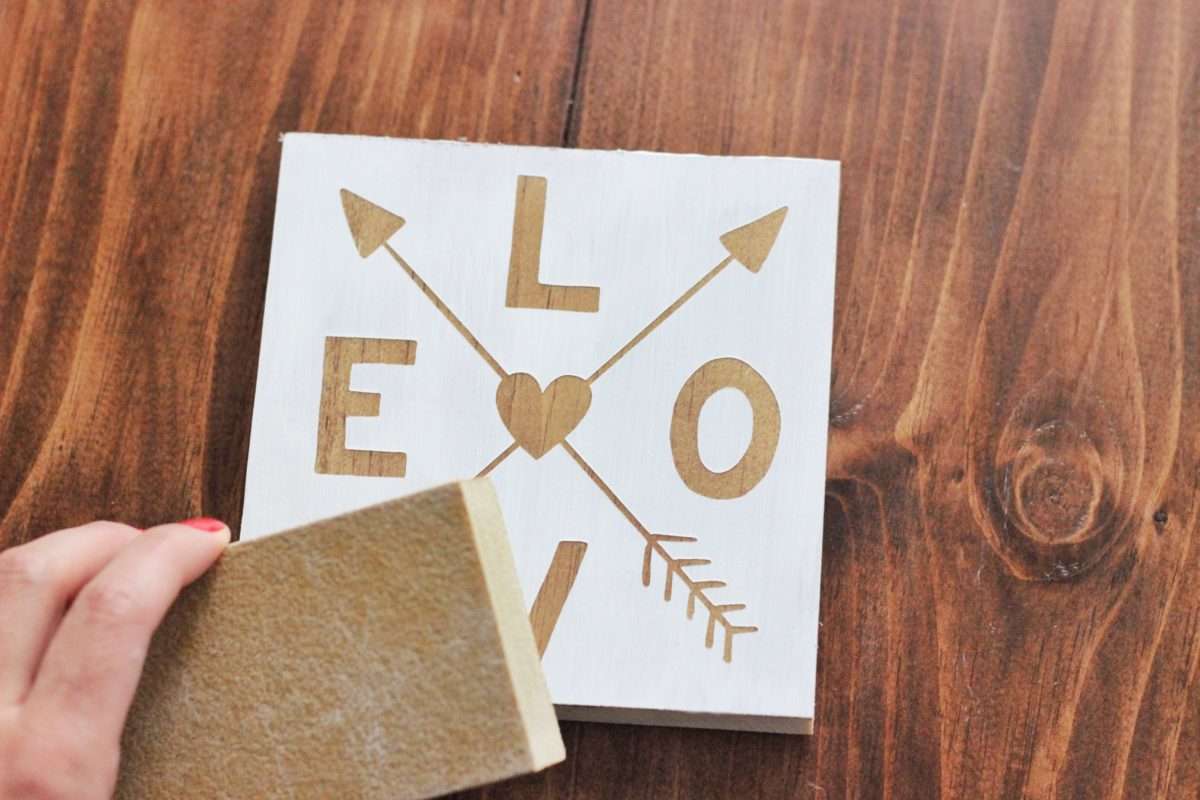
1. Use a paint brush or sponge to apply the paint over the vinyl design and on the edges of the wood too if you are not framing it. If you don’t want to distress it, you can add a second coat after the first one has dried.
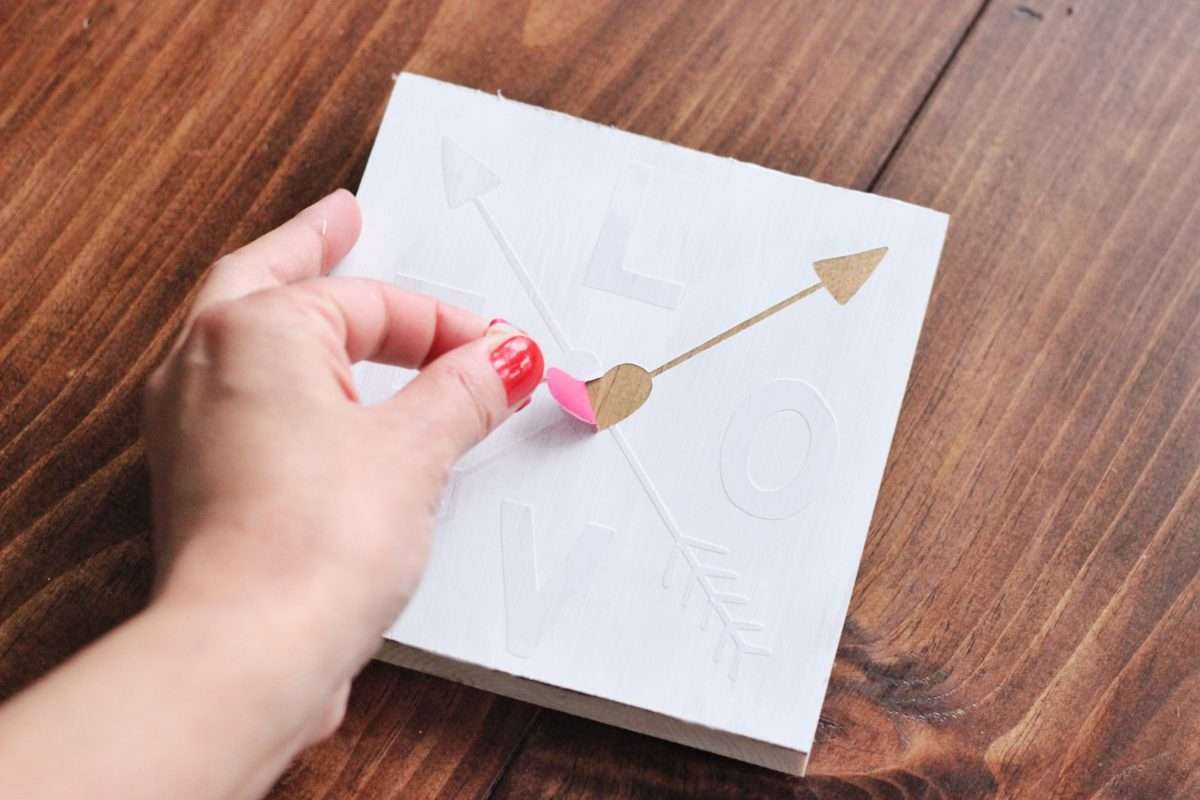
2. Remove the vinyl and use a sanding block or sandpaper for a distressed look.
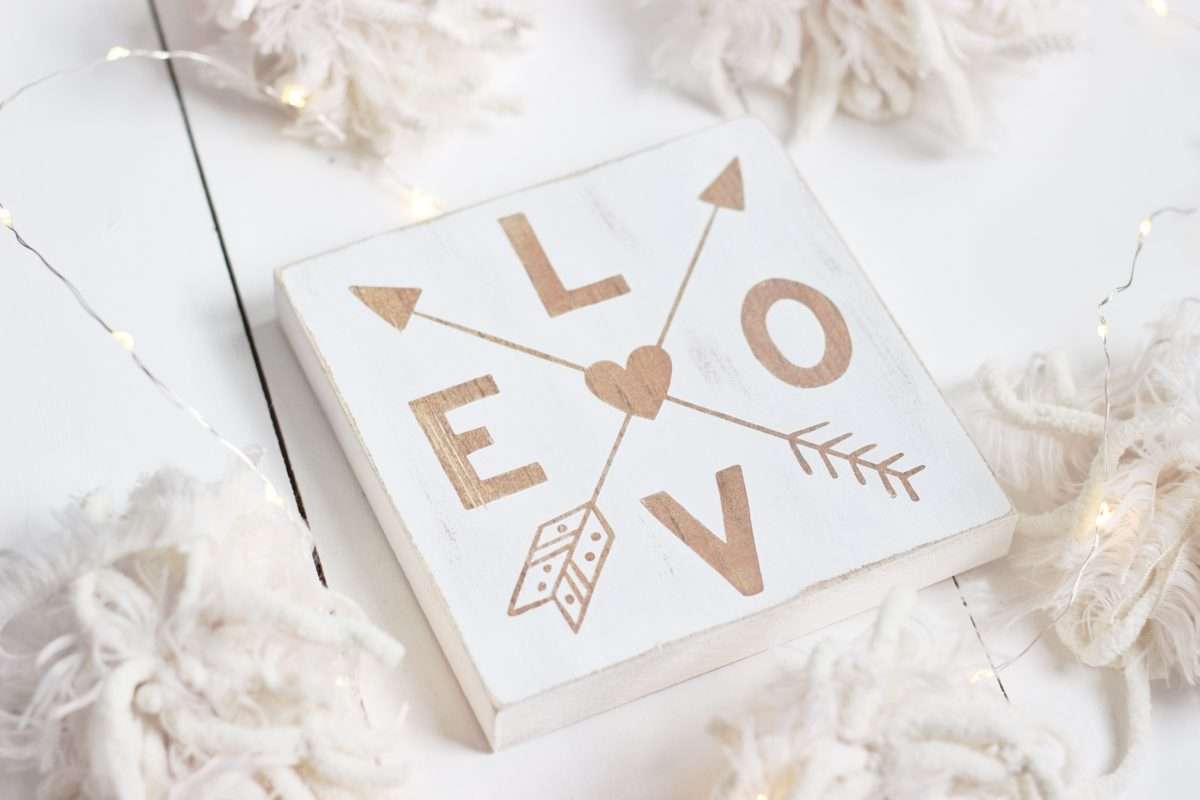
There you go! Your farmhouse style Valentine’s Day sign is ready. Such a great piece to display on your tiered tray, mantel, or nightstand. Or you can give it as a gift!
Nasze Naturalne
September 3, 2025
Your authentic voice really shines through in everything you create and share
Naszenaturalne
September 2, 2025
Really love your style
Kelly Wayment
June 28, 2024
You can use it with vinyl as long as it is smooth and flat to allow the static charge to hold on to it. Rolled vinyl that wants to go back to its rolled shape will not necessarily work well, and it would need to be trimmed to fit the ES mat cutting area.
Kelly Wayment
June 28, 2024
Yes, you can use the heat pen while using the ES mat. 🙂
Yurii
March 2, 2024
Hello. May it be used with heat pen?
Thanks
Jerome
February 24, 2024
Hi, works this with the normal vinyl foils or only with printer papter etc?