
Today we want to call your attention to the Project Wizard Tool, which helps making your projects faster and easier. Let’s take a closer look at this tool by making a Father’s Day card and gift tag.
Supplies Needed:
- Silhouette CAMEO®, Silhouette Portrait®, or Silhouette Curio™ (with a big base)
- Silhouette Cutting Mat
- Silhouette Cutting Blade
- Silhouette Studio®
- Cardstock – white and dark blue
- Silhouette Printable Adhesive Cardstock
- Silhouette Corrugated Paper
- Printer
- Design ID#268259
- Design ID #22276
Step One: Preparing the Card Design
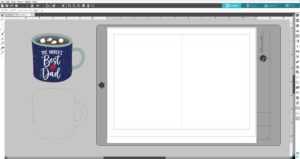
1. Open Silhouette Studio® and go to the menu panel on the upper left corner of the screen. Click File and in the pop-up menu choose New Project Wizard (short cut Ctrl + Shift + N). You will see a pop-up panel where you can choose different projects.
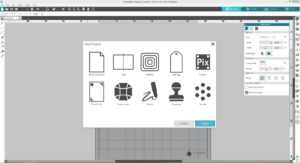
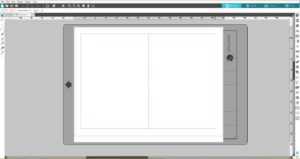
2. Double-click on the Card icon and a template for 7 in. x 5 in. card will appear on your working space.
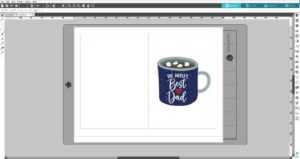
3. Download the World’s Best Dad design (Design ID#268259) from the Silhouette Design Store. Open it in Silhouette Studio® by locating it in your Library. Select both: design and cut line and resize it that it will fit your card.
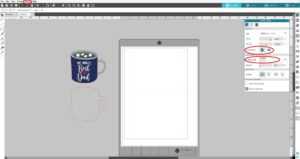
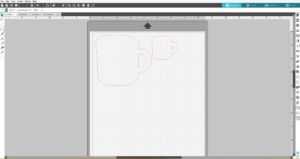
4. Place the mug design aside, just keep outer line on the working space. Select the outer line of the mug and go to the Offset panel. Click Offset tab, adjust Offset distance and click Apply. Now we have cut line for mug backing which we will cut from Silhouette’s Corrugated Paper.
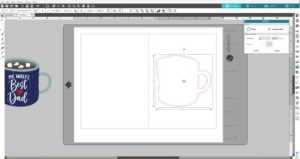
5. Place the mug cut line back on the cup and group them together. Move the mug backing cut line out of the working space.
6. Depending on the Silhouette cutting machine you will use, in the Page Setup Panel adjust type of the cutting mat and, if necessary, the page orientation. Rotate the card design (go to the Object menu and click Rotate) if necessary.
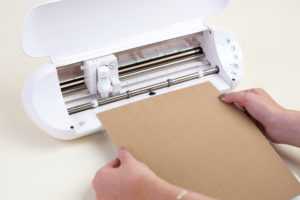
7. Place the sheet of white cardstock on your cutting mat and feed it into your Silhouette machine. In Silhouette Studio®, go to the Send tab, choose “Cardstock, Plain” as the material, adjust the blade as indicated (unless you use a machine with an AutoBlade) and click “Send.” Remove the cut designs from the cutting mat.
Step Two: Preparing the Gift Tag Design
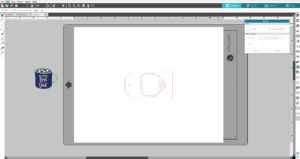
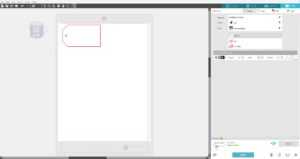
1. Open the Project Wizard and click the Gift Tag tab. Open the World’s Best Dad design (Design ID#268259) from your Library. Resize the design so that it will fit the gift tag design. Create an offset line for the corrugated paper backing.
2. Place only the gift tag design on the working space. Place the sheet of white cardstock on your cutting mat and feed it into your Silhouette machine. In Silhouette Studio®, go to the Send tab, choose “Cardstock, Plain” as the material, adjust the blade as indicated (unless you use a machine with an AutoBlade) and click “Send.” Remove the cut design from the cutting mat.
Step Three: Cutting Out the Corrugated Backing
1. Place cutting lines for corrugated paper backing on the working space.
2. Place the sheet of corrugated paper on your cutting mat and feed it into your Silhouette machine.
3. In Silhouette Studio®, go to the Send tab, choose “Corrugated Paper” as the material, adjust the blade as indicated (unless you use a machine with an AutoBlade) and click “Send.”
4. Remove the cut designs from the cutting mat.
Step Four: Making the Print & Cut
1. Open Project Wizard and click the Print & Cut tab. You will see a page with Registration Marks on it. In the Page Setup Panel change page size and the cutting mat type if necessary. Place the printable parts with cut lines for your card and gift tag on the working space. Make sure your designs are placed within the Registration Marks borders.
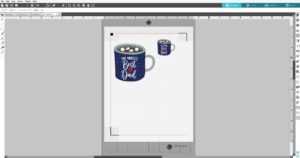
2. Print designs on Silhouette’s Printable Adhesive Cardstock.
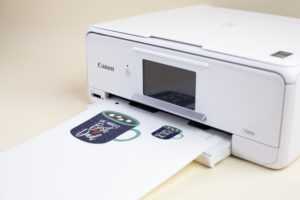
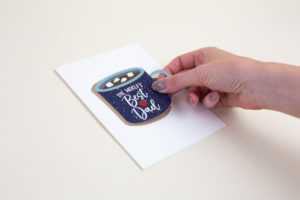
3. Place the printed sheet on your cutting mat and feed it into your Silhouette machine. In Silhouette Studio®, go to the Send tab, choose “Cardstock, Printable Adhesive-Backed” as the material, adjust the blade as indicated (unless you use a machine with an AutoBlade) and click “Send.”
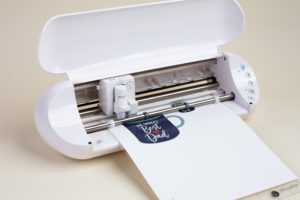
4. Remove the cut designs from the cutting mat.
Step Five: Assembling the Card and Gift Tag
1. Adhere corrugated backing to the card base and adhere printed part on the top of it.
2. Repeat the same steps for the Gift Tag.

You can make a gift box using Design ID #22276. and add a gift tag to it.

Now you know how the Project Wizard Tool can help aid you when you’re making different projects. What kinds of projects do you want to try out?
Nasze Naturalne
September 3, 2025
Your authentic voice really shines through in everything you create and share
Naszenaturalne
September 2, 2025
Really love your style
Kelly Wayment
June 28, 2024
You can use it with vinyl as long as it is smooth and flat to allow the static charge to hold on to it. Rolled vinyl that wants to go back to its rolled shape will not necessarily work well, and it would need to be trimmed to fit the ES mat cutting area.
Kelly Wayment
June 28, 2024
Yes, you can use the heat pen while using the ES mat. 🙂
Yurii
March 2, 2024
Hello. May it be used with heat pen?
Thanks
Jerome
February 24, 2024
Hi, works this with the normal vinyl foils or only with printer papter etc?