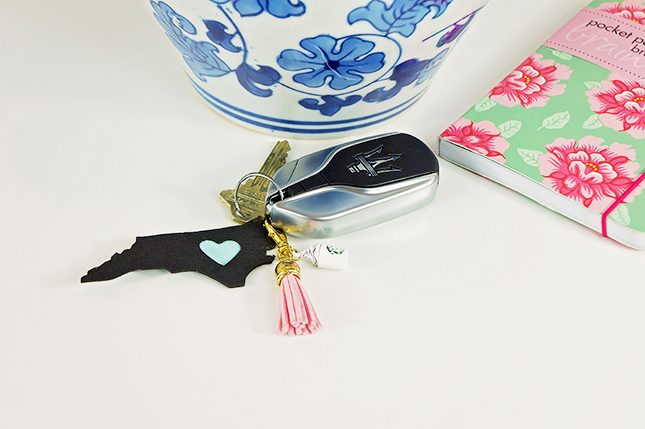
Kayla here today, showing you how to create the cutest state love keychain using Silhouette’s Faux Leather Paper and your Silhouette CAMEO. This was my first time working with the Faux Leather Paper and I am in love with the results. It has the texture of leather but it’s actually a paper! Amazing!
Here’s what you’ll need for this project:
- Silhouette CAMEO, Curio or Portrait
- Faux Leather Paper
- Heat Transfer Material or Vinyl
- Iron
- Fabric Adhesive
- Key Ring
Let’s get started!
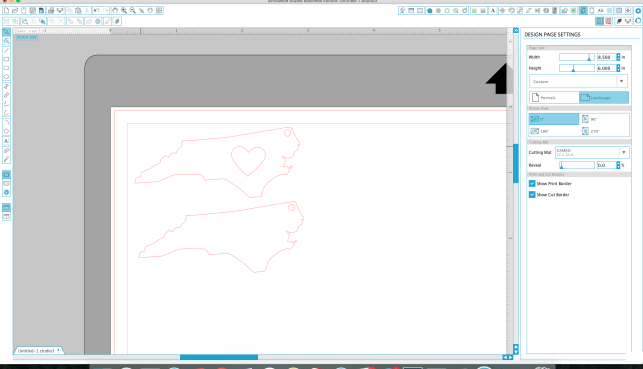
Open your state design in Silhouette Studio and resize it. Since keychains are typically pretty small I sized my state of North Carolina to be 2.5 inches long. Now, we need to create a small hole for the key ring. Use the ellipse tool to create a small circle and place the circle where you want your key ring to be attached to your design. Here’s a tip: hold shift while using the ellipse tool to draw a perfect circle.
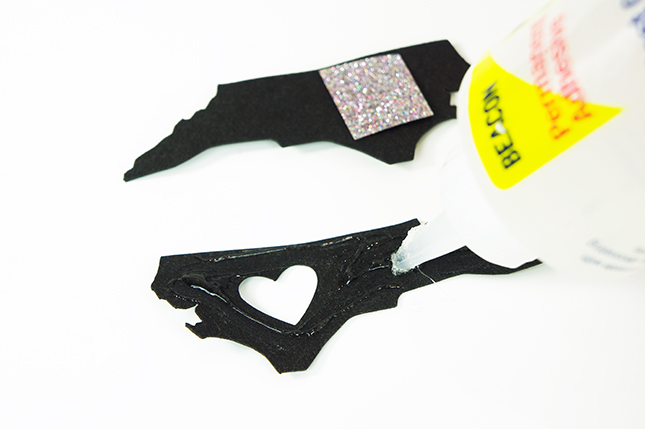
Create a copy of your design by selecting the shape and clicking object->replicate->duplicate. Next, remove the heart from one of the shapes. You should now have two states, both should have a hole for the key ring but only one should have a heart cut-out in the center.
Now it’s time to cut out your design. Select “Faux Leather Paper” as your material type in the cut settings window. You’ll notice that your blade should be set to 5 and the “double cut” box is checked. This means that the machine will make two passes over the design, which is typical for thicker materials.
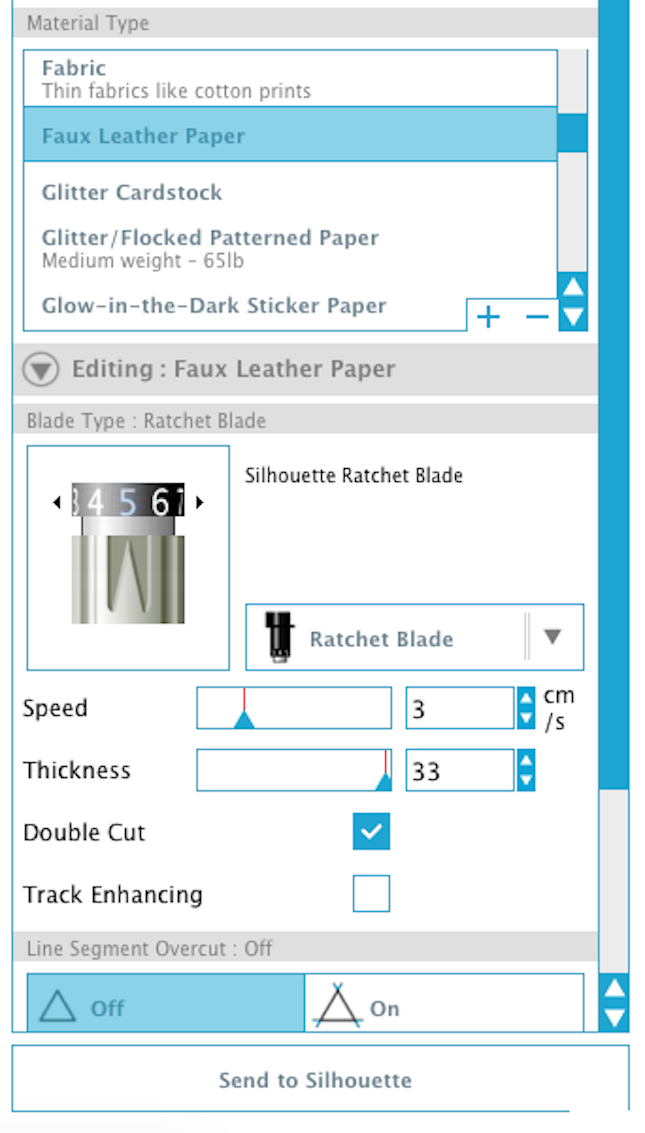
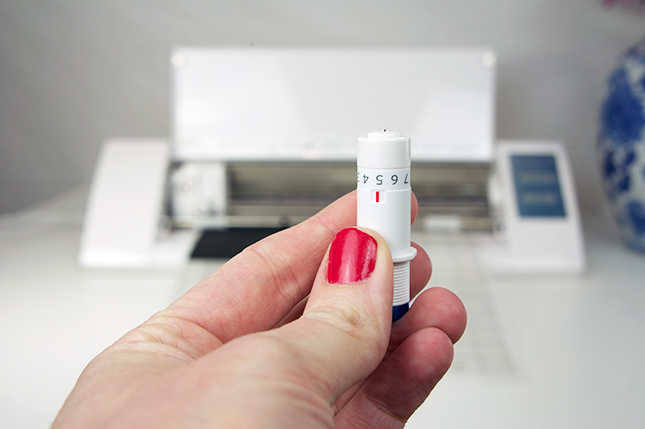
Set your premium blade to a 5 by twisting the top until the red line is on the number five. Load your cutting mat into the machine and click “send to Silhouette”. Remember, the machine will go around the cut lines twice!
After your shapes are finished cutting, remove them from the cutting mat and wash them in warm water. Yes, I said wash them! Washing the Faux Leather Paper is what gives it the look and feel of real leather. You can either toss your designs in the washing machine or just wash them by hand. Since these are so tiny I opted for hand washing. I did not use any type of detergent, just warm water and a little crumpling.
Let your designs dry completely before moving on to the next step.
Now for the fun part! You can use fabric, vinyl or heat transfer material for this step. I’m using glitter heat transfer material.
Cut a small piece of your material and iron it onto the bottom half of your design (the shape without the cutout) making sure that everything lines up accordingly. If you’re using fabric for this step, you can just use a permanent fabric glue. If you’re using vinyl, just press it on really well with your finger.

The last thing you need to do is attach your two pieces together using a strong glue. Make sure you put the glue on the coordinating side so that the heart shaped cut-out is in line with the glittered heat transfer material . I have found that permanent fabric glue works best for this step.
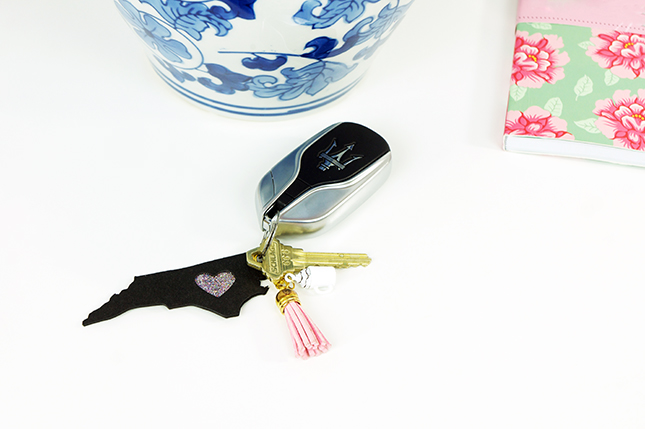
Now, all you have to do is attach your key-ring and you’re all set! Go show off your fancy new DIY Faux Leather Keychain to the world! Happy crafting!
Nasze Naturalne
September 3, 2025
Your authentic voice really shines through in everything you create and share
Naszenaturalne
September 2, 2025
Really love your style
Kelly Wayment
June 28, 2024
You can use it with vinyl as long as it is smooth and flat to allow the static charge to hold on to it. Rolled vinyl that wants to go back to its rolled shape will not necessarily work well, and it would need to be trimmed to fit the ES mat cutting area.
Kelly Wayment
June 28, 2024
Yes, you can use the heat pen while using the ES mat. 🙂
Yurii
March 2, 2024
Hello. May it be used with heat pen?
Thanks
Jerome
February 24, 2024
Hi, works this with the normal vinyl foils or only with printer papter etc?