Valentine’s Day is just around the corner, and I’ve got a print & cut project to make cute homemade fish valentines for your little ones to share! Check out the tutorial below.
Supplies:
- Letter size sticker paper
- Swedish Fish gummy candies
- Plastic ziplock bags (3” x 4”) – or use prepackaged Swedish Fish candies
- Silhouette Cameo® or Portrait®
- 1 mm blade, such as the Autoblade
- Cutting mat
- Silhouette Studio®
- Design ID #30279 and #30551 by Sarah Bailey
- Design ID #387314 by Blush Fonts
Step One: Create Design
In Silhouette Studio, set up your Page Setup in the Page Setup Panel as follows:
- Machine = Cameo (or Portrait, or whichever machine you are using)
- Cutting Mat = (choose the one you are using for your machine)
- Media Size = Letter
- Check the box to enable “Show Cut Border”
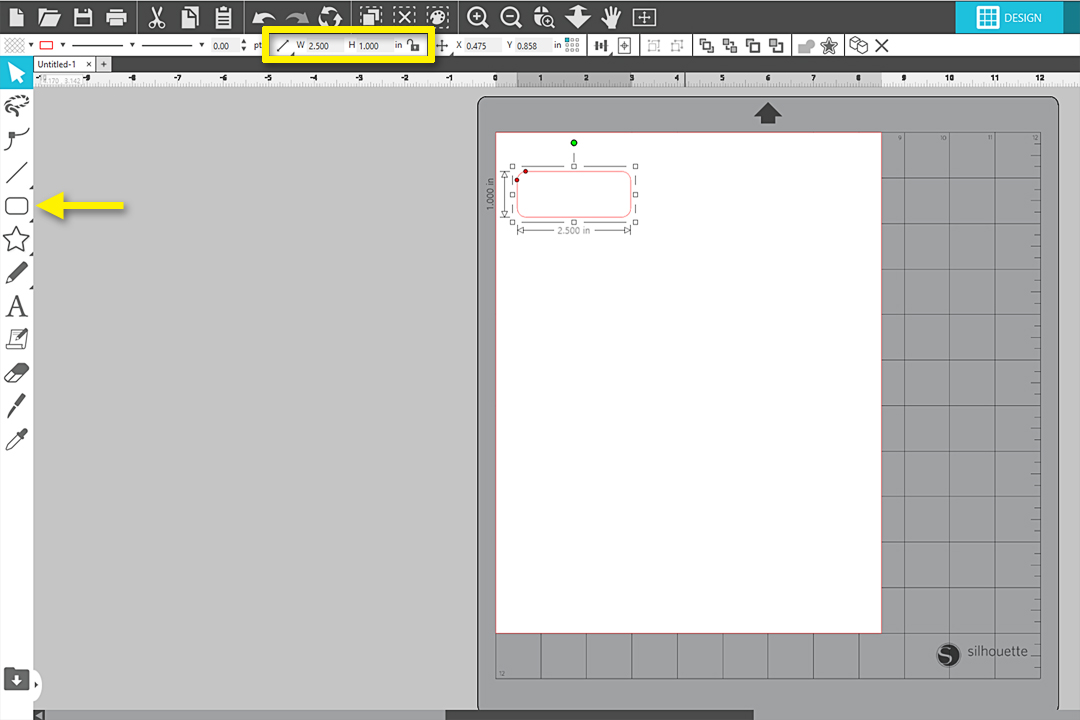
Using your Drawing Tools on the left, choose a rounded rectangle and draw it to be 2.5 in. x 1.0 in.
Tip: Use your Scale tools in the Quick Access Toolbar to make it exactly that size.
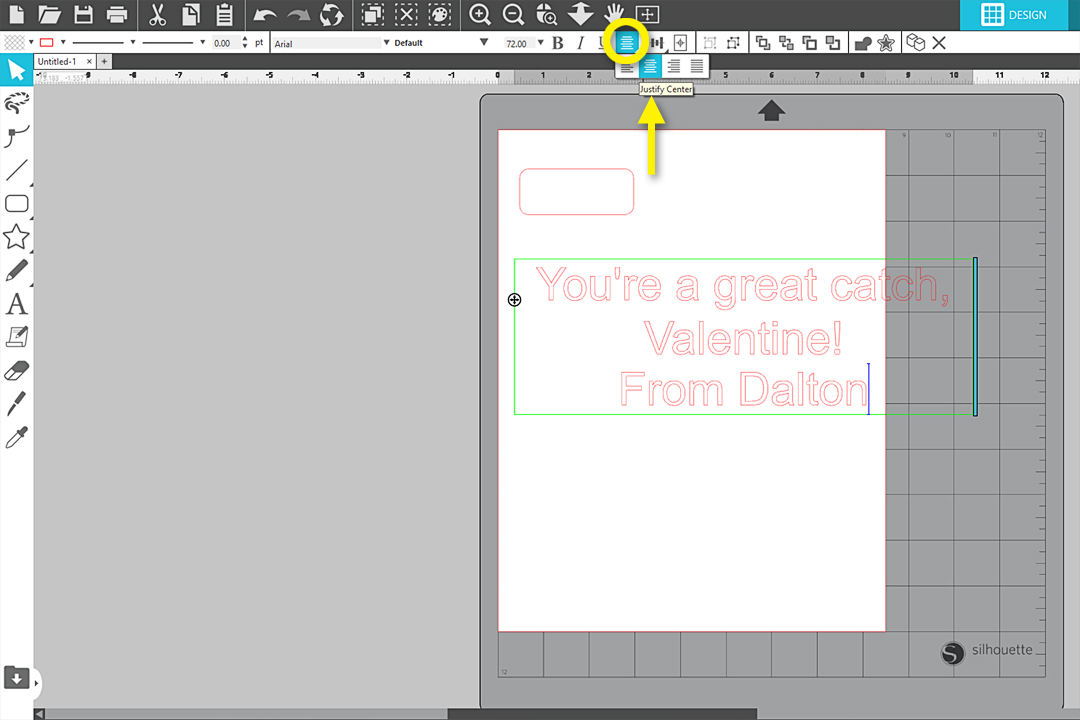
Using your Text Tool on the left, drop a cursor onto the page and type “You’re a great catch, Valentine! From _____________” (Type your child’s name)

Choose “Justify Center” from the Quick Access Toolbar or in the Text Style Panel.
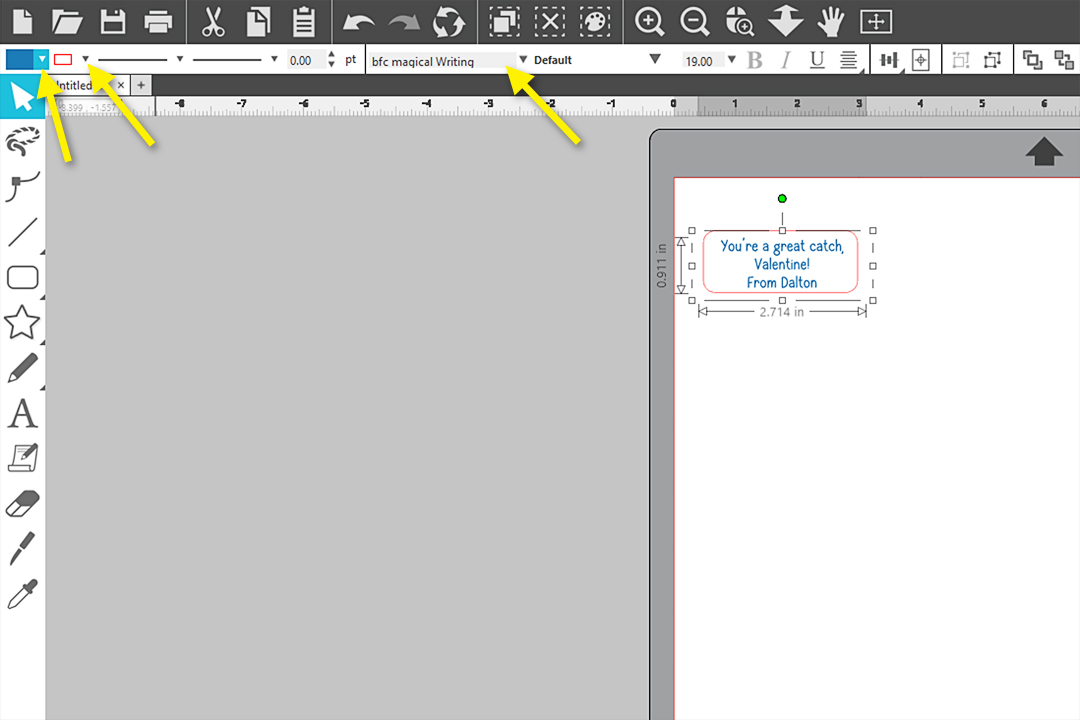
Click off to the side of the text, then click once on the text to select it as an object.
Use a corner handle to reduce the size of the text to fit inside the drawn rectangle.
While the text is still selected, change the font to BFC Magical Writing. (You may choose to leave the default font or choose another favorite font.)
Resize the text further as necessary. My font size in this example is 19.0 pt.
While the text is still selected, choose a blue fill color and an invisible line color.
Open Underwater Scene, Ungroup, keep one small fish, then delete the rest.
Open Worm on a Hook, Ungroup, keep the fish hook and its hole at the top, and delete the rest.
Because we’ll be filling the hook with color, select both the hook and its hole at the top, and make it a compound path. (Right click > Make Compound Path)
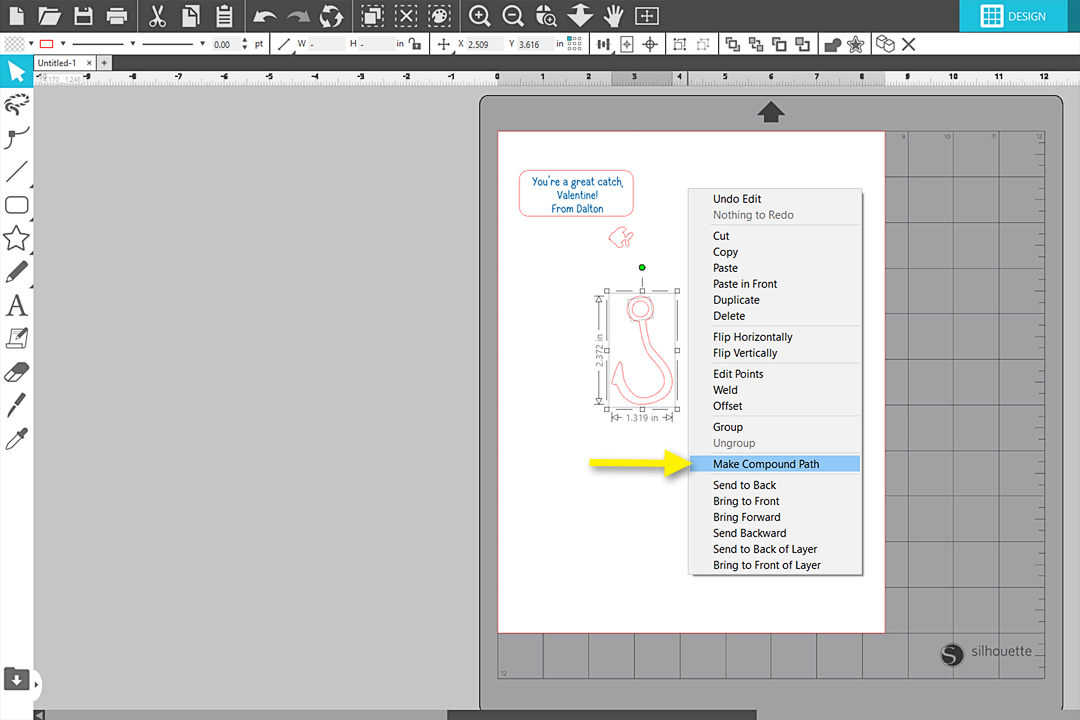
Flip the fishhook horizontally. (Right click > Flip Horizontally)
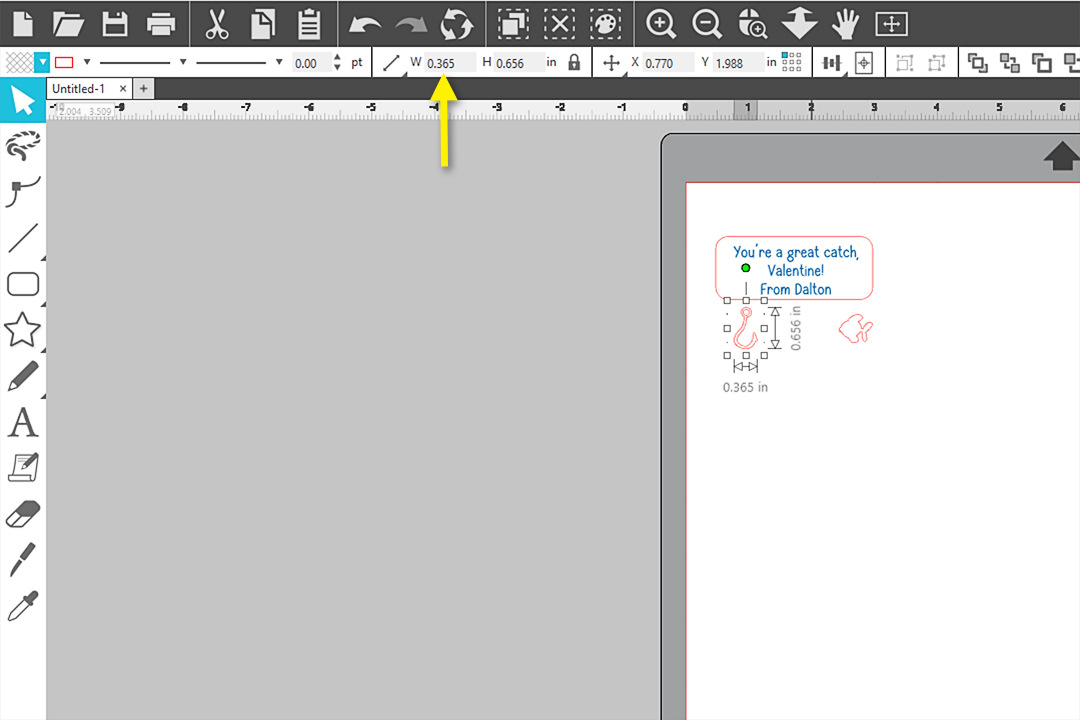
Resize the hook to about 0.365” H.
Fill the hook with a grey fill color and the fish with a red fill color.
Set both to an invisible line color.
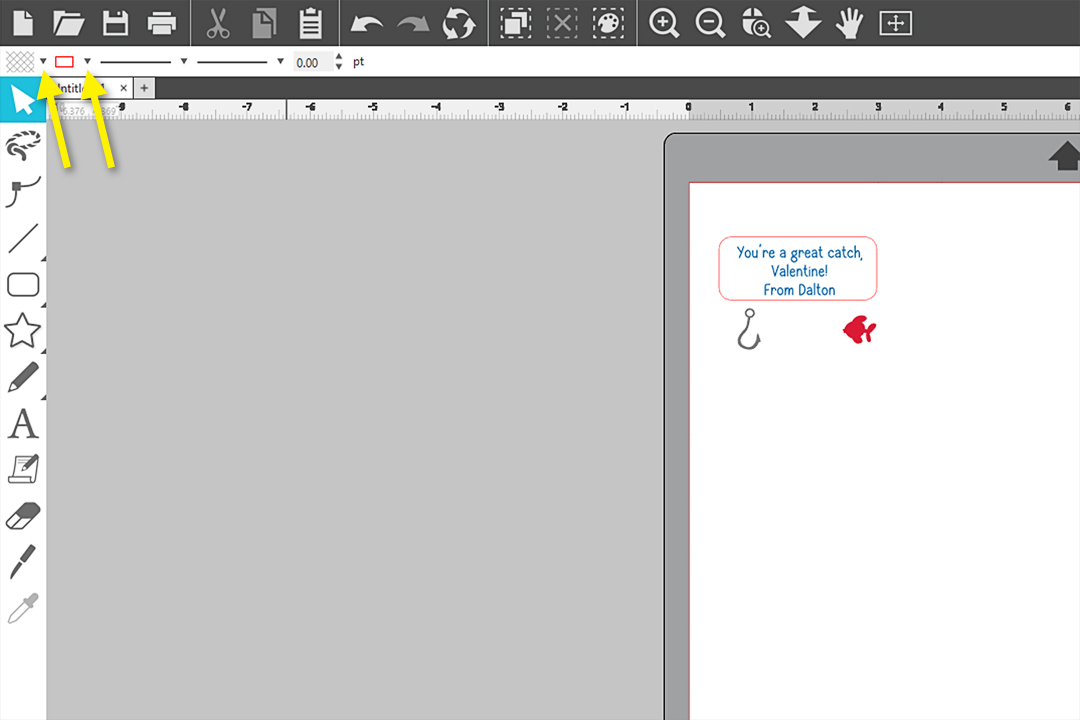
To add additional charm to the label we’re creating, Ungroup the blue text. With the word “You’re,” move only the letter U to the right (use your keyboard arrow keys), delete the O, and position the hook eye to be the new letter O. You may need to move the Y and the U a little more to make it fit well.
Move the fish into place in the gap on the right so it all looks balanced.
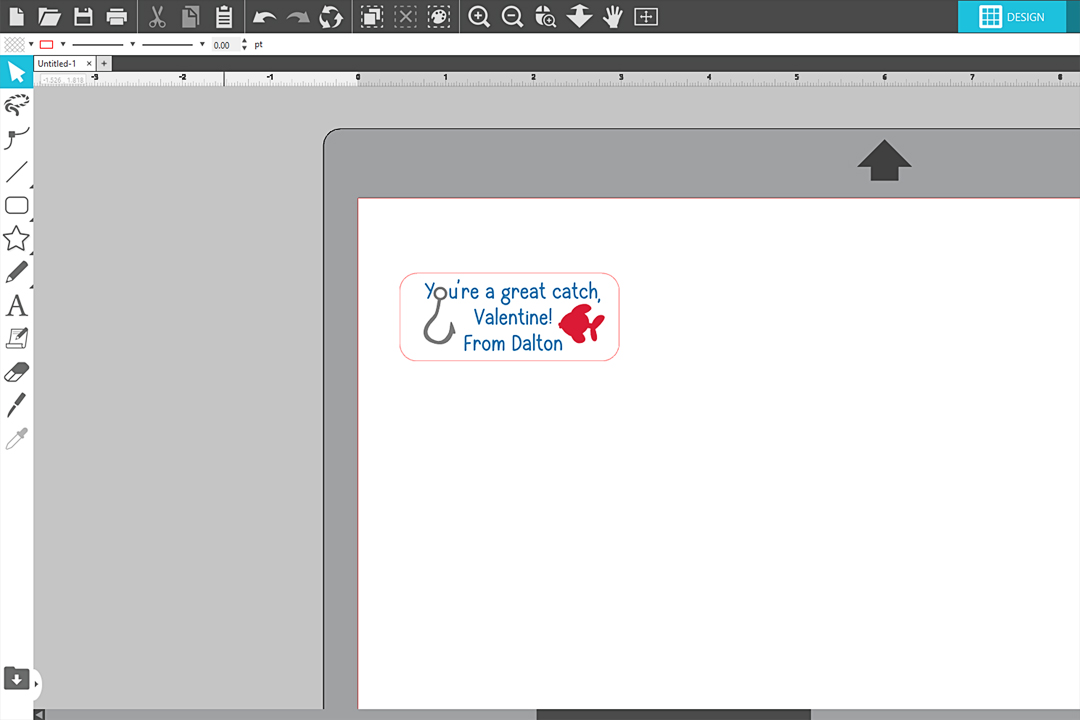
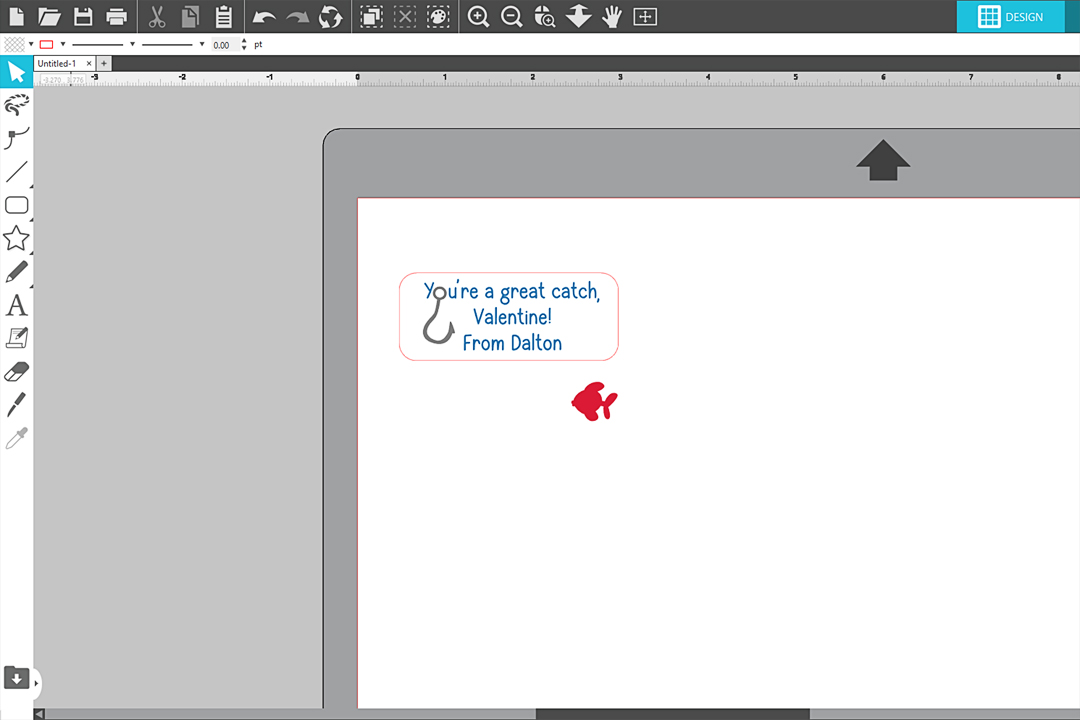
Select and Group all the text, the hook, and the fish together. (Make sure you catch the apostrophe and the comma as you select these elements, but do not include the rectangle.)
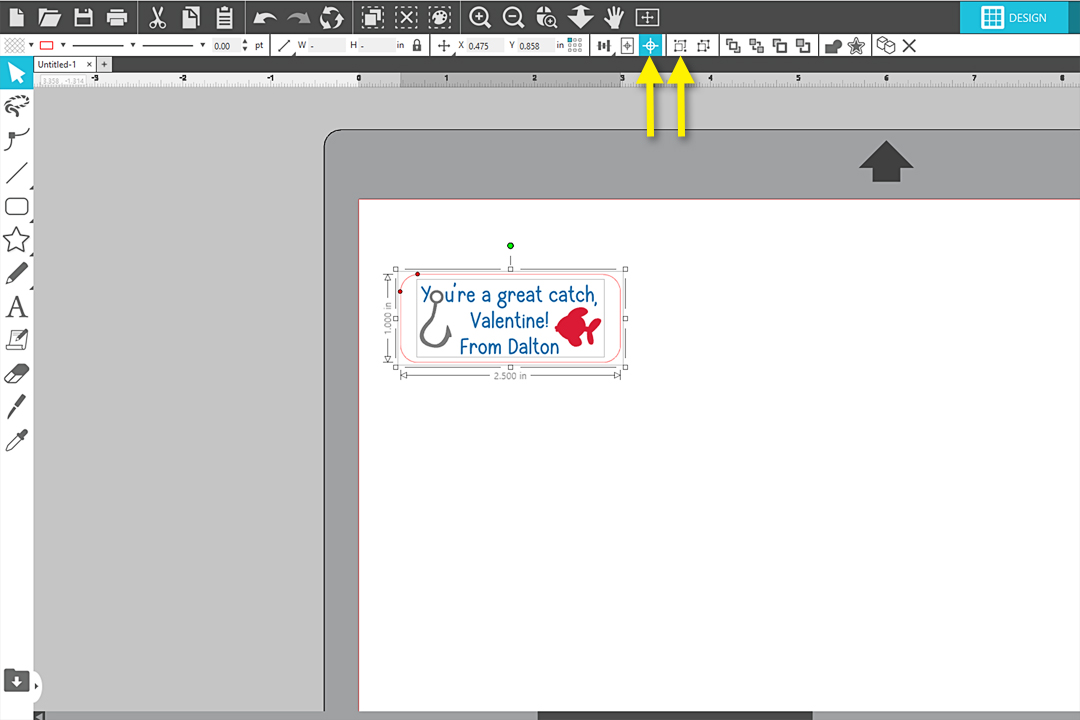
Select the elements and the rectangle, then Center within the rounded rectangle, then Group them all together.
Step Two: Prepare for Print & Cut
Turn on the page registration marks. (Type M as a shortcut key, or go to the 3rd tab of the Page Setup Panel.)
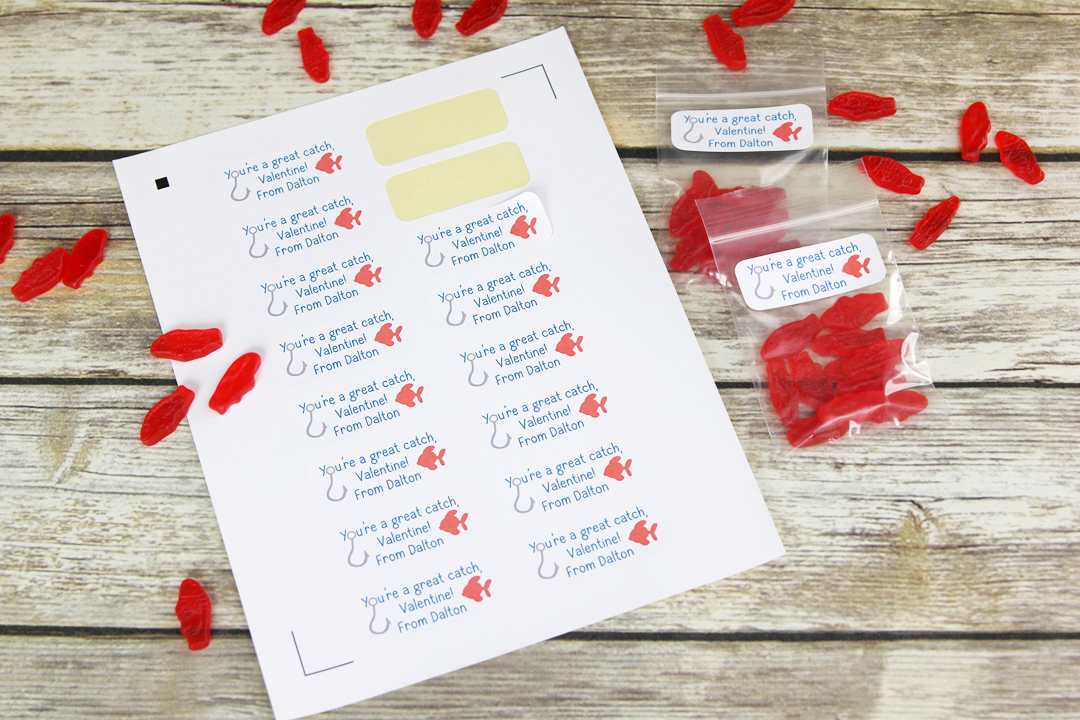
Fill the page with identical stickers by selecting the label, then go to the Replicate Panel and choose Fill Page (or use the shortcut Ctrl/Cmd + Shift + F).
The labels should automatically avoid the crosshatch areas and stay within the red cut border, but you may need to delete and rearrange some pieces in order to stay within those boundaries if the software does not do that for you.

Go to the Send Tab, select everything on the page, and choose “Cut Edge” so only the outer boundary of each label will cut.
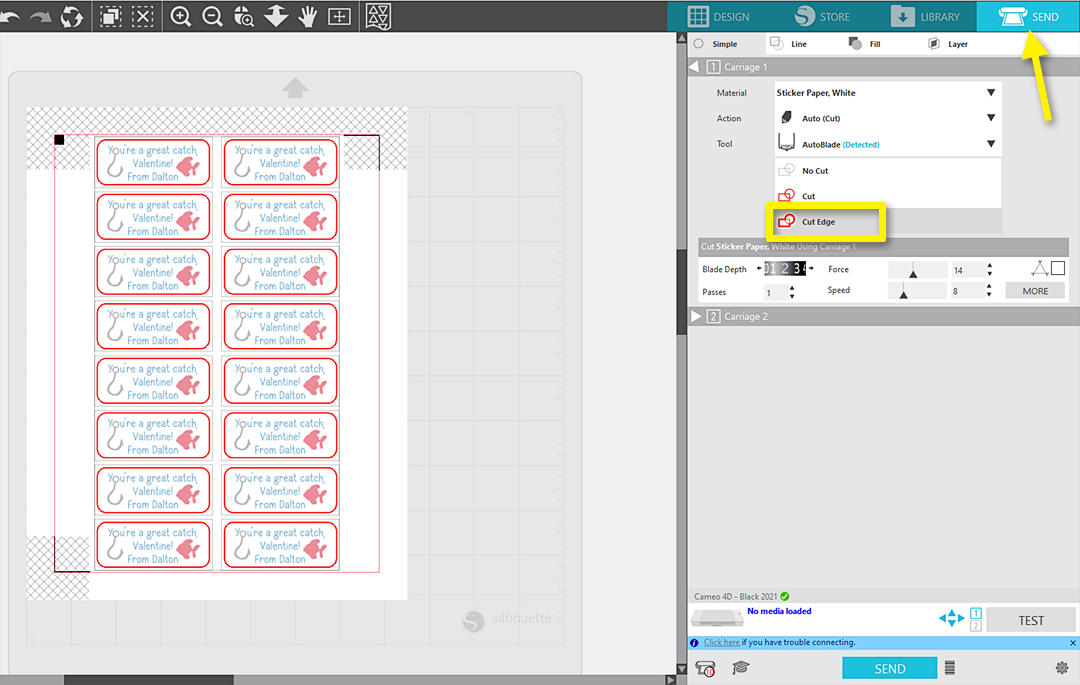
Set up your cut settings as follows:
- Material = Sticker Paper, White
- Action = Cut
- Tool = Blade (whichever blade you are using)
- Adjust the settings as necessary based on your own test cuts with this material. I find the default usually works well for me for white sticker paper.
Send to your printer by clicking the printer icon at the top of the page.
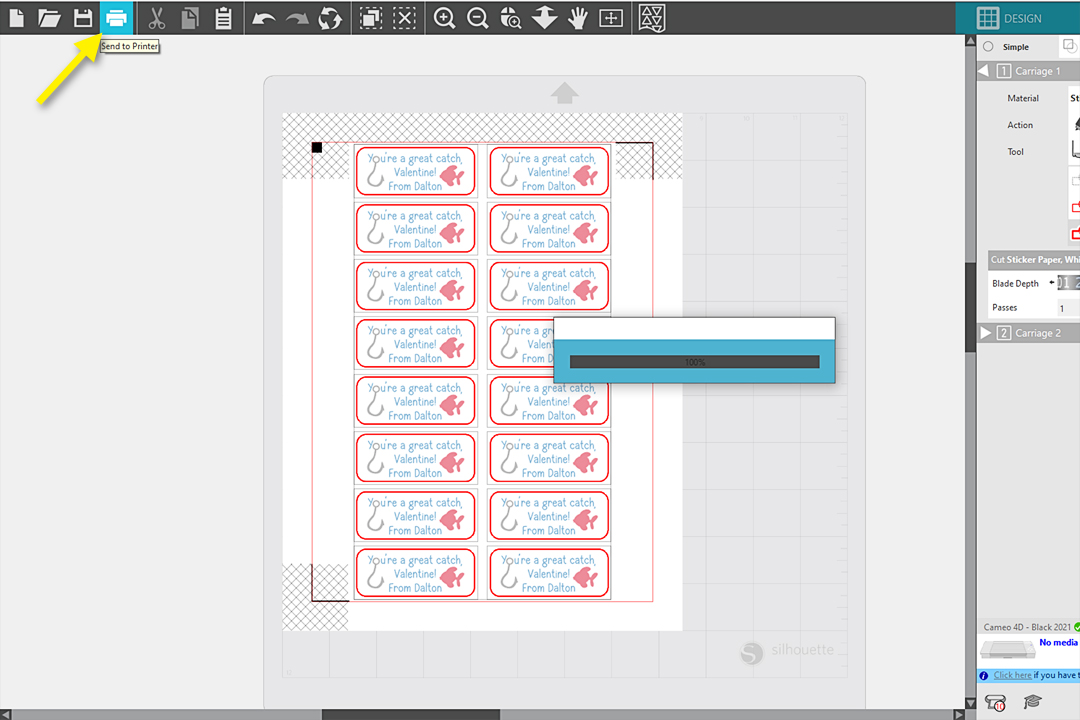
When the Print Preview appears, review your document to make sure the registration marks and design and orientation show as expected.
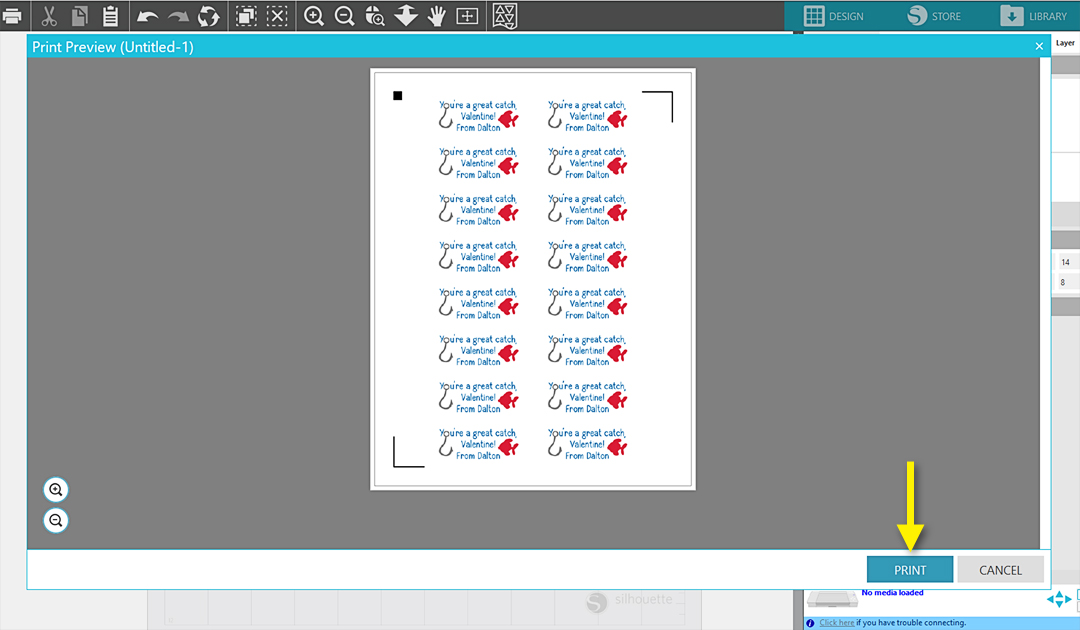
Then choose “Print” to open your printer dialogue box. At this time, you can choose your printer and set preferences to ensure the paper source, print quality, paper size, etc. are correct.
Make sure to load white sticker paper into your printer. When ready, choose OK and Print, or whatever your printer needs to continue.
Once you’ve removed your sticker sheet printout from your printer, place the sticker printout on your cutting mat, load it into your cutting machine, and click Send in the software. Your Silhouette machine will read the registration marks and cut out around the labels.
Step Three: Assemble Valentines
Place the stickers on clear 3 in. x 4 in. ziplock bags. (You can usually find these in the jewelry section of craft stores.)
Fill the bags with Swedish Fish (or even gummy worms).
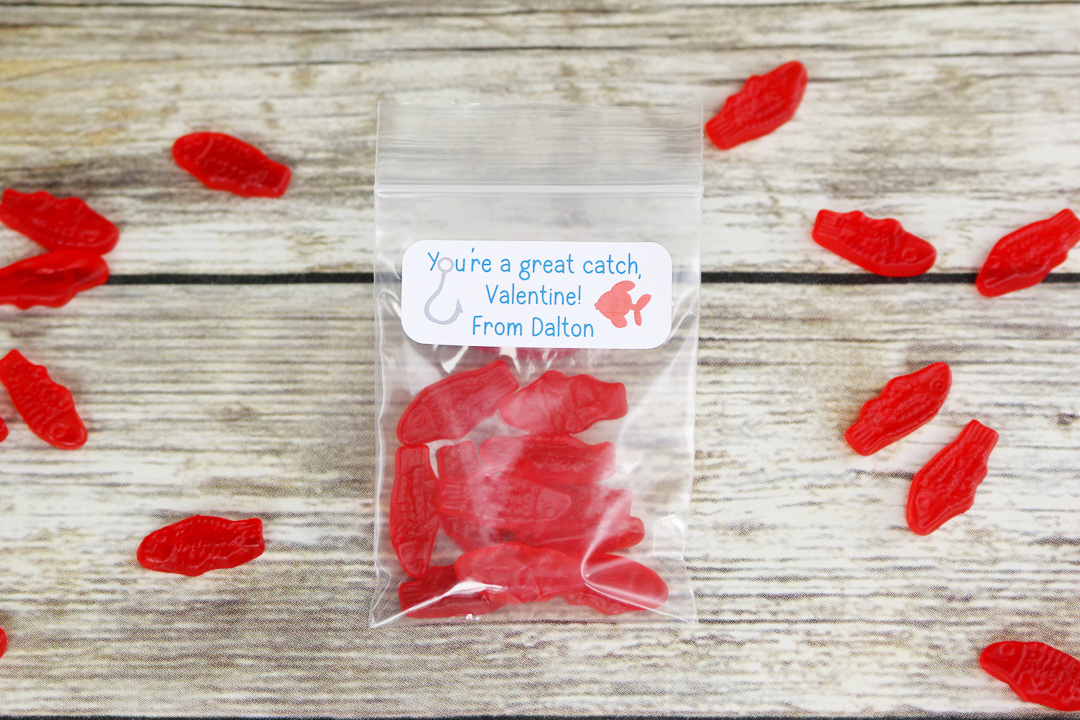
As an alternative, place the stickers directly on prepackaged treat bags of Swedish Fish.
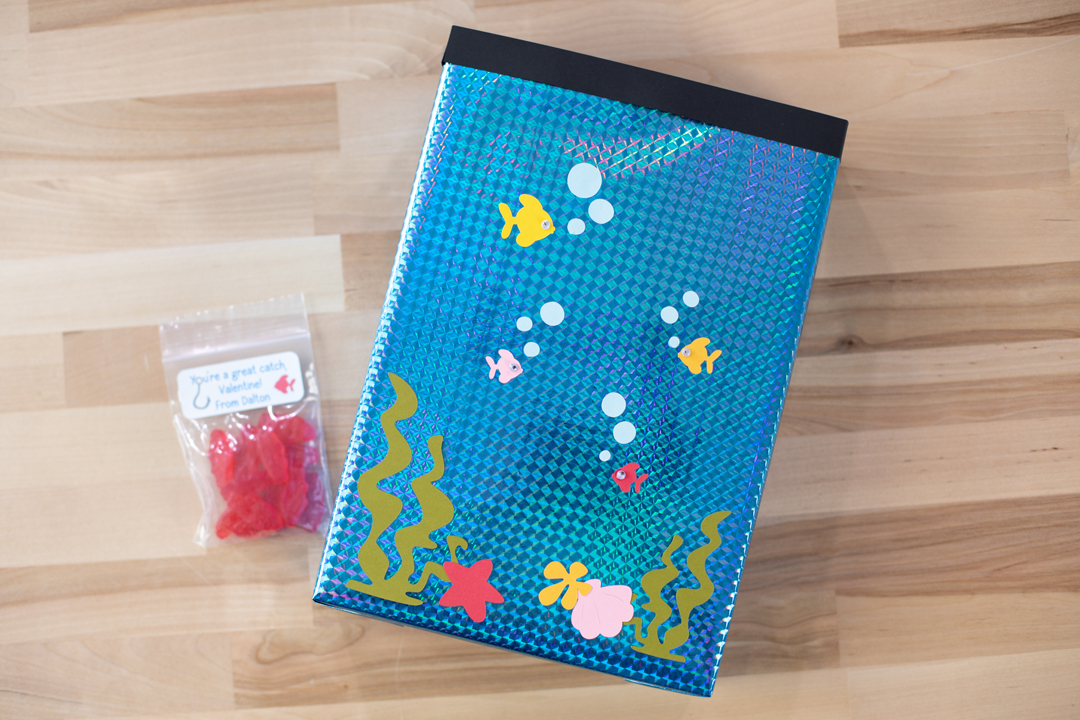
If you want a coordinating fish tank Valentine collection box for your child, check out my Craft Along video tutorial here!
I hope you enjoy making these homemade Valentines for the kids!
 Free Class - Father's Day Apron Set
  Free Class - Custom Graduation Tumbler