Cari here with you, and today I’m sharing a fun project using UV light–sensitive fabric ink. This type of a project is fun for a kid of any age to wear—that’s why I made one for myself! 🙂
You Will Need:
- Silhouette CAMEO®
- Design ID #117563
- Silhouette Stencil Vinyl
- Silhouette Hook & Scraper Tools
- Silhouette Transfer Paper
- T-shirt
- Silhouette UV Light Sensitive Fabric Ink (3 colors of your choice)
- Sponges or Foam Brushes
STEP ONE: PREPARE AND CUT DESIGN
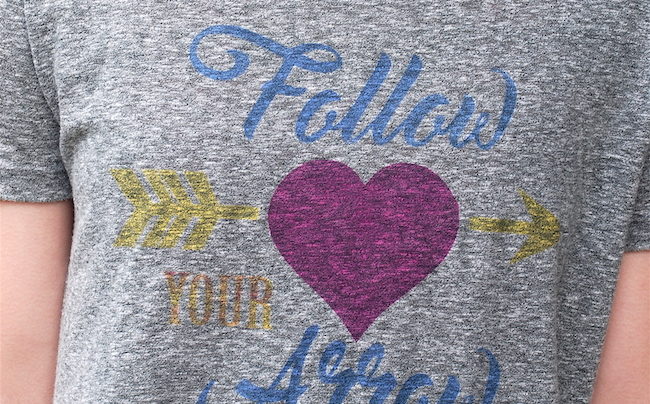
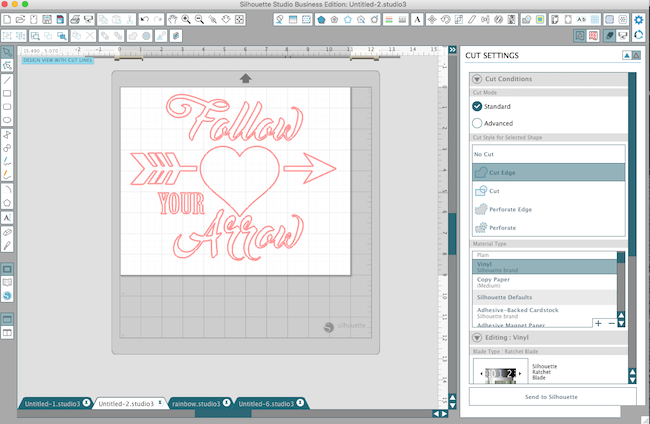
Open file Design ID #117563 in Silhouette Studio®. Resize the design if needed, depending on the size of your T-shirt. (I made mine slightly smaller to approximately 9.8 inches x 7.9 inches.)
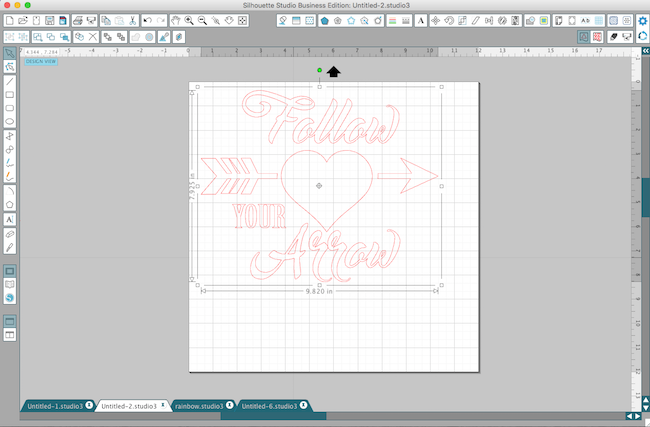
In the Design Page settings, change the width and height to match the size of vinyl that you’re using for your template. (I had cut a piece of stencil vinyl which was 9 in. x 11 in.) Adhere the vinyl to the CAMEO 12 in. x 12 in. mat. Then select this mat size in the mat settings.
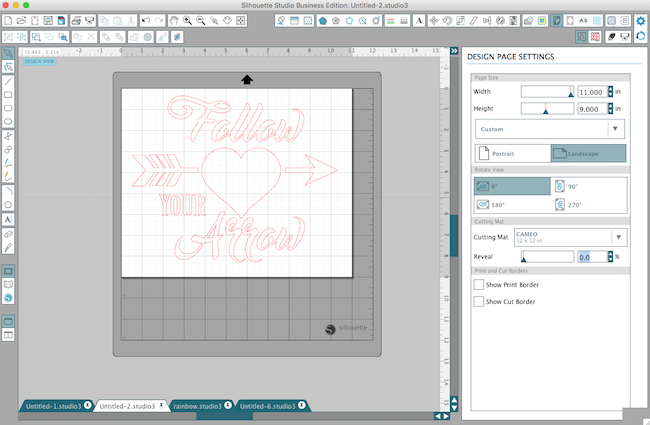
Then head into the Cut Settings window and select the following: Cut Edge, Silhouette Vinyl, and blade depth 1. Then send your design to your Silhouette CAMEO®.
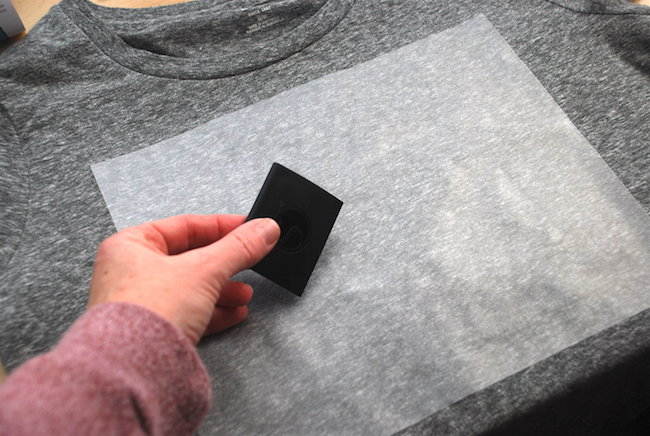
STEP TWO: APPLY STENCIL TO T-SHIRT
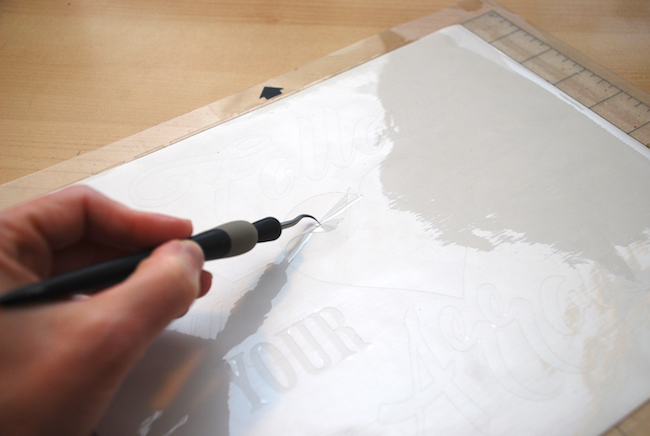
Once the design is cut, weed (peel away) the design so that you are left with a stencil. Normally when you apply vinyl, you remove the outside parts and insides of the letters o, a, and e, etc. But when making a stencil, you remove the actual design.
TIP: I left the vinyl on my mat when I did the weeding because that way the vinyl laid flat at all times and didn’t curl up at the ends.
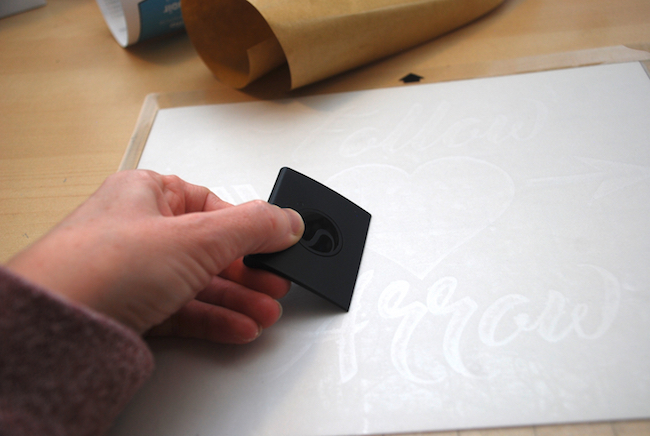
When you finish weeding, apply some transfer tape over the vinyl stencil. It’s easiest to start at one end and work your way across the design to avoid bubbles and creases in the transfer tape. Use the scraper tool to smooth out any bumps and to adhere the transfer tape to the vinyl stencil.
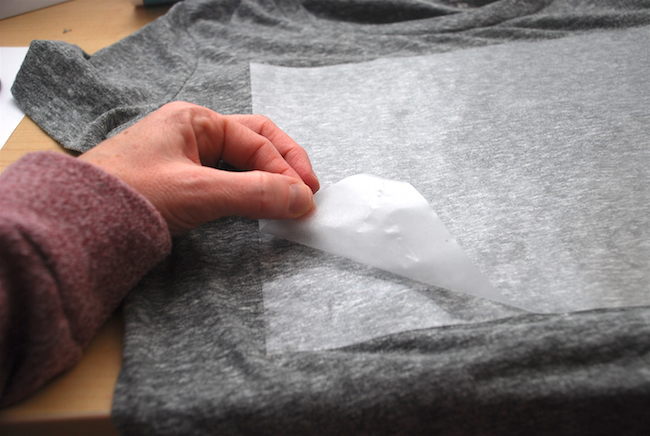
Then carefully peel off the transfer tape from the mat—the vinyl stencil will come off along with the transfer tape.
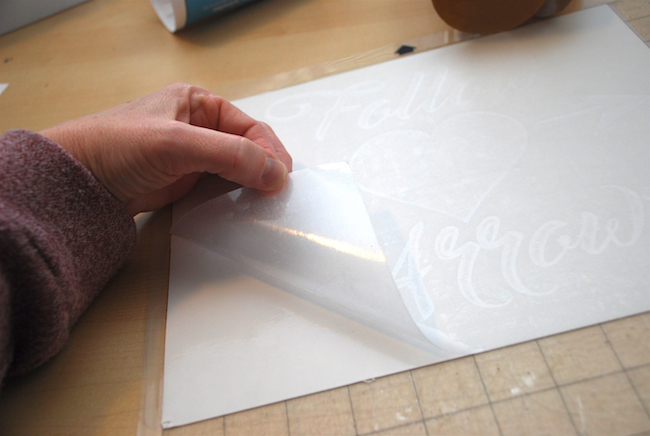
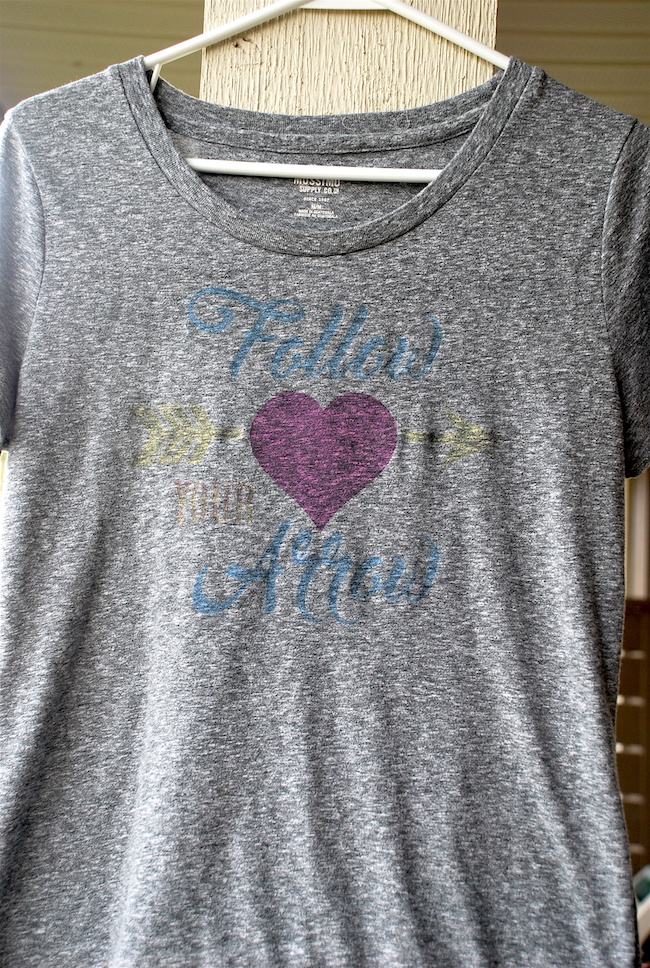
Adhere your vinyl design to the center of your material—I used a light grey T-shirt.
Use the scraper tool to gently rub the stencil to the fabric.
Then carefully remove the transfer tape, and you’re left with just the stencil on your T-shirt.
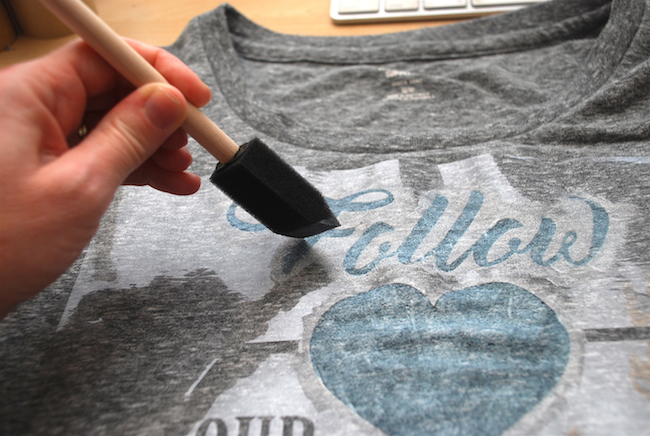
STEP THREE: PAINT YOUR DESIGN
You are now ready to paint!
I used a foam brush to paint on the 3 colors.
TIP: I placed a piece of cardboard on the inside of the shirt so that the paint didn’t seep through to the backside of the shirt. This also gave a bit more stability when painting.
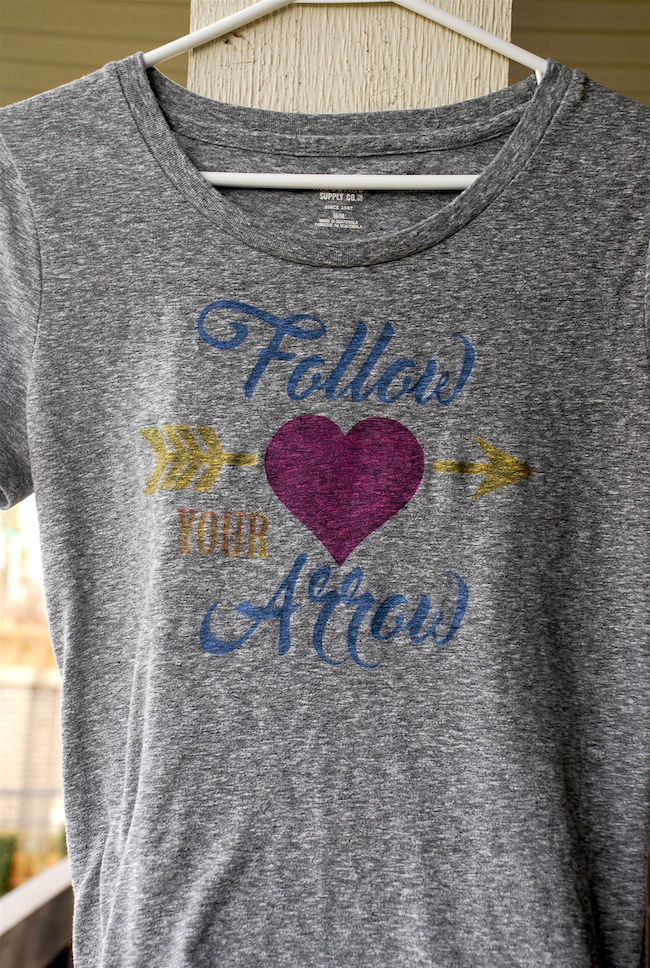
When you’re finished painting you won’t notice any color, especially once it dries. Here’s a look at just after I finished painting the entire piece. It looks blue, but it doesn’t stay that way when you’re outside.
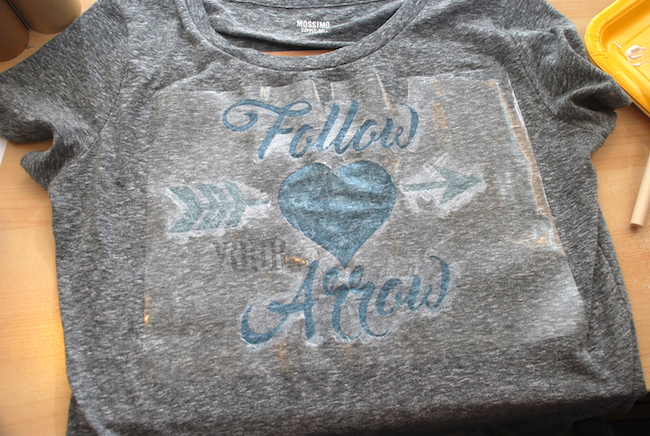
After the paint has dried completely, lightly iron your design to set the ink.
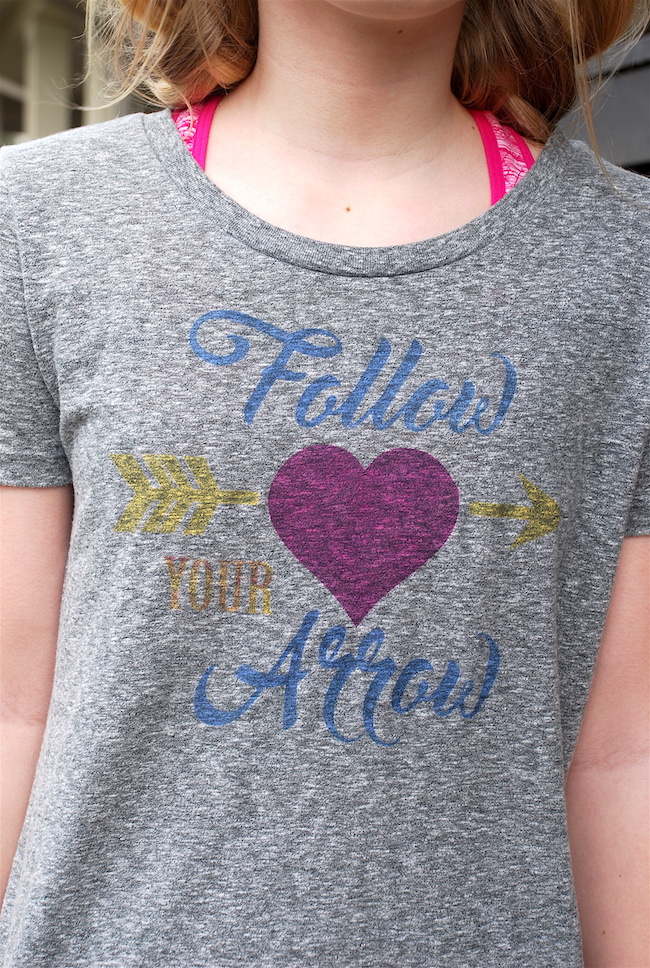
Now the fun part! Once you go outside, the sunlight will immediately bring those painted colors to life!

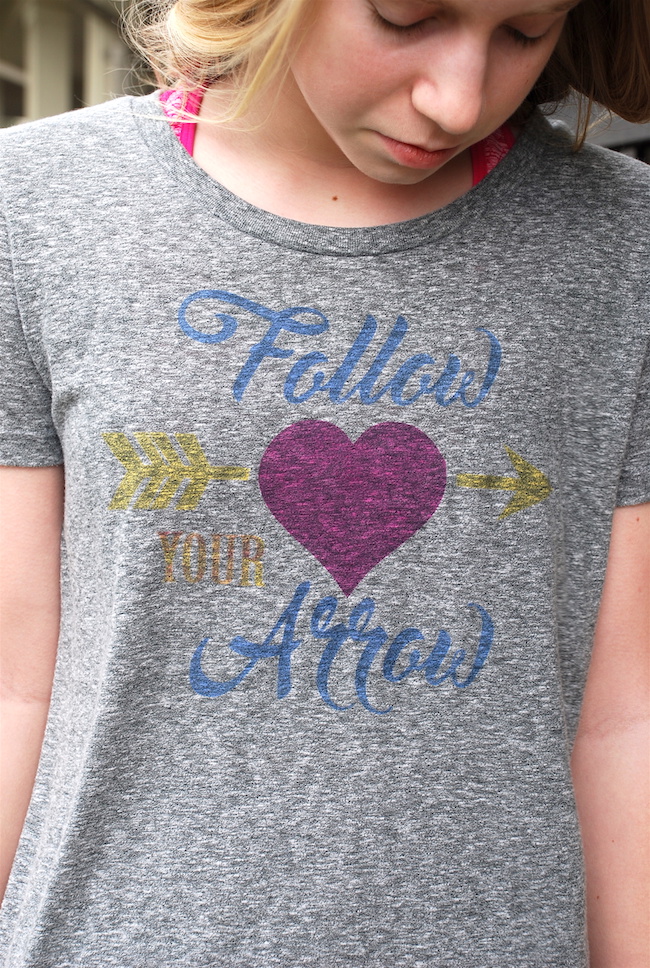
I took pictures of 3 stages.
- Just put outside . . .

2. After a few seconds . . .
3. After approximately ten seconds—it happens fast!
We’ve had such rainy weather the past few weeks that I haven’t had a chance to snap a picture of it. So today when the sun began to poke through the clouds, I asked my daughter to put on the shirt so that I could quickly snap a few pictures. I’m thrilled with how it turned out!
I hope that you try out these fun fabric inks and have as much fun wearing your new garment as you will have creating it! In what other ways do you want to try out UV light–sensitive fabric ink?
Nasze Naturalne
September 3, 2025
Your authentic voice really shines through in everything you create and share
Naszenaturalne
September 2, 2025
Really love your style
Kelly Wayment
June 28, 2024
You can use it with vinyl as long as it is smooth and flat to allow the static charge to hold on to it. Rolled vinyl that wants to go back to its rolled shape will not necessarily work well, and it would need to be trimmed to fit the ES mat cutting area.
Kelly Wayment
June 28, 2024
Yes, you can use the heat pen while using the ES mat. 🙂
Yurii
March 2, 2024
Hello. May it be used with heat pen?
Thanks
Jerome
February 24, 2024
Hi, works this with the normal vinyl foils or only with printer papter etc?