One of the coolest pieces of technology when it comes to Silhouette has to be PixScan™. Have you ever had a photo of someone or something you found in a magazine that you wanted cut out perfectly, but didn’t trust you and your scissors to get it right? Well now you can have your CAMEO do it for you using PixScan™ technology! Simply take a photo of what you want cut out, upload it, and Silhouette will do the rest!
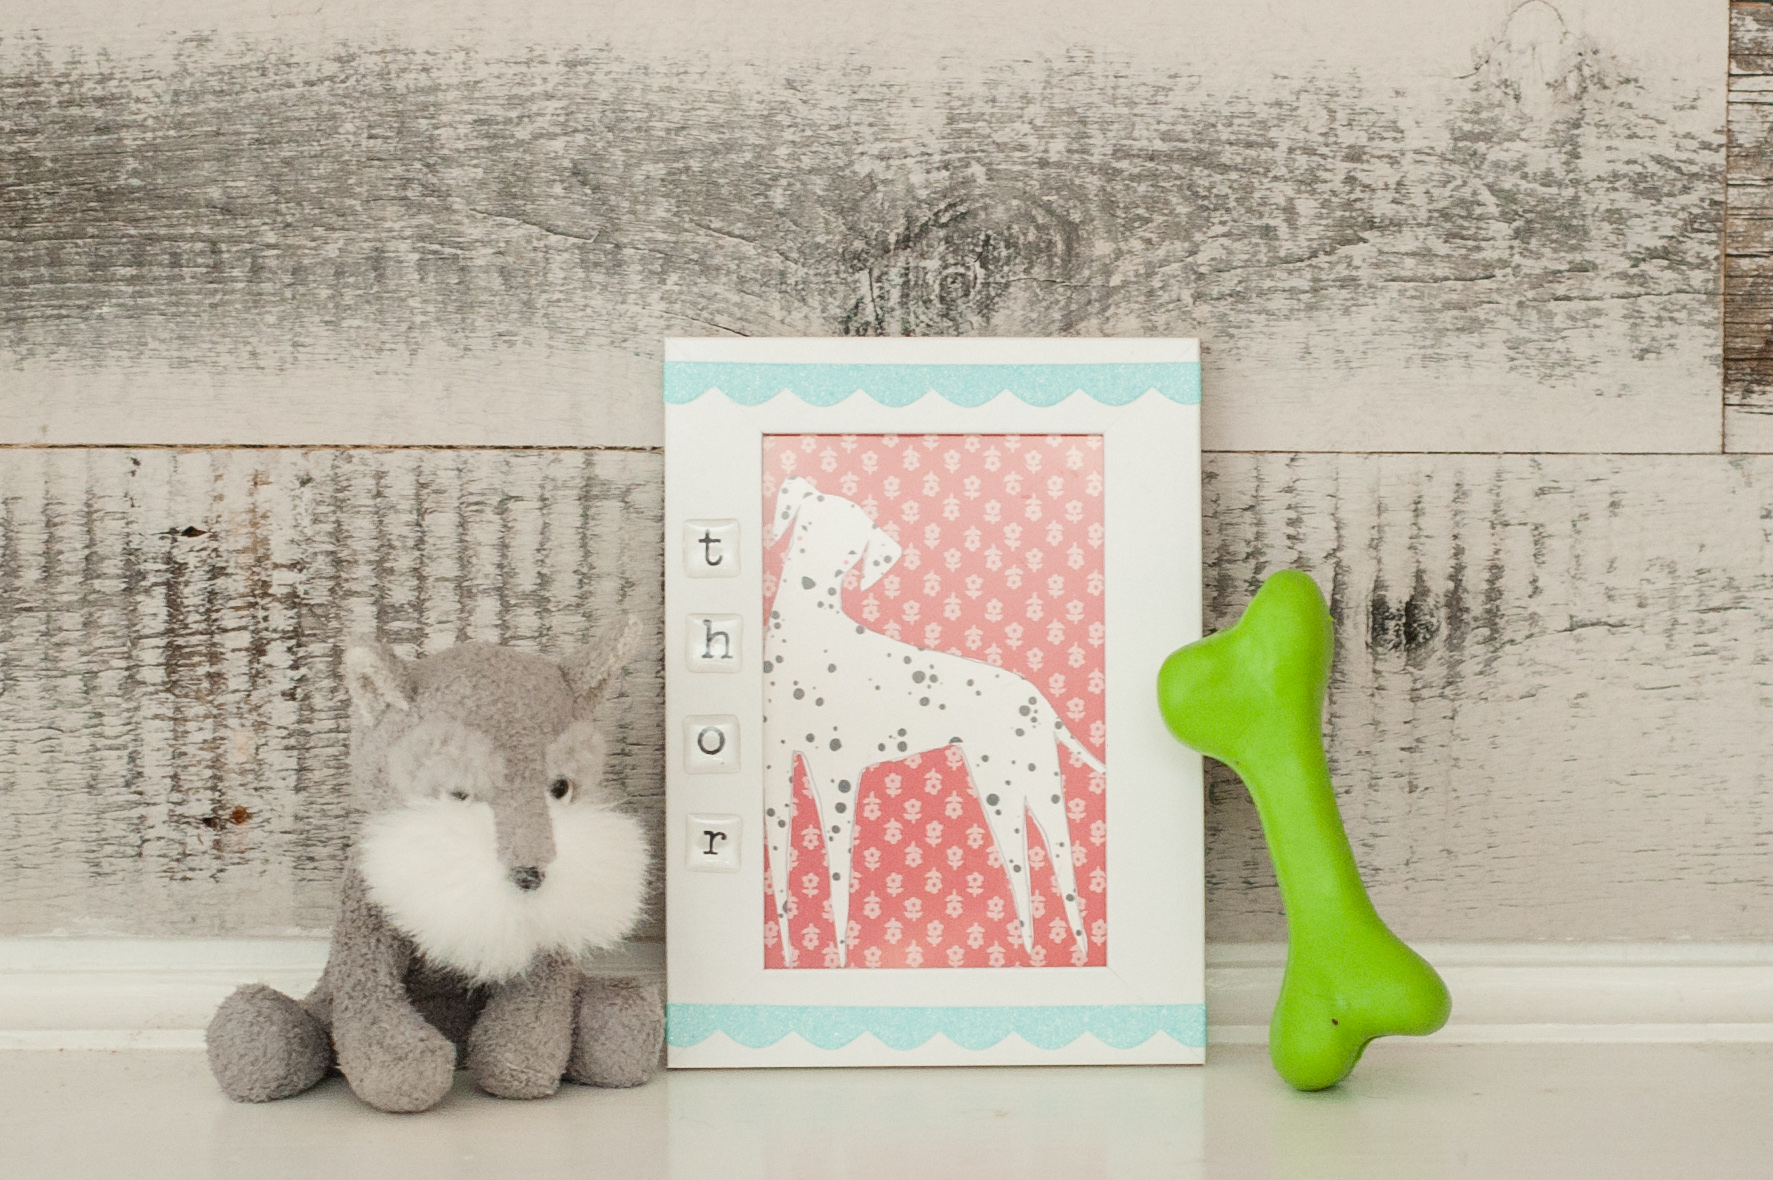
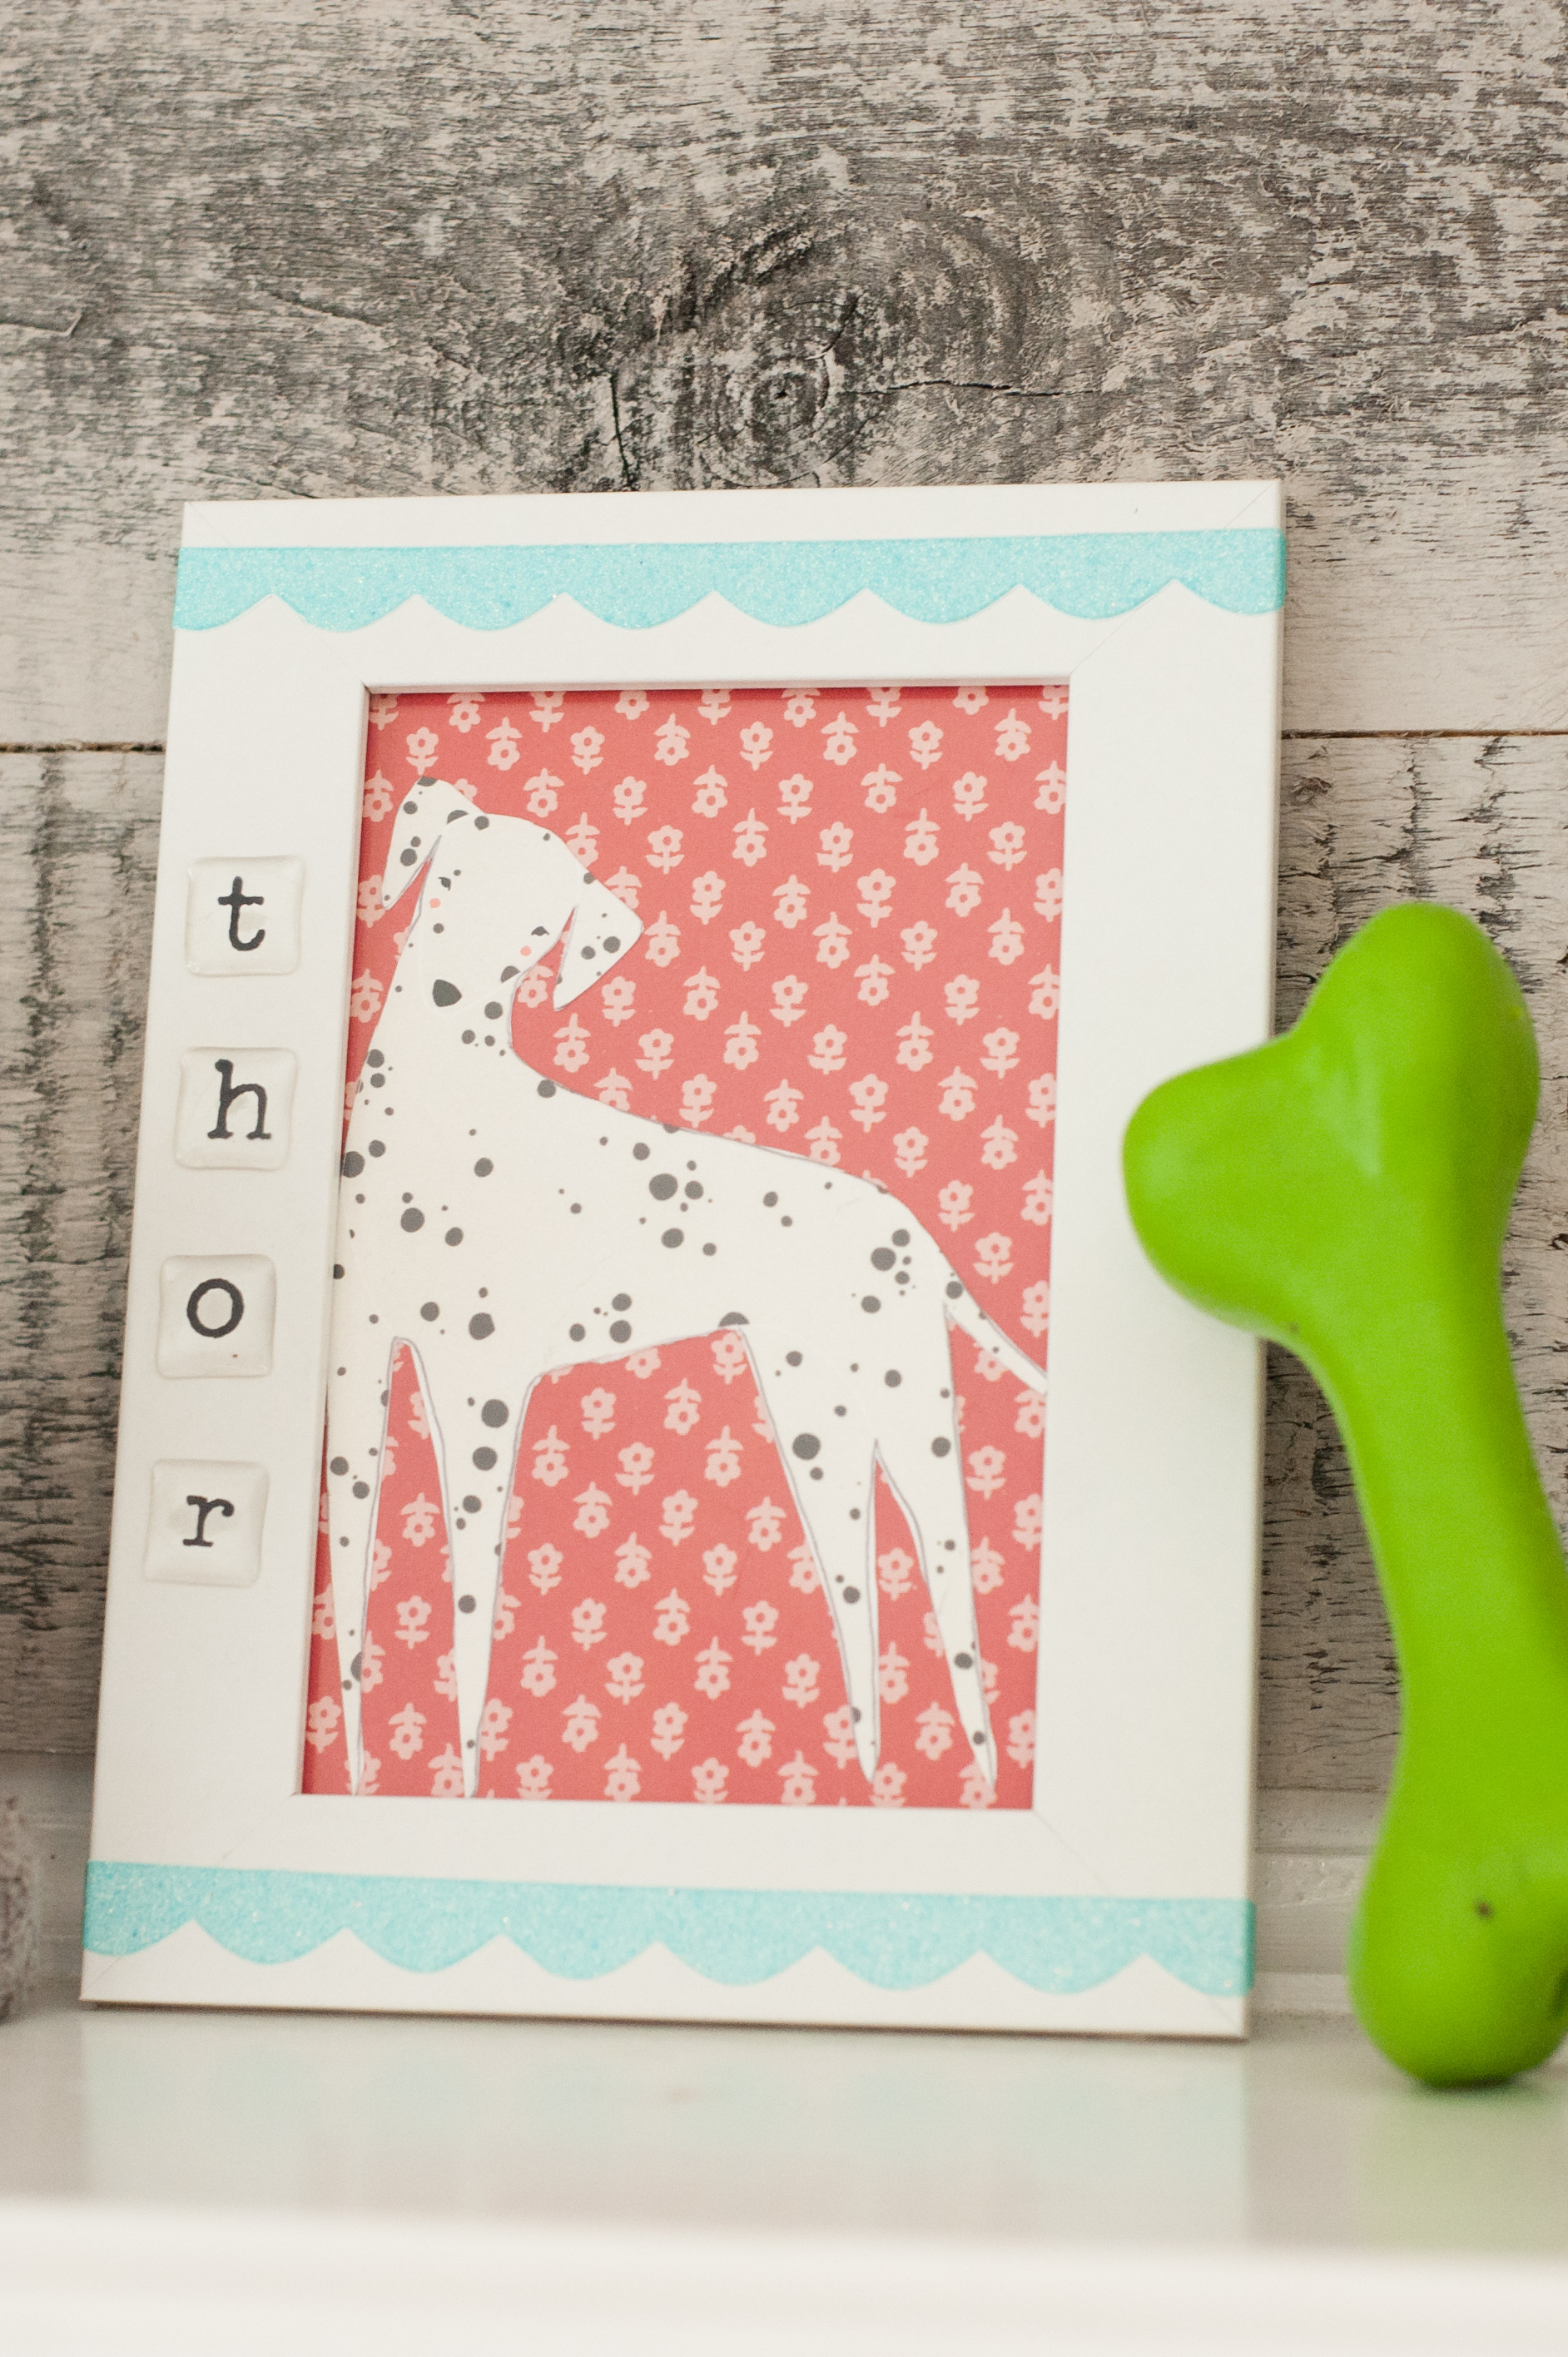
I found a super adorable greeting card with a Great Dane on it that looks exactly like my sister’s dog. I thought it would be fun to make some adorable framed art to give to her as a gift!
Here’s what you’ll need:
- PixScan™ Mat
- Cell phone (or camera)
- Printer
- Photo or image you want cut
- Spatula tool
- Frame
- Scrapbook paper and stickers
Step 1
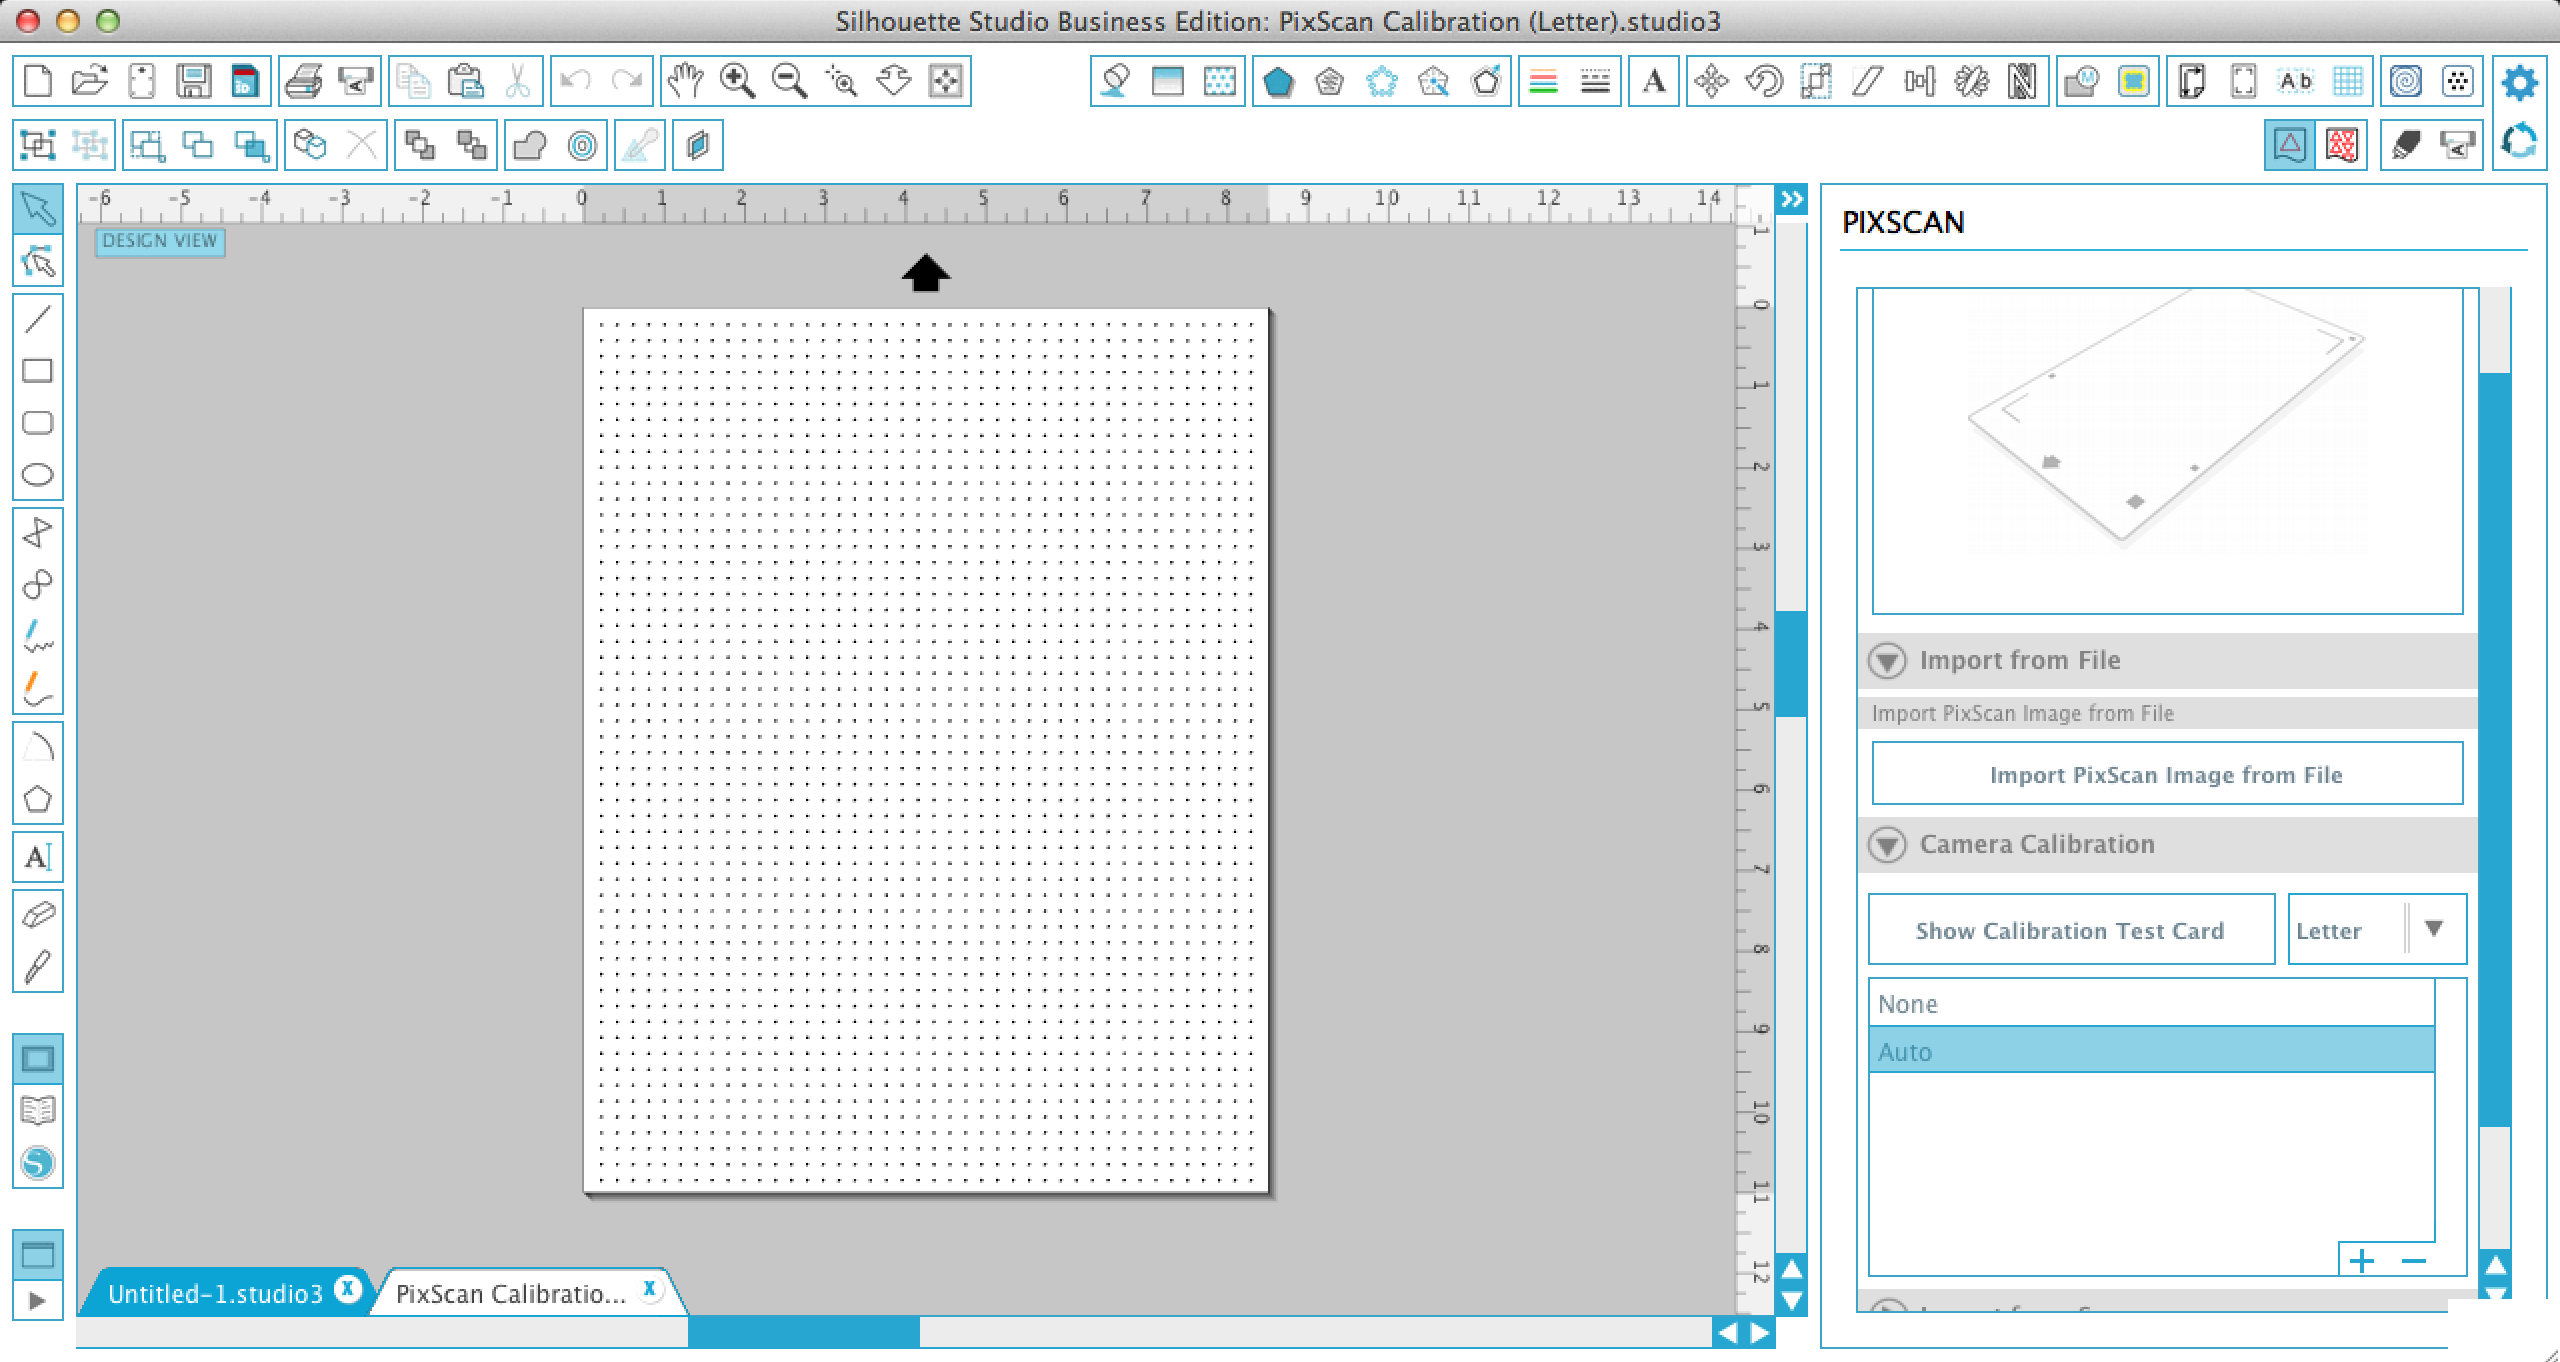
When using PixScan™ technology, the first step is to calibrate the camera you’ll be using. This can be done using your cell phone or any digital camera – it’s up to you! I found using my phone to be quickest and easiest. To calibrate, begin by opening your Silhouette Studio® Software. Navigate to the PixScan™ menu by clicking the little icon that looks like a PixScan™ mat that is 3rd from the left in the top navigation bar.
Once the software opens the menu, click ‘Import form File’ > ‘Camera Calibration’ > ‘Show Calibration Test Card’. This will bring up an image of a series of dots on your screen. Print this page from your computer using your home printer.
Step 2
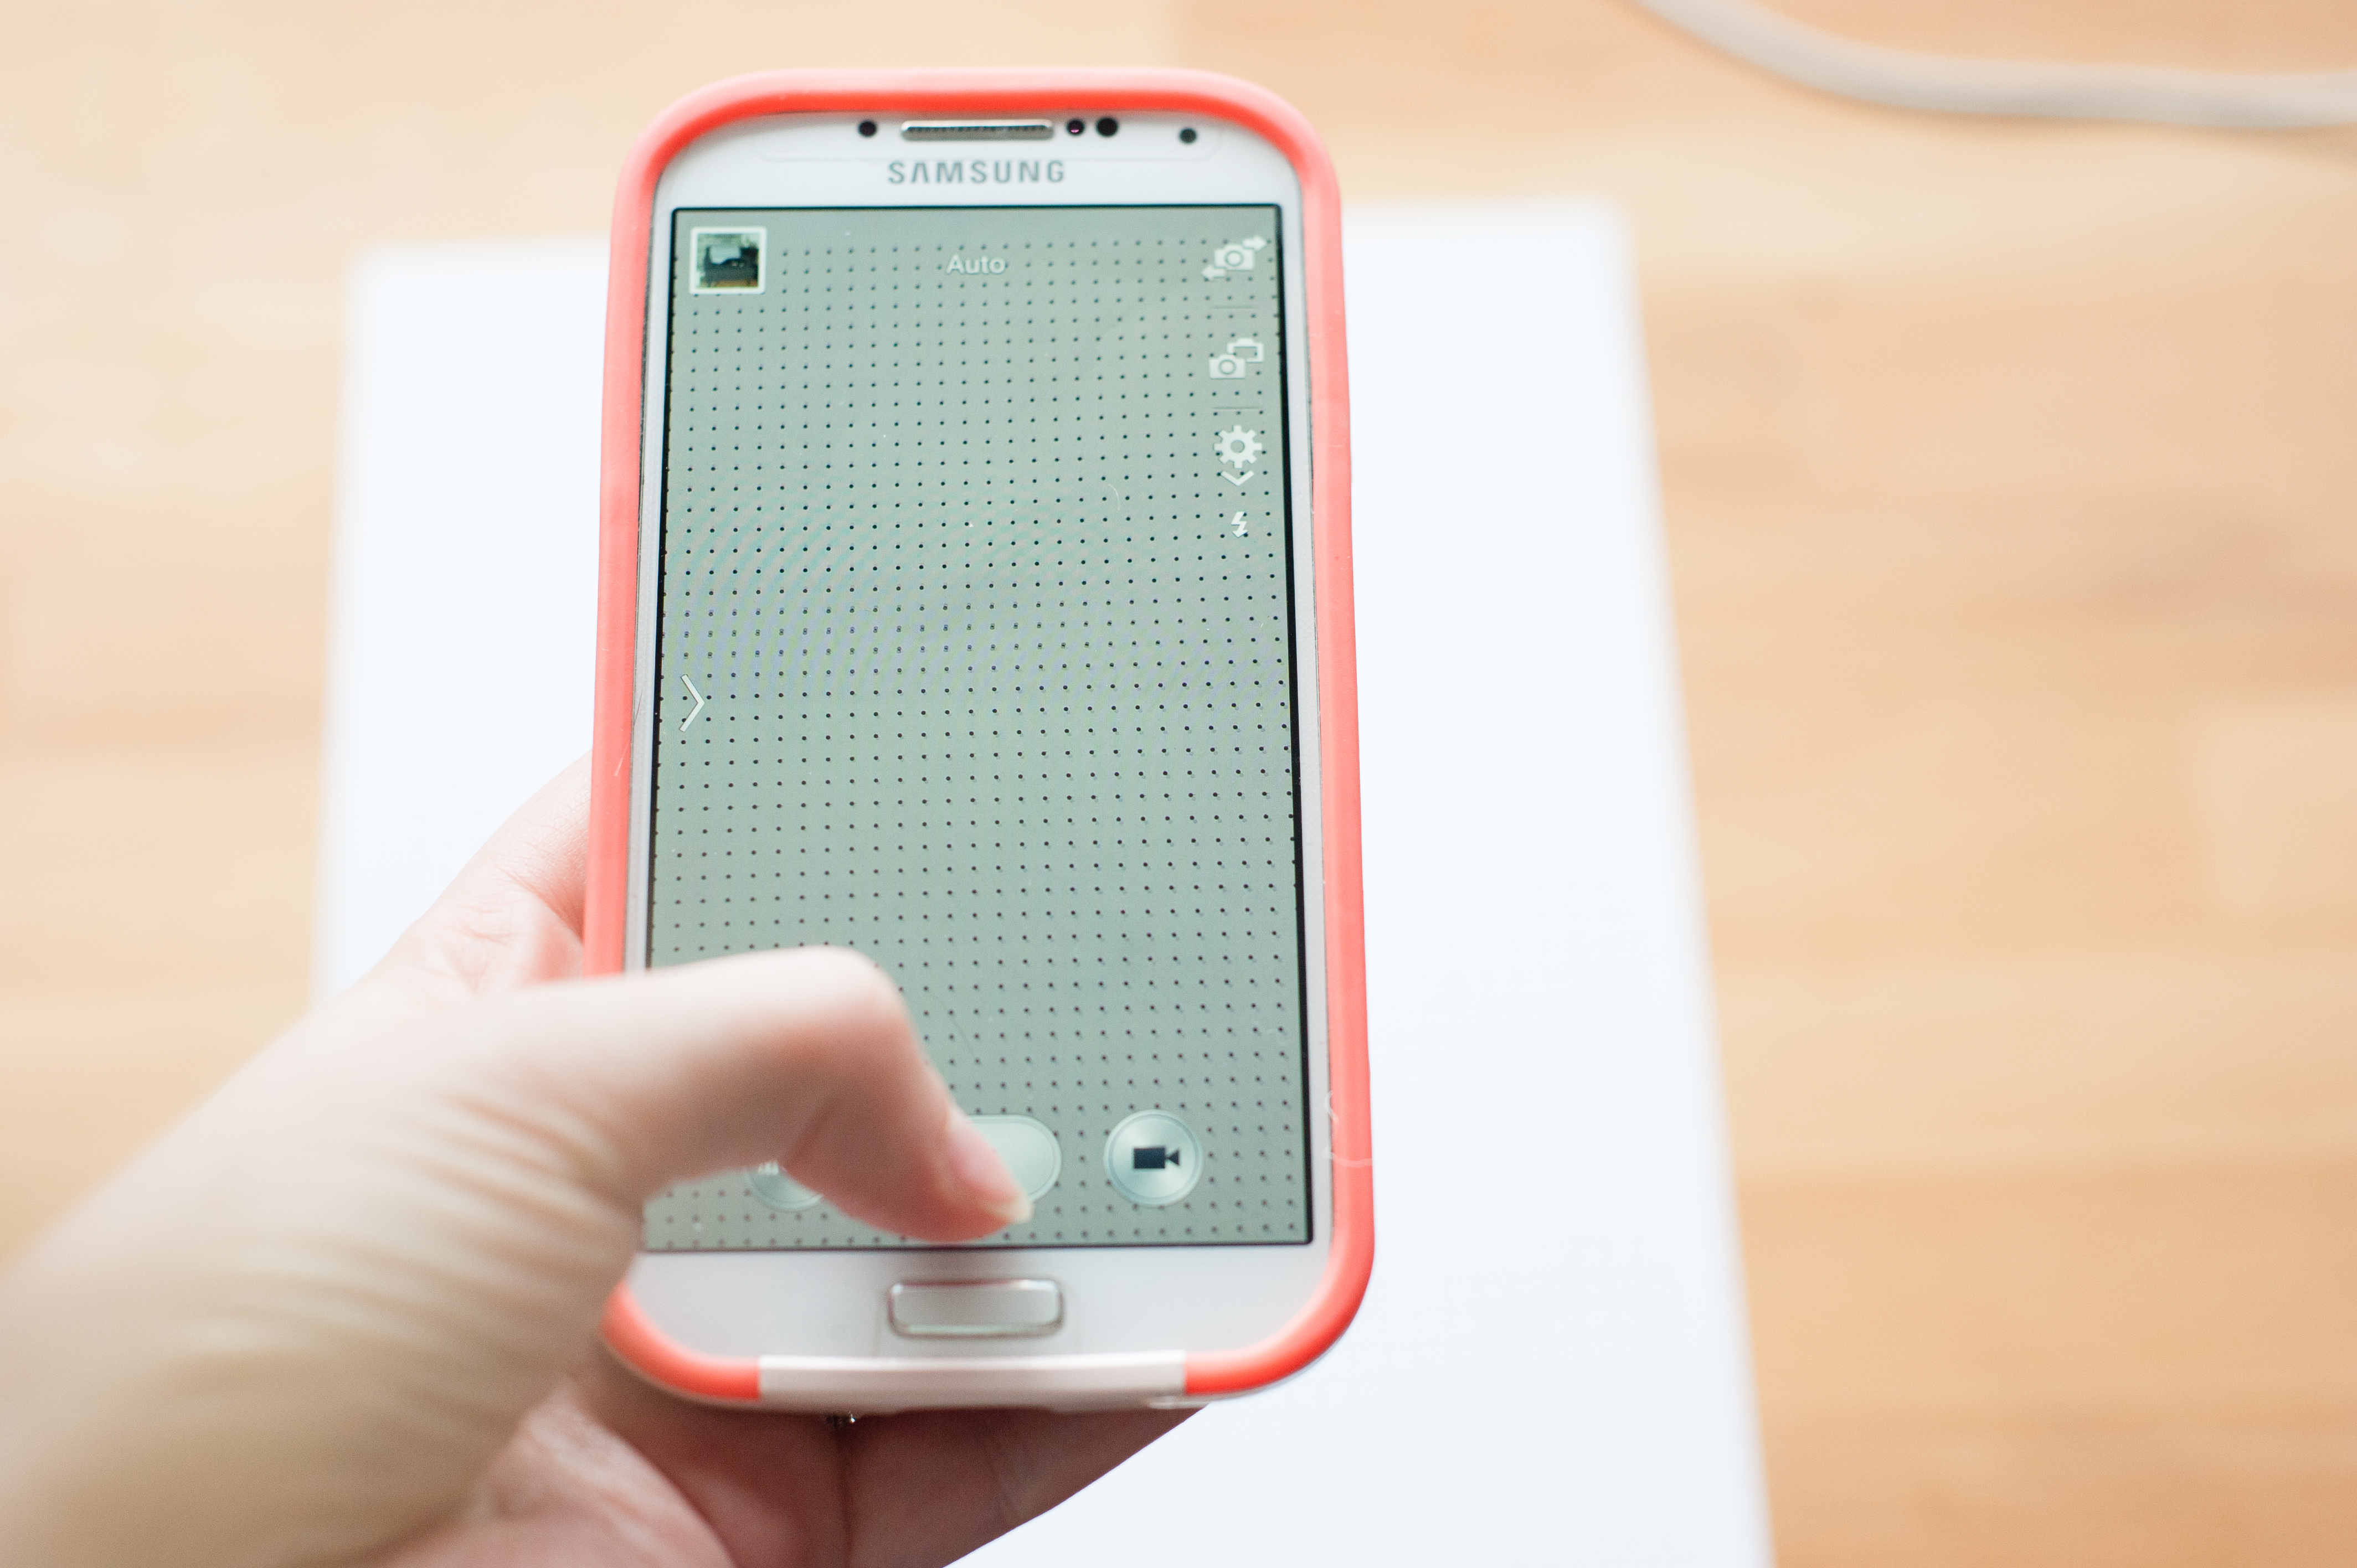
Take a picture of your printed out calibration test card using your cell phone. Make sure you are in a well lit area with no funky shadows or piercing lights. Take a photo above the test card, getting as of straight on and level photo as you can. You do not need to get all of the dots in the photo, just make sure you get a large amount of them and that they are relatively straight.
Step 3
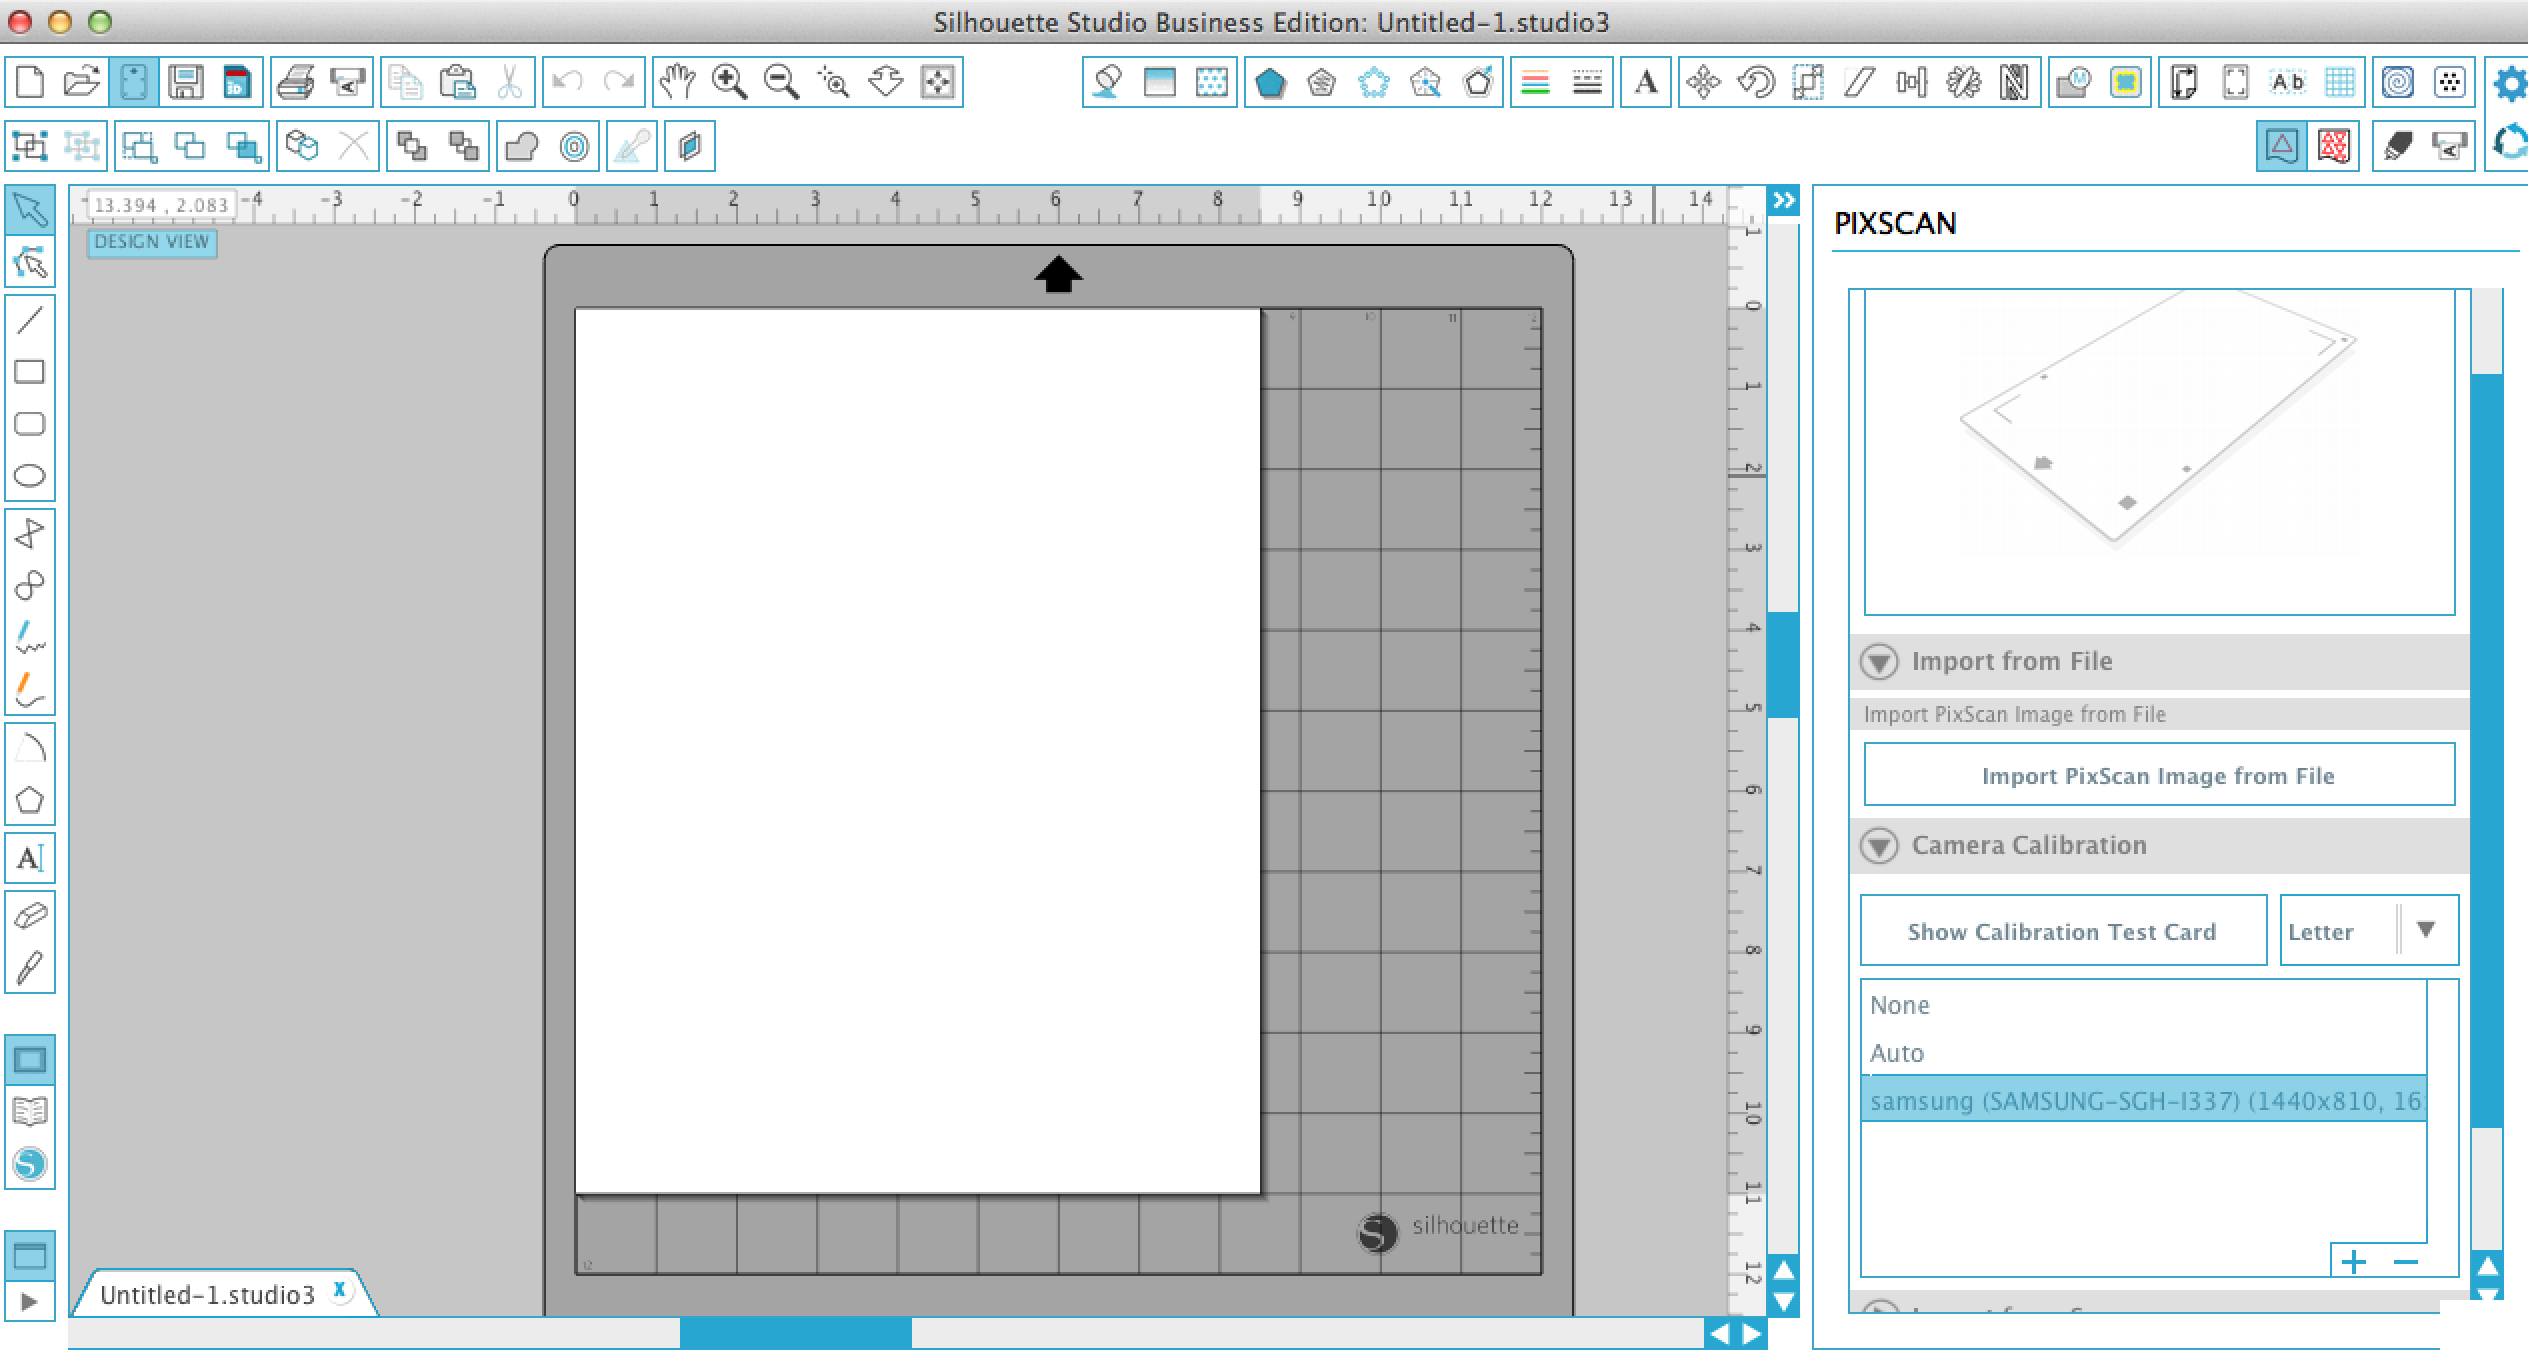
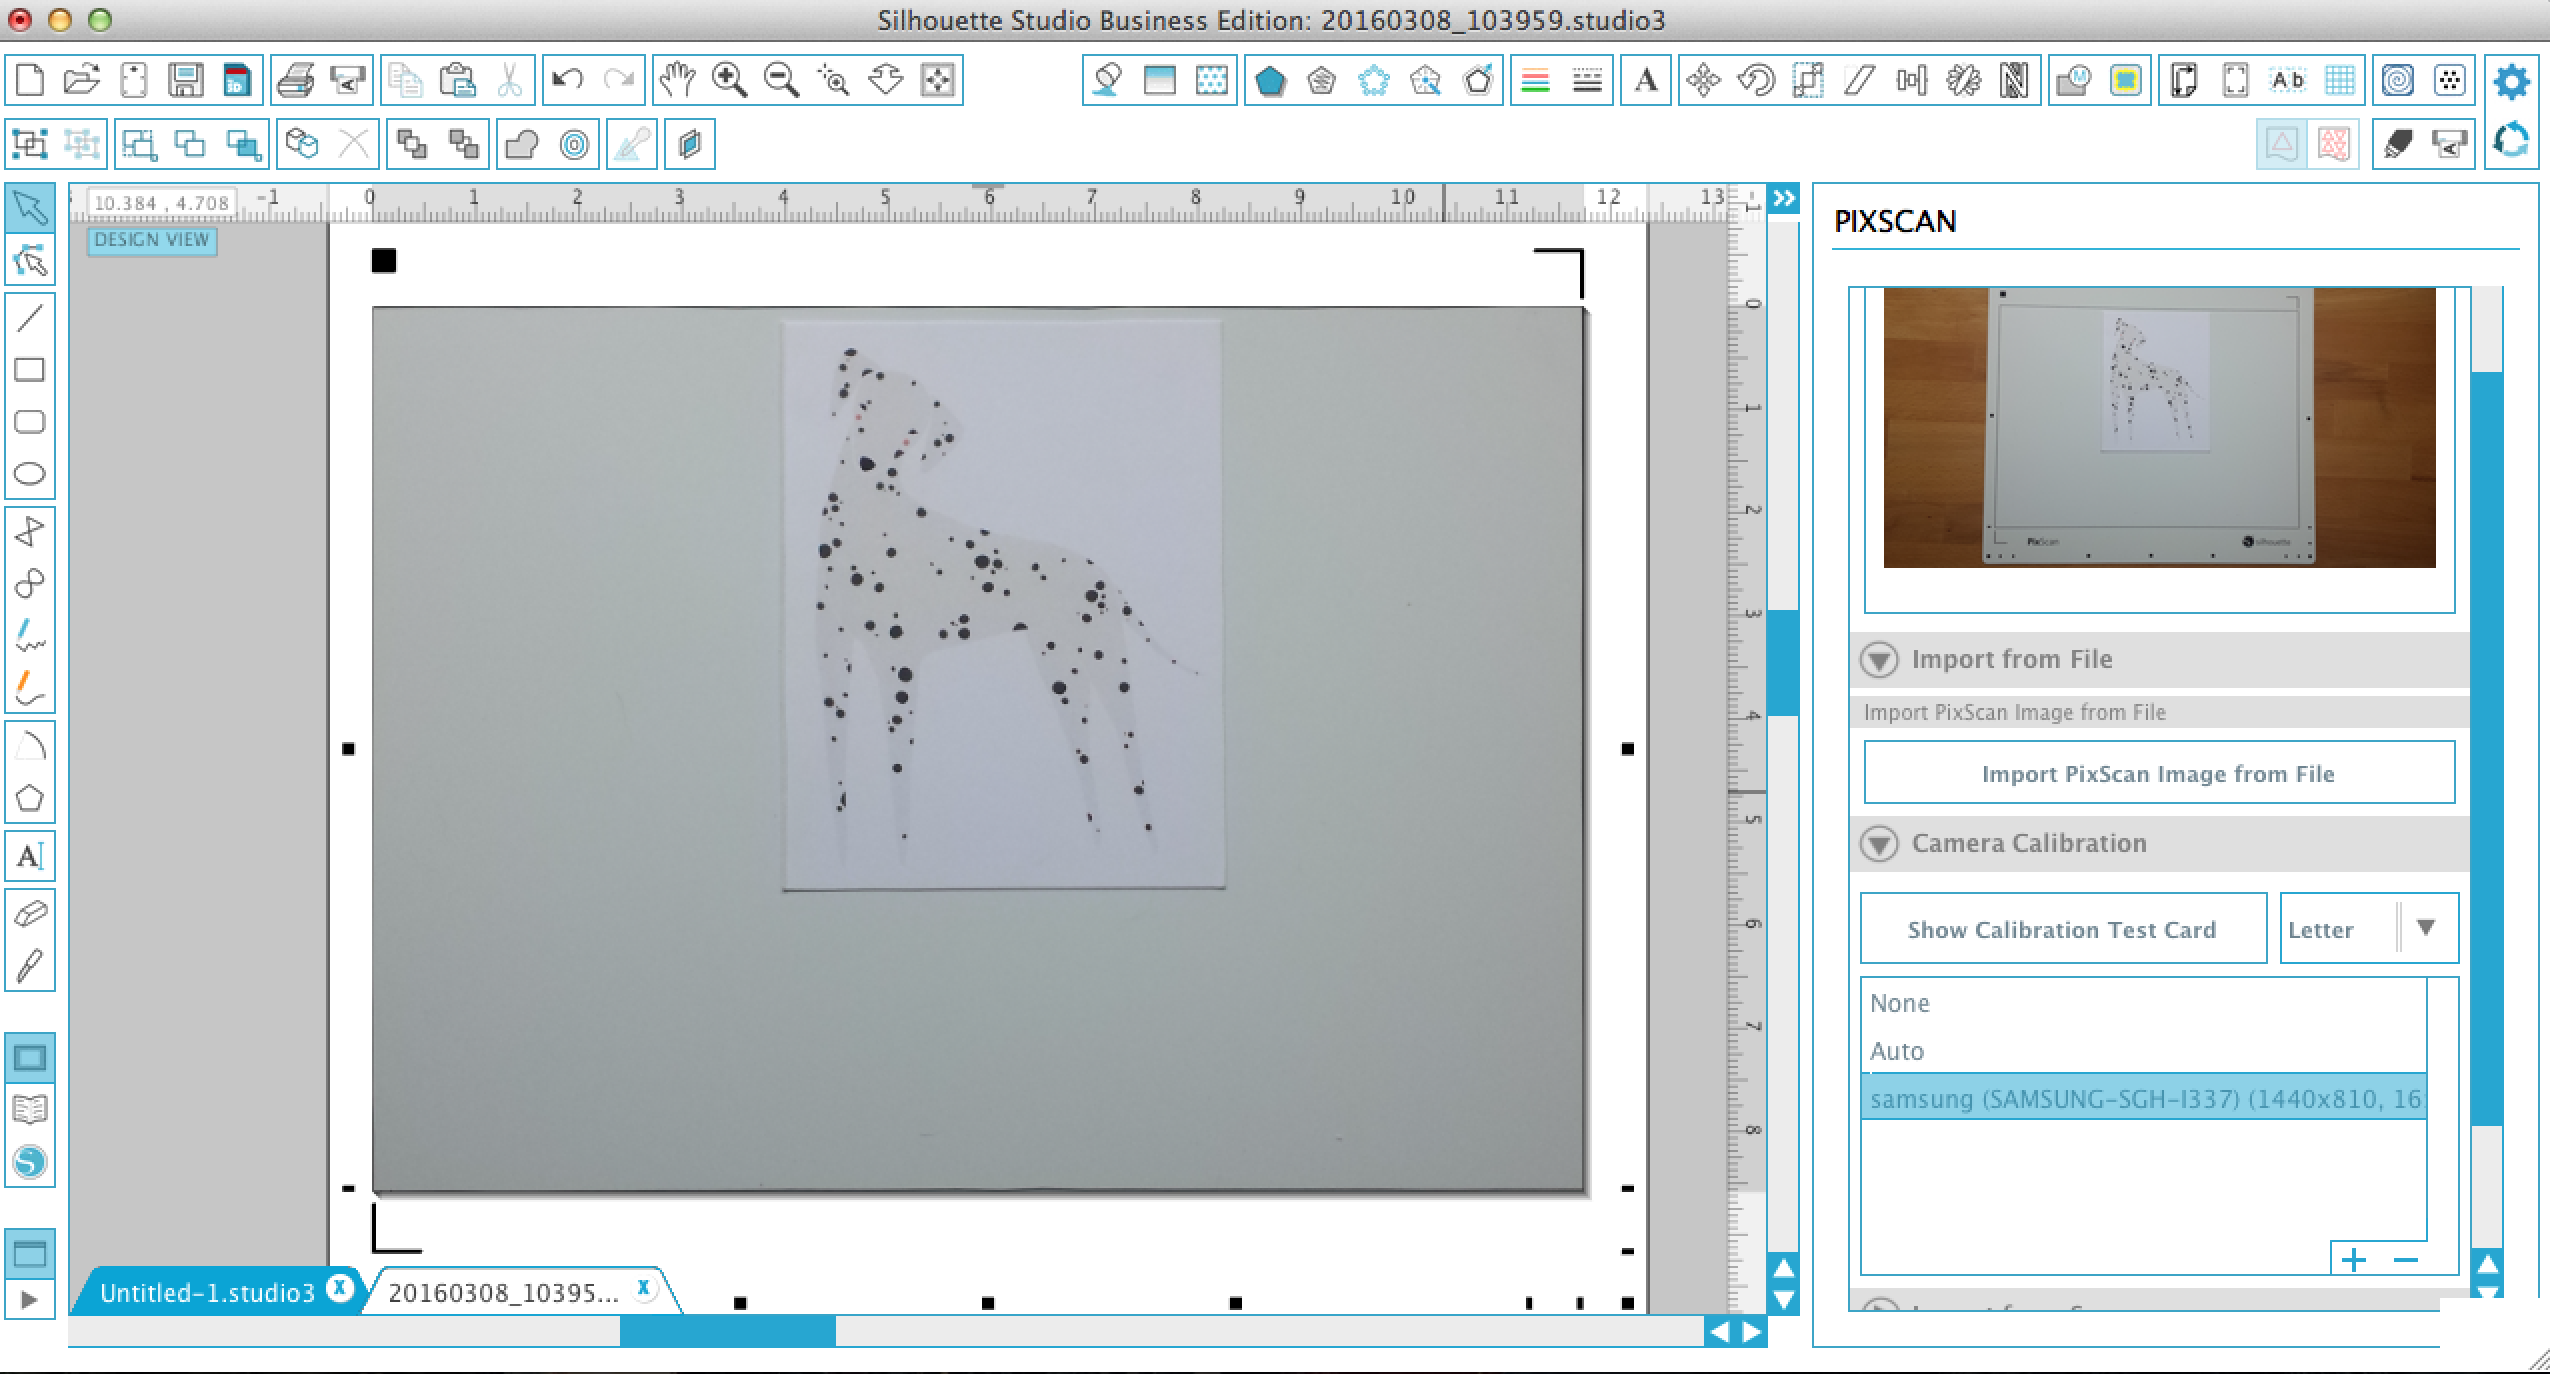
Send this photo to your computer (via email or the cloud, etc). And save it to your desktop. Back in your Silhouette Studio® software, click the little + icon in the PixScan™ menu under ‘Camera Calibration’ and upload the photo you took from your phone. It should load fairly quickly and will know what kind of device you are using. As you can see in the photo below, the software automatically detects that I am using a Samsung phone. Awesome, huh? Your camera is now calibrated!
Step 4
Place the photo or image you want cut out (in my case it’s a Great Dane that I found on the front of a greeting card) and place it on your PixScan™ mat – exact positioning doesn’t matter! Press down so your image is stuck securely to the mat.
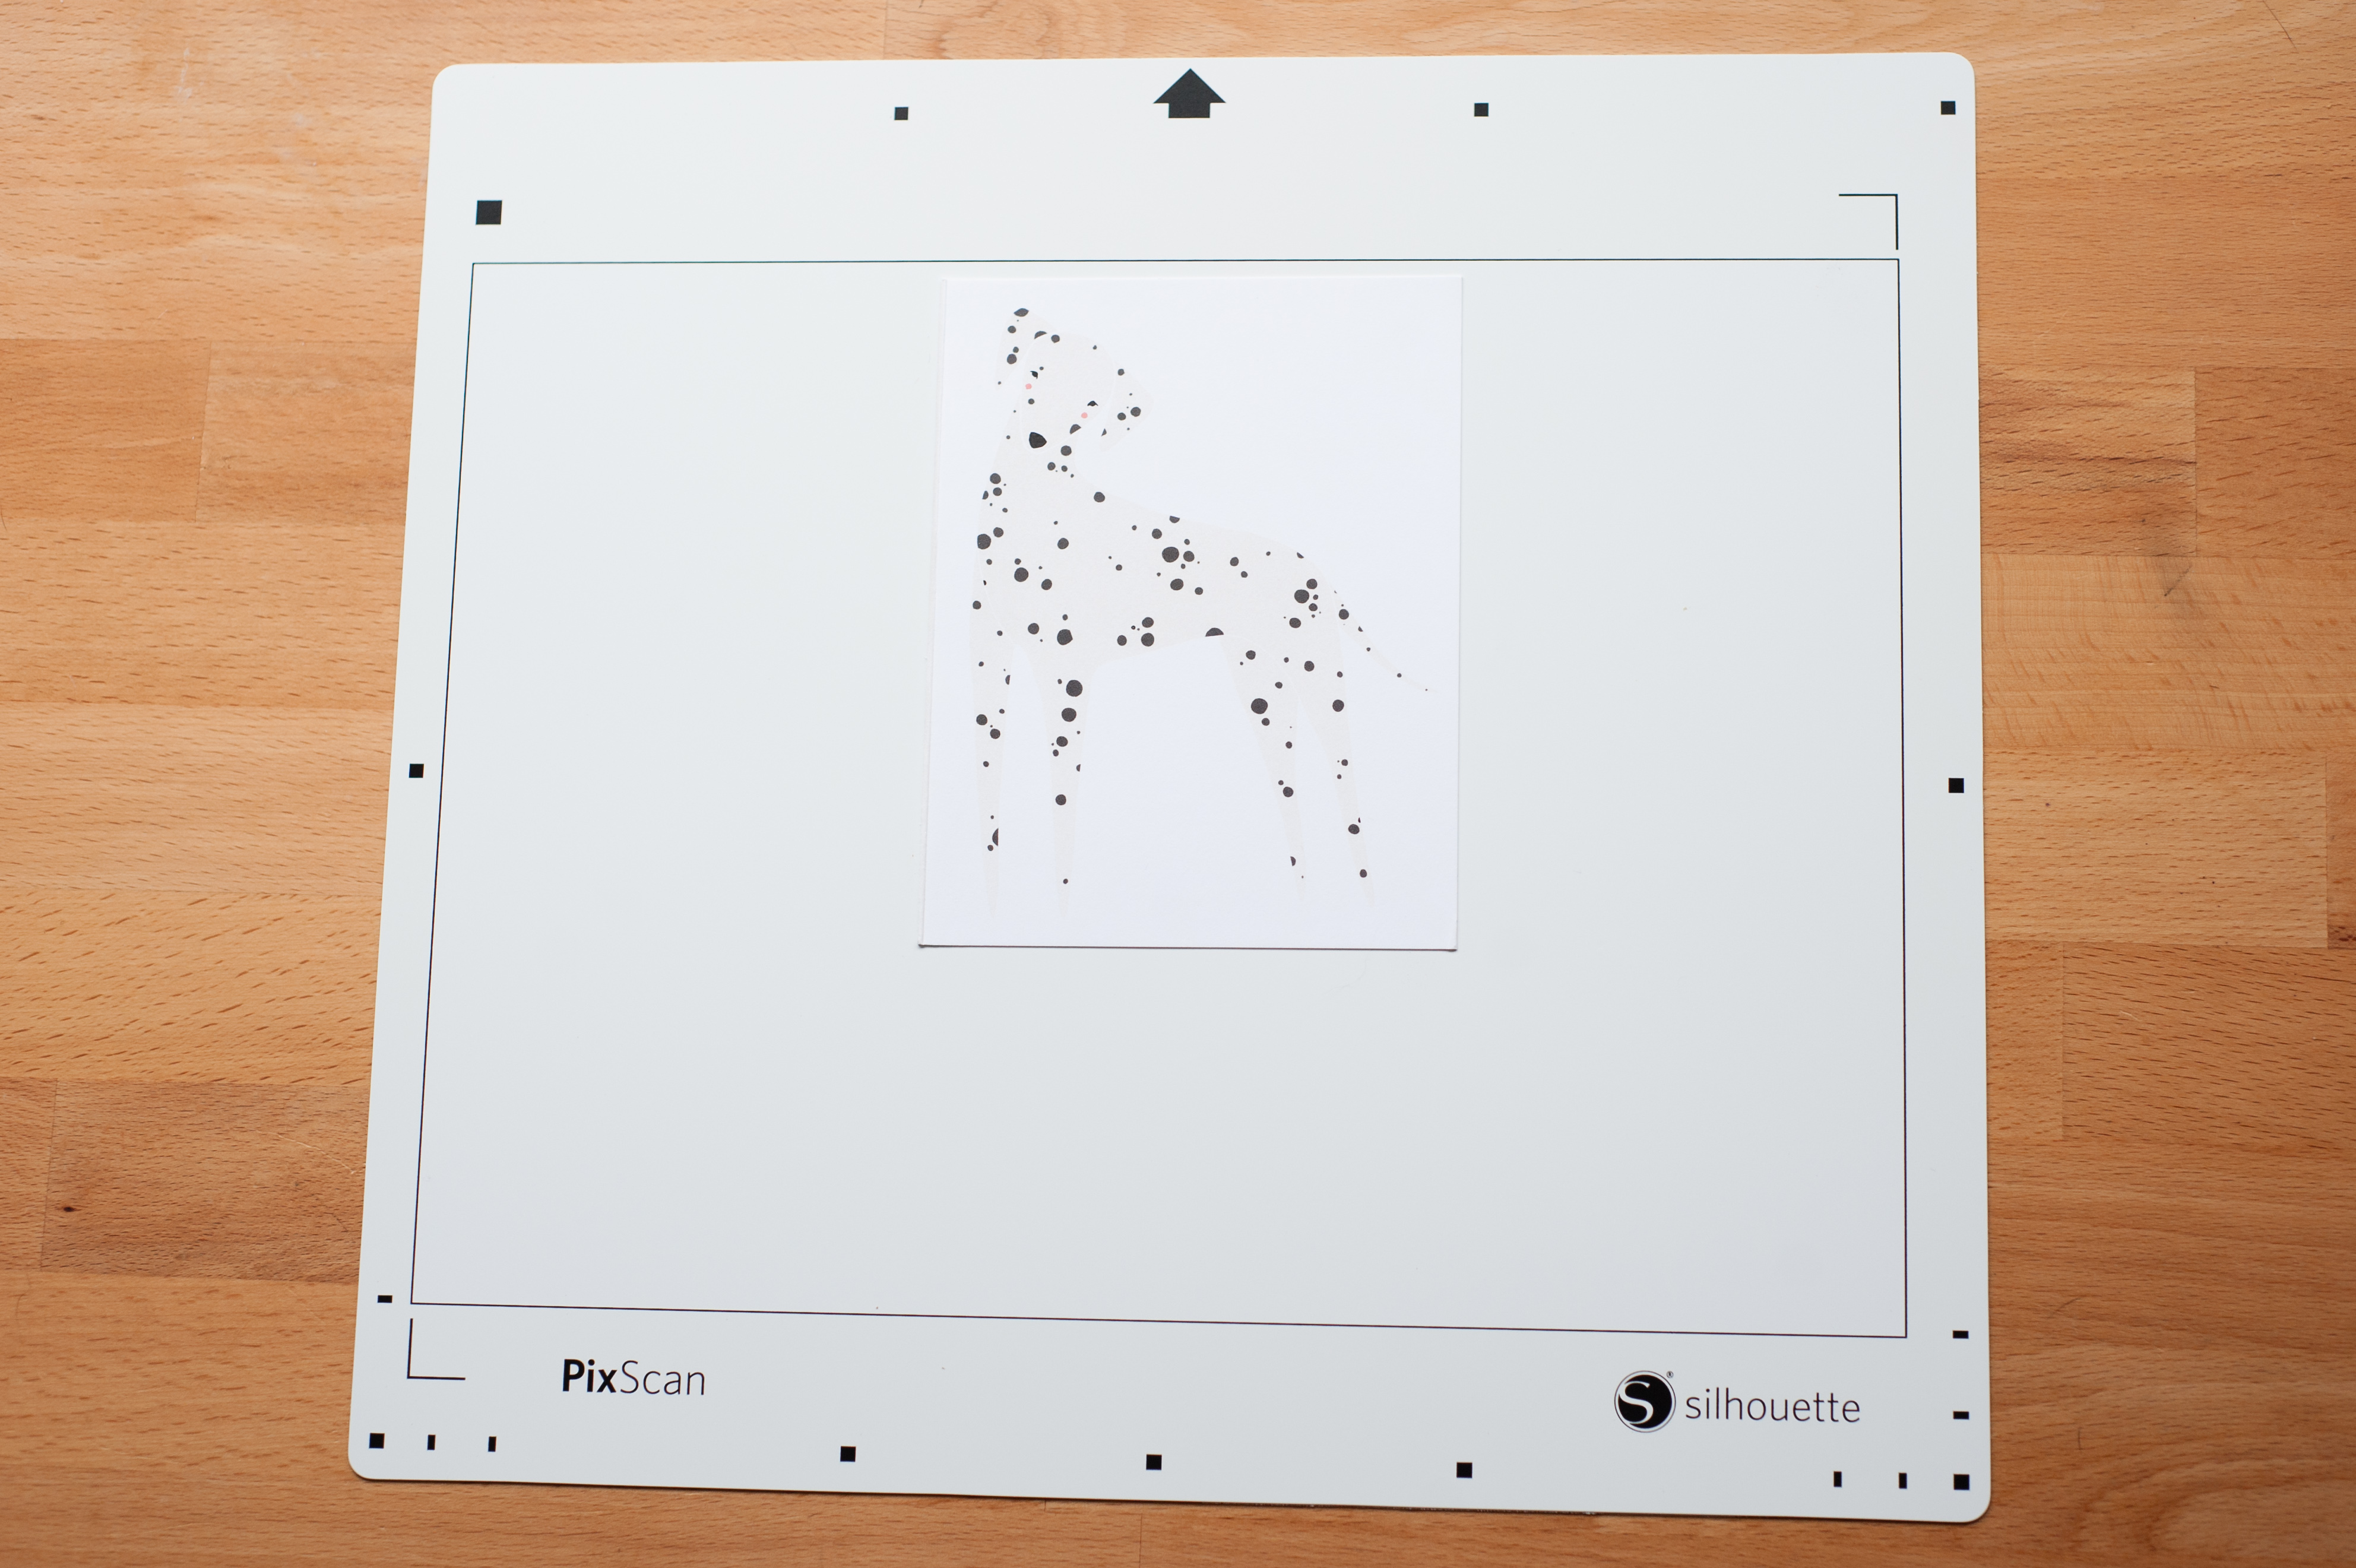
Now, using the camera or cell phone that you calibrated earlier, take a photo of your PixScan™ mat, making sure you get the entire mat in the frame. It doesn’t matter if you took the calibration test card photo vertically and the PixScan™ mat photo horizontally – the software will still be able to recognize it, so use whatever orientation that will best get the PixScan™ mat in the frame.

Step 5
Send this photo to your computer in the same way that you sent the calibration test card. Download your image. Back in the Studio software, click ‘Import From File’ > ‘Import PixScan Image from File’ and select the photo you just took.

It might take a while to load, but never fear, it will eventually! When it pops up, your image will be exactly as you took it on your cell phone.
Step 6
Now it’s time to trace your image so the CAMEO will know where to cut! Click the little yellow and blue butterfly icon in the top navigation menu to be directed to the Trace Menu. Click ‘Select Trace Area’ and draw a box over your image. Turn off your High Pass filter, and then mess around with the Threshold and Scale sliders until your entire image is outlined and/or filled in with yellow. Since my original picture is in black and white, I opted to just fill it until I could see the outline clearly, however, if your picture is in full bold color, it’s more than okay to use the sliders to fill your entire design until it is yellow. Once you are satisfied with the fill, click ‘Trace Outer Edge’ and you will have a beautiful cuttable outline of your picture!

Step 7
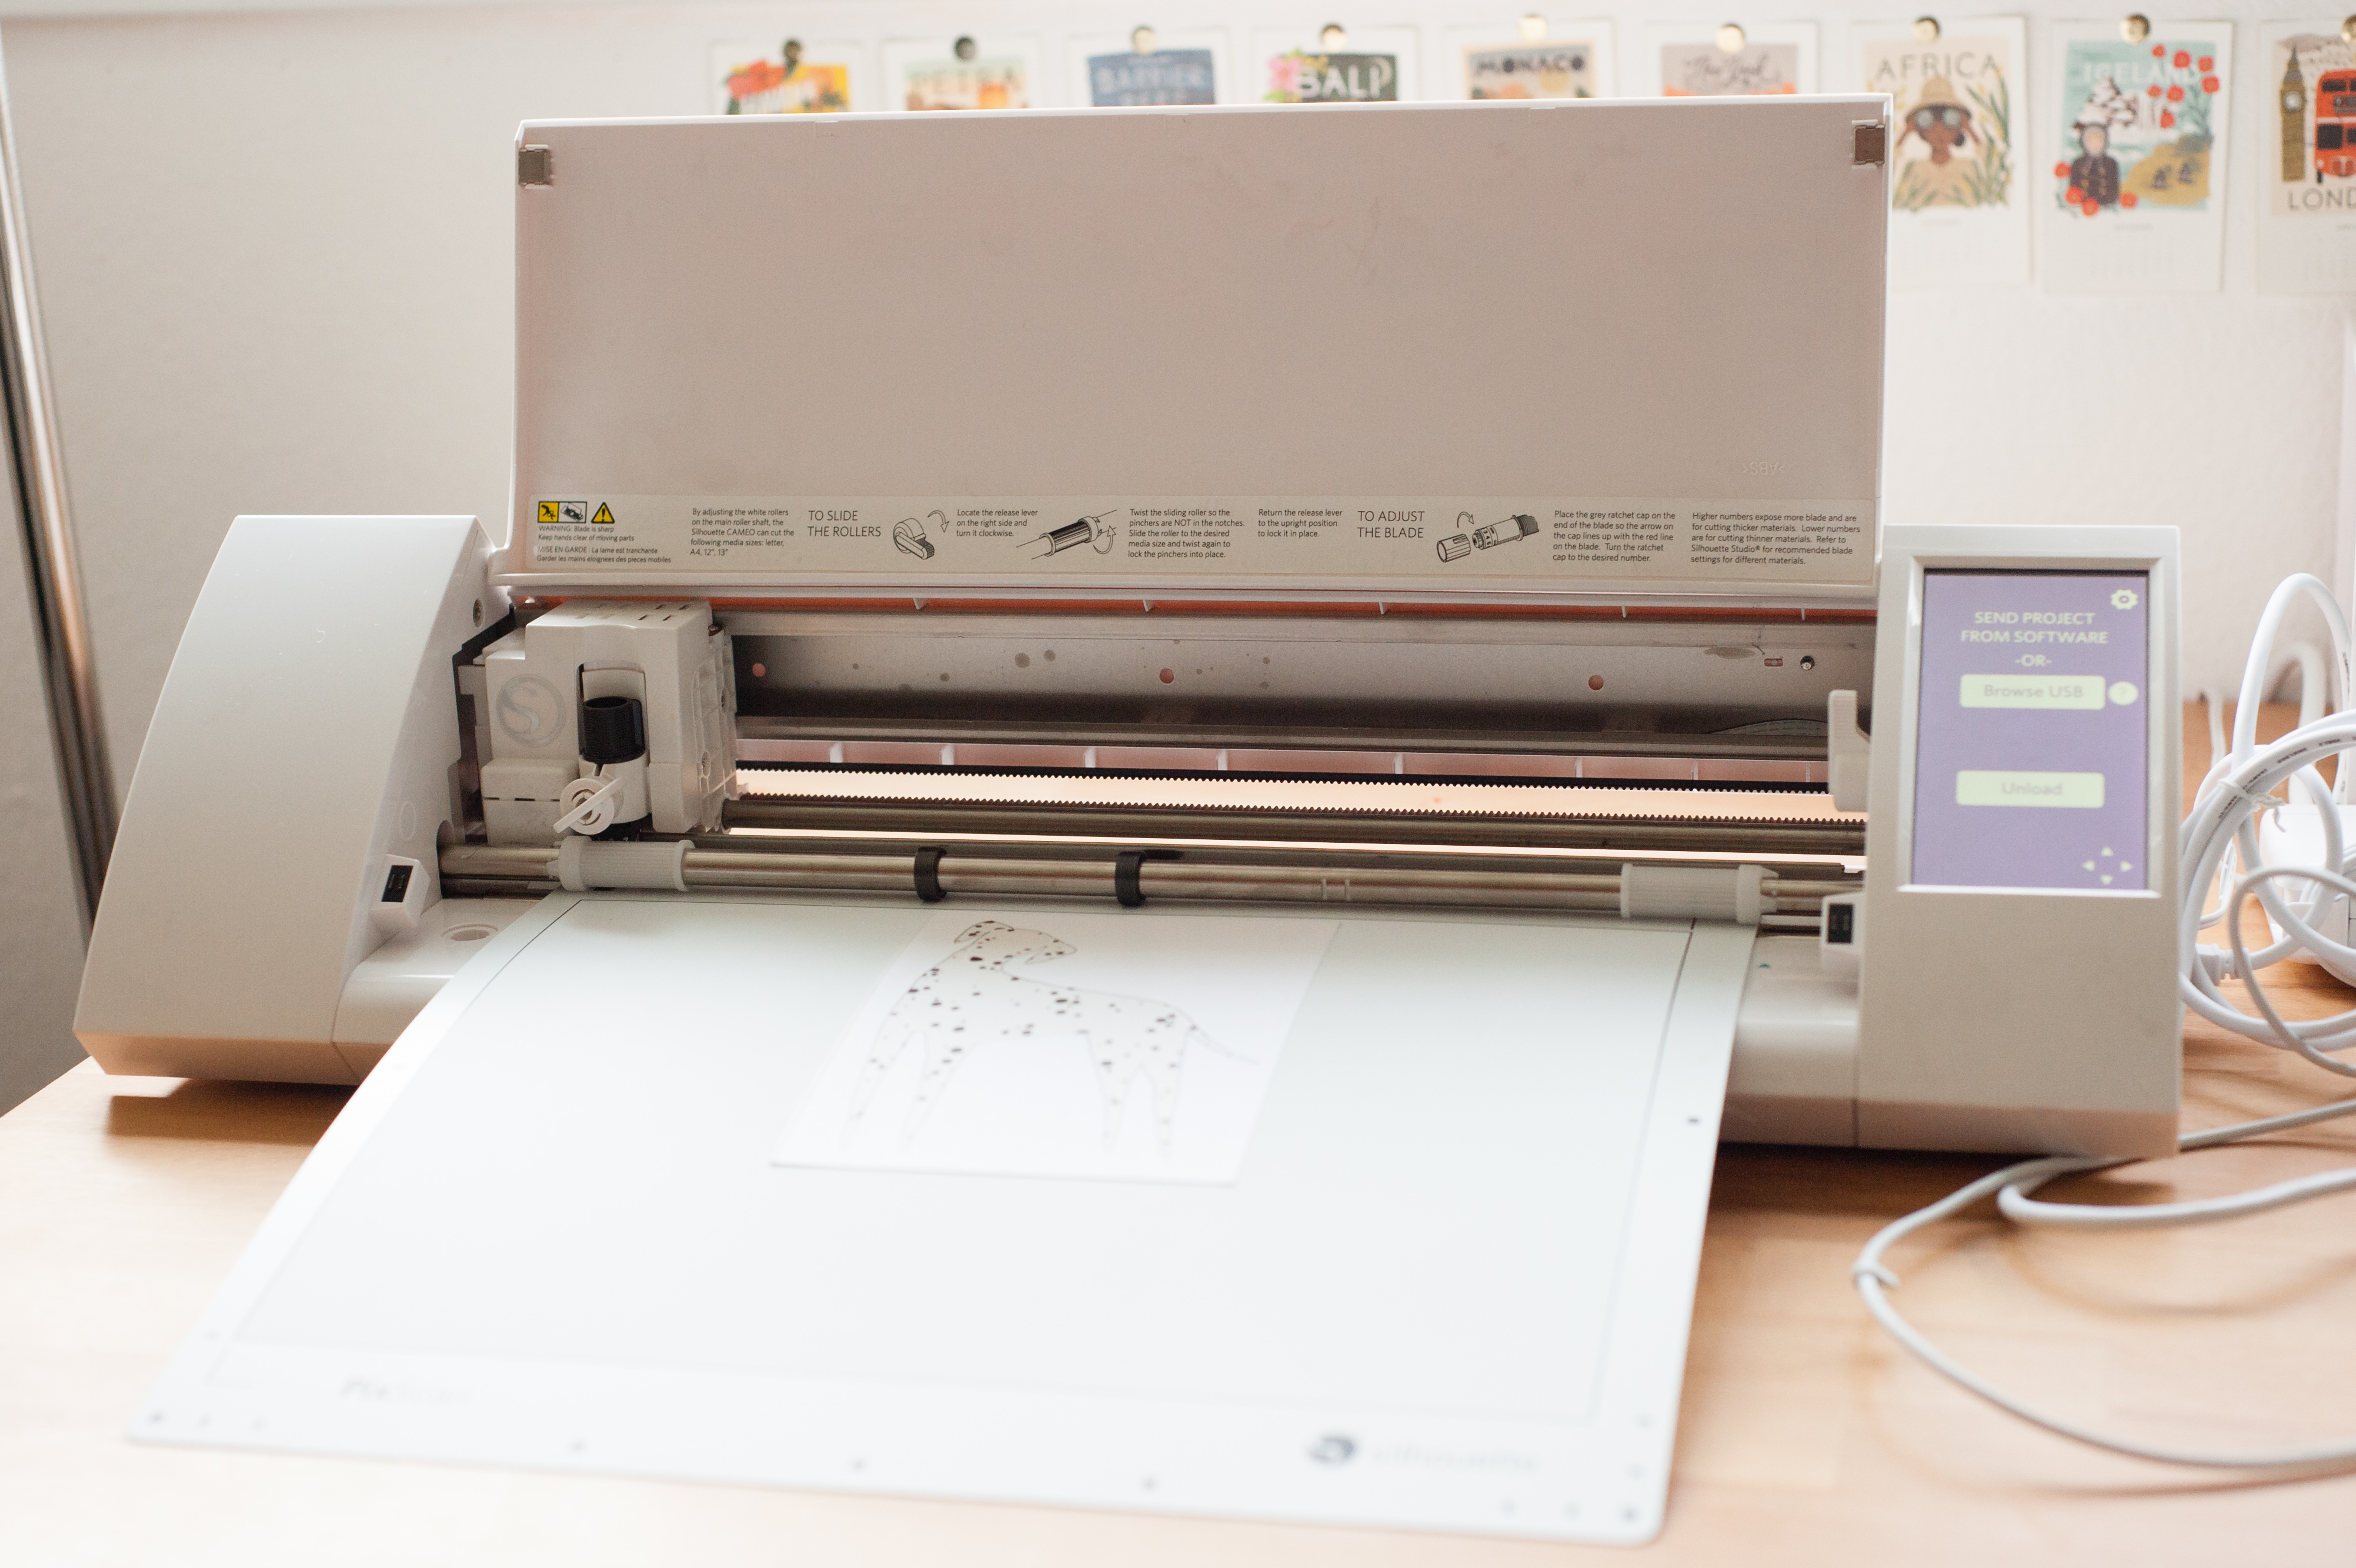
Insert your PixScan™ mat into your CAMEO by feeding the edge of it into the machine and hitting ‘Load Mat’ on the touchscreen. This will automatically feed your PixScan mat through to the proper beginning location.
Step 8
Back in your software, head on over to the Cut Menu (denoted by a little ratchet blade symbol). Select the outline you made when you traced your image and select ‘Cut Edge’. Set your material (in my case I set it as cardstock since it was a thicker greeting card) and adjust your ratchet blade accordingly. Then hit ‘Send to Silhouette’ and watch it go! Your CAMEO will scan the corners of the PixScan™ mat and will cut exactly around your image. How cool is that??

Once it’s finished cutting, simply unload your PixScan™ mat, and use the spatula tool to gently lift your picture off of the mat. Then remove the excess paper and you have your cut out image! It really is that simple.

Step 9
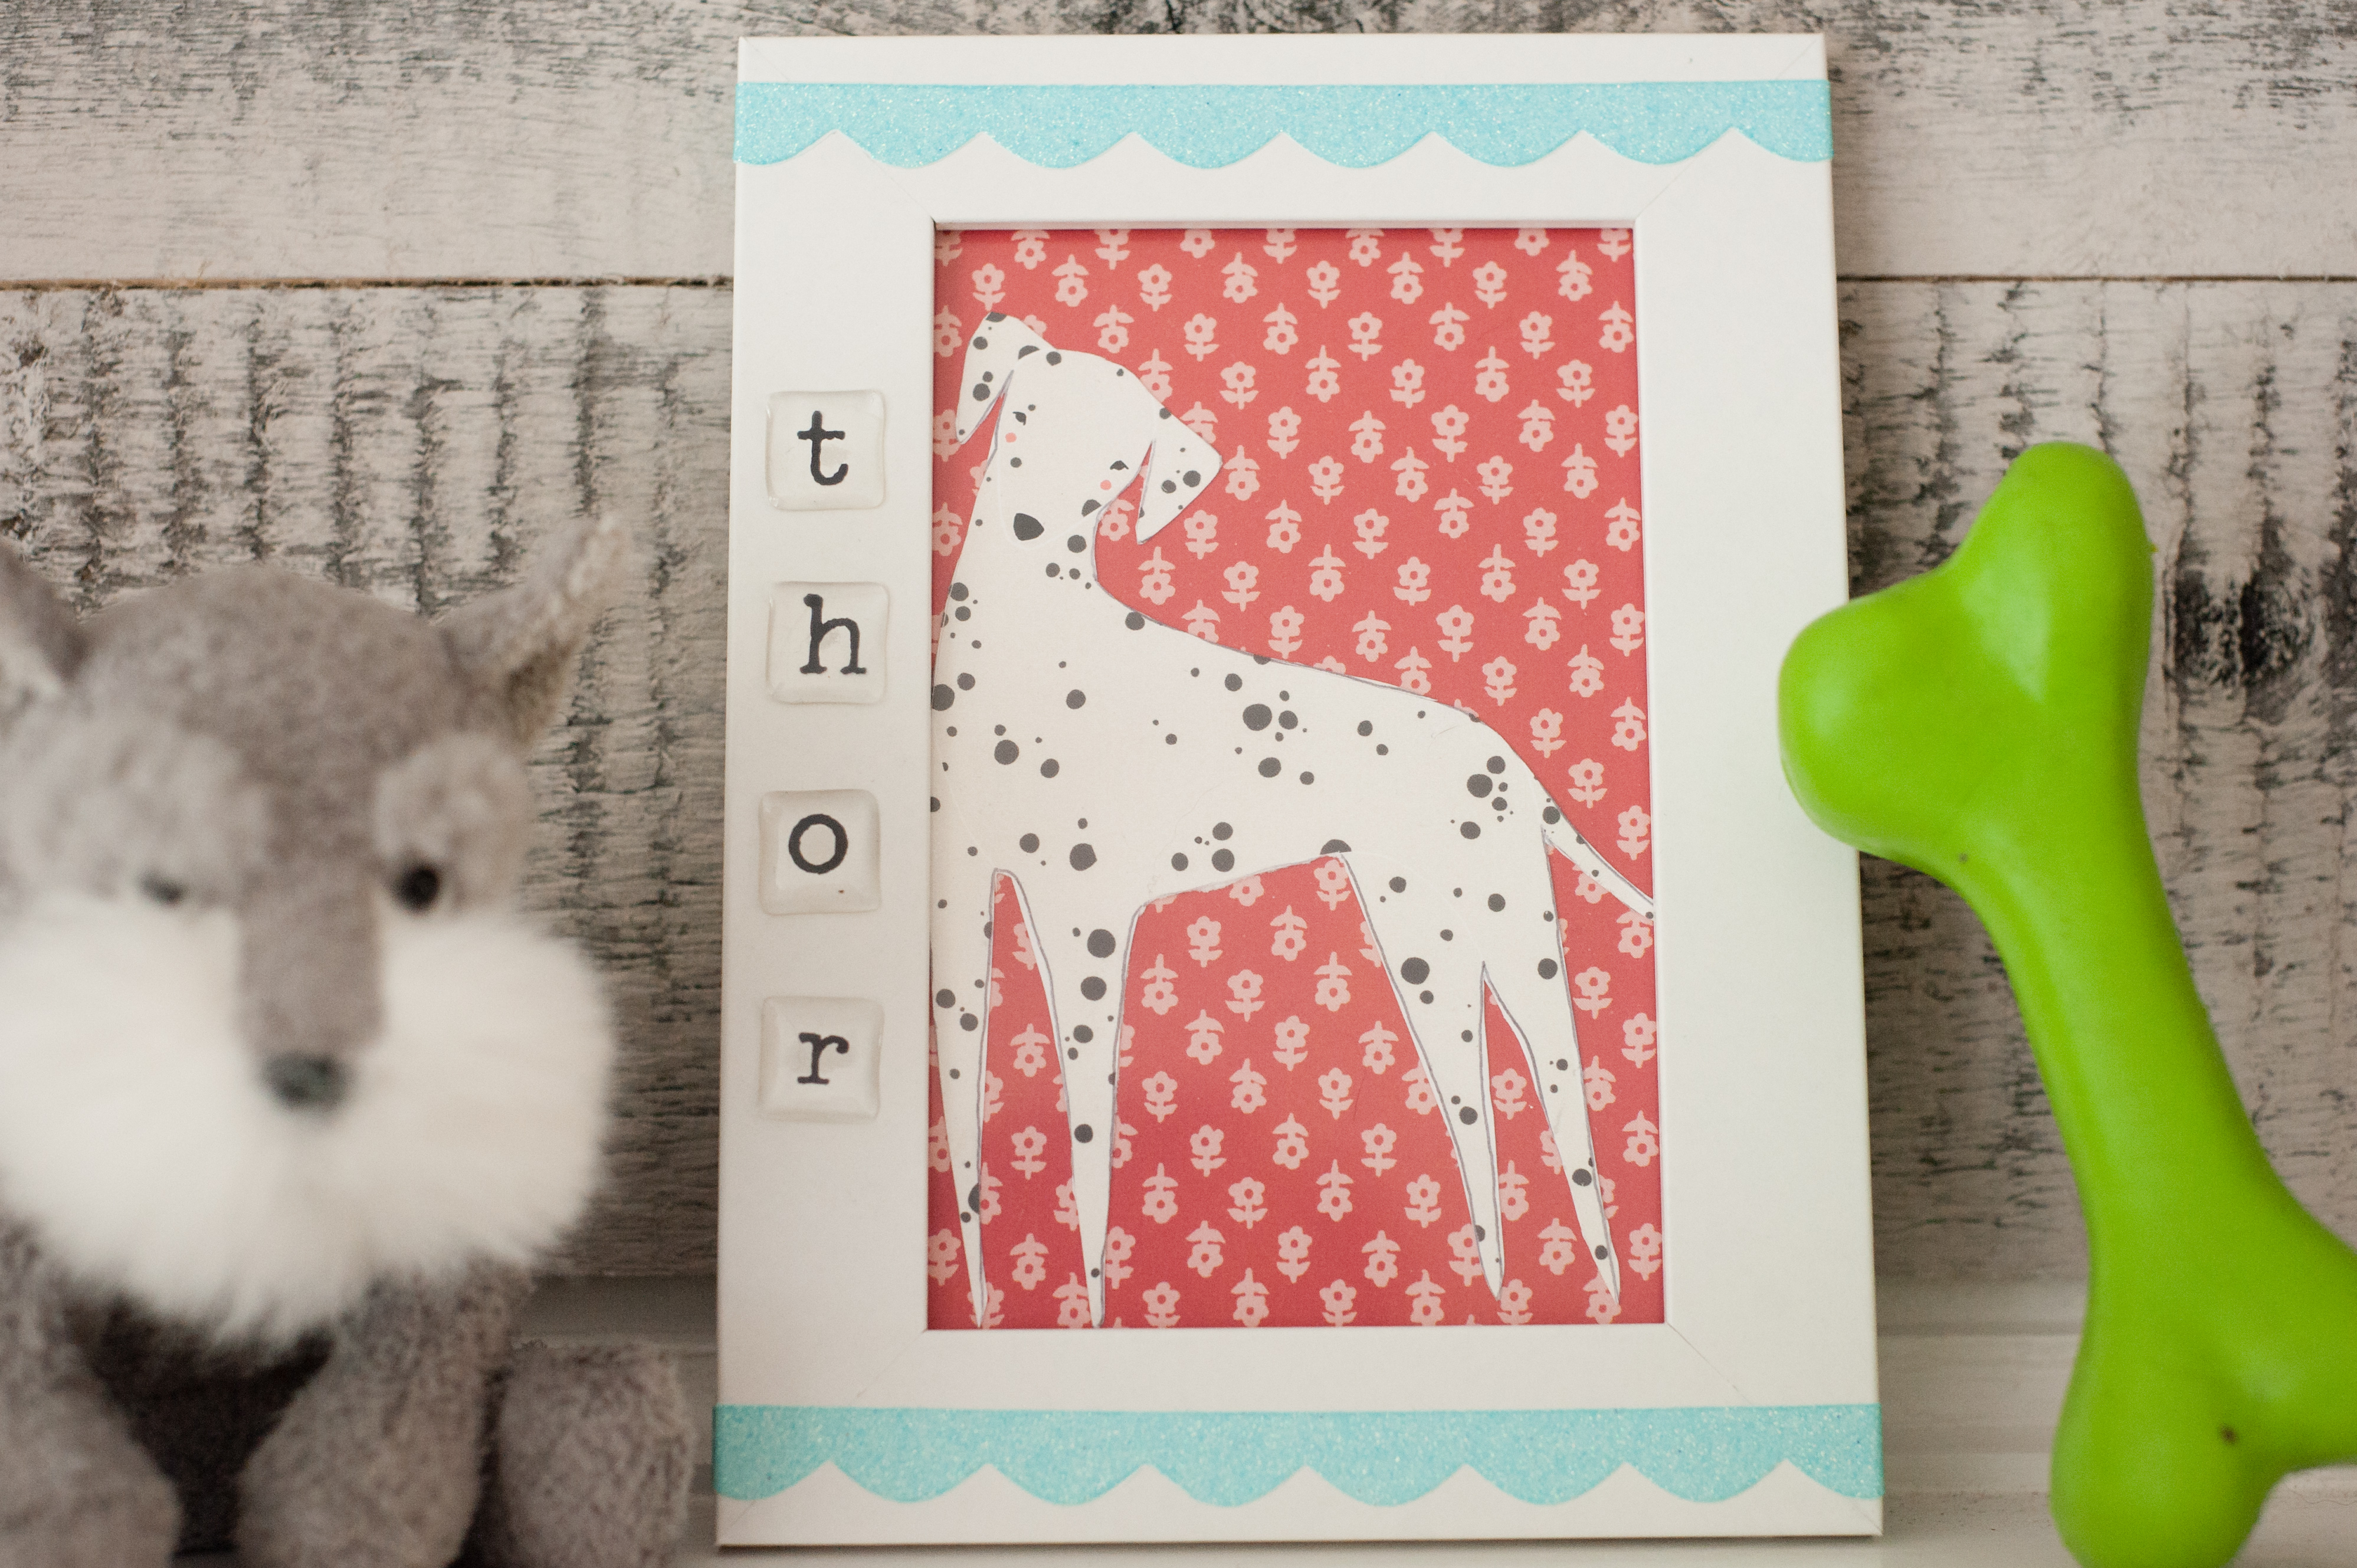
Glue your cut-out picture to some pretty scrapbook paper and pop in a frame. Feel free to embellish the frame with stickers, other CAMEO cut-outs and more!

Pop everything back in the frame and now you have some awesome custom framed art thanks to Silhouette’s awesome PixScan™ technology!
Nasze Naturalne
September 3, 2025
Your authentic voice really shines through in everything you create and share
Naszenaturalne
September 2, 2025
Really love your style
Kelly Wayment
June 28, 2024
You can use it with vinyl as long as it is smooth and flat to allow the static charge to hold on to it. Rolled vinyl that wants to go back to its rolled shape will not necessarily work well, and it would need to be trimmed to fit the ES mat cutting area.
Kelly Wayment
June 28, 2024
Yes, you can use the heat pen while using the ES mat. 🙂
Yurii
March 2, 2024
Hello. May it be used with heat pen?
Thanks
Jerome
February 24, 2024
Hi, works this with the normal vinyl foils or only with printer papter etc?