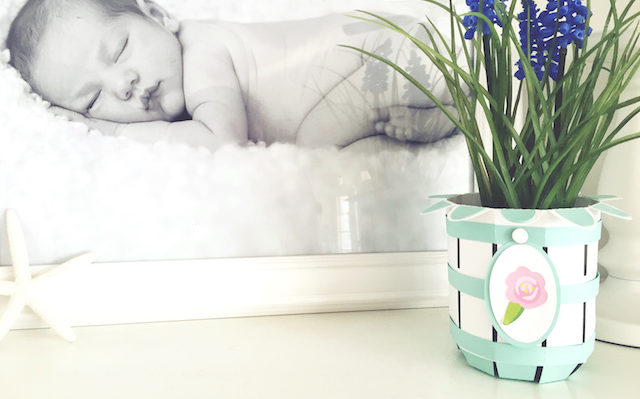
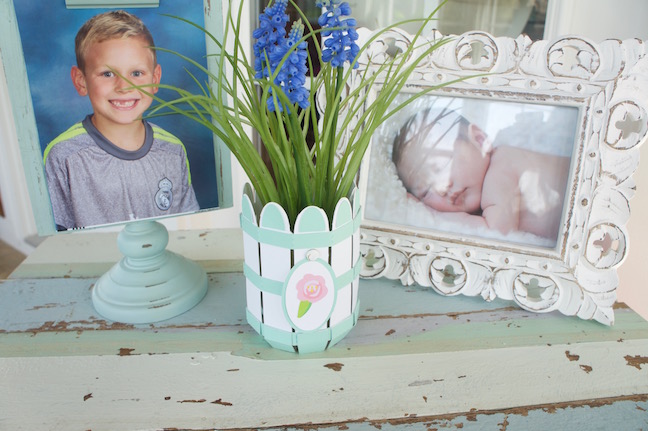
For this project, I got to work with this adorable basket design by Snapdragon Snippets; when I saw it, I knew that it would make the perfect faux planter for a tiny houseplant!
You Will Need:
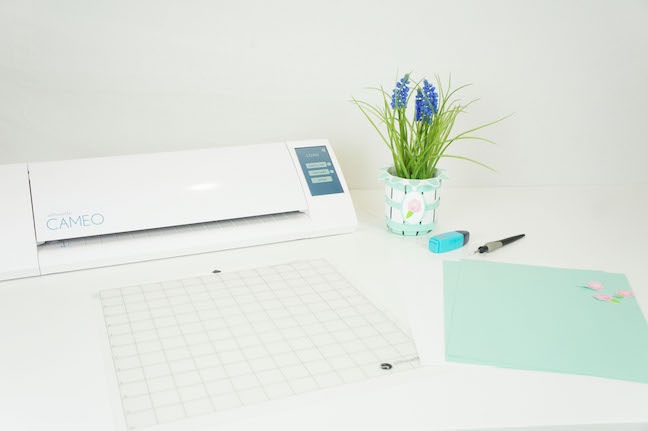
- Silhouette CAMEO®
- Cutting mat
- Ratchet blade
- Cardstock
- Adhesive cardstock
- Adhesive (any kind strong enough for cardstock)
- Embellishment (I used a sticker I made with the Print & Cut feature)
- Paper fastener
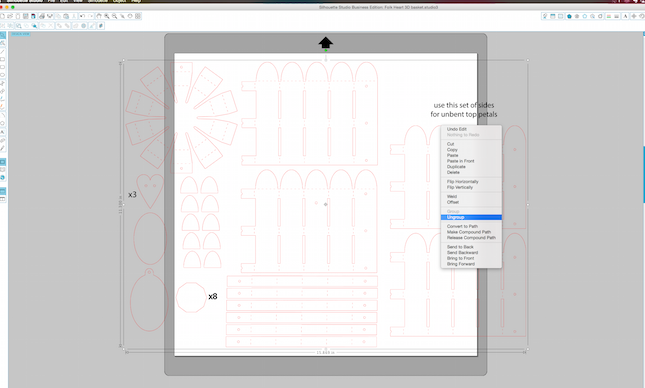
STEP ONE: PREPARE DESIGN FOR CUTTING
To start, ungroup the design and delete any unwanted text or shapes. This design comes with two sets of sides, one with perforations along the top petals and one without. You’ll only need one set of sides to complete the project.
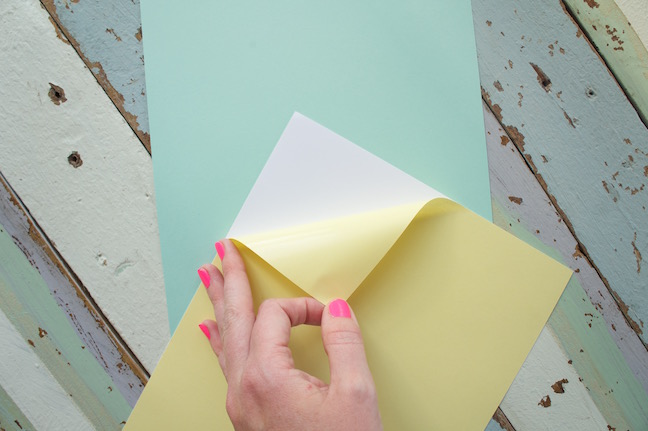
STEP TWO: PREPARE CARDSTOCK FOR CUTTING
I wanted my final product to be pretty sturdy, so instead of using just a single sheet of cardstock, I doubled up my cardstock by attaching a piece of adhesive cardstock to the sheet of regular card stock before cutting out the basket pieces. Just peel away the yellow paper backing of the adhesive cardstock and stick the two sheets of cardstock together.
STEP THREE: ADJUST SETTINGS AND CUT DESIGN
Since we doubled up on the thickness of our cardstock, we will need to adjust the blade depth accordingly. Use the ratchet blade on an “8,” and run a double cut on your cardstock.
STEP FOUR: ASSEMBLE BASKET
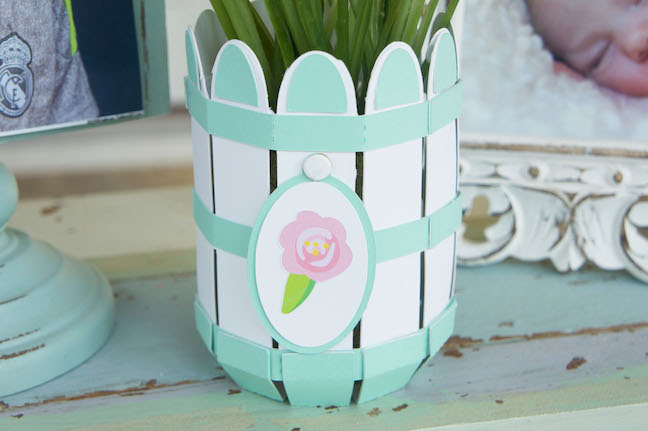
Assemble your basket! You’ll notice that I didn’t use all of the available pieces in the original design, I decided what worked best for the shape I wanted to create with my personal project and went from there: there are no rules in crafting!
When I first tried assembling my basket, I used one of those adhesives that rolls tape, and I found that it wasn’t strong enough to withstand the bending and folding of the cardstock. So just be sure to use a really good, strong adhesive.

Once I assembled the basket, I added a pretty floral sticker that I printed on white sticker paper using the Print & Cut feature. I attached the sticker to a cardstock tag I had cut from extra cardstock with scissors. Then I attached the tag to the planter using a cute little paper fastener, and voilà! Adorable planter basket!
How do you accessorize your houseplants?
Nasze Naturalne
September 3, 2025
Your authentic voice really shines through in everything you create and share
Naszenaturalne
September 2, 2025
Really love your style
Kelly Wayment
June 28, 2024
You can use it with vinyl as long as it is smooth and flat to allow the static charge to hold on to it. Rolled vinyl that wants to go back to its rolled shape will not necessarily work well, and it would need to be trimmed to fit the ES mat cutting area.
Kelly Wayment
June 28, 2024
Yes, you can use the heat pen while using the ES mat. 🙂
Yurii
March 2, 2024
Hello. May it be used with heat pen?
Thanks
Jerome
February 24, 2024
Hi, works this with the normal vinyl foils or only with printer papter etc?