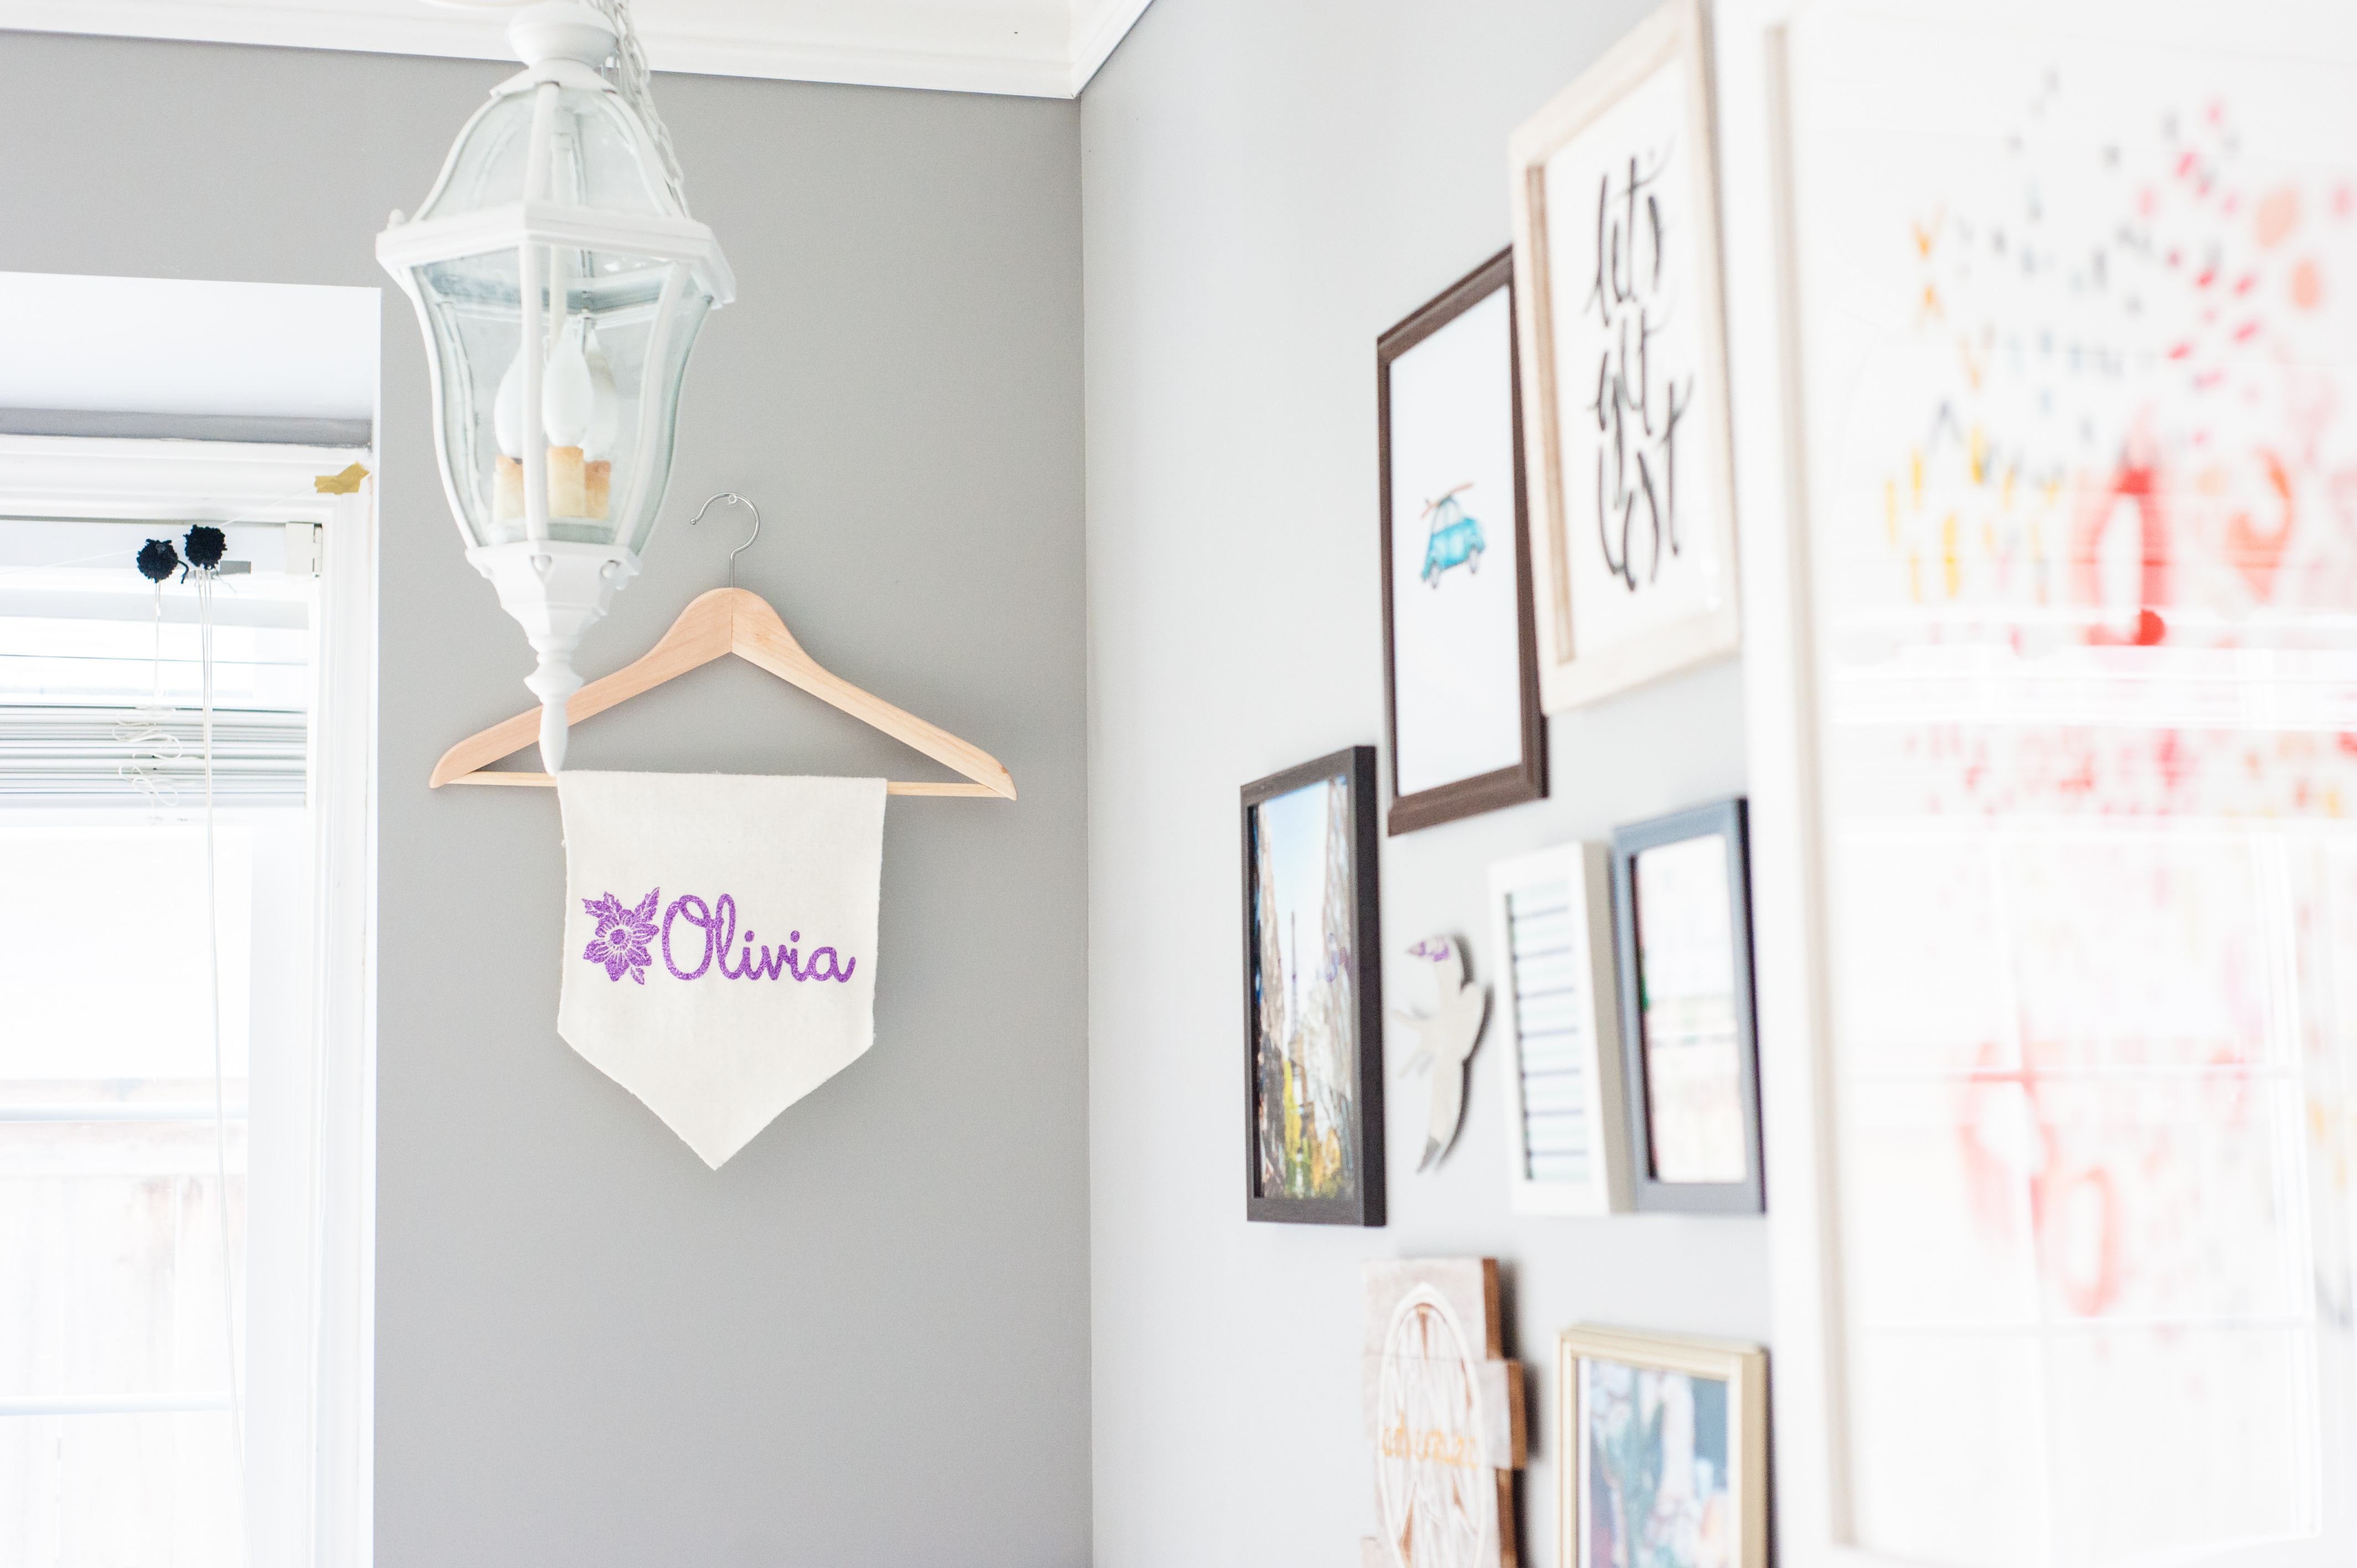
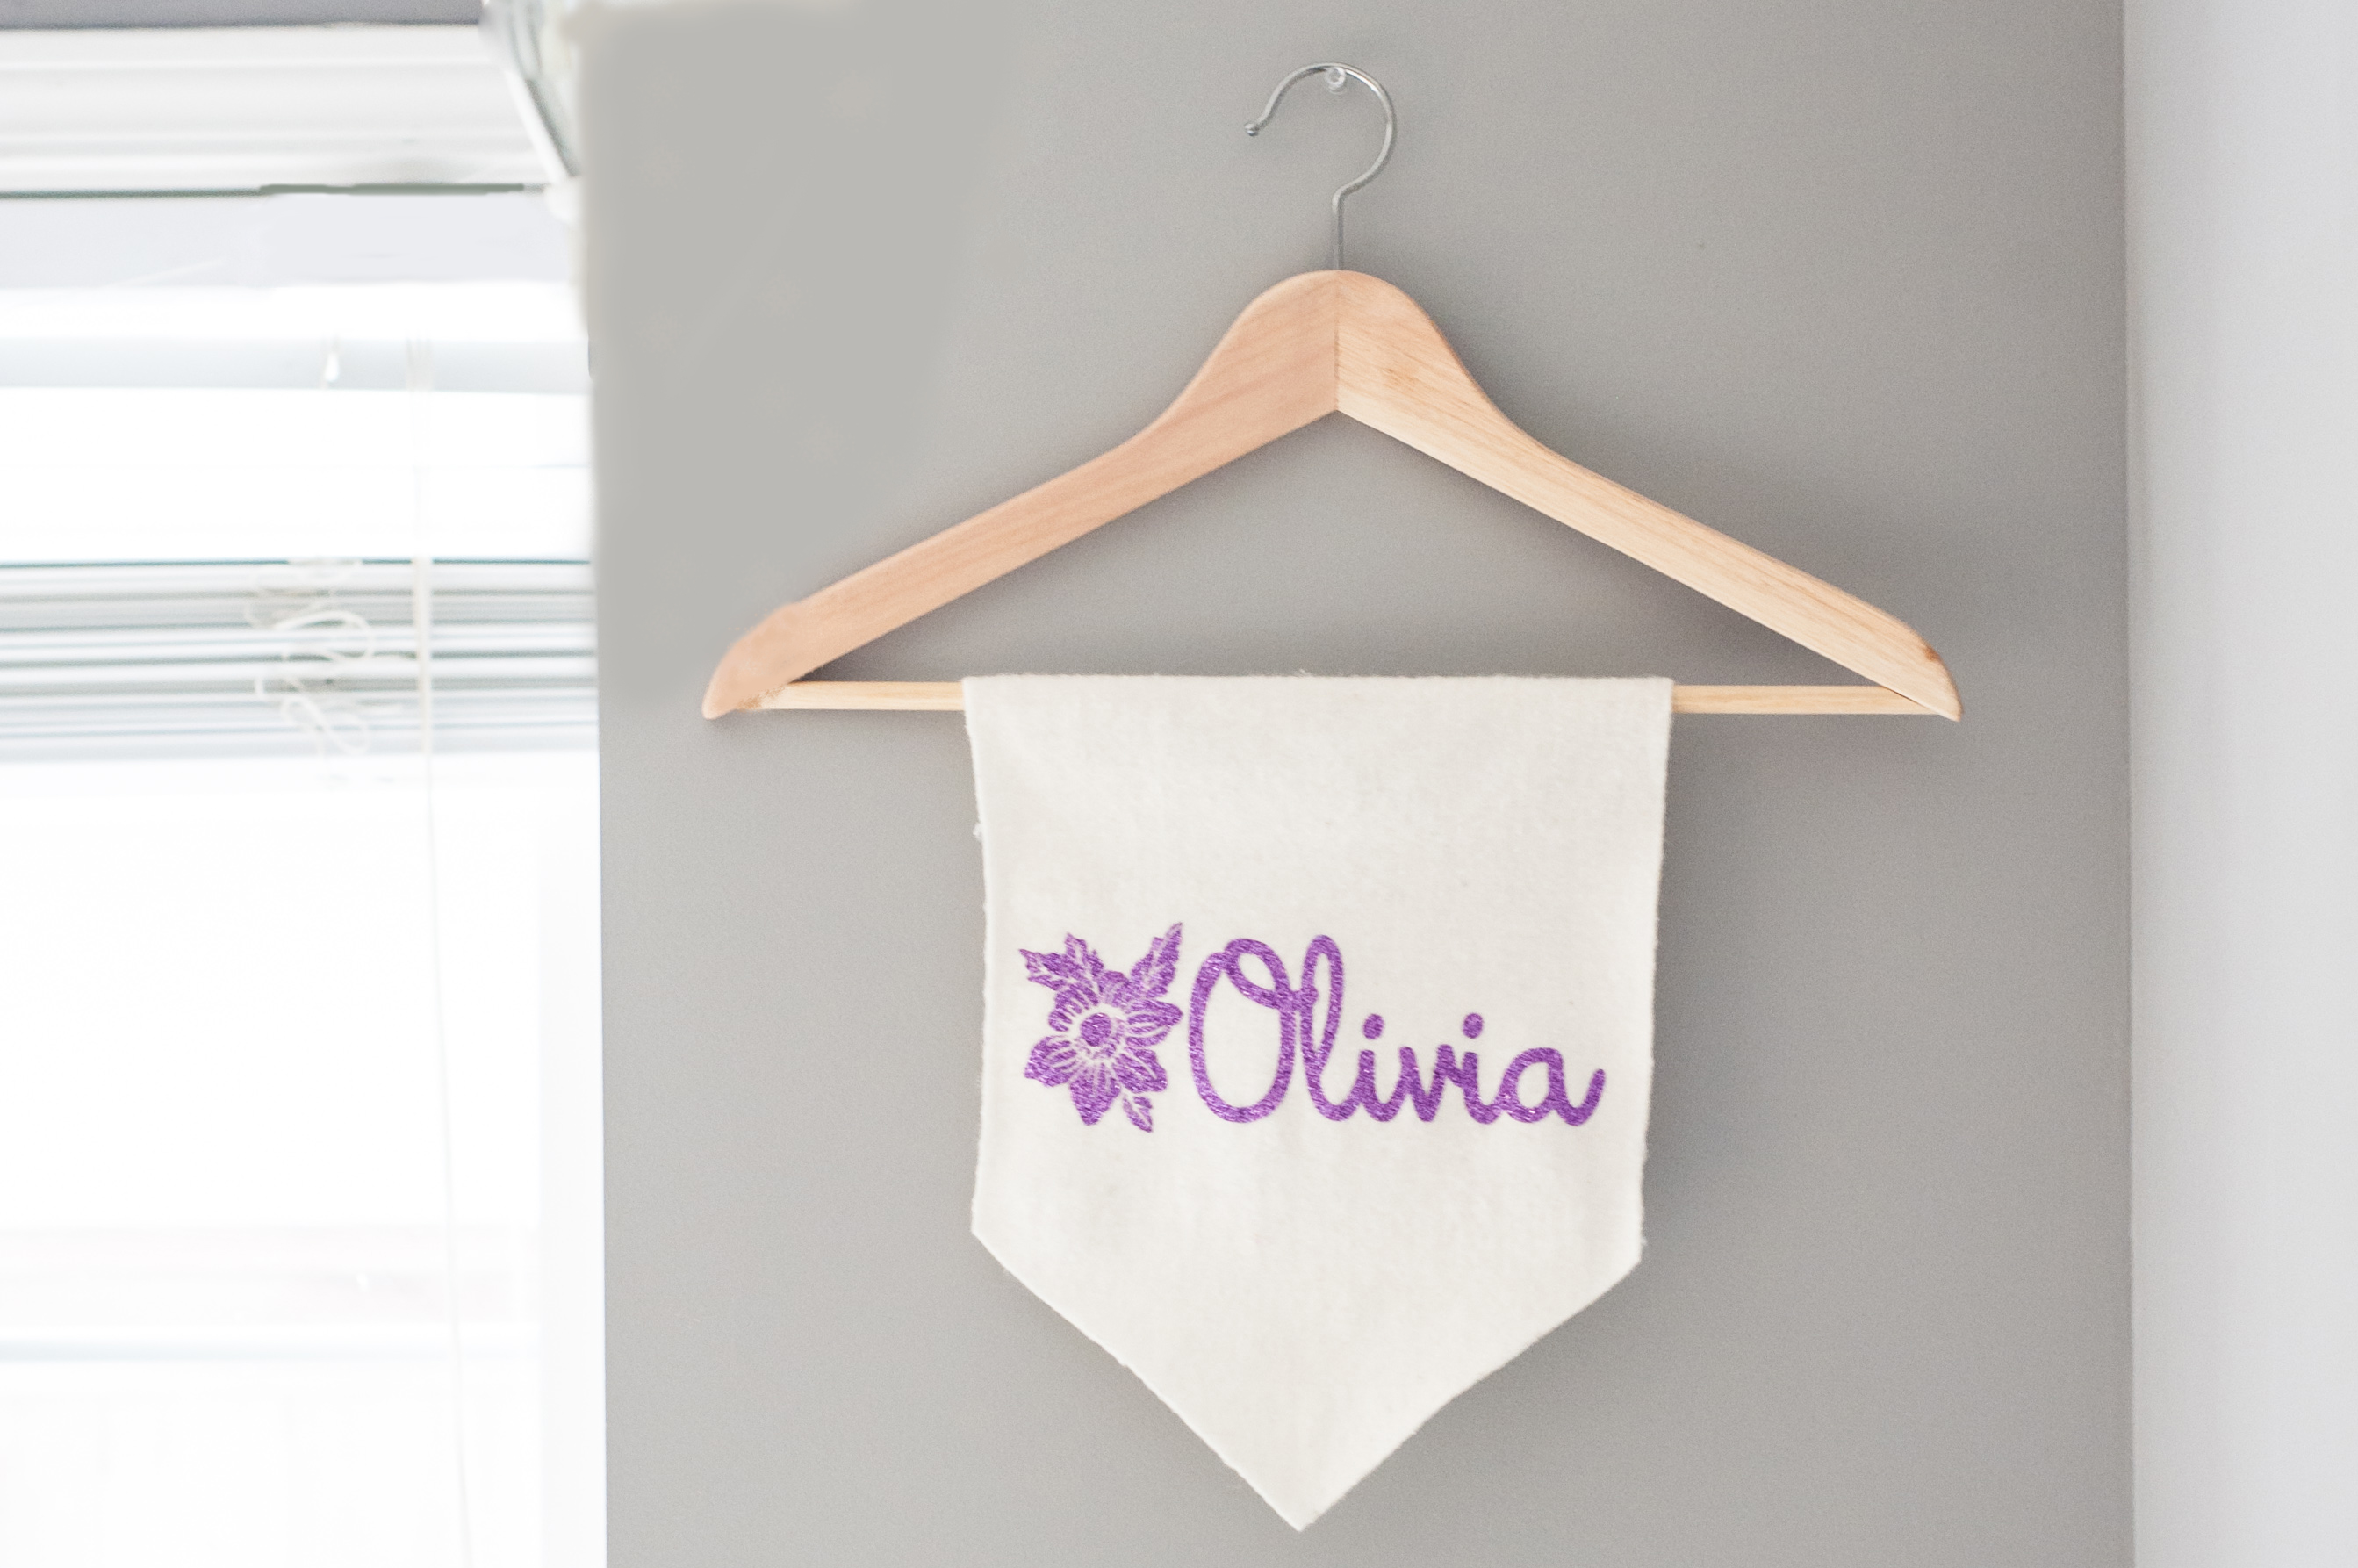
For this project we are using a beautiful flower design by Dresden Carrie. I have a friend who recently had a baby and wanted to make a special present for her. I thought a pretty name banner would be the perfect piece of decor and I had some lavender Heat Transfer Material that was the exact hue used in this sweet girl’s nursery. Name banners are fun for kids (and adults!) of all ages and they are SO easy to whip up in a flash.
Here’s what you’ll need for this project:
- Silhouette CAMEO or Portrait
- Heat Transfer Material (in desired color)
- Hook Tool
- Iron
- Fabric
- Hanger or dowel
- Hot Glue Gun
Step 1
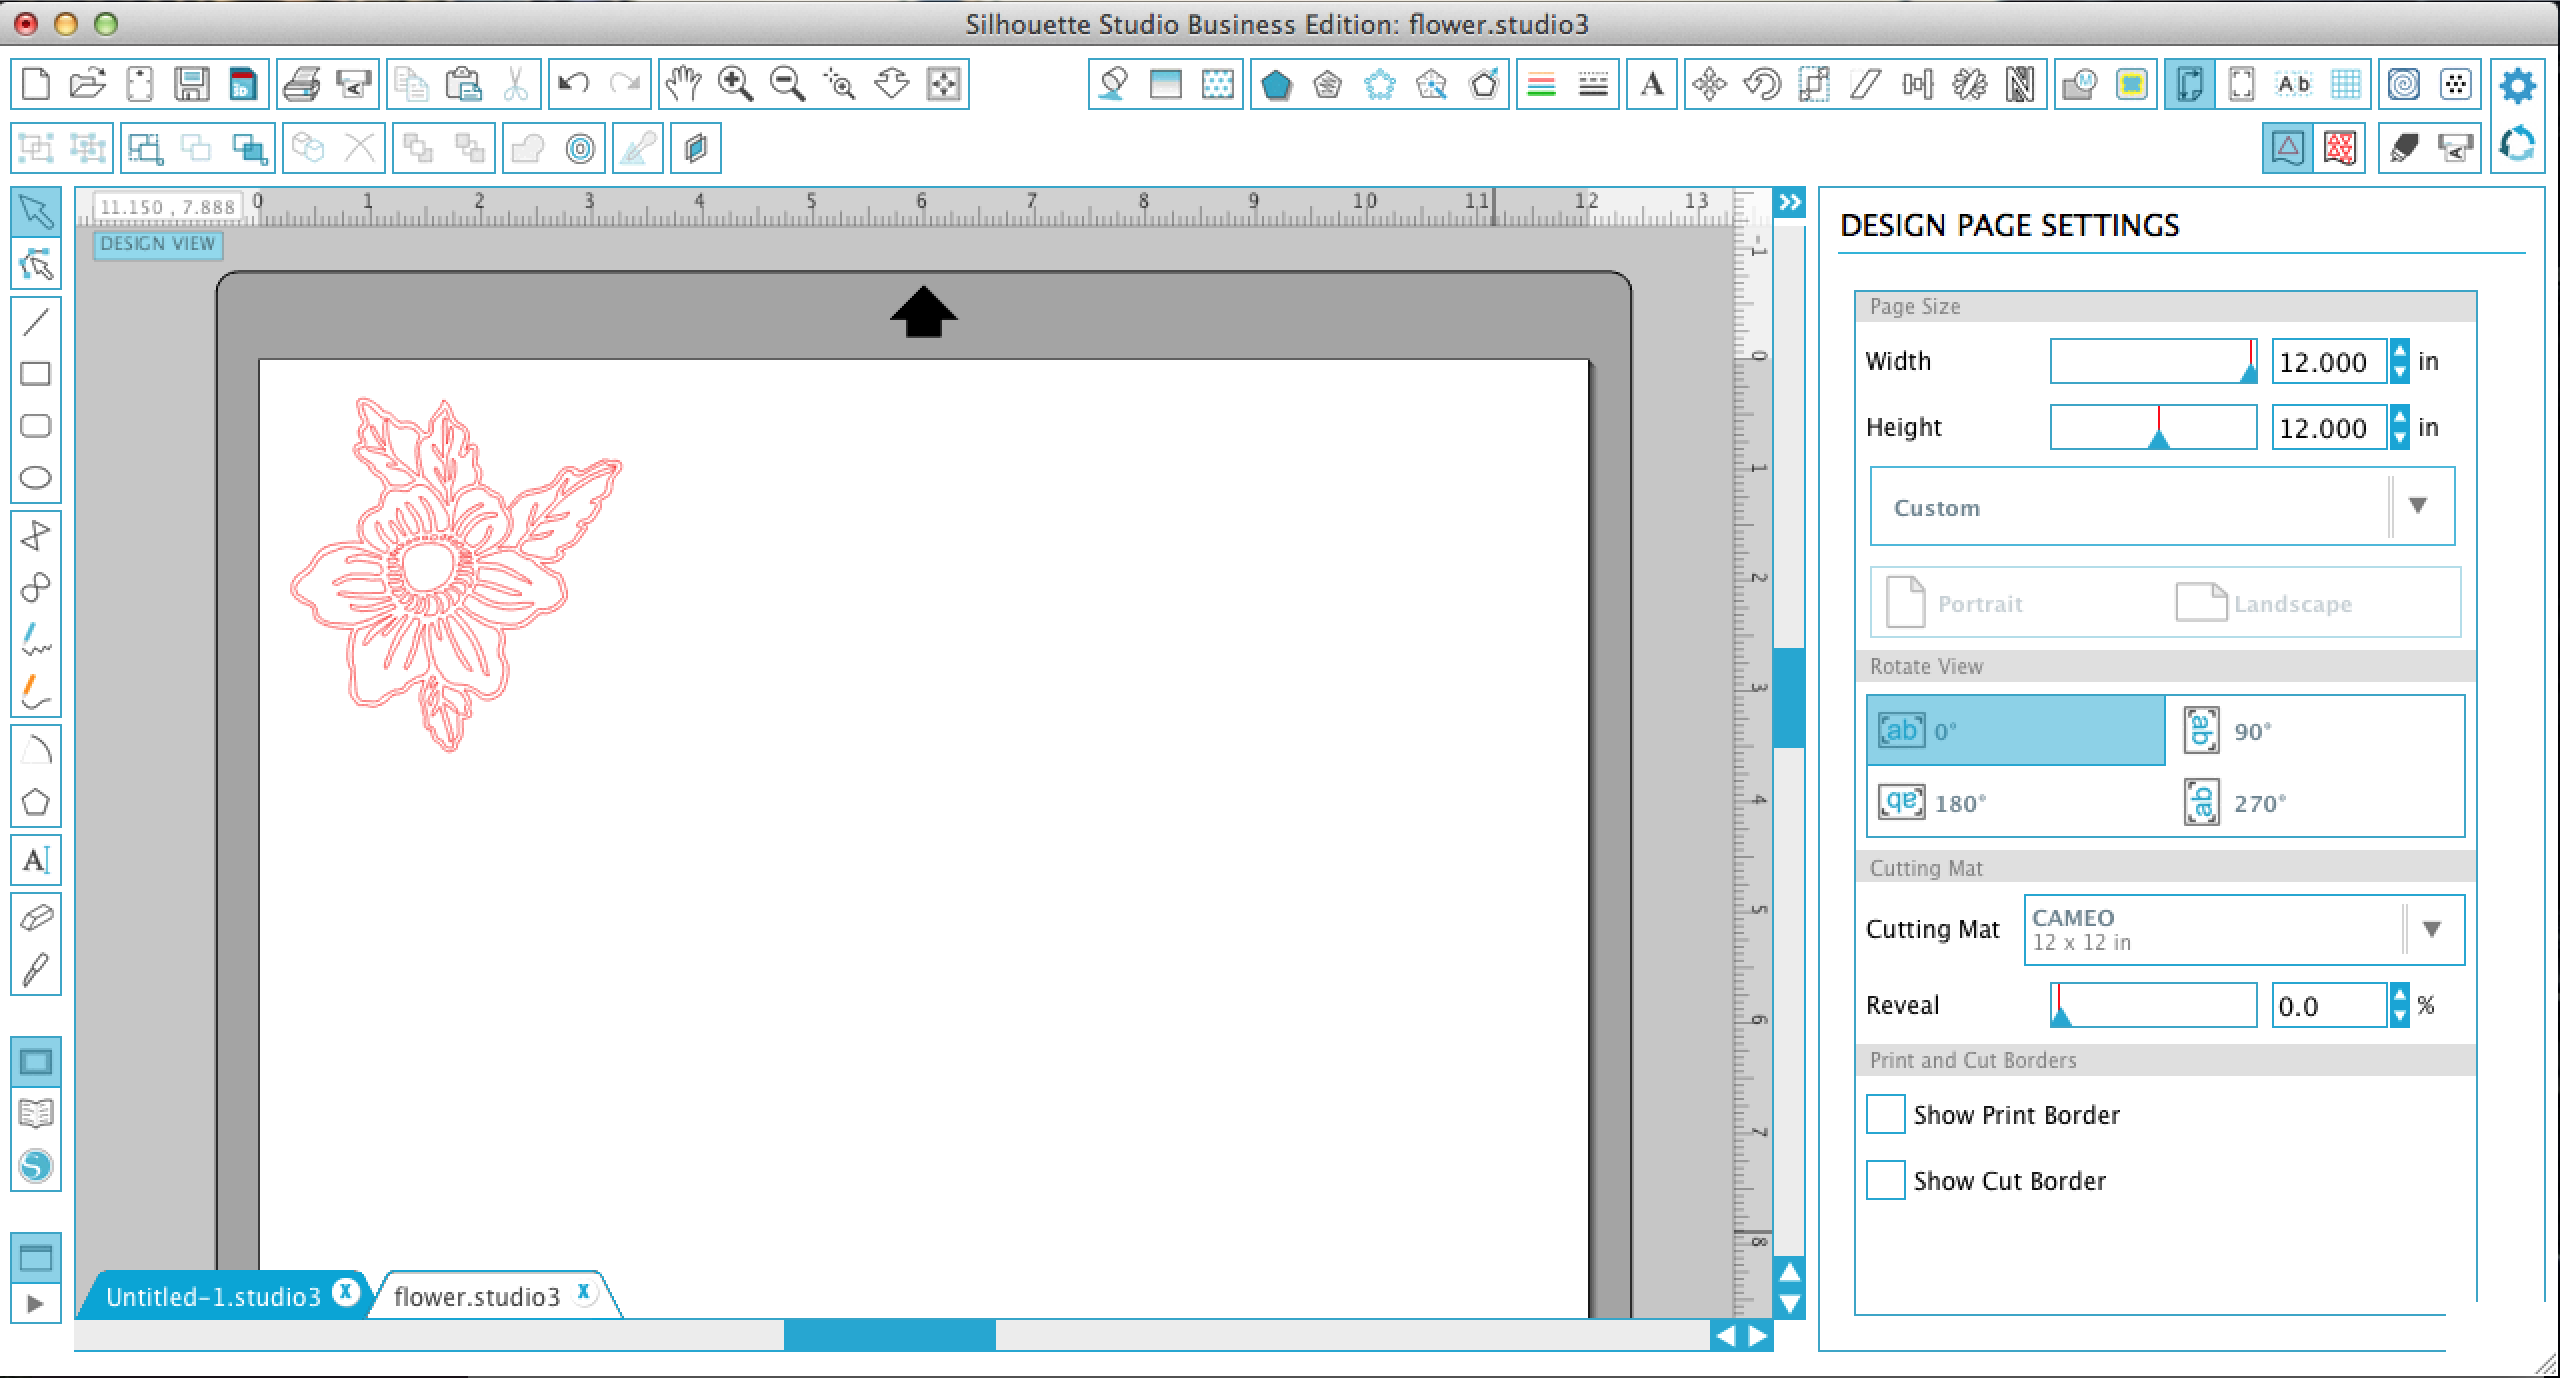
Open up the free flower design of the week in your Silhouette Design Studio and drag the corners until it’s the size you want.
Step 2
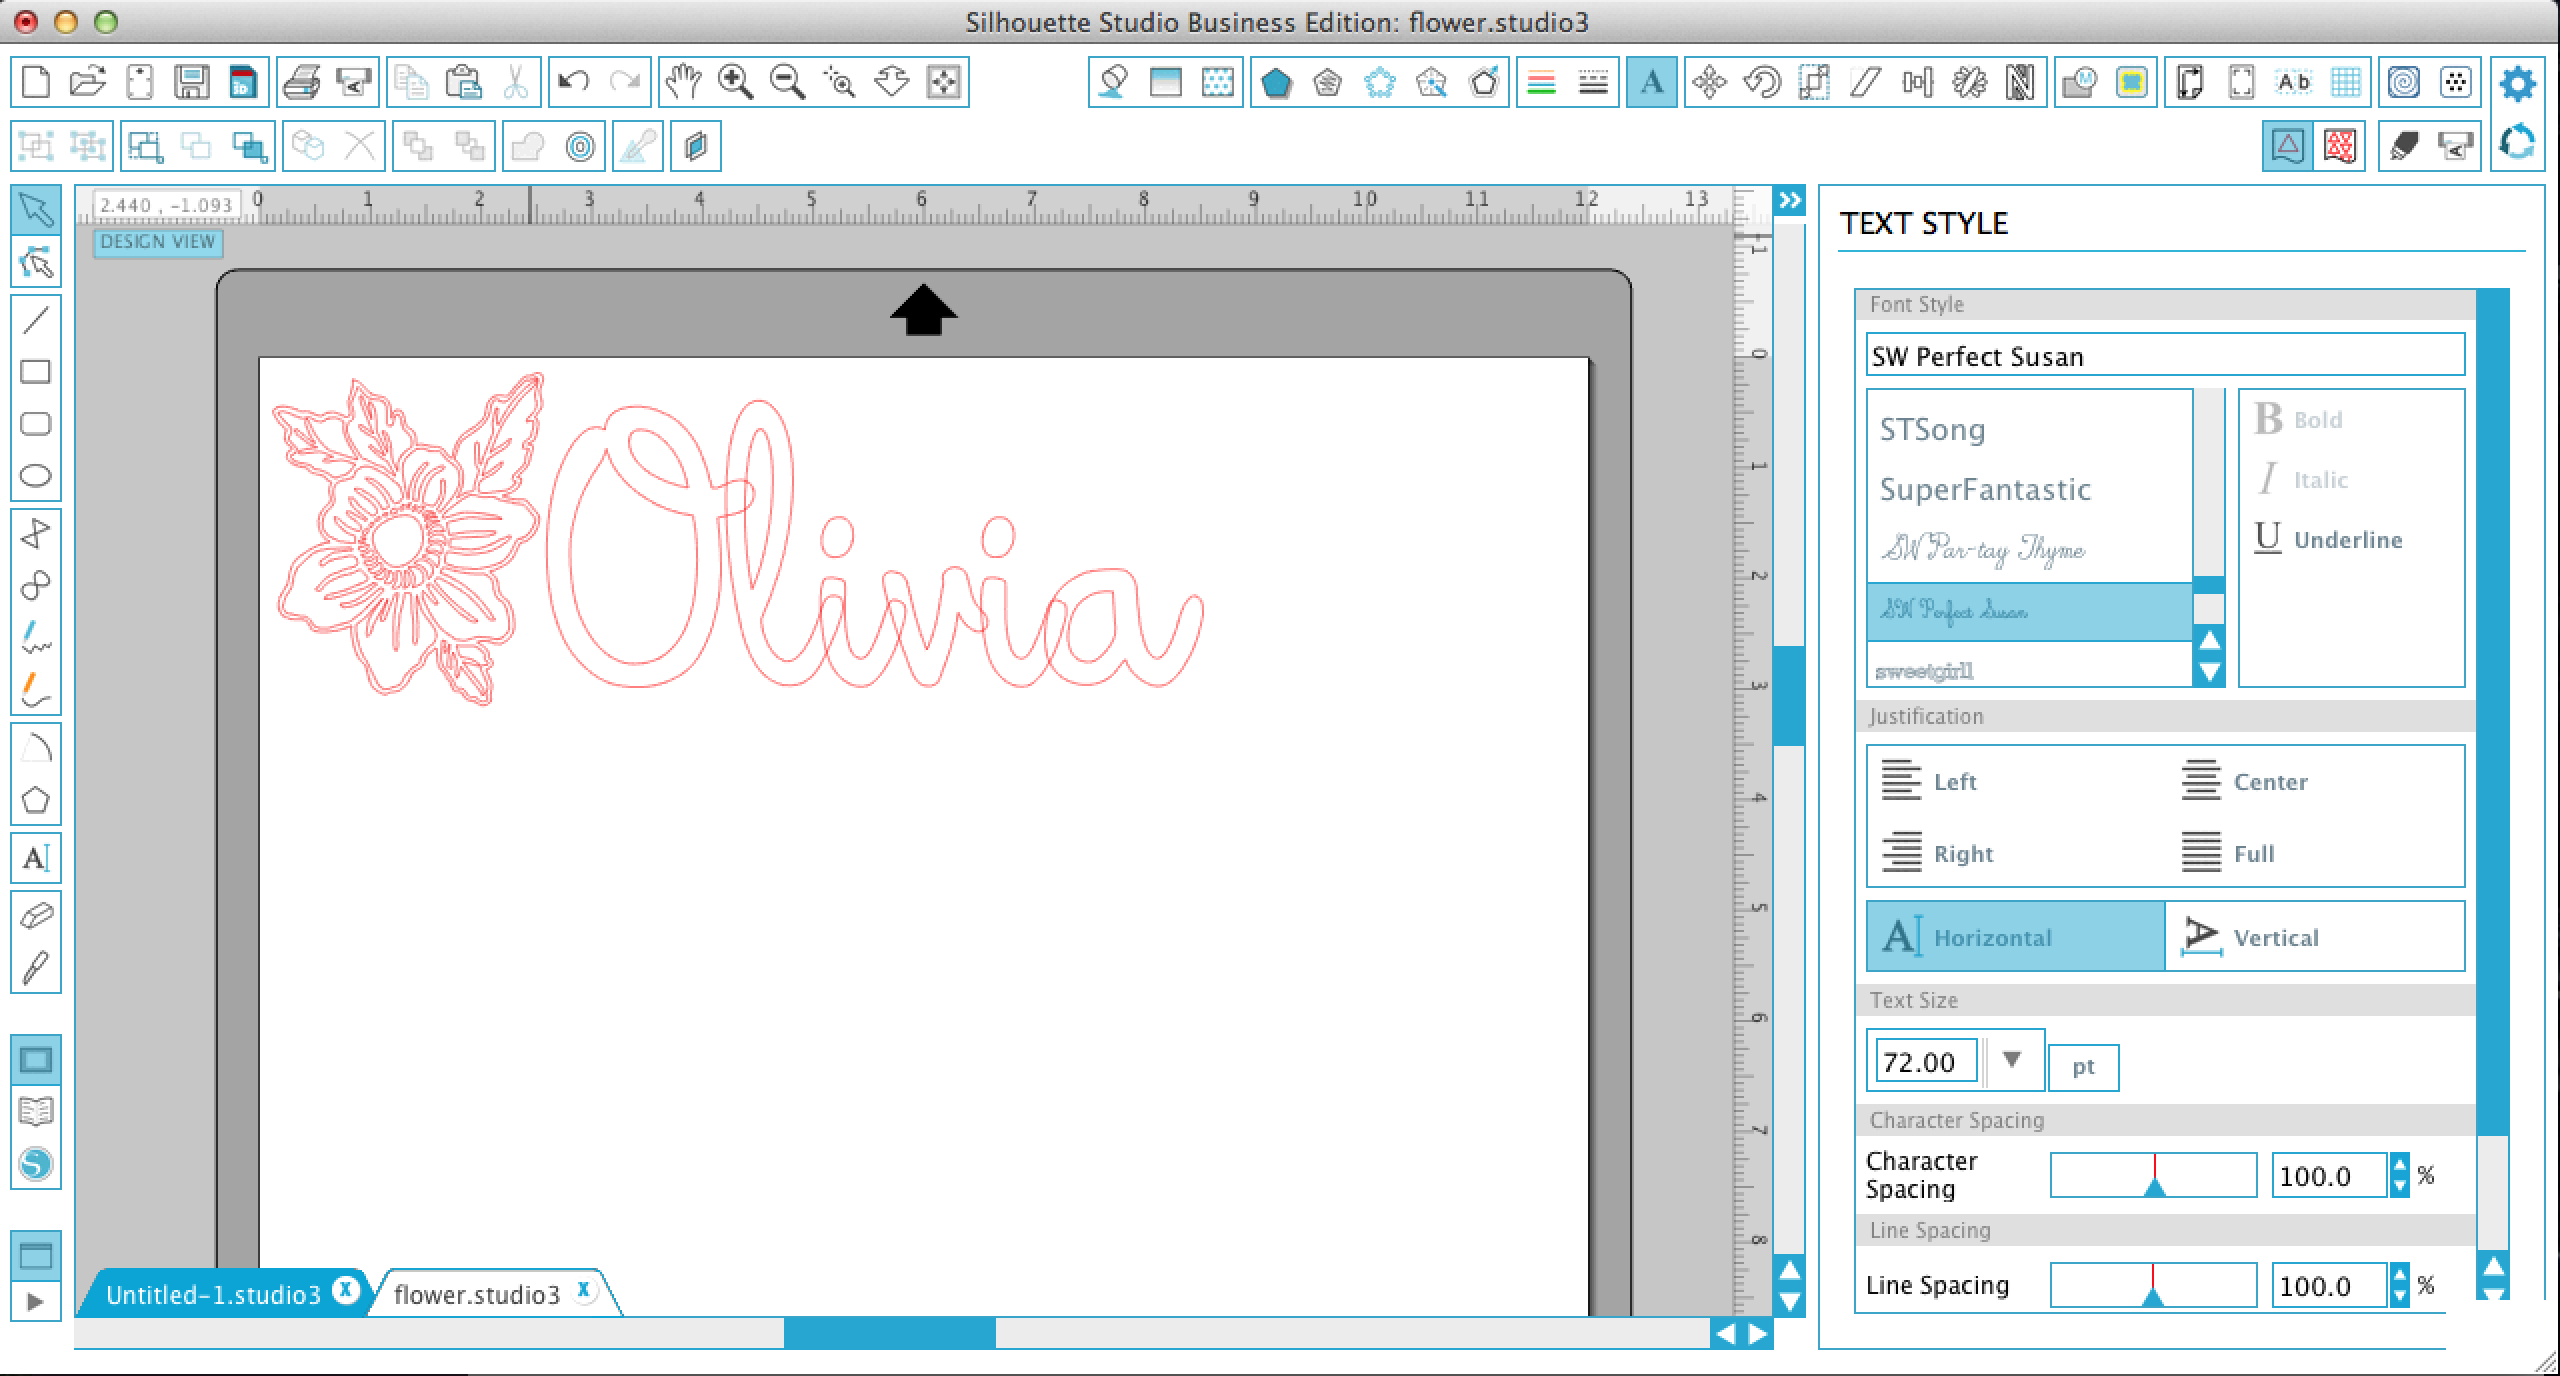
Add your desired name by clicking on the ‘A’ icon on the left side of your design software. Choose a font, and then type out the name. For this project, I used SW Perfect Susan, which you can find in the Silhouette Design Store. Size your text until it lines up with your flower.
Step 3
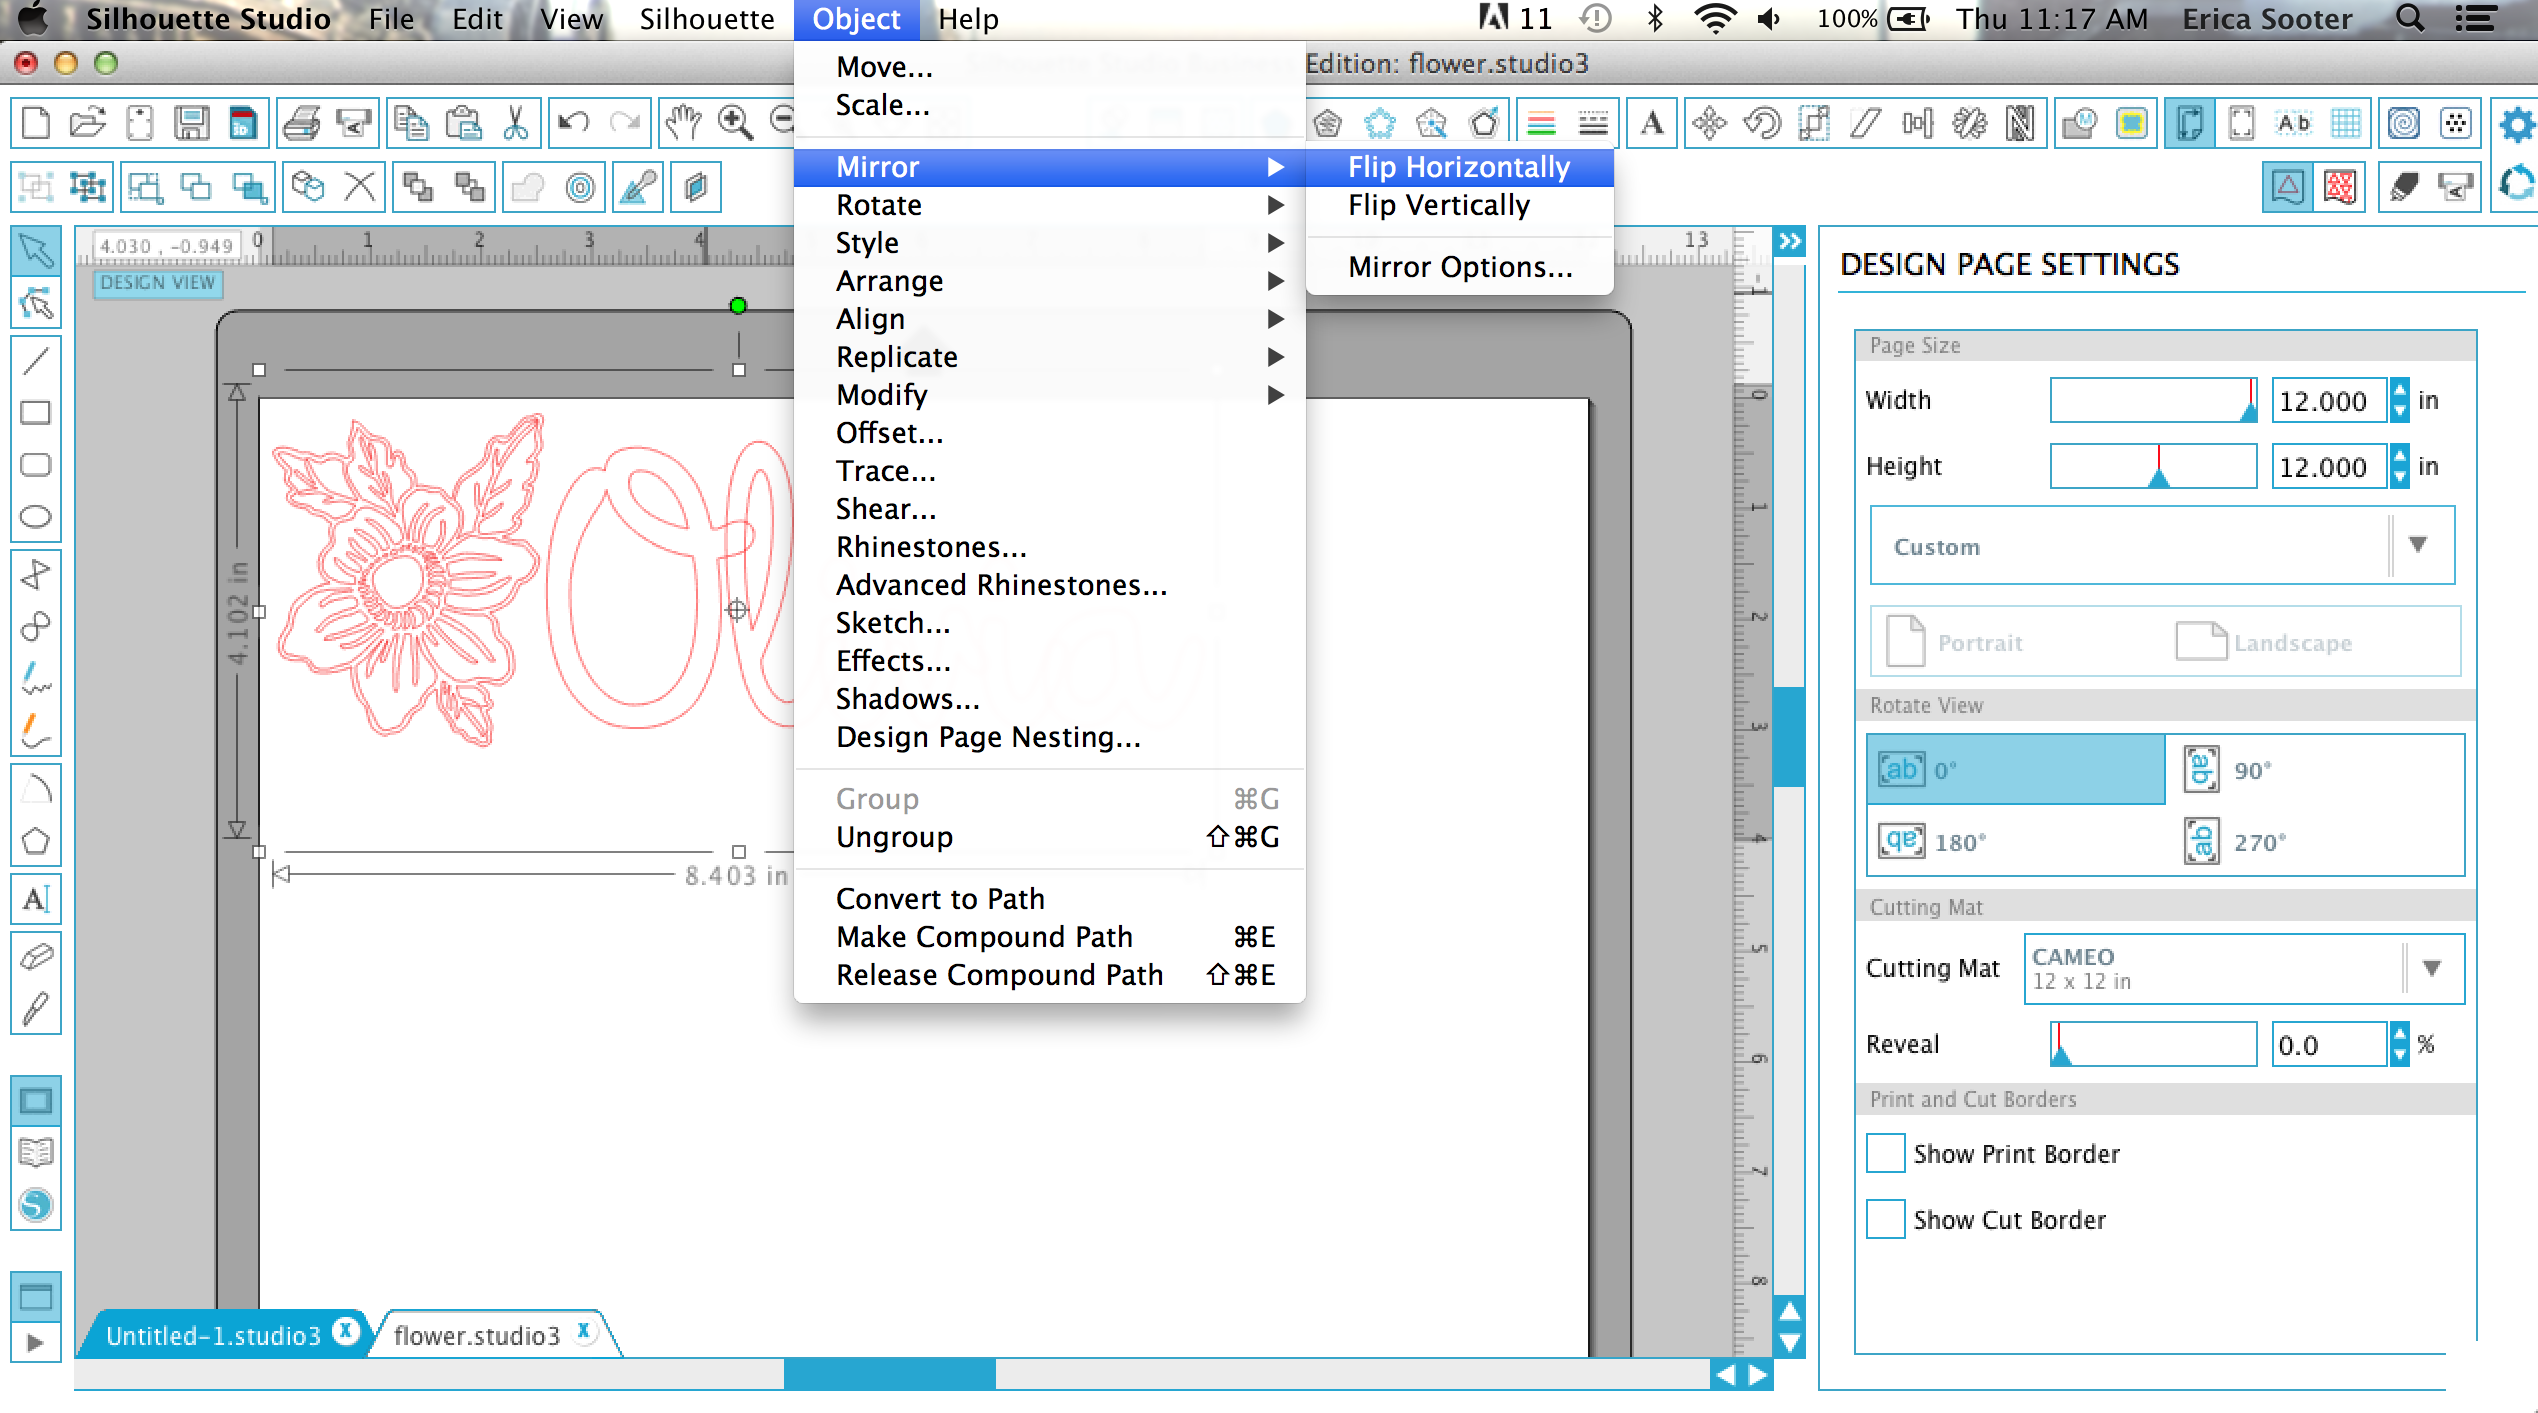
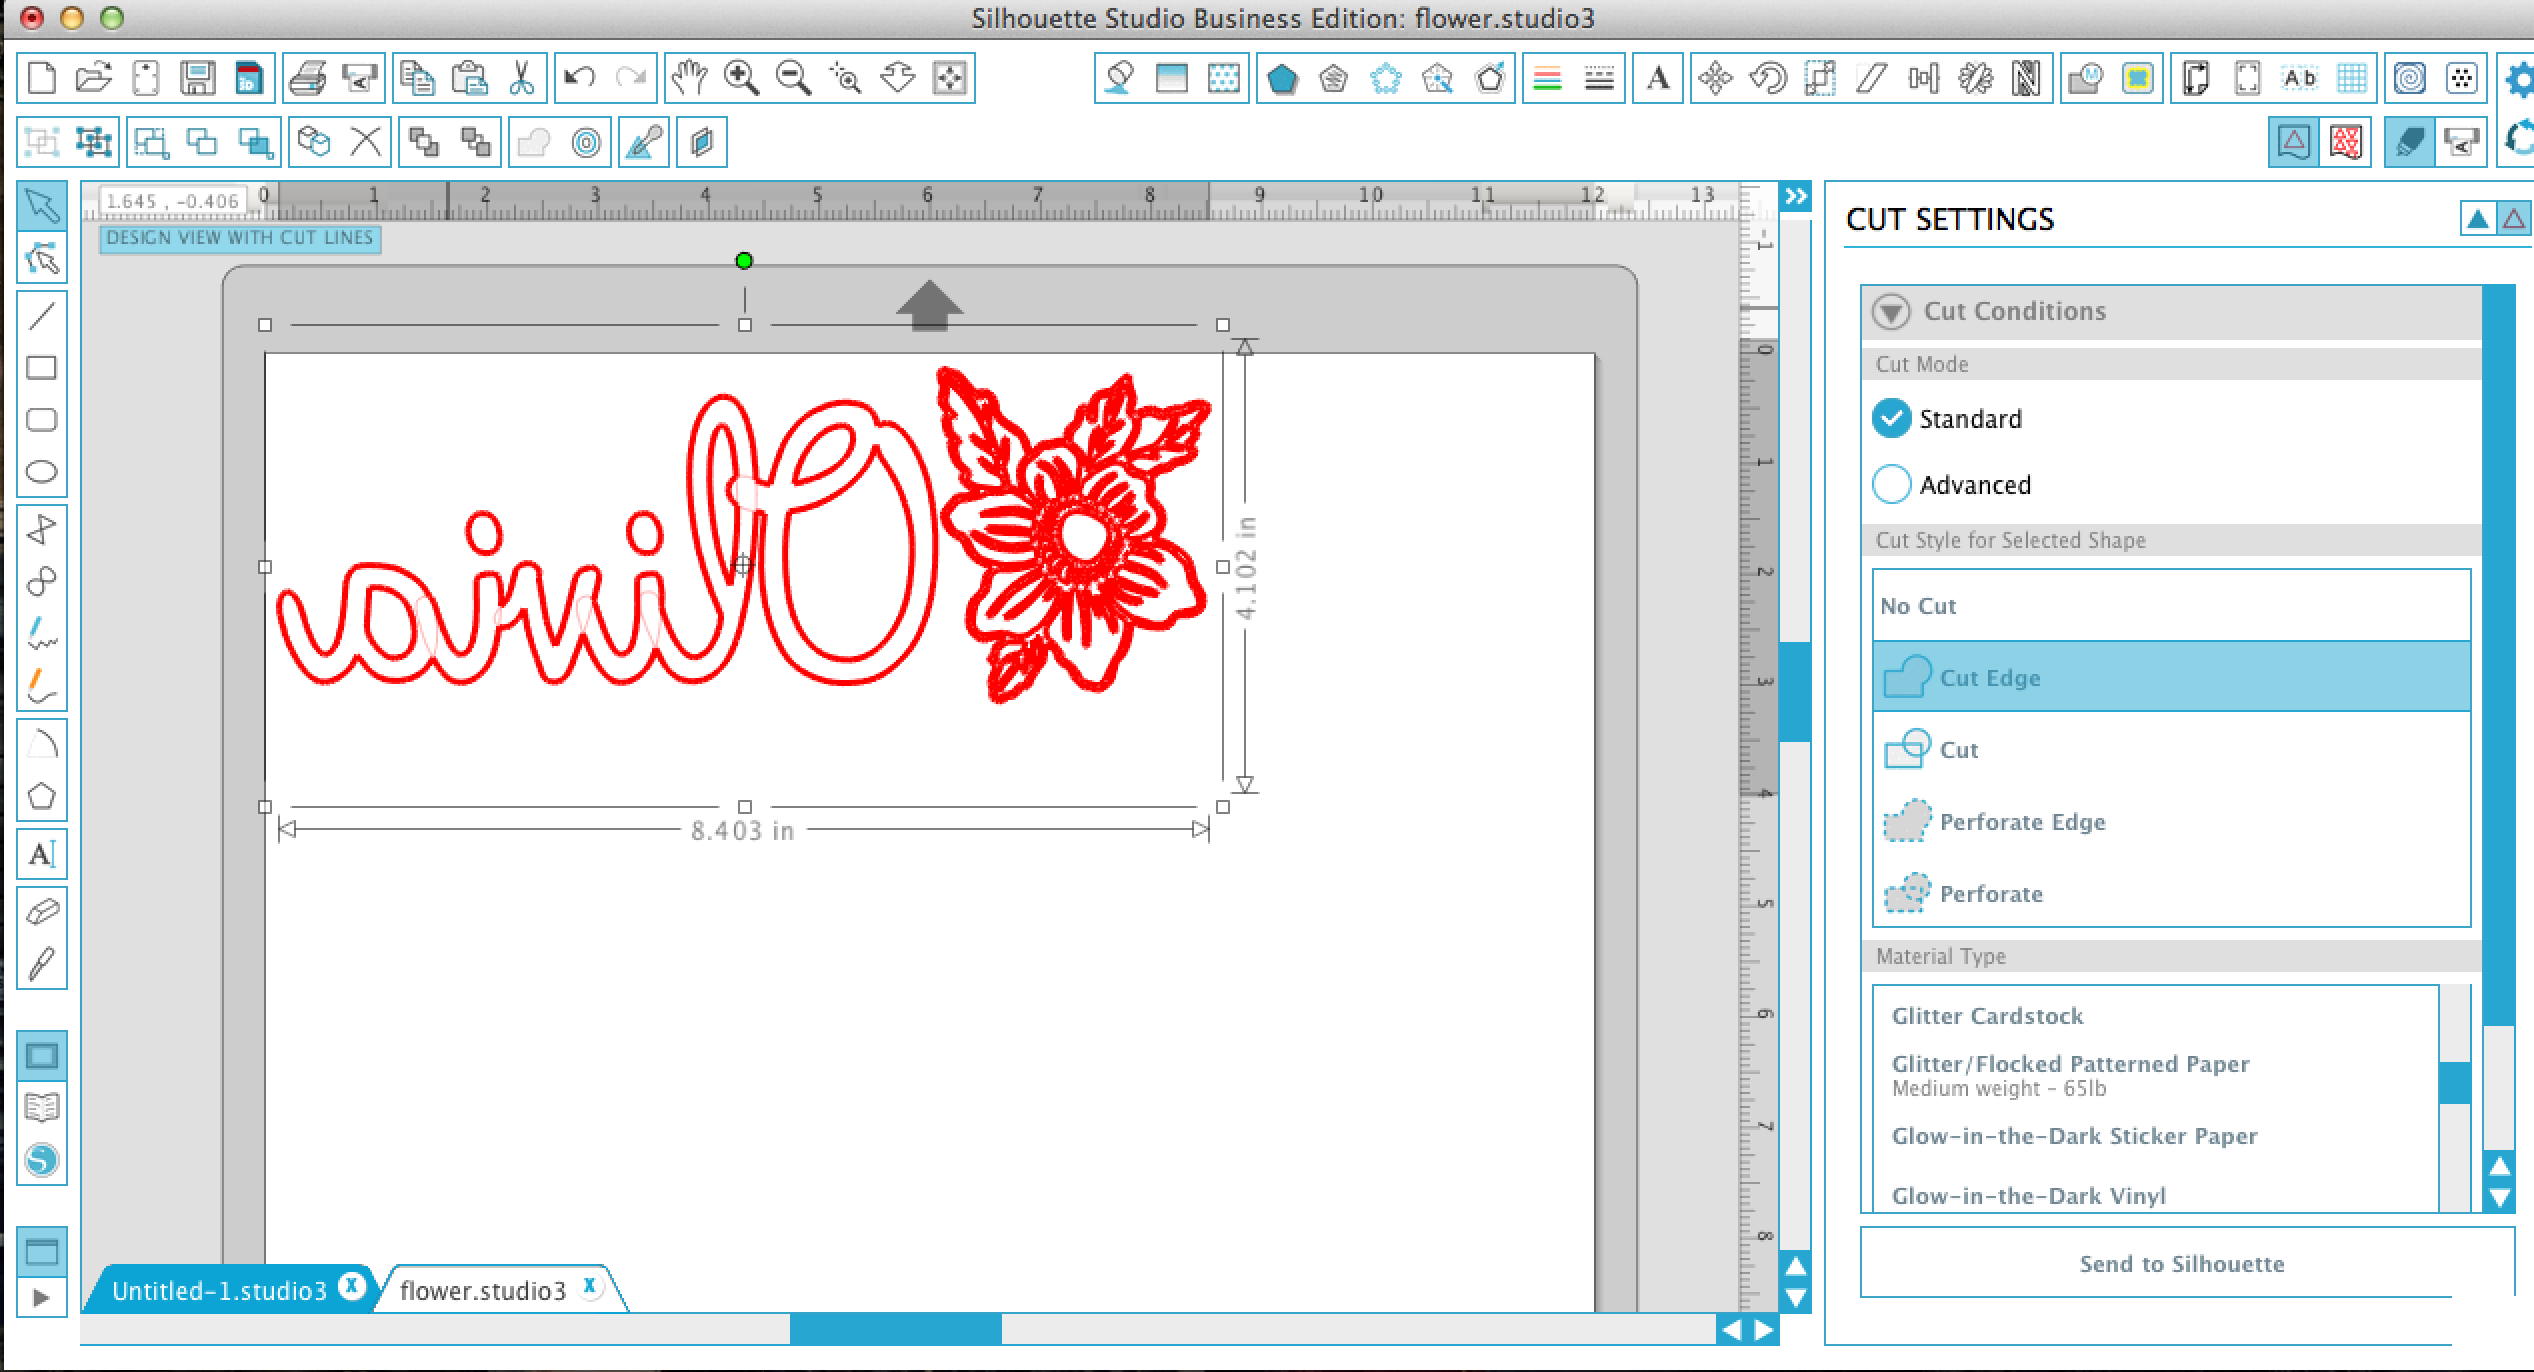
When you are satisfied with the spacing and sizing of your design, you’ll need to flip, or mirror, your design so that it appears backwards. When using Heat Transfer Material, you always need to mirror your design so that it will be facing the right way when you iron it on your final project. To make sure your whole design flips correctly, group your designs together so they will move as one unit. First click on the flower, press and hold the shift key, and click on the name. Group them together, by going Object > Group. Now that your designs are one unit, go to Object > Mirror > Mirror Horizontally. This will flip your design so it is ready to cut.
Step 4
Now that your design is mirrored and ready to go, head to the Cut Menu, by clicking on the Ratchet Blade icon in the upper right corner. Make sure your design is selected and the hit ‘Cut Edge’ – this will cut the outline of your design but not the little pieces of letters that overlap. This way your name will come out as one piece instead of individually cut out letters.
Step 5
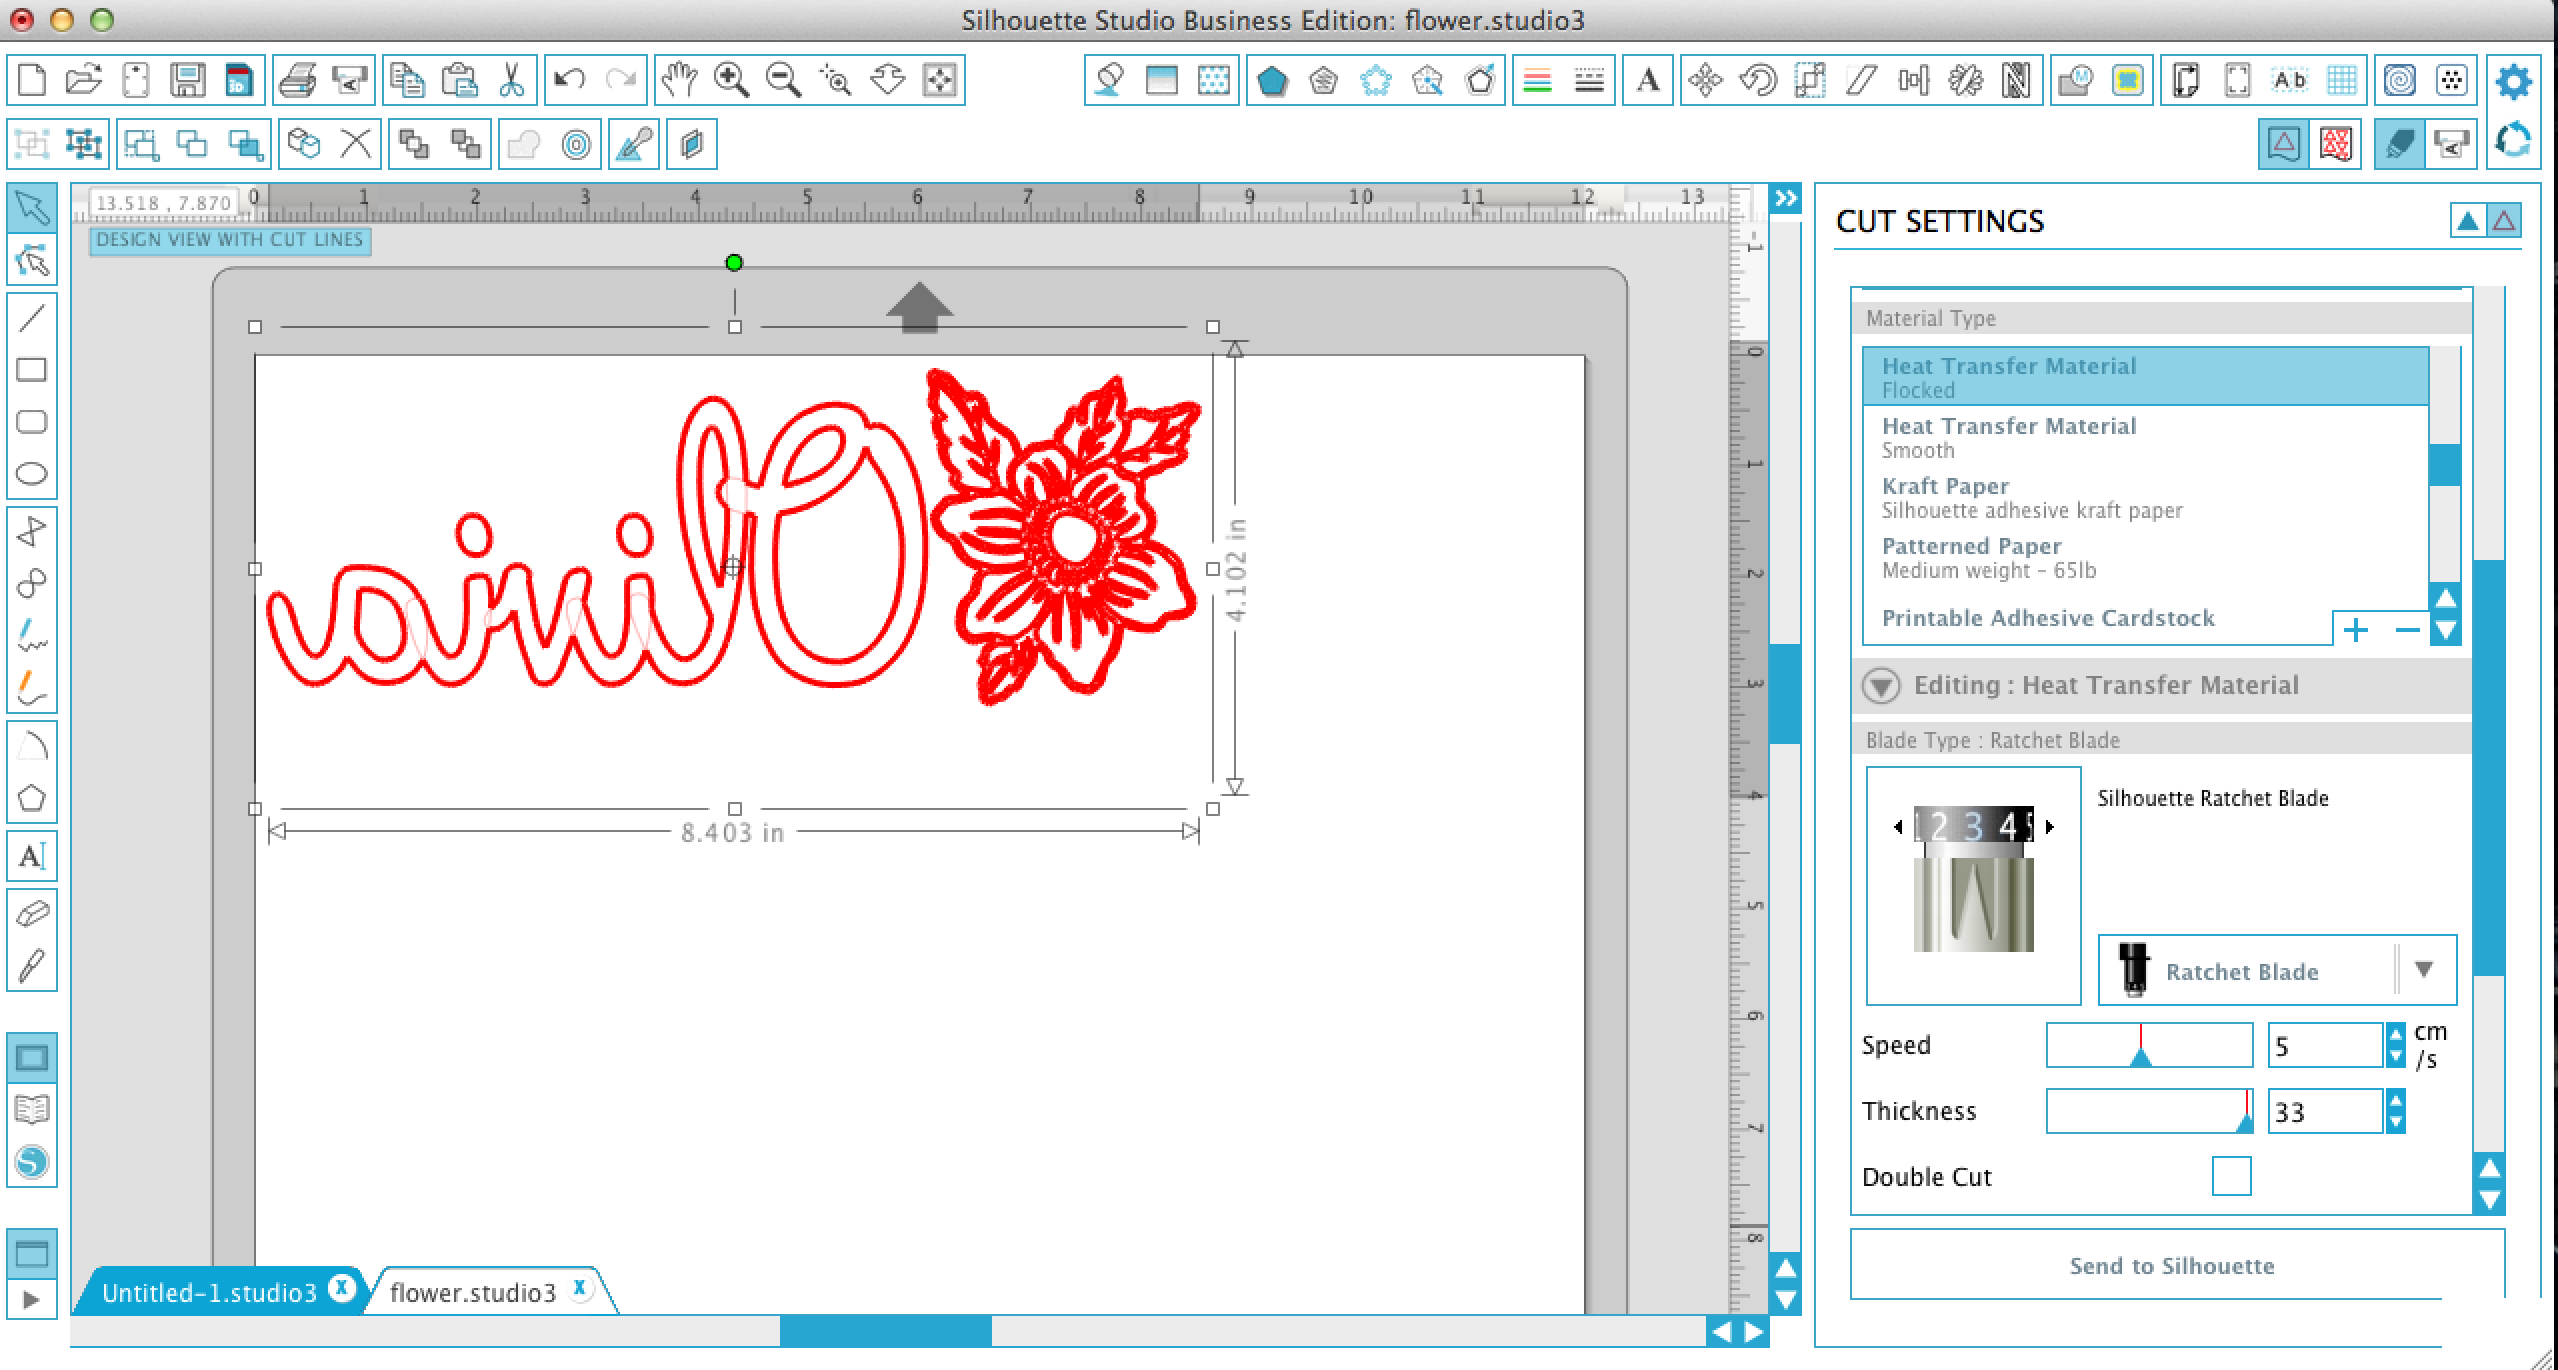
Select your material as ‘Heat Transfer Material – Flocked’ if you are using Glitter HTM. Adjust your blade to 3, according to the dialog.
Step 6
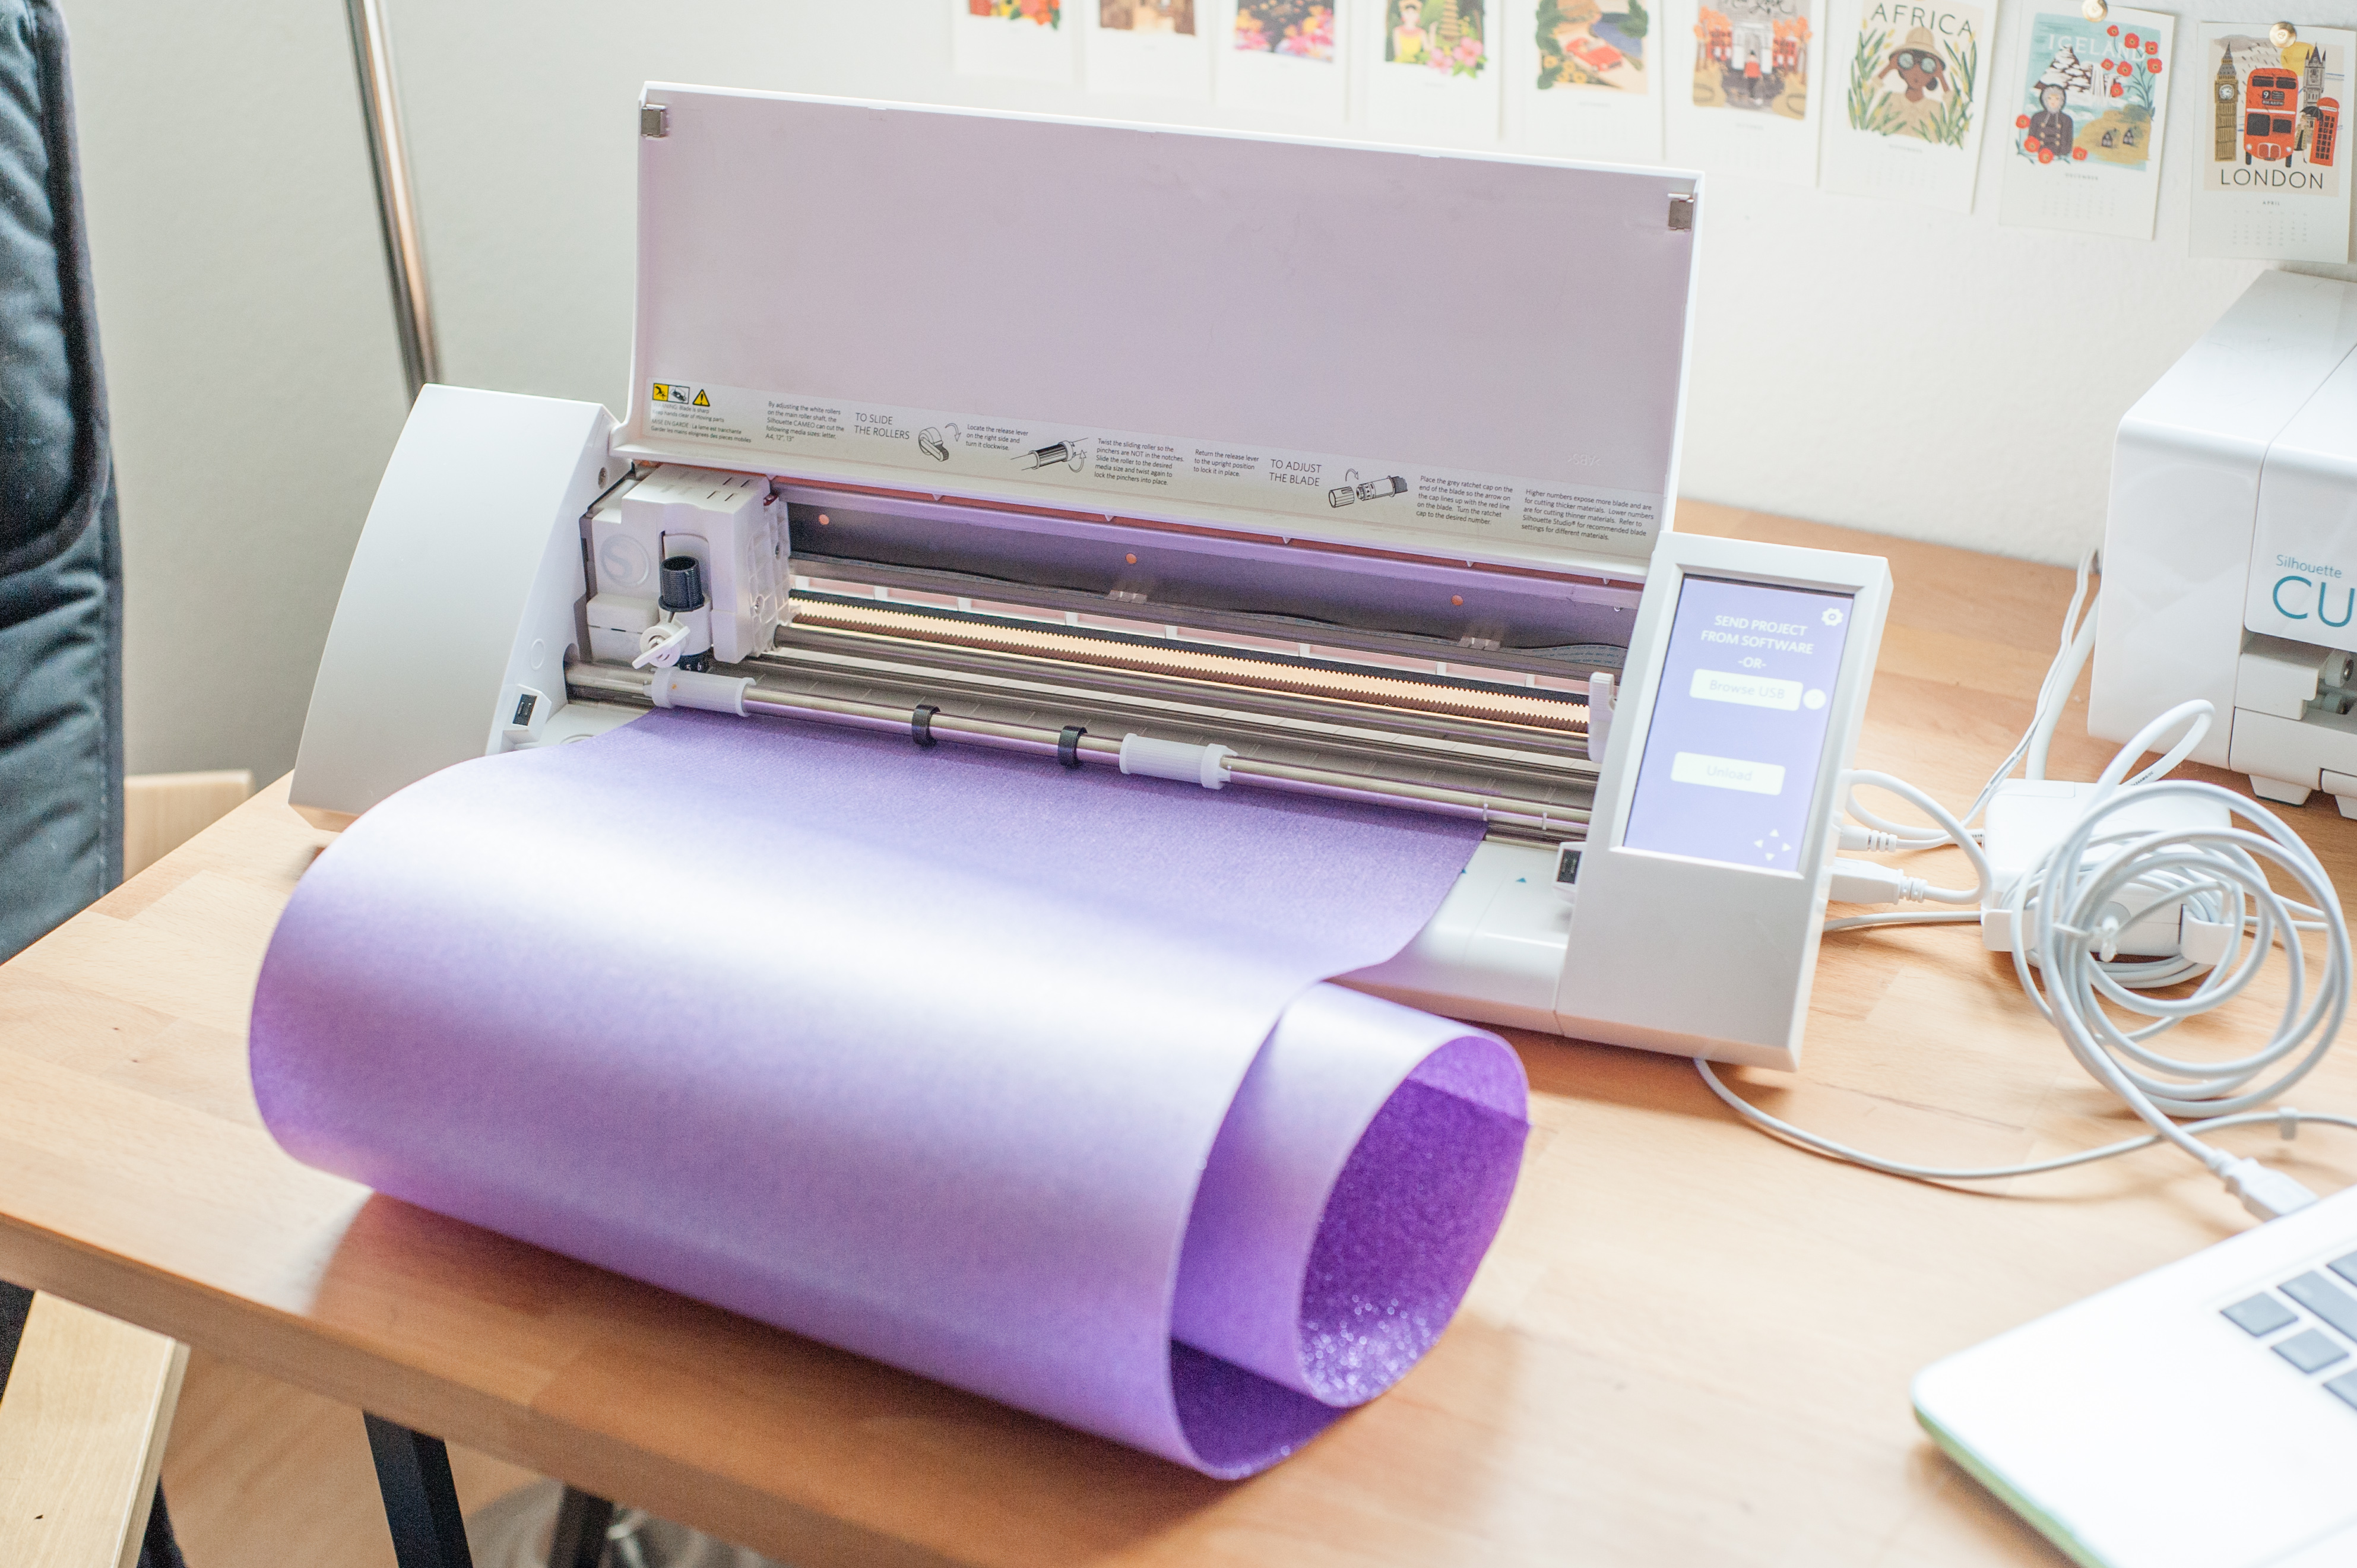
Load your Heat Transfer Material into your Silhouette by inserting the edge of the HTM, without a mat, into the machine and hit ‘Load Media.’ Make sure that the glossy/glittery side is facing down and the dull side is facing up. Once you are loaded, hit ‘Send to Silhouette’ back in the software and watch your machine work it’s magic!
Step 7
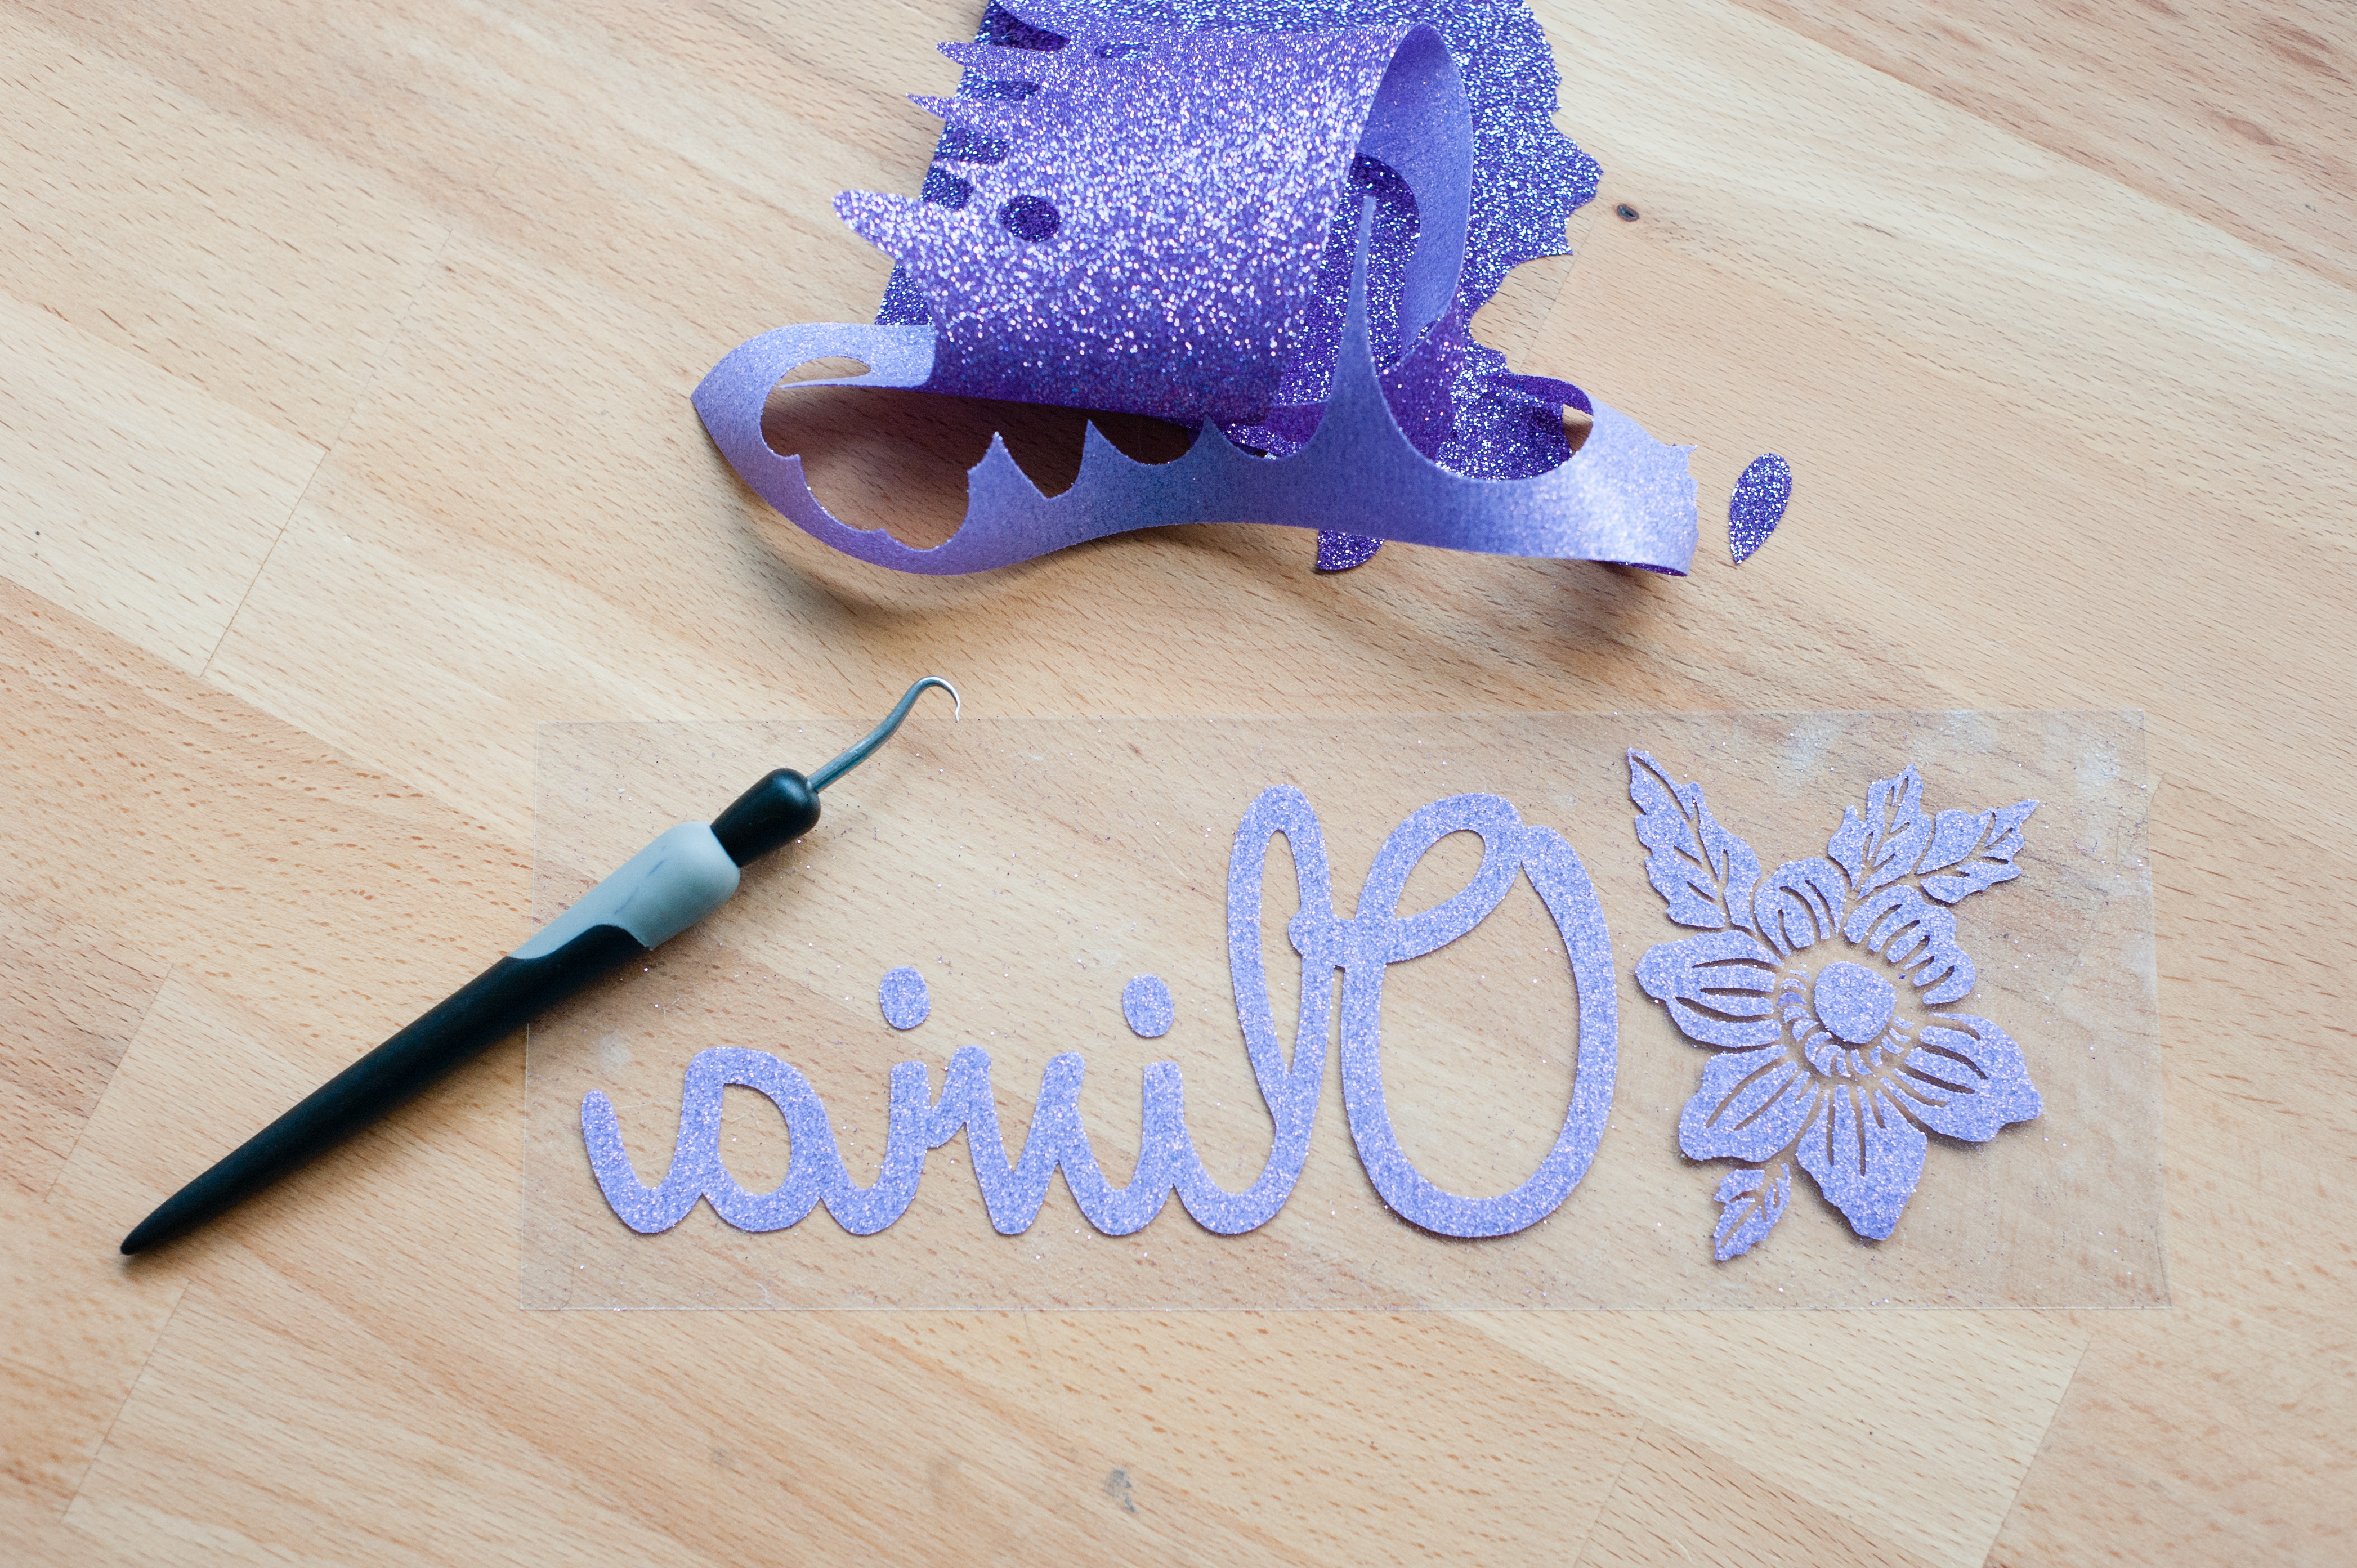
Once your design is cut, remove the HTM from your machine by clicking ‘Unload Media.’ Then weed your design using the hook tool.
Step 8
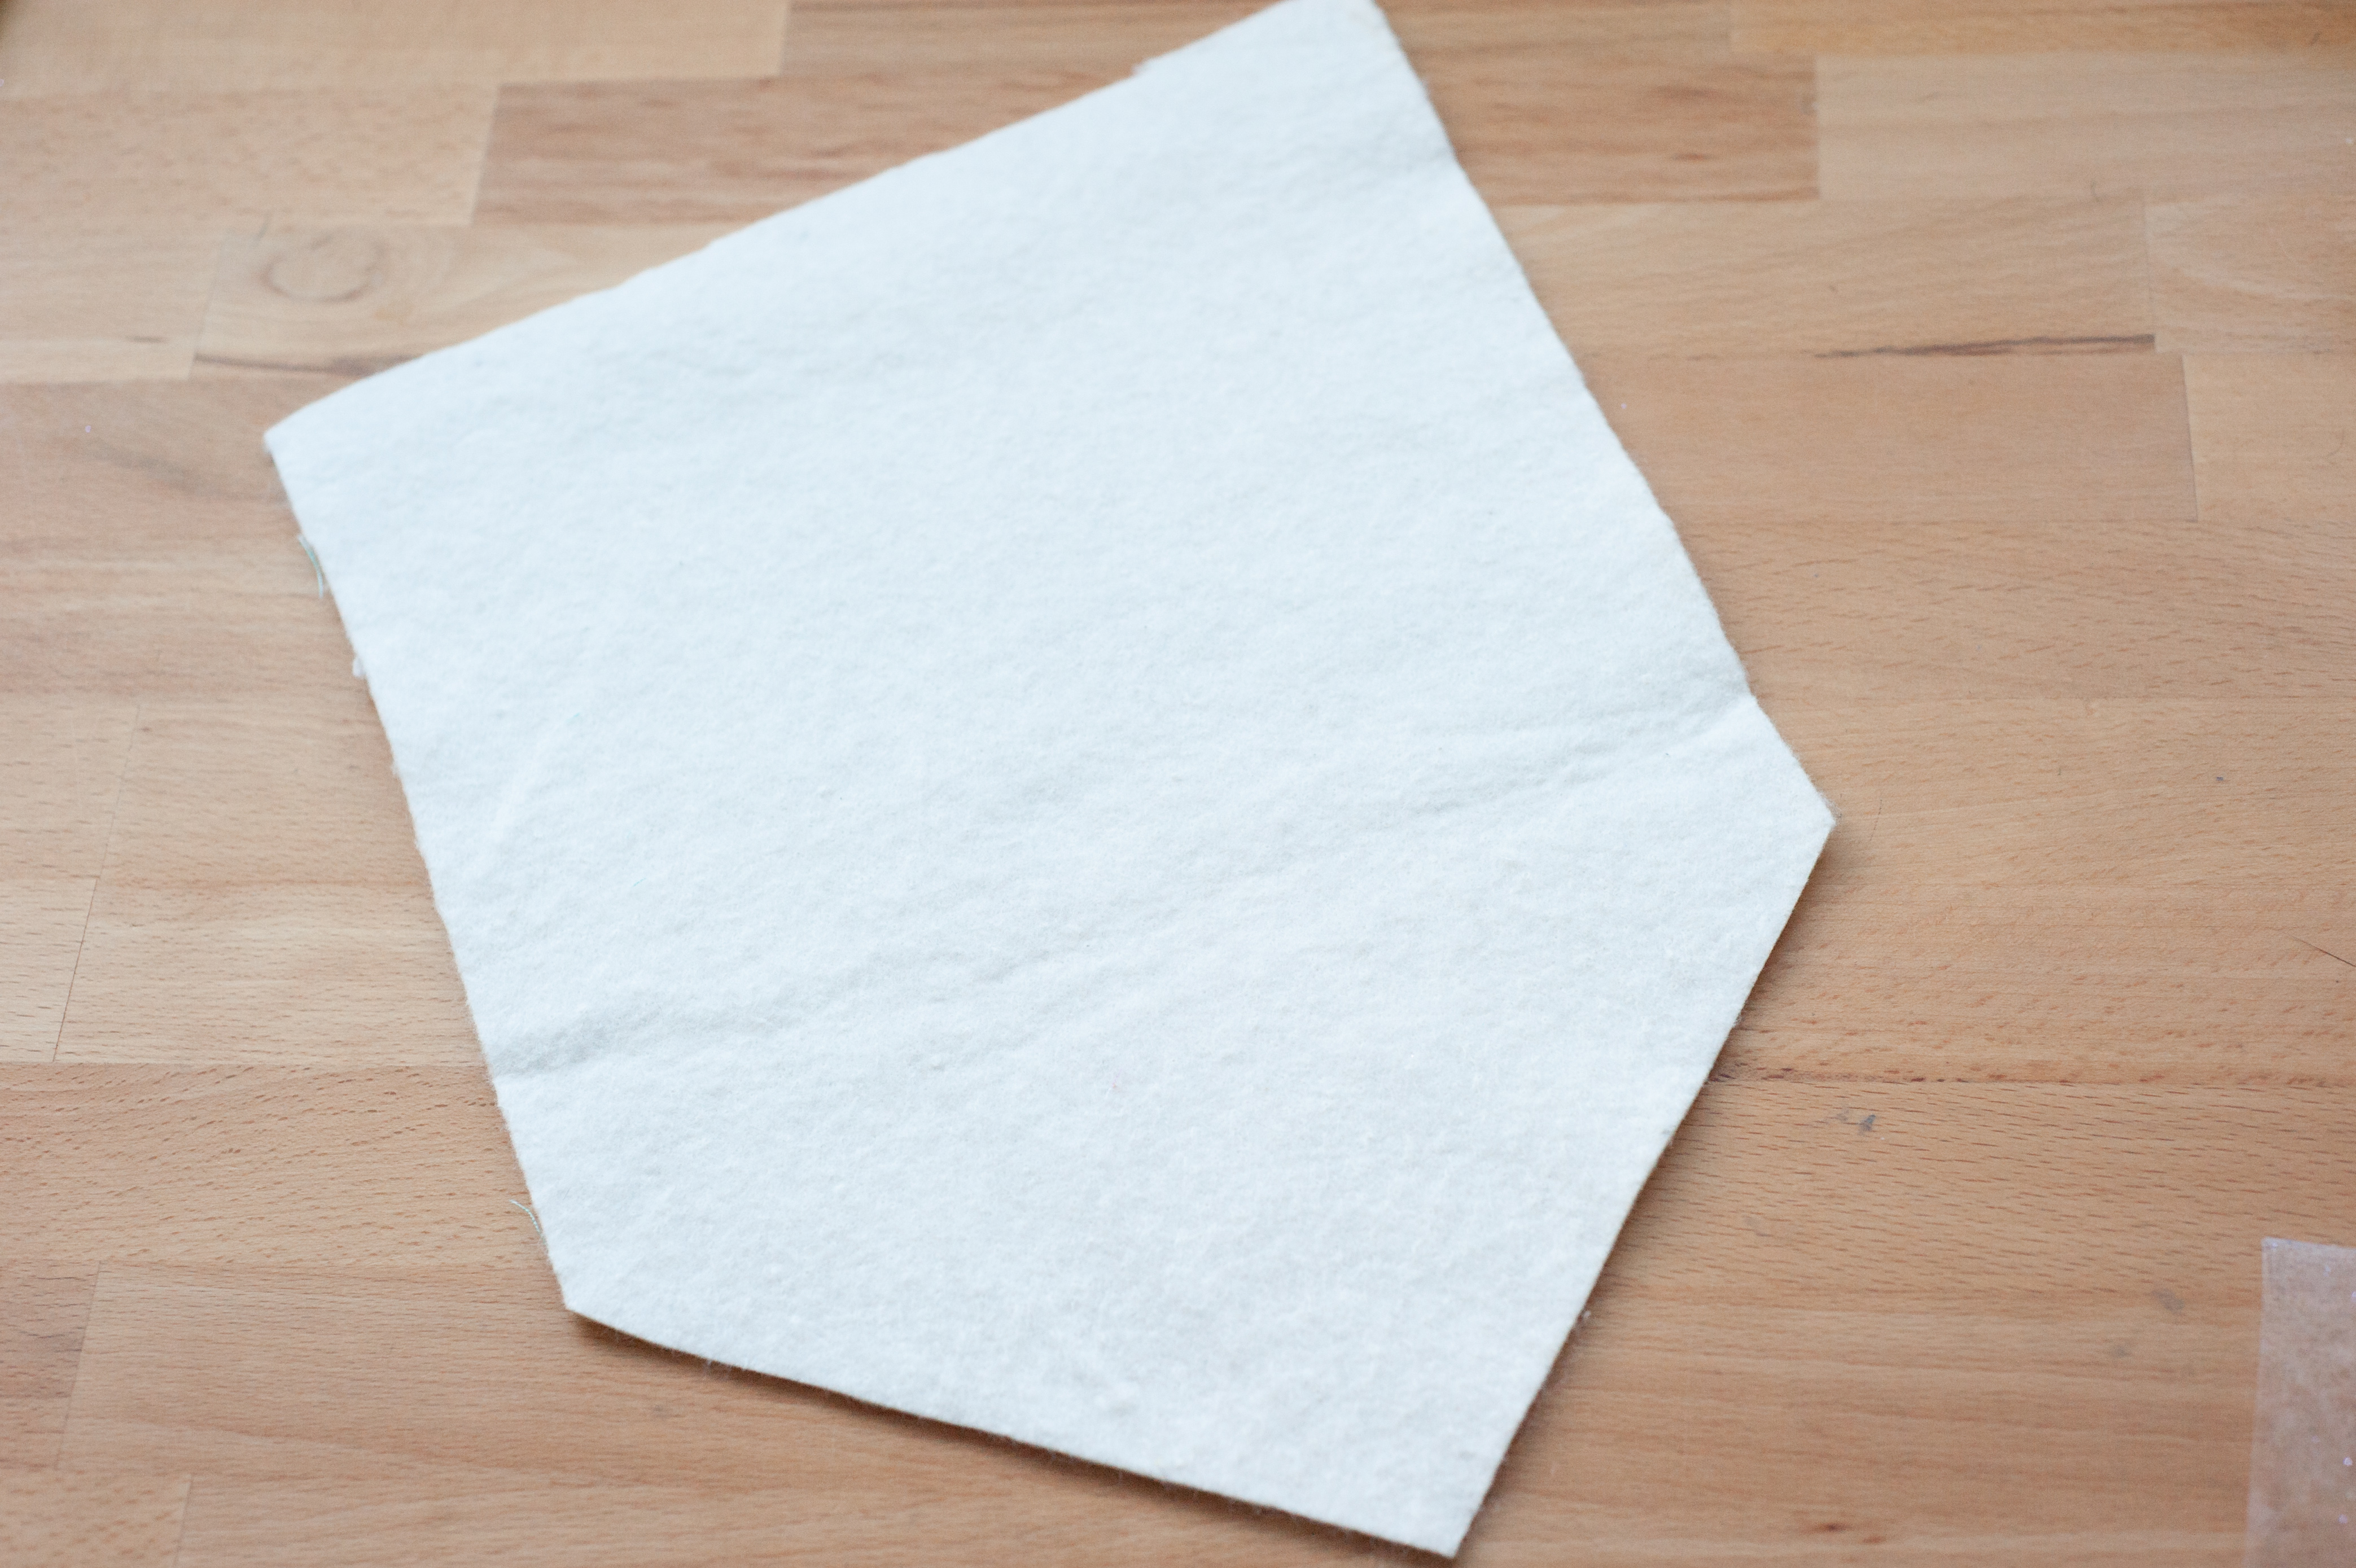
Cut out a banner shape from a piece of fabric or material. Here I used a piece of ivory-colored felt.
Step 9
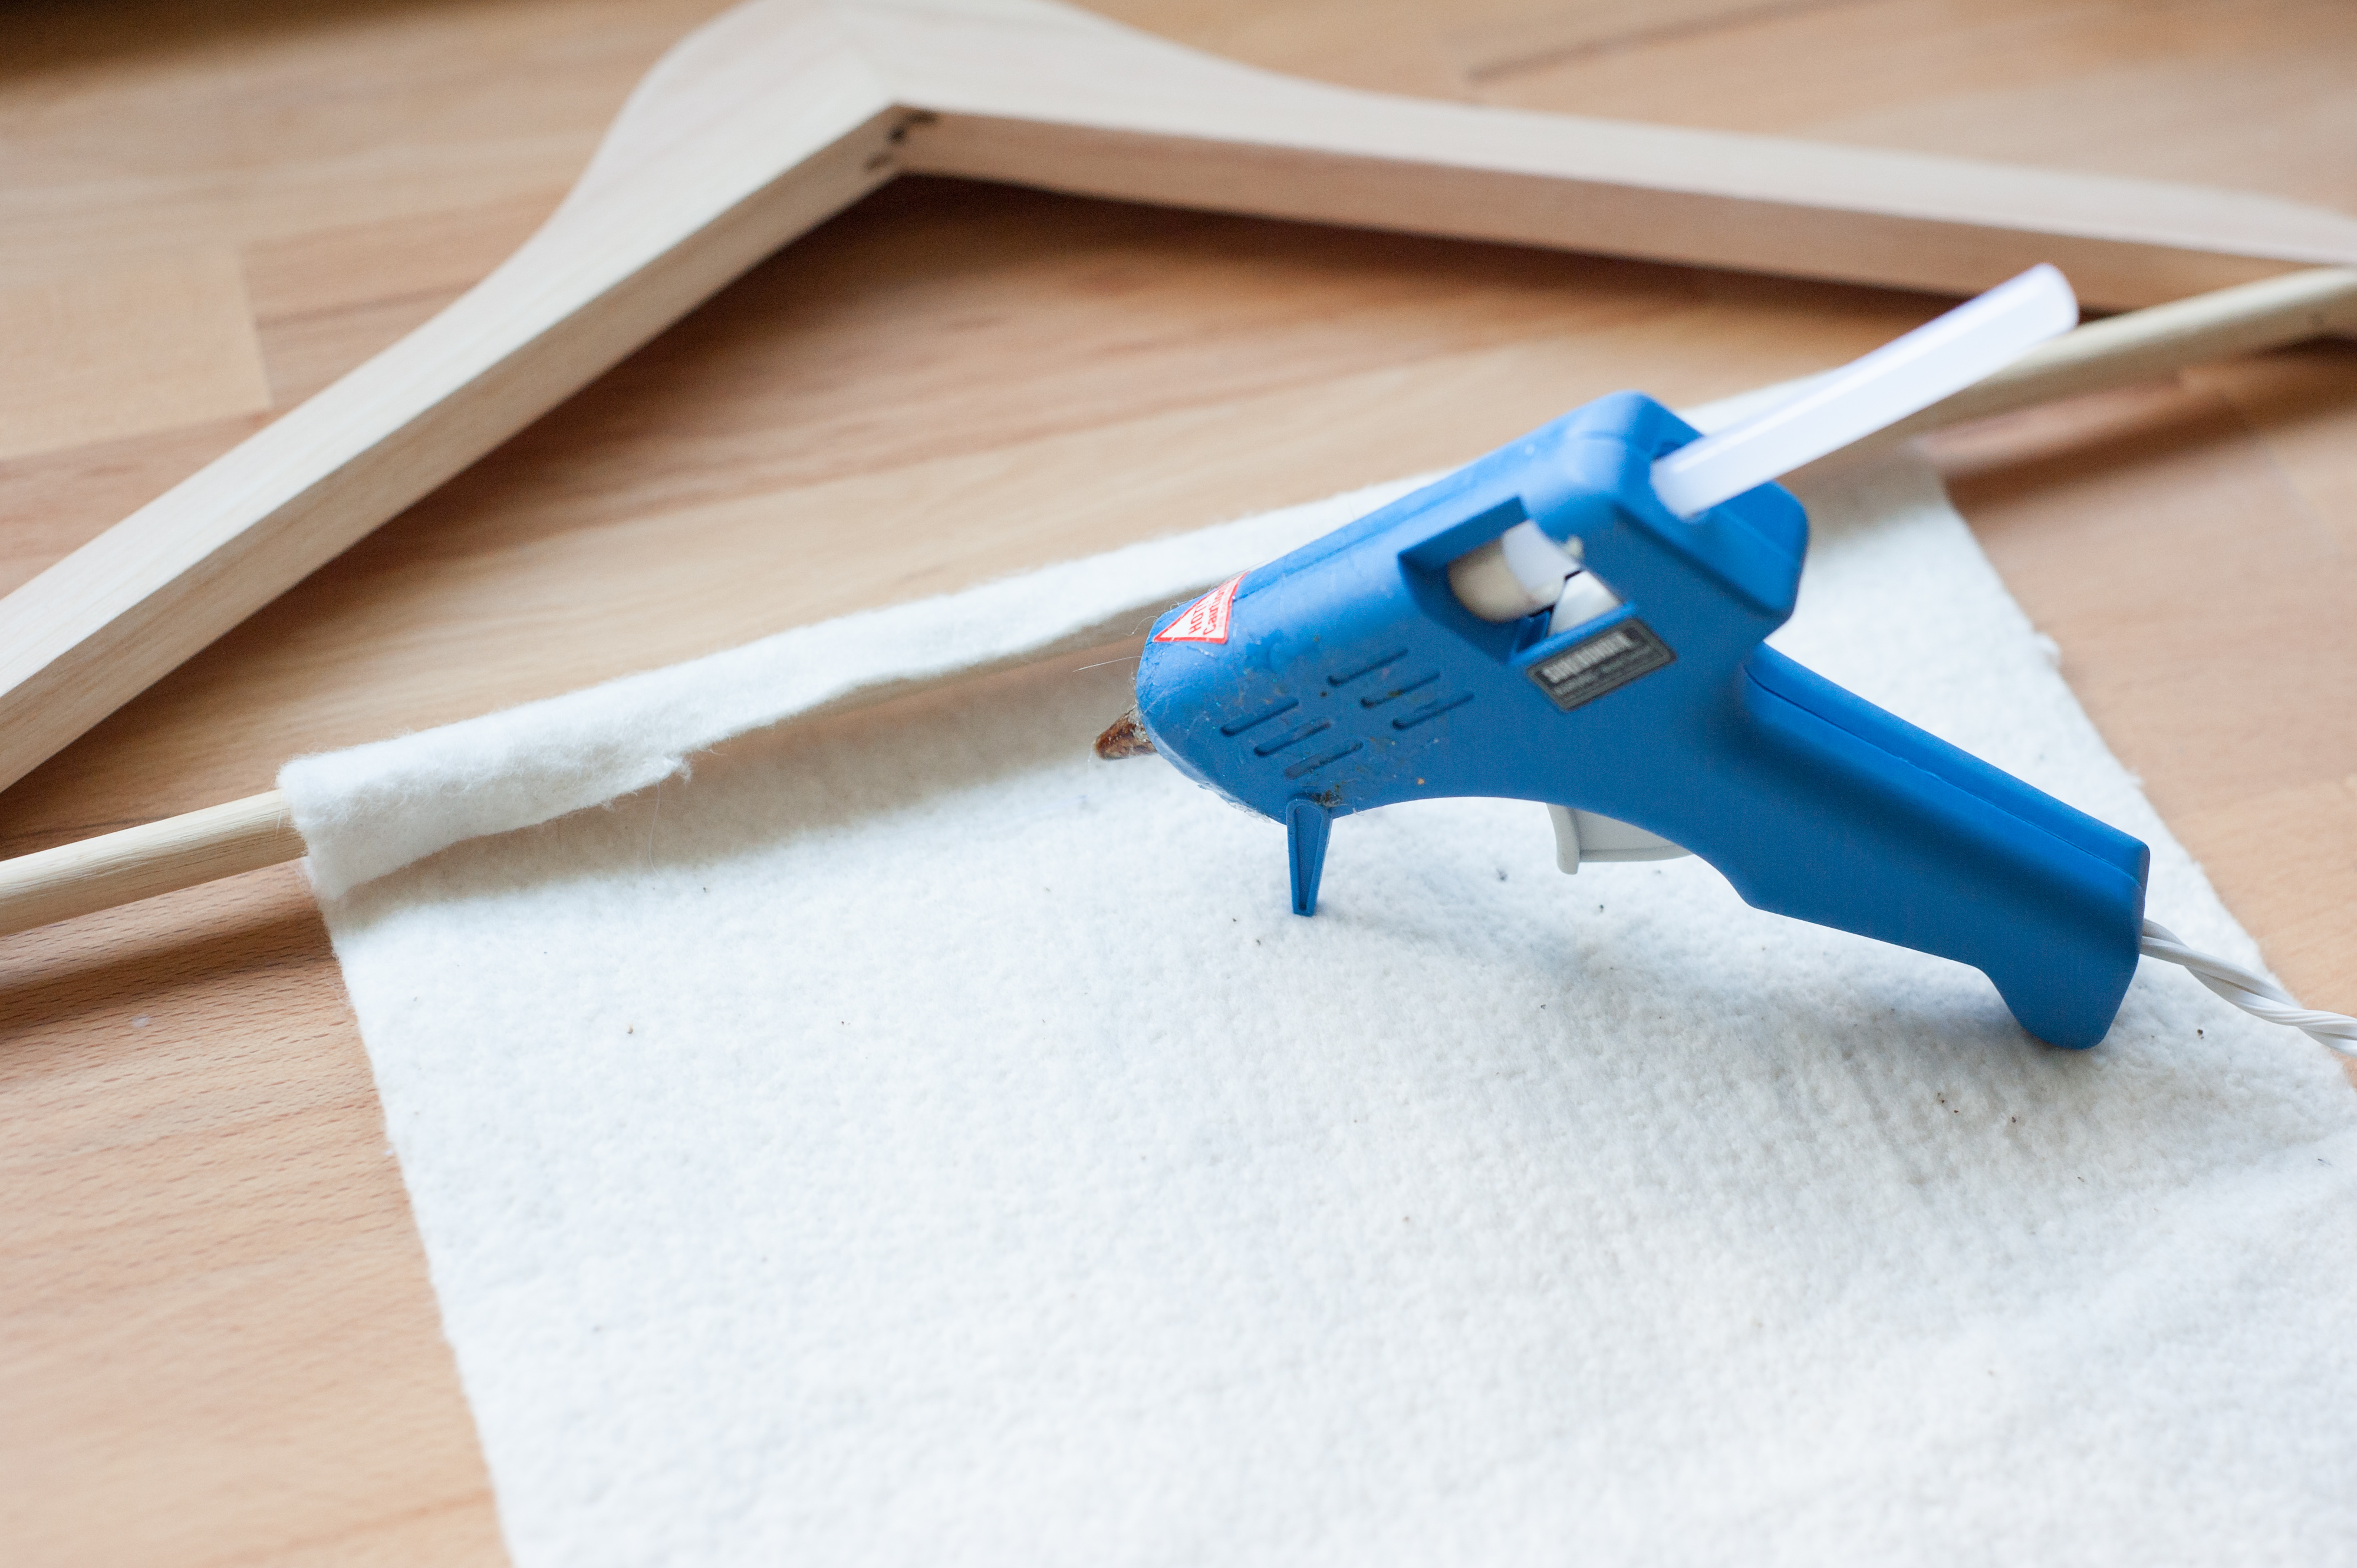
Glue your banner around a wooden hanger or dowel by adding a thin line of hot glue and pressing down.
Step 10
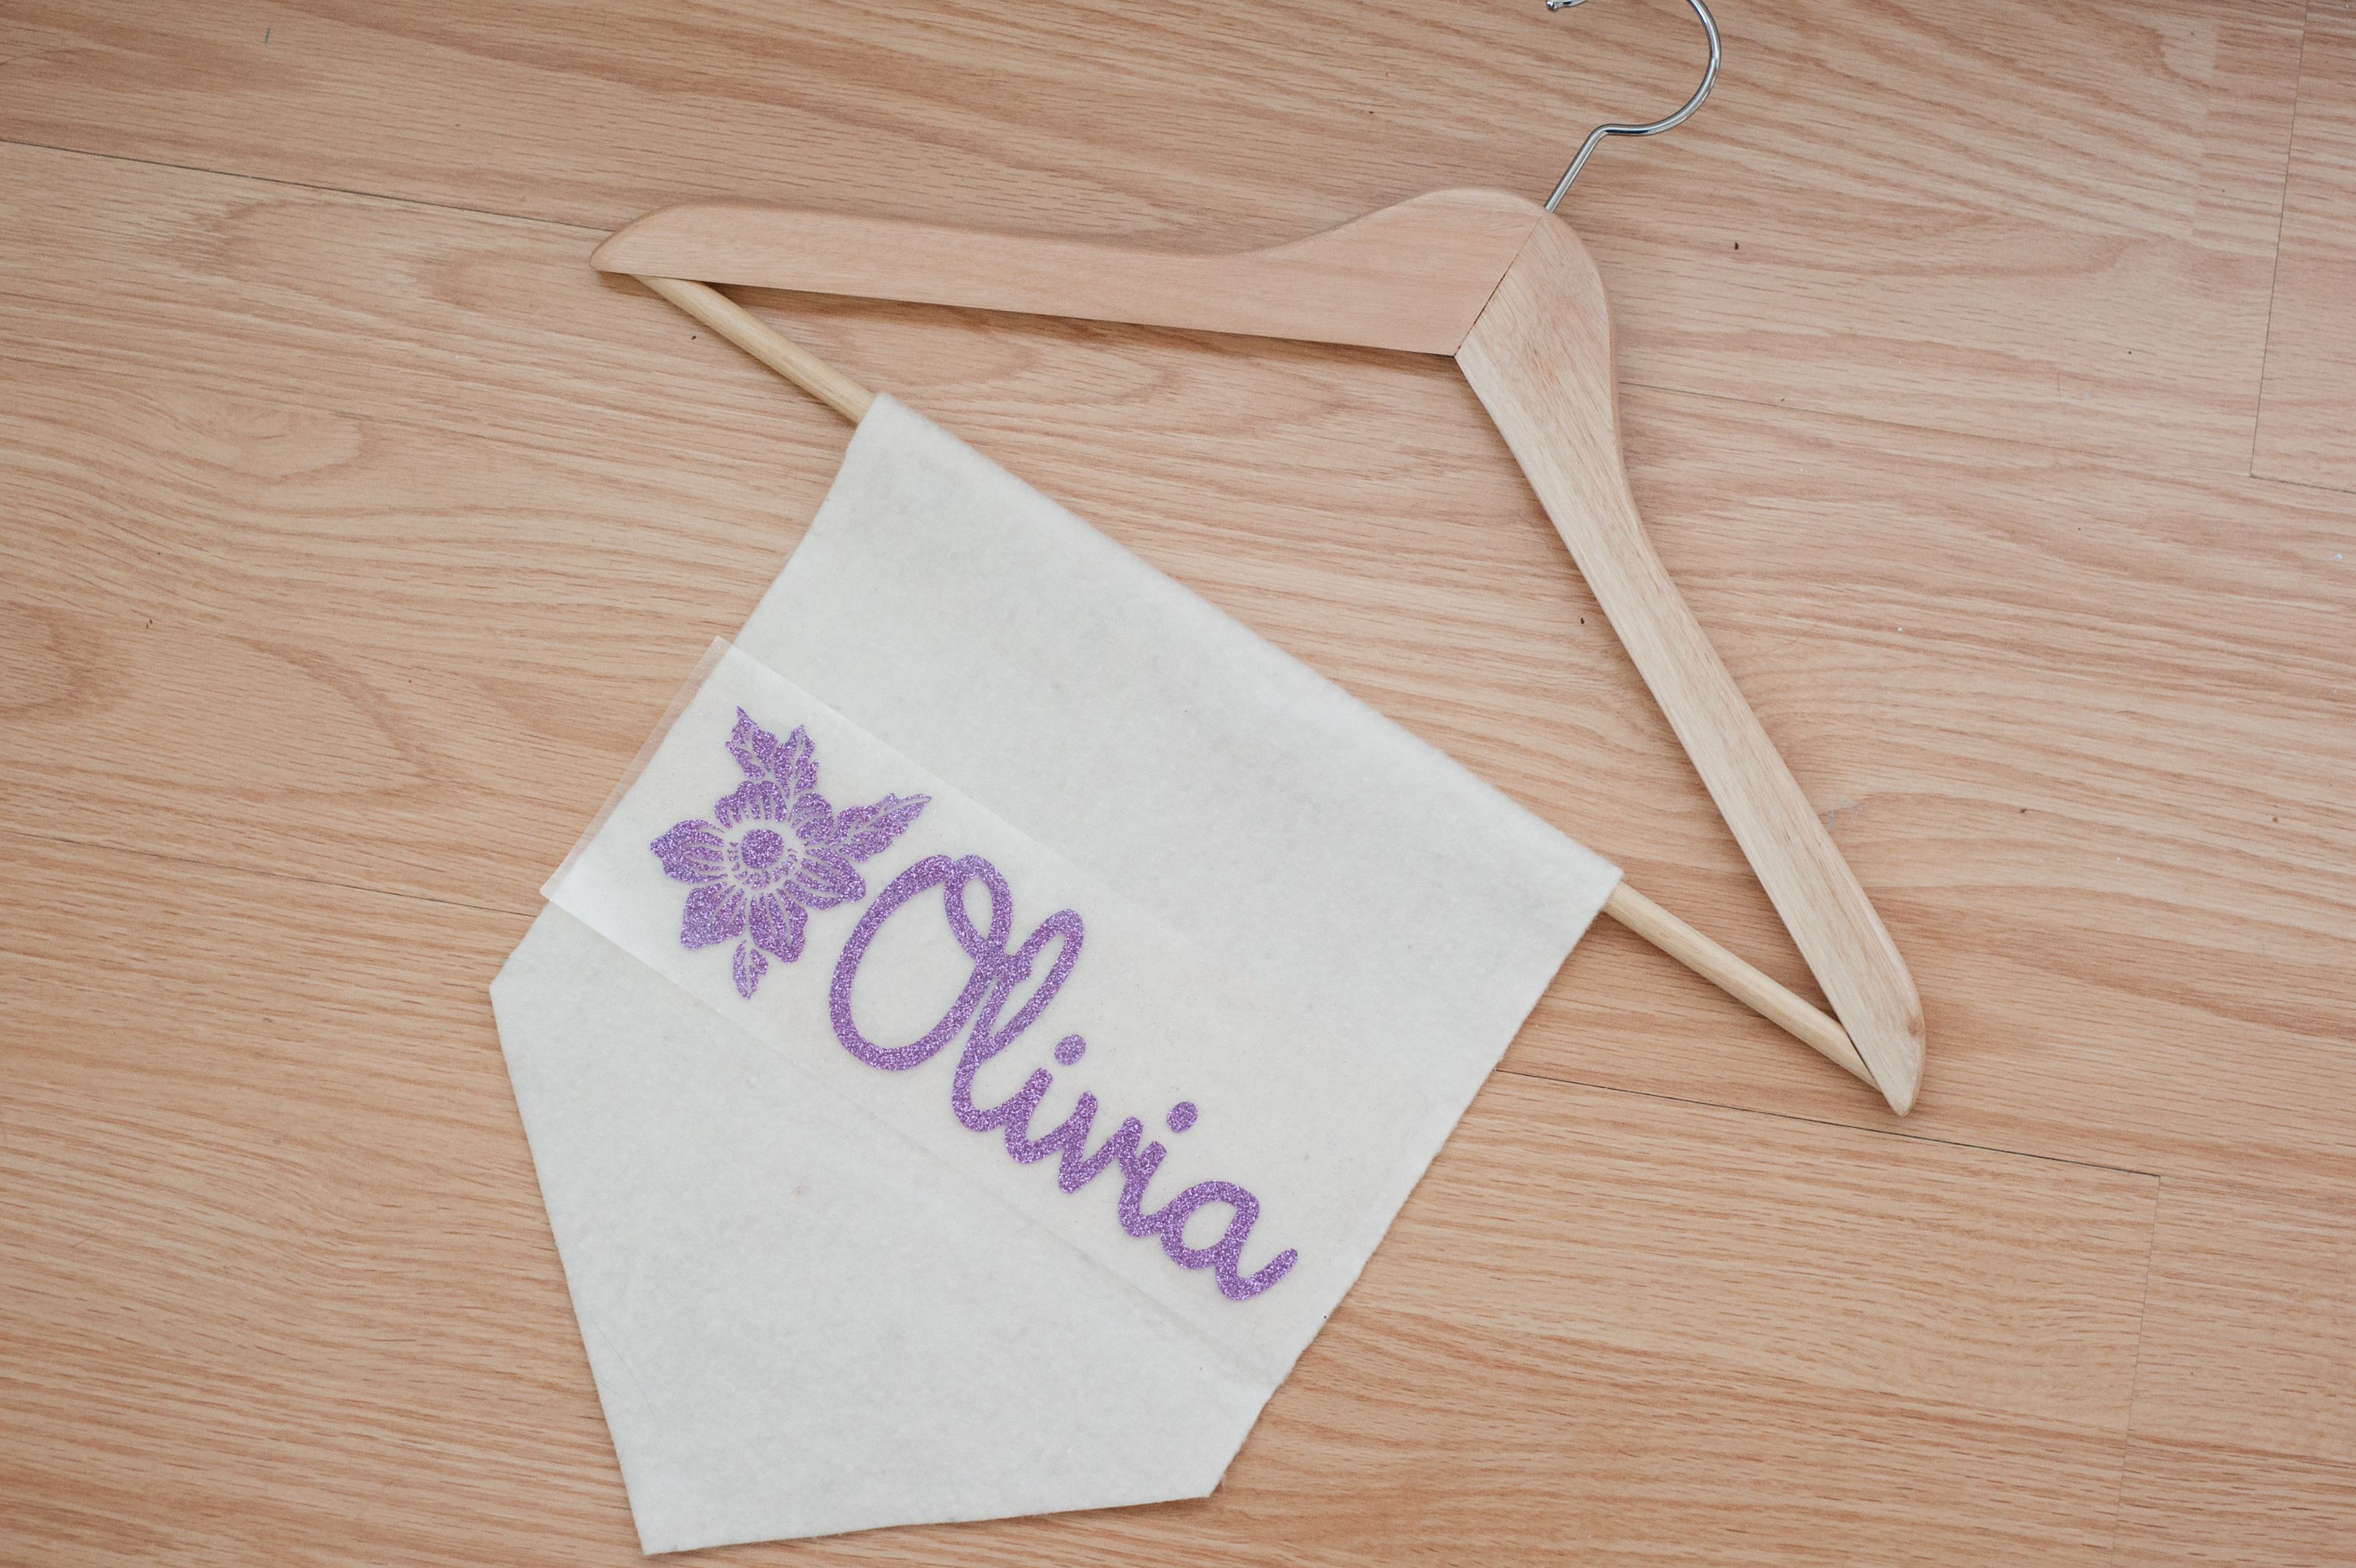
Flip your banner over, and position your floral name design over your fabric. Once you have it adjusted to where you want it to be, press down firmly and smooth it out.
Step 11
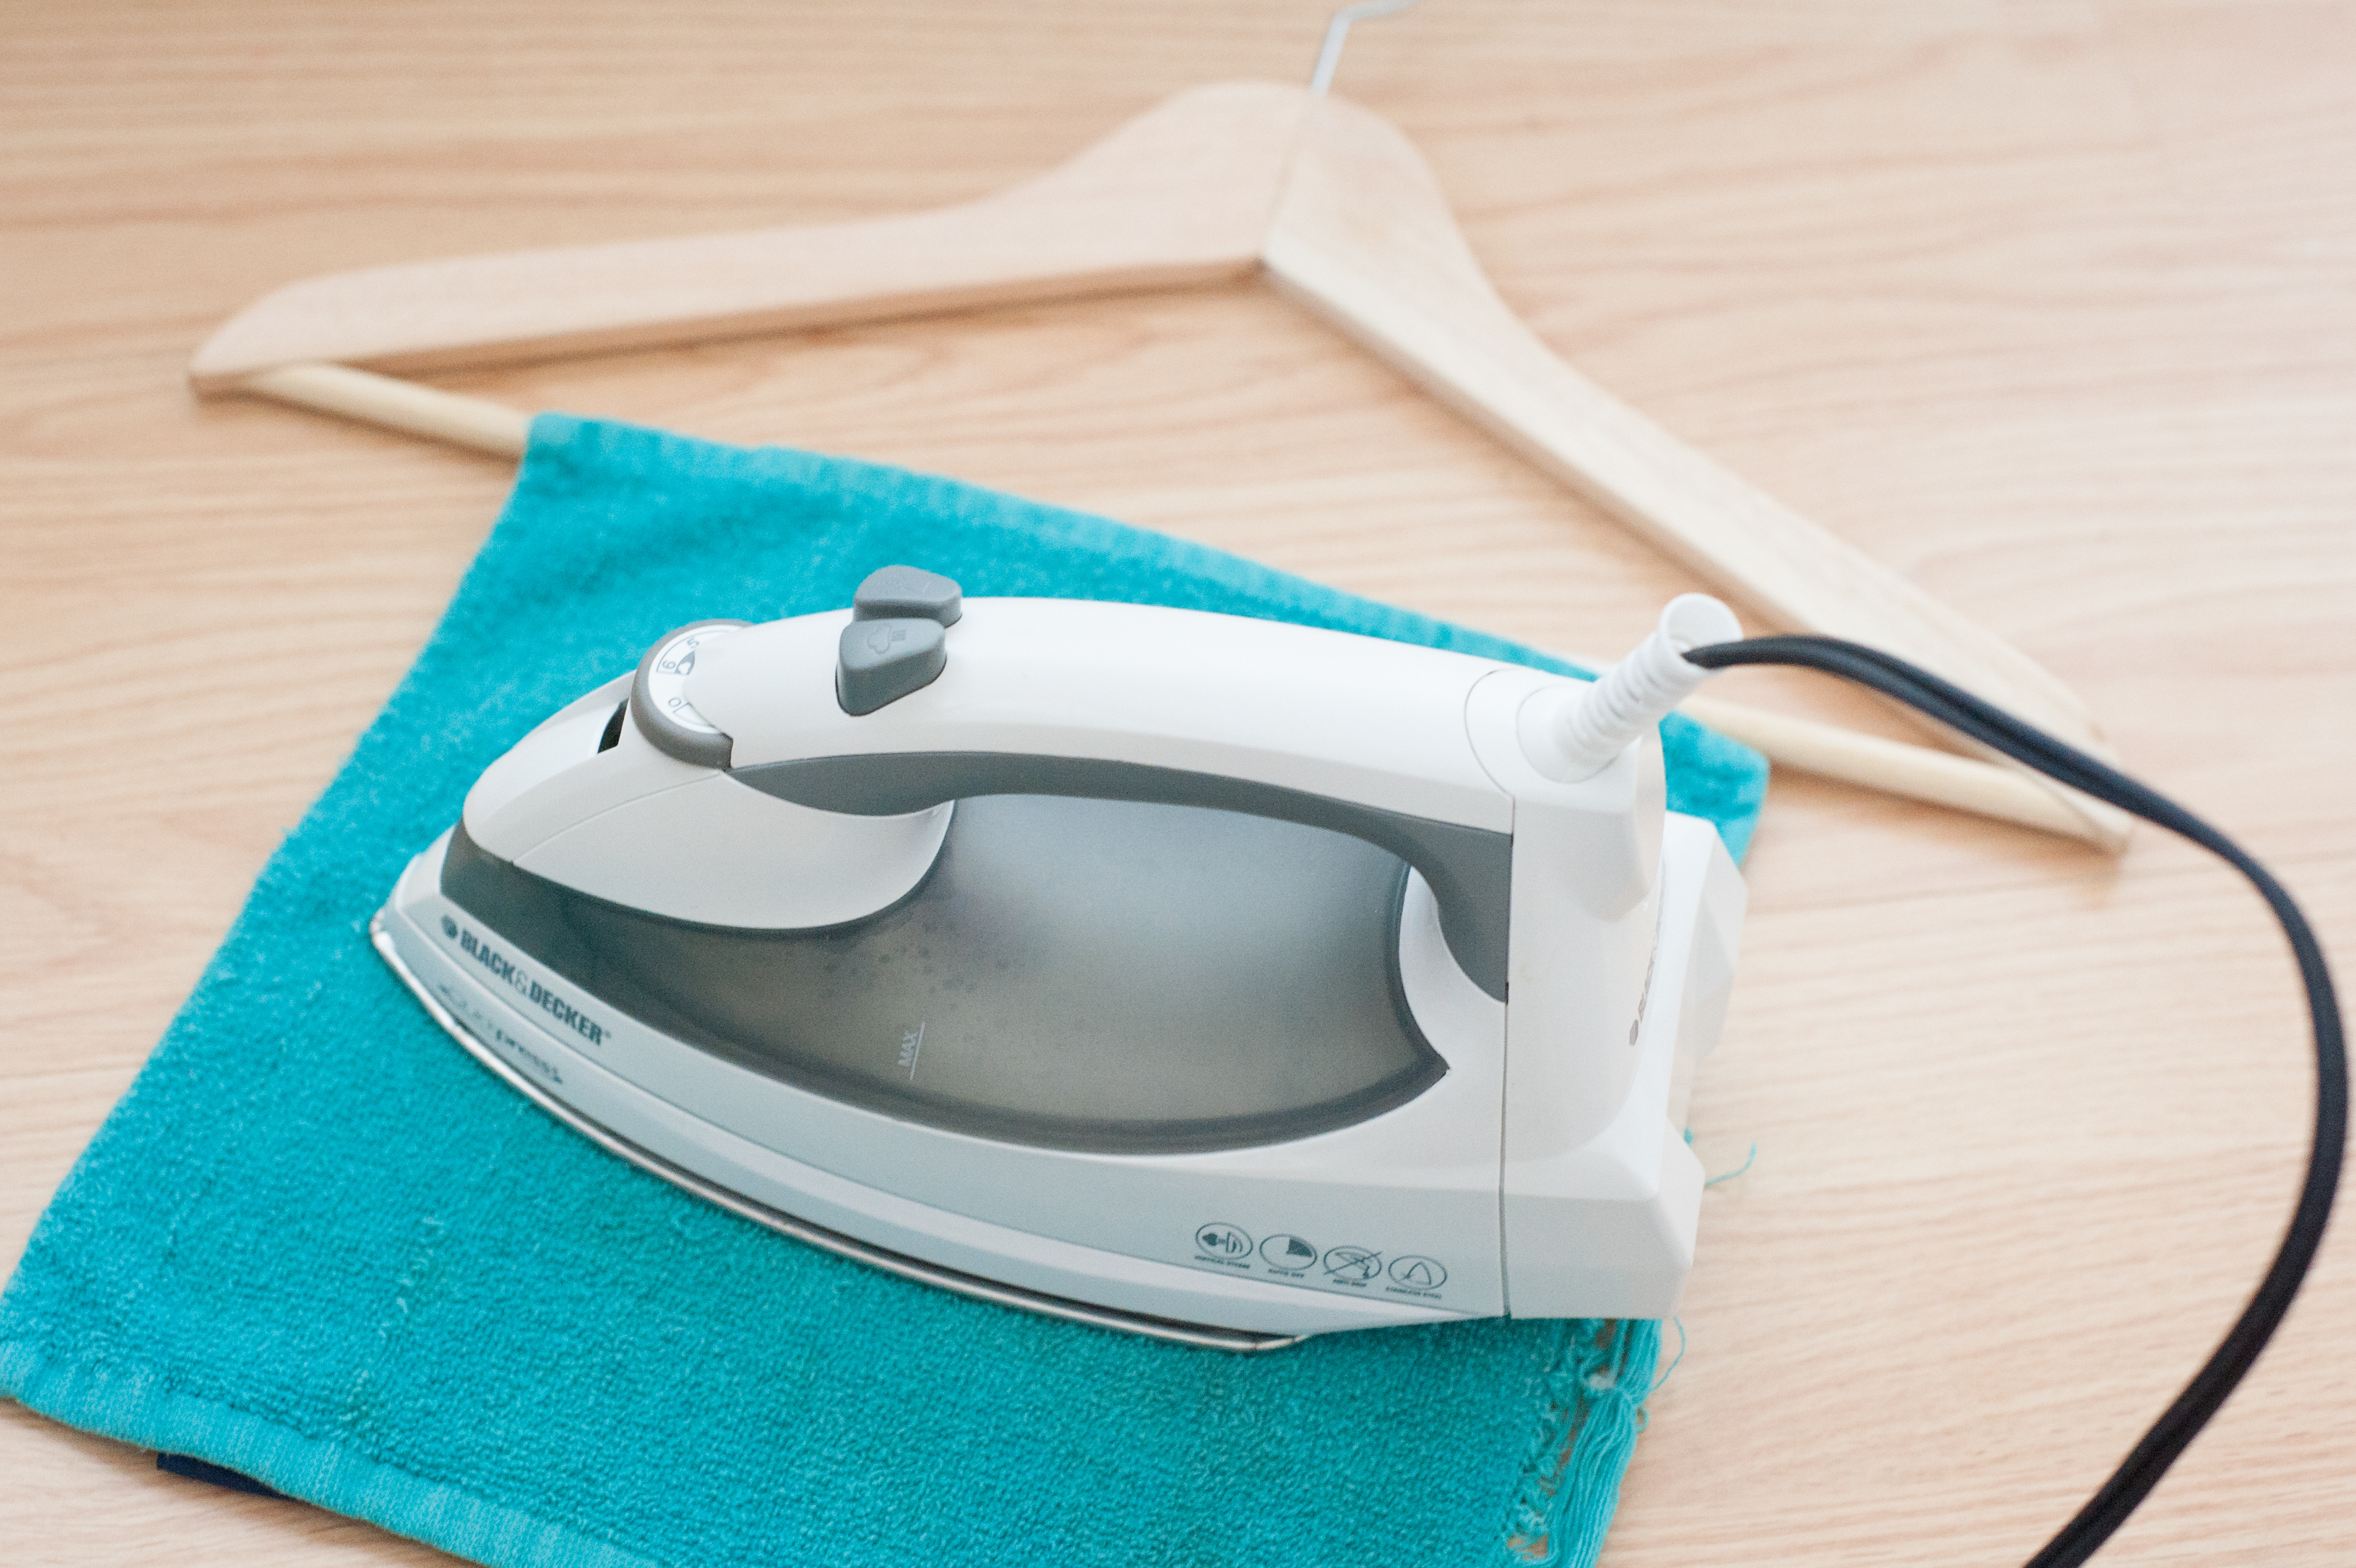
Cover your banner with a cloth or another piece of fabric and run your iron over it, pressing firmly. Do this for a minute or two, then check to see if your design has adhered to your banner by peeling up the plastic edging. If the design is still stuck to the plastic, carefully place it back down and continue ironing.
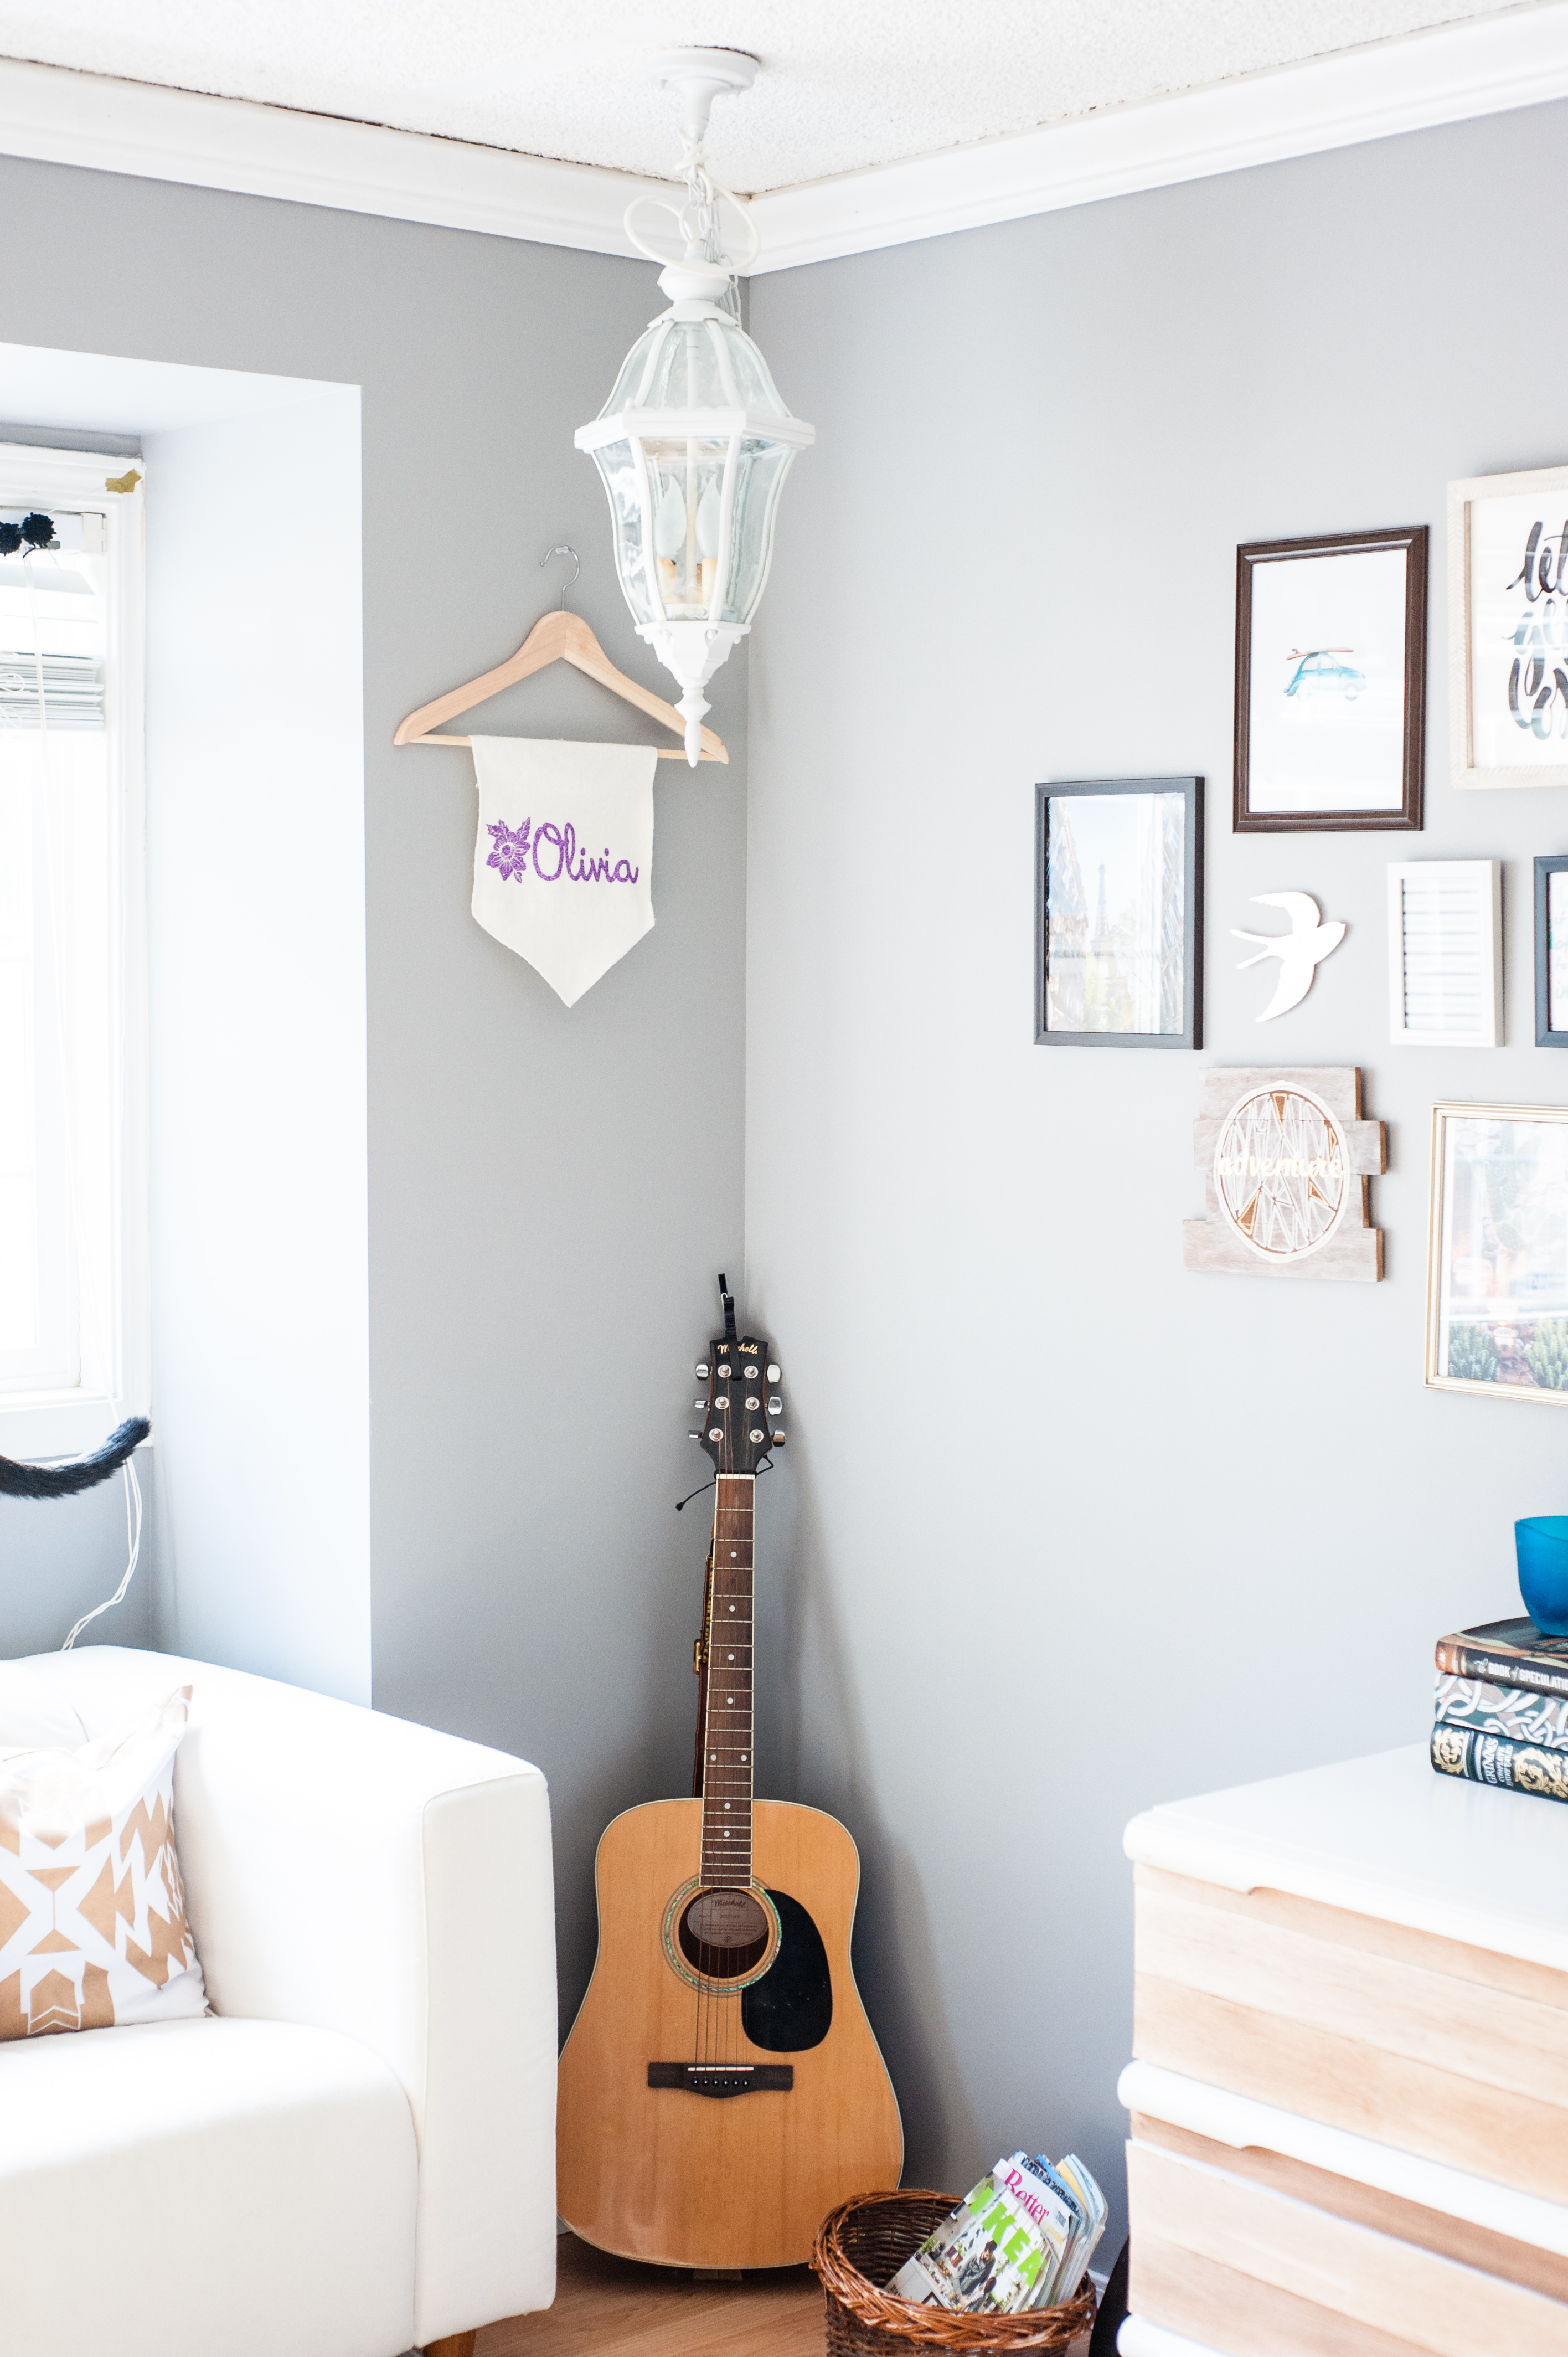
Once it’s done you can easily peel up your plastic sheeting and you will have your finished floral name banner!

Nasze Naturalne
September 3, 2025
Your authentic voice really shines through in everything you create and share
Naszenaturalne
September 2, 2025
Really love your style
Kelly Wayment
June 28, 2024
You can use it with vinyl as long as it is smooth and flat to allow the static charge to hold on to it. Rolled vinyl that wants to go back to its rolled shape will not necessarily work well, and it would need to be trimmed to fit the ES mat cutting area.
Kelly Wayment
June 28, 2024
Yes, you can use the heat pen while using the ES mat. 🙂
Yurii
March 2, 2024
Hello. May it be used with heat pen?
Thanks
Jerome
February 24, 2024
Hi, works this with the normal vinyl foils or only with printer papter etc?