Hi all, Nicole here today! For this project, I used a super versatile shape that is perfect for spring—or any time of year!
Today I am sharing a spring framed art project that is sure to brighten up any area of your home! I placed my new artwork on my Spring-themed mantle.
You Will Need:
- Silhouette CAMEO® (or Portrait)
- Silhouette Studio®
- Double-Sided Adhesive Cardstock Starter Kit
- Cutting Mat
- Blade
This project incorporates two mediums: flocking on Silhouette’s Double-Sided Adhesive Cardstock and a printed image. The printed image component is actually a trick I recently learned to fill text (or any shape) with any photo, and I can’t stop using it.
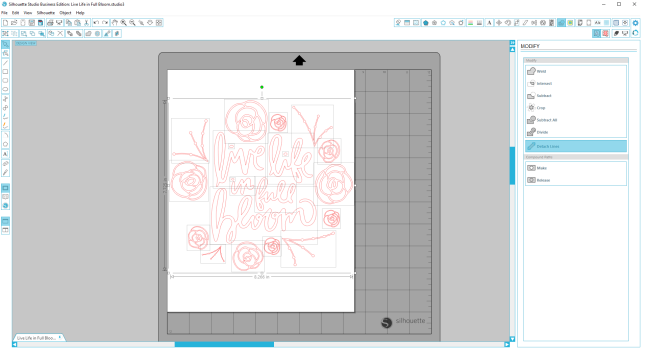
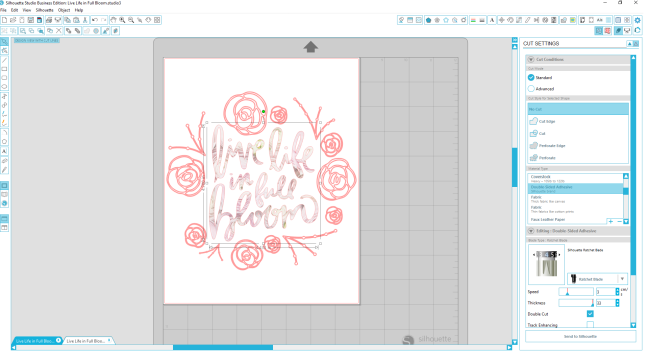
Step One: Open and Edit Free Design
After you open the Free Shape of the Week in Silhouette Studio®:
(1) Resize the design to fit on the page and center it to fit.
For the base of this project I printed the shape on an 8.5 in. x 11 in. sheet of white cardstock, so you’ll want to adjust your page settings based on what you’re printing on.
(2) Select the shape while in the Modify panel.
(3) Click “Detach Lines” once.
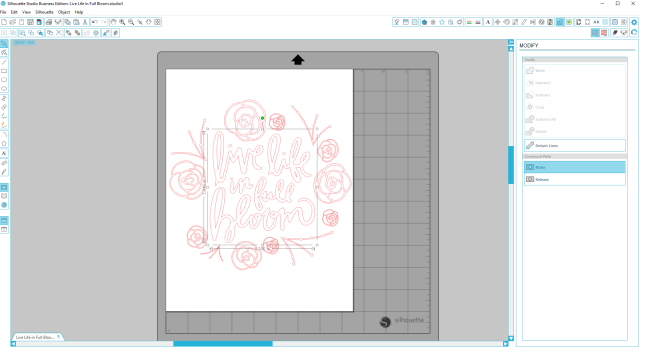
Later we will fill the words with an image, but first we need to merge all of the text pieces into one shape by:
(1) Highlighting only the words in the center.
(2) Clicking “Make” to merge them into one shape.
Step Two: Upload Photo as Pattern
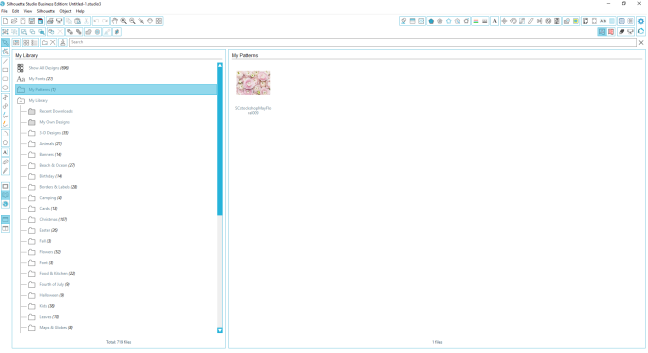
Grab a photo that you already have on your computer and love. I used a ranunculus photo I purchased a while back from the SC Stockshop and saved the photo to my desktop.
To save your photo as a pattern in your library:
(1) Open “My Library” in Silhouette Studio®.
(2) Click and drag the image you want from your Desktop into the My Patterns folder in “My Library.”
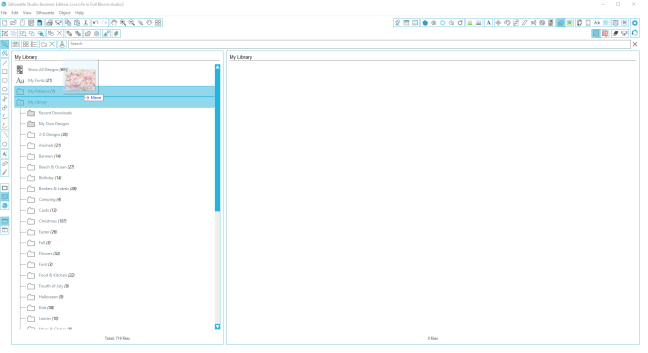
Once the image uploads, you will see the thumbnail appear in My Patterns.
Super simple, right?! Mind. Blown. Okay, now we’re ready for the fun part!
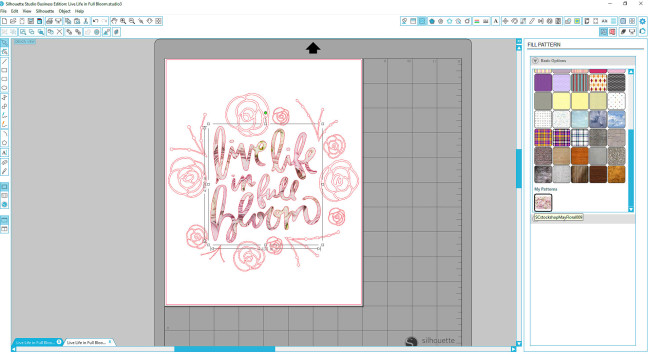
Step Three: Fill Text with Pattern
To fill the text with a pattern:
(1) Open the Fill Pattern window.
(2) Scroll to the bottom of the Basic Options and you will find “My Patterns” and you will see your newly uploaded image! Yay!
(3) Click the center text shape that we already made and click to fill the text with your photo.
Easy peasy! Seriously that’s it.
Now you can print this page on your color printer as is. The red cut lines you see will not print, only the image.
To send it to your printer you can:
(1) Click on “File > Print”
OR
(2) Click the little printer icon in the top left navigation bar.
NOTE: In the Silhouette Studio® Designer Edition, it is in the top row, six icons from the left.
Step Four: Cut Flowers and Weed Shapes
Now we cut our flower embellishments.
To cut out our flowers:
(1) Place a sheet of the Double-Sided Adhesive paper onto the Cutting Mat (white part of the paper facing up).
(2) Click the center text.
(3) Choose the “No Cut” option in the Cut Settings panel.
NOTE: Since we printed the text on a separate piece of paper, we don’t need to waste time or product by cutting it on the Double-Sided Adhesive.
(4) Use the default cut settings in Silhouette Studio for Double-Sided Adhesive and load your Mat into the CAMEO.
To add the cut flowers to the white printed cardstock:
(1) Place each of the embellishments on the printed cardstock by grabbing the flowers with the Spatula Tool.
(2) Weed each piece until you are left with only the little flowers.
(3) Place them on your page according to the original design.
(Note: In general, I prefer REALLY simple projects and this part of the project was tedious but stay with me because the final product is TOTALLY worth the effort!)

I did all of the flowers first and saved the little leaf accents for later, since I used two different colors of flocking. I found it easier to do one color at a time and not stress about any cross-flocking contamination.
Once all of your flower shapes are weeded and on your paper, you are ready to flock!
Step Six: Flock, Baby, Flock
I highly recommend the Double-Sided Adhesive Starter Kit even if you are not a beginner to Double-Sided Adhesive Sheets. This kit comes with the Paper, Spatula, and a handy Brush for applying the flocking or glitter, etc. It also comes with the flocking I used in this project. You can buy the glitter that comes in this kit separately, but you can’t buy the flocking separately. And. it. is. awesome.
I used the hot pink and lime green colors! So bright and Springy! It’s also fun and really easy to use.
Grab the included brush and the hot pink flocking powder and get ready to flock!
(1) Grab a little pinch of the powder and sprinkle it over each flower.
(2) Take the brush and rub, dab, and splotch the powder into the adhesive paper.
I get a little rough with it to make sure I really cover the sticky areas on the adhesive.
When you are satisfied with the coverage you can
(1) Dump the excess into the trash
OR
(2) Roll up the edges of the paper, tap the excess into the center of the page, and carefully pour it back into the little container.
I also blow on each flower to really get the extra powder off of the page.
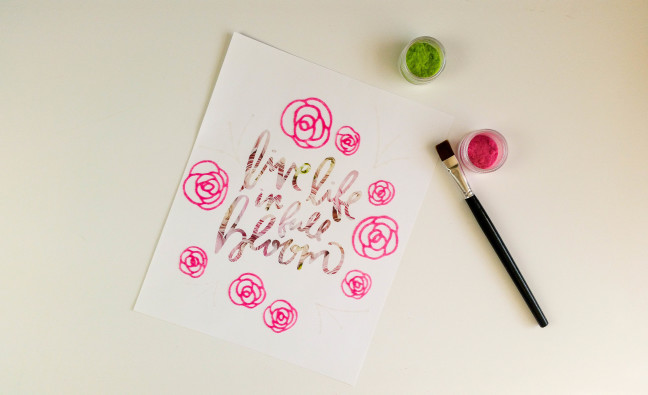
Remember earlier when I mentioned doing the flowers first and saving the leaf accents? This is why.
We want to ensure we are done with the first color of flocking and have cleaned our page before adding another color. The leaf accents are MUCH easier then the flowers because they require no weeding.
To apply the leaf accents:
(1) Just pull each little leaf guy off of your Cutting Mat and place them on your paper according to the original design.
NOTE: I kept Silhouette Studio® open in front of my crafting space so I could reference the design throughout the process.
(2) Pull off the white paper, exposing the adhesive on the top and get your lime green flocking powder.
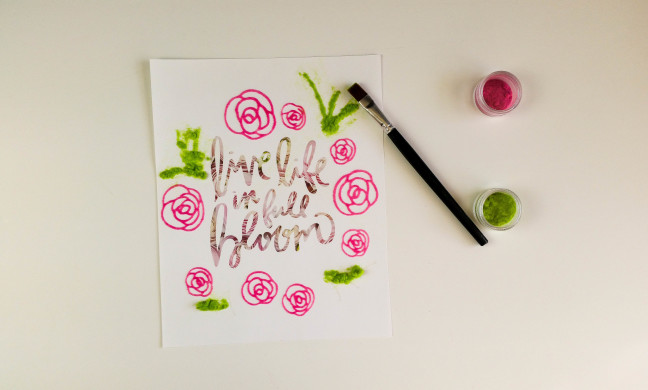
Repeat the same process as flocking the flowers to complete your leaves.

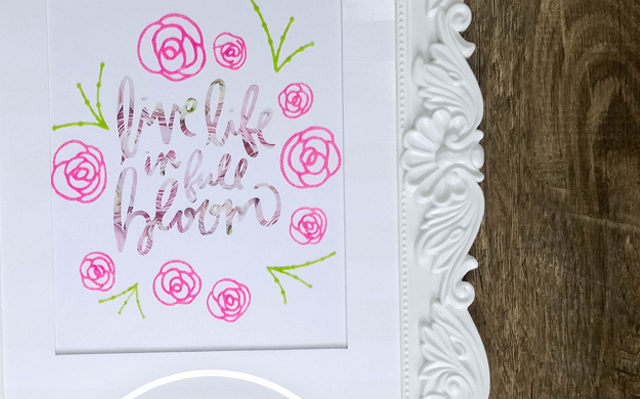
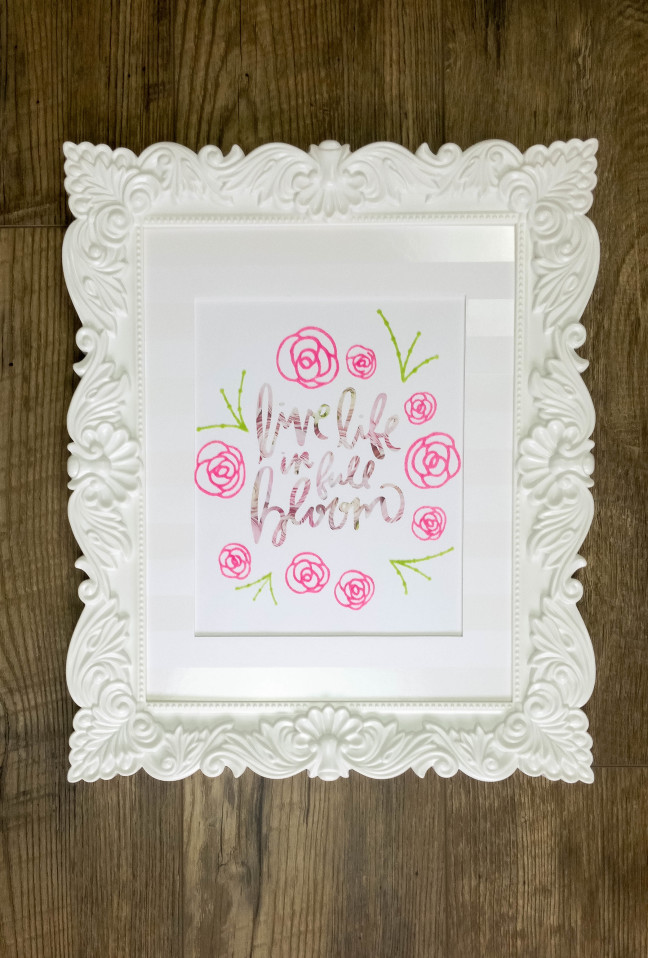
I love the texture of the flocking on this project mixed with the floral image background of the text, it creates so much interest for a really fun look!
Step Seven: Frame and Admire
I grabbed a cute Heidi Swapp frame that was on sale at my local Michaels and framed my new springy Live Life in Full Bloom Art, but you could easily update a frame you have lying around the house as another option. I’m all for reusing what is already on hand, so do a quick run around your house to see if there are any frames you may have forgotten about before running down to the store.
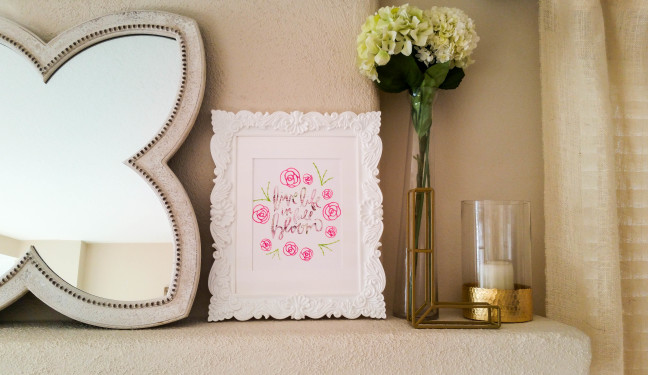
I placed my framed art on my spring mantle and I think it is perfect! I already had a spring bunting that I made with my CAMEO for my Easter mantle that works great with all of the Springy colors in this framed art.
This was a fun project and it makes me smile every time I walk by my fireplace!
Kelly Wayment
June 28, 2024
You can use it with vinyl as long as it is smooth and flat to allow the static charge to hold on to it. Rolled vinyl that wants to go back to its rolled shape will not necessarily work well, and it would need to be trimmed to fit the ES mat cutting area.
Kelly Wayment
June 28, 2024
Yes, you can use the heat pen while using the ES mat. 🙂
Yurii
March 2, 2024
Hello. May it be used with heat pen?
Thanks
Jerome
February 24, 2024
Hi, works this with the normal vinyl foils or only with printer papter etc?
Kelly Wayment
February 16, 2024
Once you’ve pushed the mat up against the rollers, just press the “Load” arrow button (bottom right on the display). Does a regular sticky mat load into the machine for you?
Michelle a goodall
January 24, 2024
Hello! I just got my new electrostatic mat and have watched every video i can find on it. However, what i can t find is why it wont feed into my cameo 5/ it slides right up the rollers but wont go any further. and yes- iam pushing the into button. help!