
Have you had a chance to play with our metallic vinyl? We love the effect that it gives to a project. Today we took our FREE Design of the Week and turned it into a custom wooden tray. It’s amazing how our metallic vinyl can transform a simple project into something really sophisticated.
Supplies Needed:
- Silhouette CAMEO® or Silhouette Portrait® or Silhouette Curio™
- Silhouette Metallic Vinyl – Gold
- Silhouette Transfer Tape
- Wooden Tray
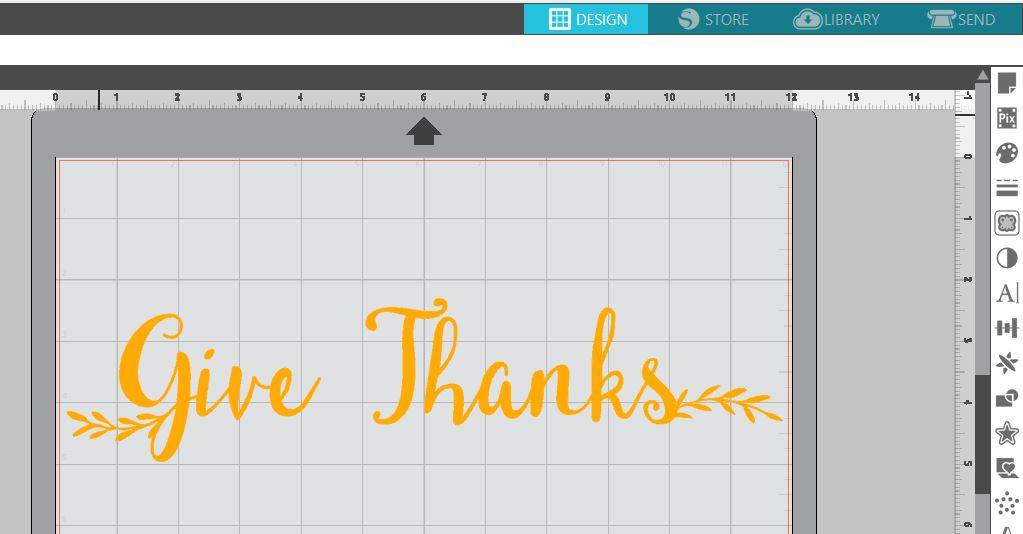
- Design ID #228428
Step One: Set Up The Design
- Open up Silhouette Studio®. Open Design ID #228428 by locating it in your library.
- Adjust the size of the design by selecting it and dragging the outer corner to make it larger or smaller to fit the dimensions of your wooden sign.
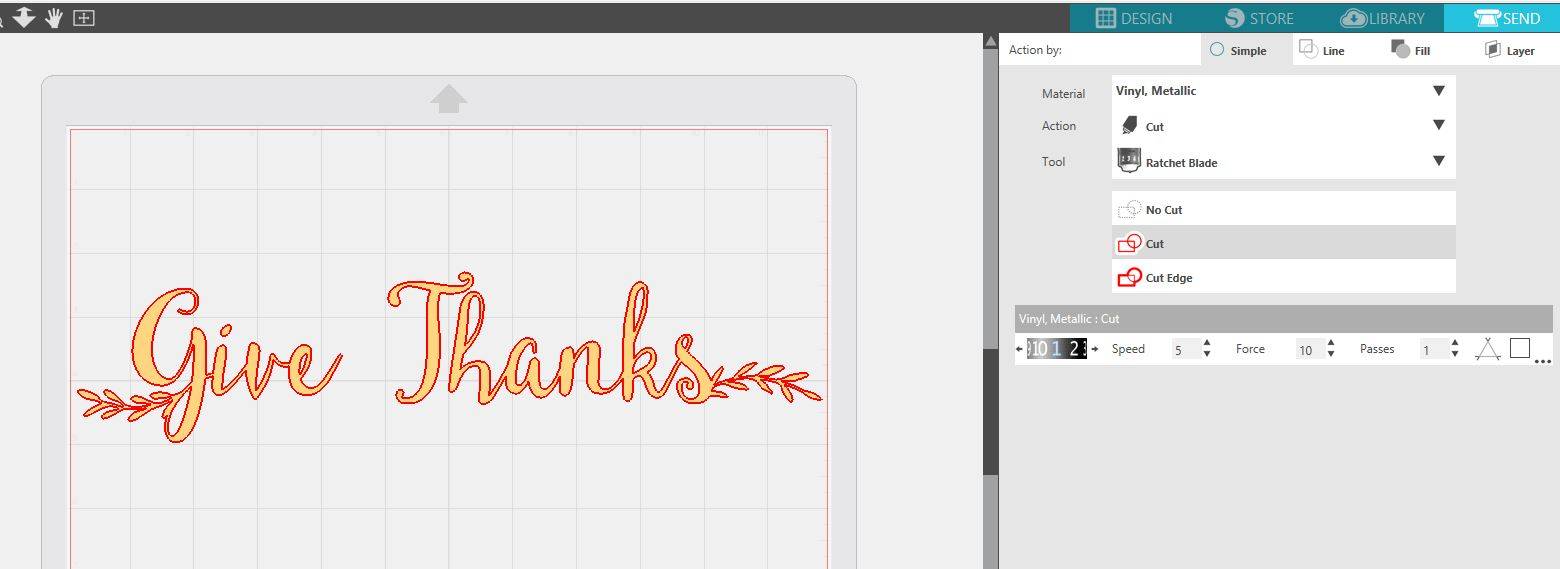
- In Silhouette Studio®, select the Send window in the top right-hand corner. Select your entire design and make sure the Cut option is selected.
Step Two: Cut And Assemble
- Load your vinyl into your machine. Make sure to adjust your rollers so that your machine can properly grip your material.
- In the Send window, select the Vinyl, Metallic setting and select Send. (Remember that if you don’t have an AutoBlade, you will need to adjust your blade settings.)
- After your machine is done cutting, unload the vinyl from your machine and weed away unnecessary parts of the design.
- Place the Transfer Tape over your design to help move your design over to the wood tray.
- Slowly peel away the white backing from the vinyl.
- Align your design on your wooden tray. Once you have it in the position you would like, rub the vinyl on the wooden tray. Use your scraper tool to help adhere the vinyl.
- Slowly peel away the transfer tape to reveal your finished design.
Nasze Naturalne
September 3, 2025
Your authentic voice really shines through in everything you create and share
Naszenaturalne
September 2, 2025
Really love your style
Kelly Wayment
June 28, 2024
You can use it with vinyl as long as it is smooth and flat to allow the static charge to hold on to it. Rolled vinyl that wants to go back to its rolled shape will not necessarily work well, and it would need to be trimmed to fit the ES mat cutting area.
Kelly Wayment
June 28, 2024
Yes, you can use the heat pen while using the ES mat. 🙂
Yurii
March 2, 2024
Hello. May it be used with heat pen?
Thanks
Jerome
February 24, 2024
Hi, works this with the normal vinyl foils or only with printer papter etc?