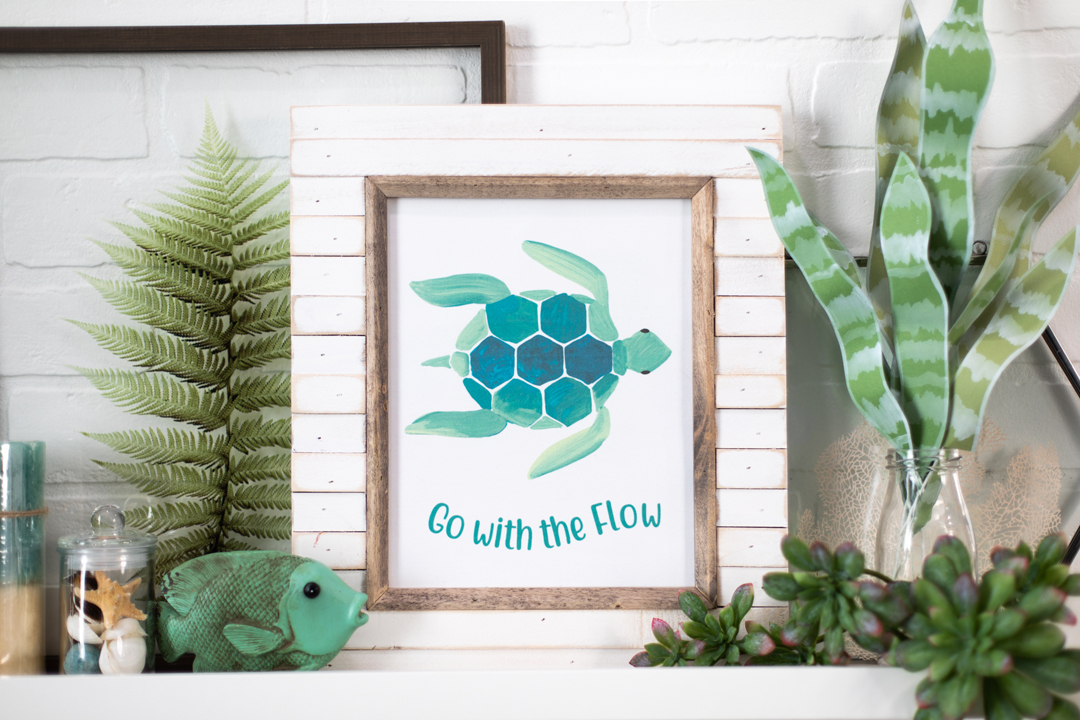
This March, Silhouette has been filling its social media with #craftthecolorwheel projects from various makers. I jumped in and submitted a couple colorful projects to add to the mix. This is my green project, which is a simple printable with curvy text added for fun.
Usually when you plan Print & Cut designs, you have a smaller area to work with than the full page because you must leave room for registration-mark reading. Today I’ll show you how to Print & Cut a design that’s large enough to put in an 8 x 10 inch frame. I’ll also throw in a little curved-text magic to customize the design.
I used my Silhouette Portrait® 3 because it’s great for working with letter-sized paper and to prove that a large print like this can be done on the Portrait. However, you can use a Silhouette Cameo® instead.
Supplies:
- Silhouette Portrait® 3
- Silhouette Portrait cutting mat
- Inkjet Printer
- Printable Cotton Fabric
- 8 x 10 inch Frame
- Silhouette Studio®
- Design ID #268057, #281786
Step One: Create Design
1. Open the Sea Turtle design (Design ID #268057) in Silhouette Studio®. If you get a message to turn on Registration Marks, you can cancel it. We are not going to use Registration Marks this time.
Note: The reason you use Registration Marks on a printable design is for precision and accuracy. Because our design will have cut lines far away from the design itself, we do not need this extreme accuracy. No one will notice if we are off by 1/8 inches when this is placed in a frame. Most of the time, you need Registration Marks turned on for a Print & Cut, but not this time.
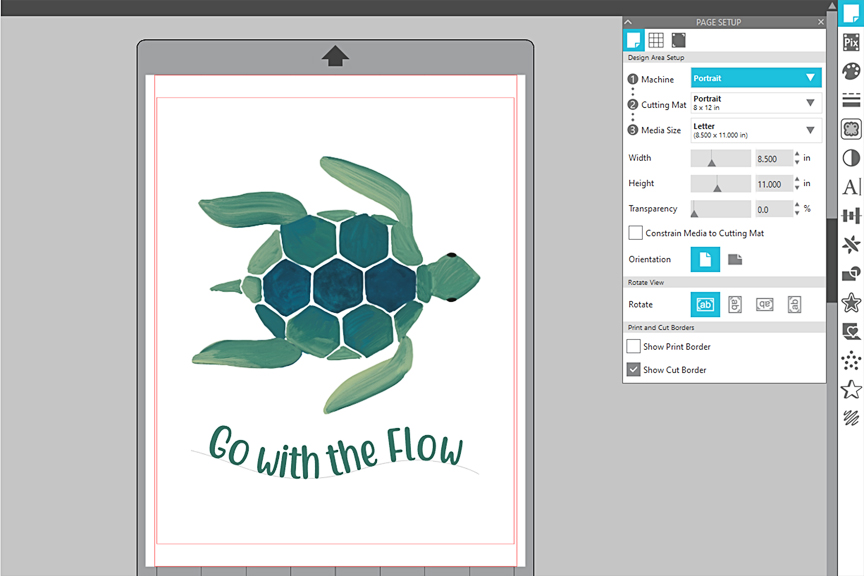
2. In the Page Setup panel, set up your machine and media. Because we are using the Portrait, our settings are as follows:
- Machine = Portrait
- Cutting Mat = Portrait
- Media Size = Letter
- Check the box for “Show Cut Border”
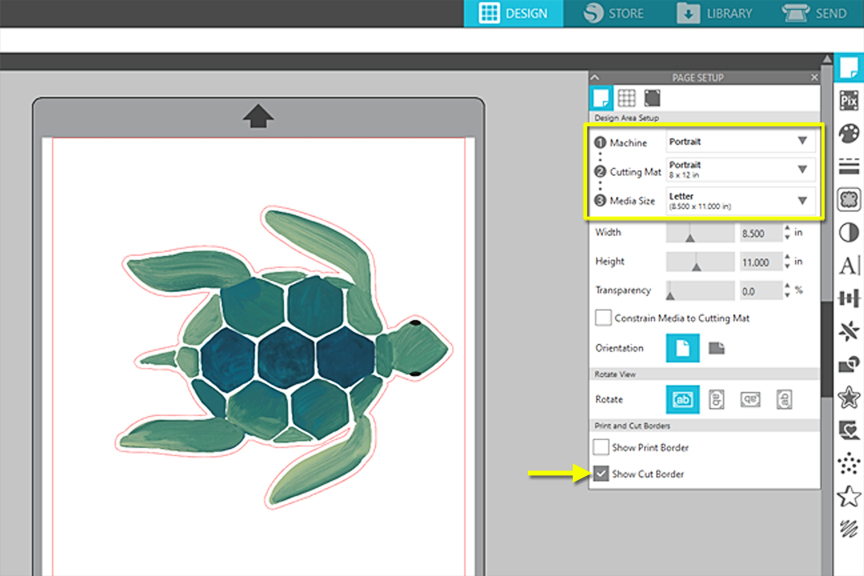
You can use a Cameo machine for this project instead. Just change the machine and cutting mat selection to Cameo, but keep the media size as letter.
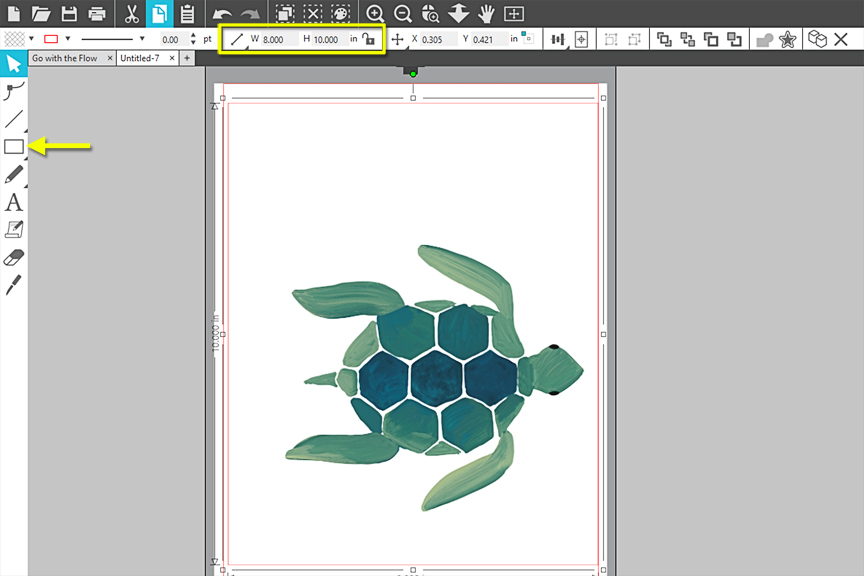
3. Click and drag the turtle away from its red cut line and delete the red cut line so only the turtle image remains. (Ungroup first, if necessary.)
4. Use the Draw a Rectangle tool to draw a rectangle that’s about 8 inches wide x 10 inches high.
5. Once you’ve got it pretty close, set the exact dimensions to 8.0 inches W x 10.0 inches H in the Scale input in the Quick Access Toolbar. (Unlock the aspect ratio first.)
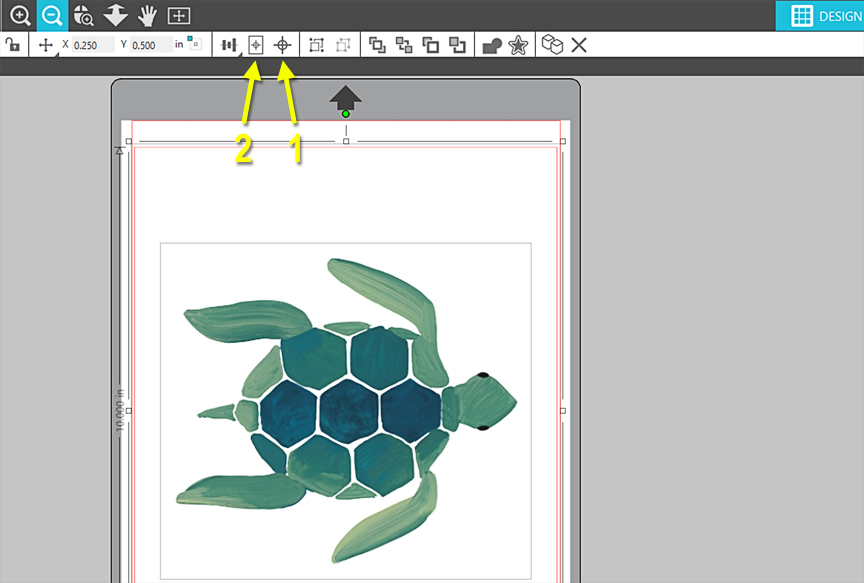
6. Select both the turtle and the rectangle, and choose Center, and then Center to Page in the Quick Access Toolbar. We’ll fine-tune the positioning later, so this step isn’t essential, it but will help your screen look like mine.
Step Two: Create Curved Text
1. Click on your Text Tool on the left, and then click anywhere on the page. Type “Go with the Flow” in the text box.
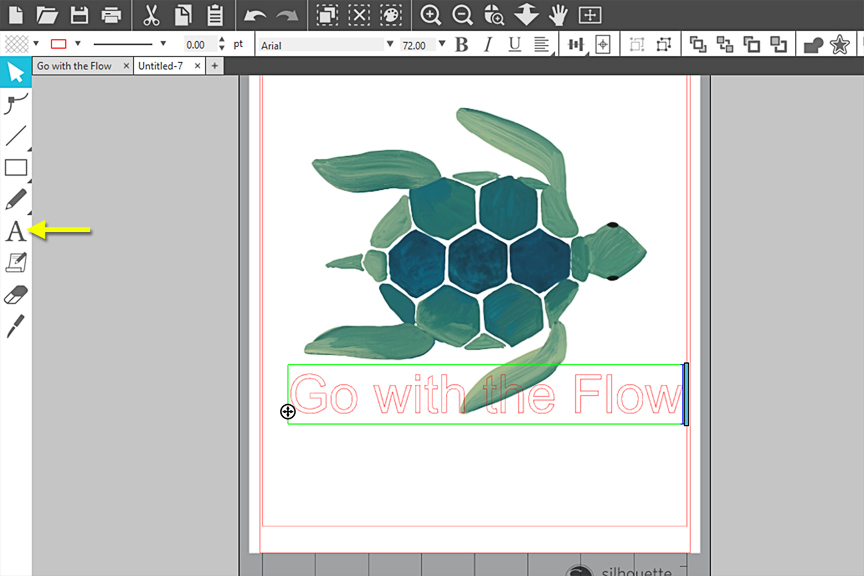
2. Click away from all objects to deselect it, and then click once on the text to select it without entering text-edit mode.
3. Click the drop-down menu for Fill Colors in the upper left side of the Quick Access Toolbar, and choose the eyedropper tool. Then hover your mouse over the turtle until you find a nice color for your text. Click to select that color, which will fill your selected text with that color.
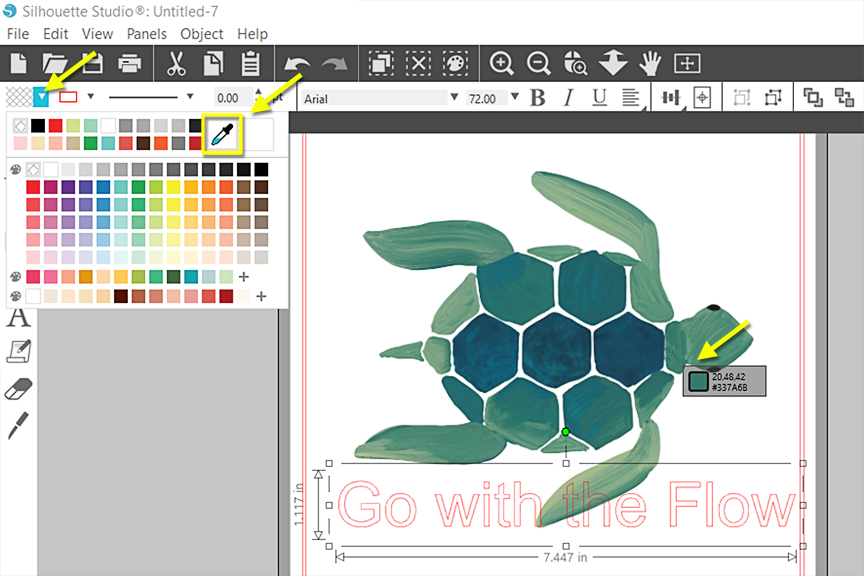
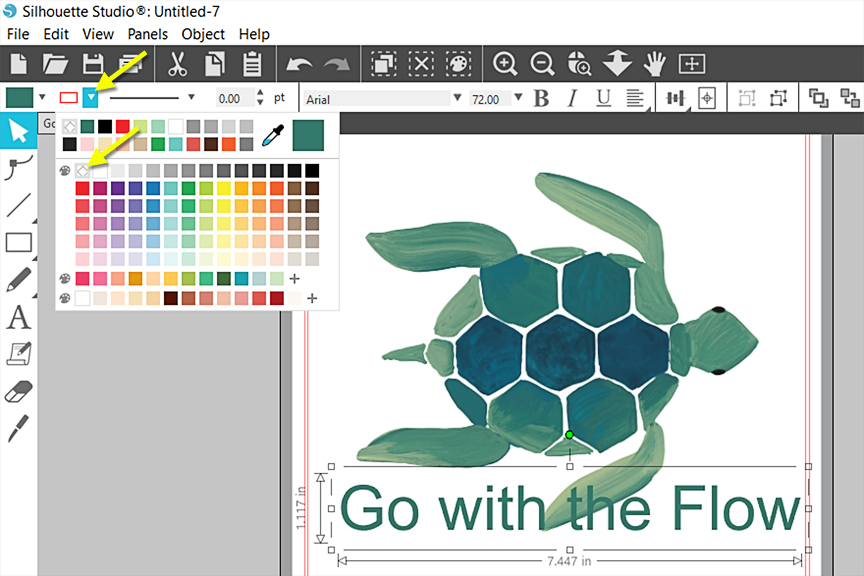
4. Change the line color to blank so it’s not distracting. (This is optional; the line color will not print on text unless you take other steps to force it.)
5. With the text still selected, choose the Quotable font (Design ID #281786) from the Quick Access Toolbar or from the Text Style panel.
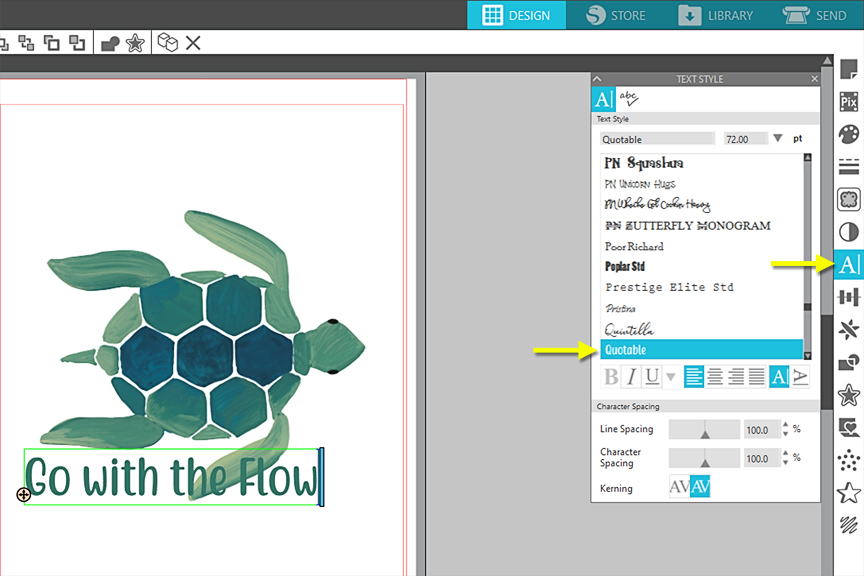
Note: This Quotable font will show up in your font list AFTER you have purchased it from the Design Store (Design ID #281786). You may need to save your work and restart Silhouette Studio® for it to show up if you purchase it in the middle of this project. You can use any installed font on your computer, but results will vary with spacing and slant as you apply it to the curve in the next steps.
6. Draw a curved line by choosing the “Draw a Curve Shape” from your Line choices on the left. Click down in four spots on your page to create a curve something like this. (Double-click on the last point to complete the shape).
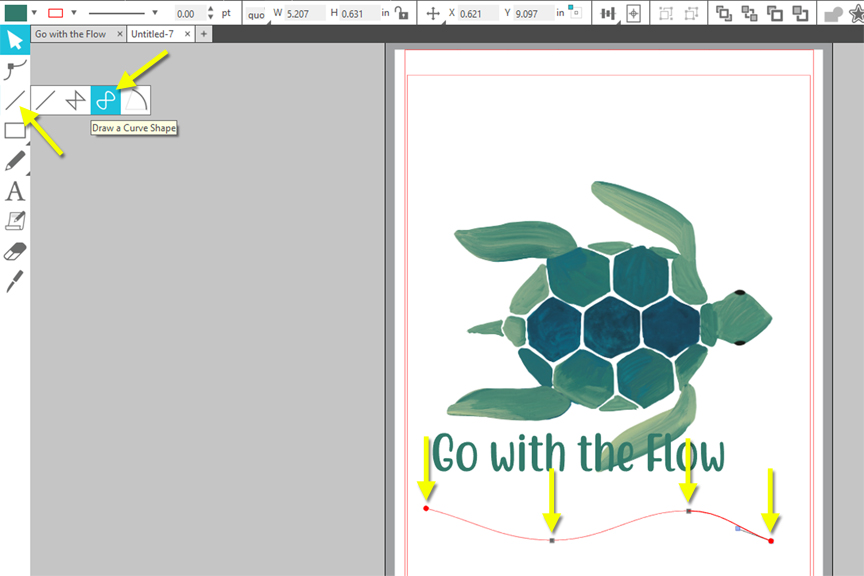
7. Move the curved line away from any other shapes so there’s no interference in the next step.
8. Double-click your typed text to bring up the text-edit box with a four-pointed arrow.
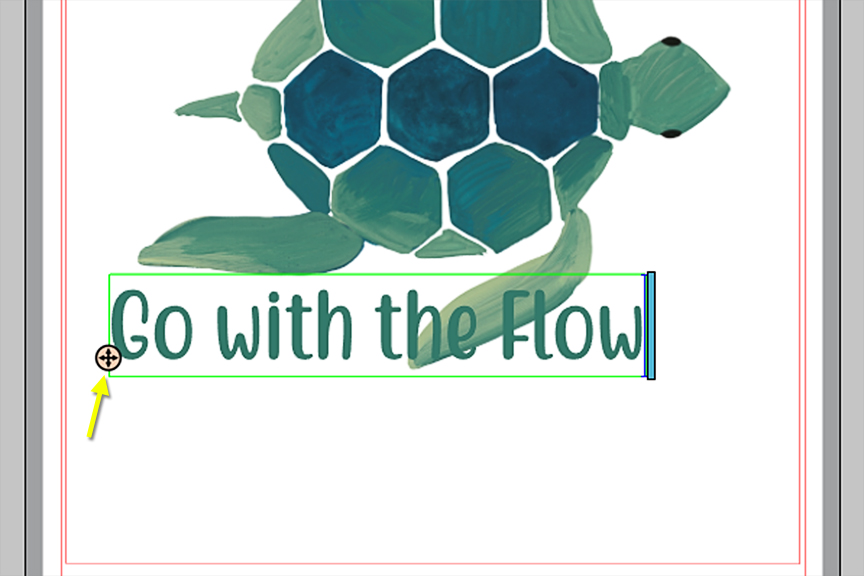
9. Click and drag this handle to drag the text over to the curved line. Drop it from the top, and it should snap to the curved line. Continue to drag the four-pointed arrow along the line until it looks good with its shape.

Note: To learn more about Text to Path, please see this video on Using Text in Silhouette Studio®.
10. Drag the text back over to the main design. (The curve will come with it—don’t use the four-pointed arrow to drag this time.)
11. Fine tune the elements within the 8 x 10 inch rectangle as follows:
- Drag the turtle up so it’s in the top 2/3 of the rectangle.
- Adjust the curve of the line by double-clicking the line and moving the individual points or Bezier curves with point editing.
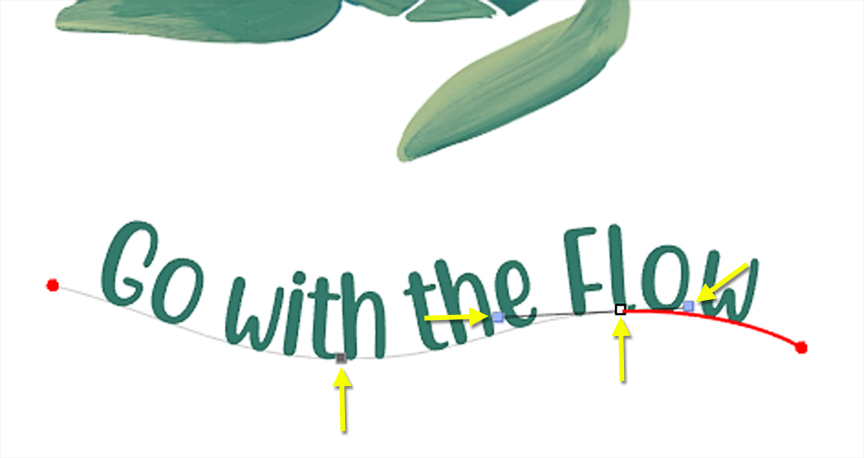
- Adjust the placement of the text on the line by double-clicking the text and dragging the four-pointed arrow left or right along the line.
- Drag the text into position within the rectangle so it all looks visually balanced.
- Select all the elements including the rectangle, and choose Align Center from the Quick Access Toolbar.
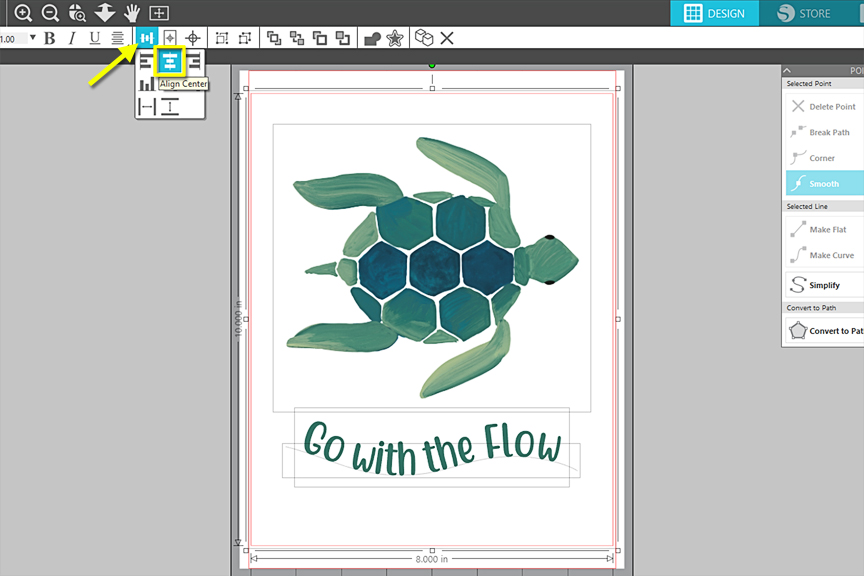
- Leave plenty of white space above, below, and to the sides of your whole design so nothing gets covered when framed.
- Don’t worry if it doesn’t look exactly like mine. Just try to make it visually balanced, and go with the flow!
12. Once you’re happy with how it looks, select all of it and group it together using the Group function. You can right-click and select “Group” or use the keyboard shortcuts (Ctrl G or Cmd G). The curved path for the text will not print and will not cut while it’s attached to the text.
Note: The 8 x 10 inch rectangle must be within the Portrait cut border so the blade can cut it.
Step Three: Print Design
1. Now it’s time to print this onto a printable cotton fabric sheet. You could absolutely print this onto paper or your favorite printable media, but Silhouette makes these cotton fabric sheets that are printer-ready and have a great texture to them.
2. Click the printer icon to send the design to your printer, and a print preview will pop up. This is a good chance to make sure it looks good visually and that no extra lines or artifacts are showing.

3. Click the blue Print button to bring up your printer dialog box where you can make sure you have the correct printer and settings selected.
4. Send it to print with the cotton sheet loaded. Make sure the design will print on the fabric side and not the backing.
Step Four: Cut and Frame
1. Place the printed cotton sheet onto your Portrait mat as shown on the virtual mat.
2. In the Send tab, select the grouped design and choose Cut Edge so only the outer 8 x 10 inch rectangle is highlighted. This will make sure the text doesn’t cut separately.
3. Choose the media and cut settings.
- Material = Cotton fabric, printable
- Action = Auto (Cut)
- Tool = AutoBlade (or choose your favorite blade)
4. You may wish to do a sample cut to make sure your settings are correct, but don’t cut within the 8 x 10 inch rectangle. With a sharp blade, the default settings of Blade 3, Force 33, Speed 5, Passes 1 worked well for me. If you want to cut through the backing as well in order to add bulk for framing this, you can increase your settings to cut through both the fabric and the backing.
5. Place the cotton printout onto the mat and load the mat into your Portrait. Because you have no registration marks to correct any misalignment, try to be careful with your placement.
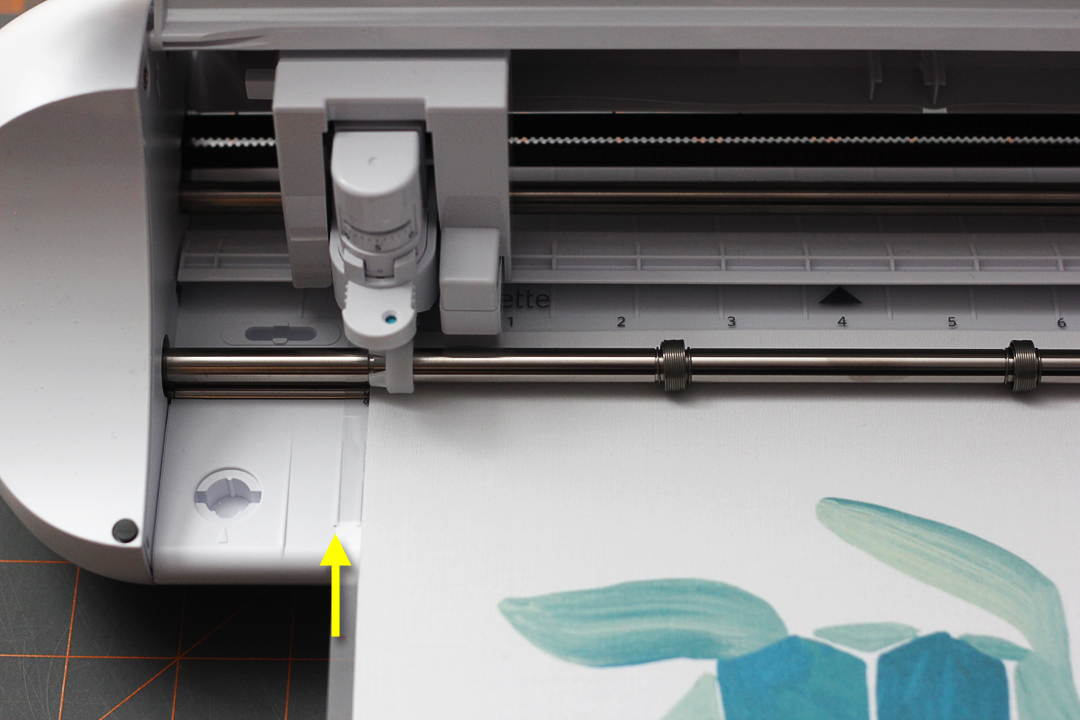
6. Send to cut when ready.
7. Remove the cutout and frame it! If you need to shift the design in any direction a little bit inside the frame, you can.
I used a wide wooden frame that reminded me of the beach to match the sea-turtle theme.
I hope you enjoyed this project while learning a little more about your options for Print & Cut and adding curved custom text.
Feeling inspired by color? You can jump in on the action on social media! Create a color-inspired project and post it this month with #silhouettecolor or #craftthecolorwheel for a chance to be featured on Silhouette’s social media page!
 Free Class - Father's Day Apron Set
  Free Class - Custom Graduation Tumbler