
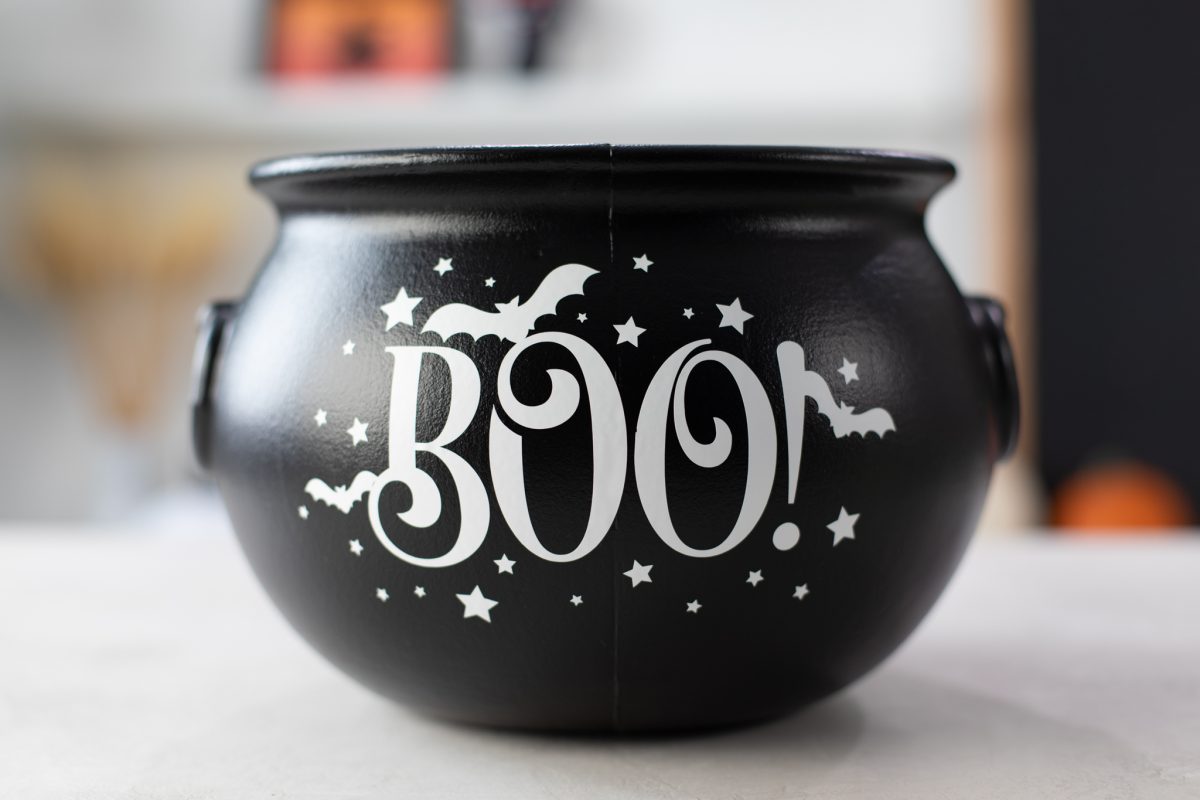
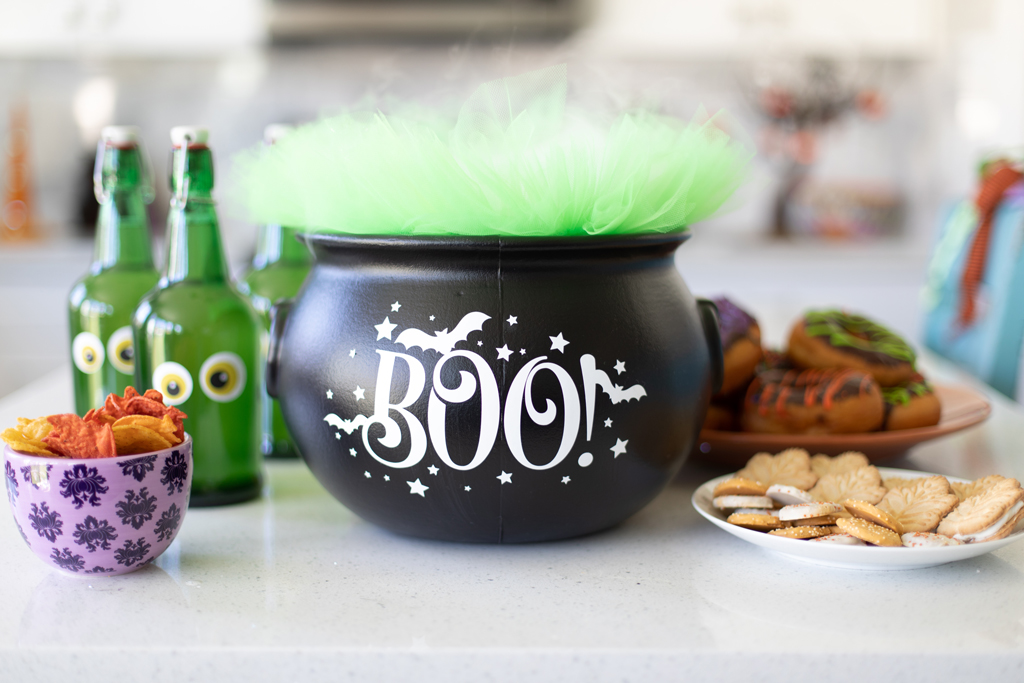
This super cute cauldron is a great centerpiece for any haunted get-together and is also a fantastic serving dish! I picked it up for less than $10 at my local Walmart, thinking it could make a cute project, and I was right! It adds a little extra festivity to any Halloween party, and the great thing is that it is fun and easy to make (my favorite kind of project, win-win!). I made this using my Silhouette Portrait 3®, but you could also easily do it with your Cameo.
So without further ado, let’s jump right in!
Supplies Needed:
- Silhouette Portrait® or Silhouette Cameo®
- Silhouette Studio® – any edition
- White Matte Vinyl
- Transfer tape
- Hook
- Scraper
- Scissors
- Cauldron
- Green tulle
- Sewing Machine
- Thread
- Hot glue gun
- Extra glue sticks
- Design ID #218961
Step One: Create the Design
This part is pretty straightforward. All you need to do is purchase the design from the Design Store, find it in your Silhouette library, and open it in a new document in Silhouette Studio®. Once your design is opened, the first thing you need to do is update your settings.
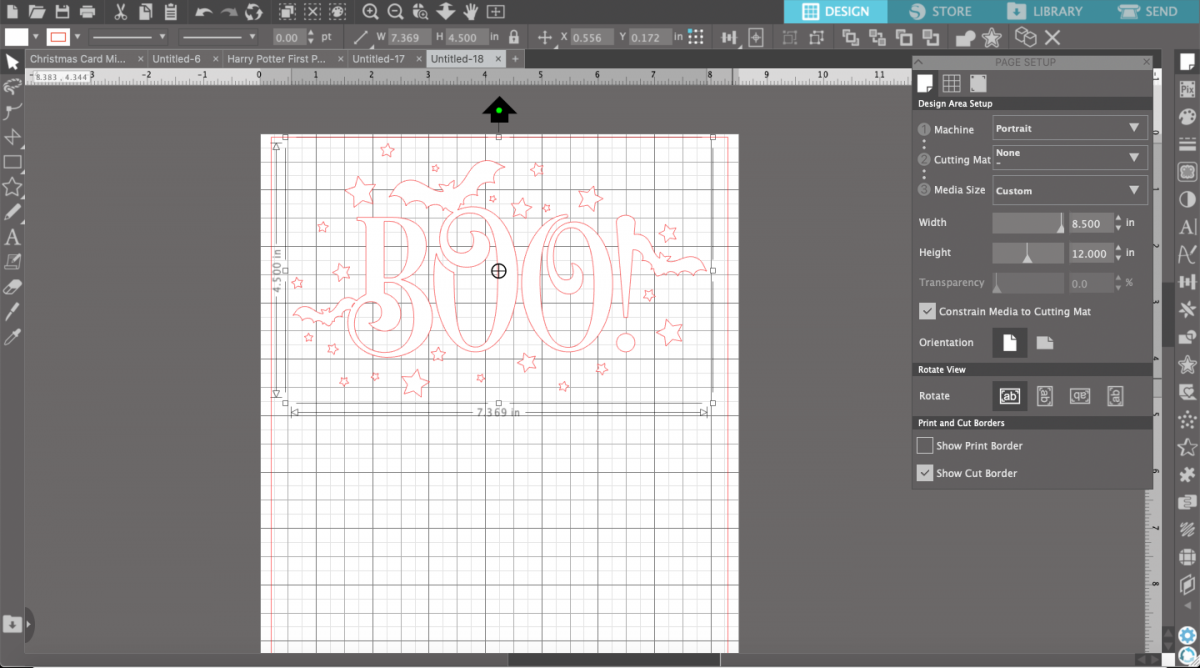
1. Choose your design area setup in the Page Setup panel.
- Machine = Portrait (or whatever machine you’re using)
- Cutting mat = None
- Media size = Custom (9 x 12 inches)
2. Size your design to fit on your cauldron. My design was 4.5 inches tall by 7.36 inches wide (4.5 x 7.36)
3. This step is optional, but I like to add a fill color to my design so I can better visualize the final product. Since the “Boo” on my cauldron will be white, I made the design white in Silhouette Studio®.
Design tips for a curved surface:
- Choose a design that is not attached on the outer edges. (This “boo” is a good choice because the letters aren’t connected, and that allows for flexibility on curves.)
- Don’t go too big; opt for multiple small designs when working with lots of curves.
- Avoid applying to curves, if possible.
- If you have Silhouette Studio® Designer Plus Edition or Business Edition, use the Conical Warp tool.
Step Two: Cut the Vinyl
This project works on a piece of vinyl that is 9 x 6 inches. You can cut the vinyl on the mat if you’d prefer, but cutting the vinyl directly from the roll works too. For my project I decided to cut it directly from the vinyl roll. Before sending the design to cut, make sure that your design fits within the 9 inches of cutting width.
- In the Send panel:
- Make sure the cut lines are showing
- Material = “Vinyl, matte” (you should test your settings, but I used Blade 2, Force 20, Speed 5)
- Make sure you have the correct machine selected (Portrait 3)
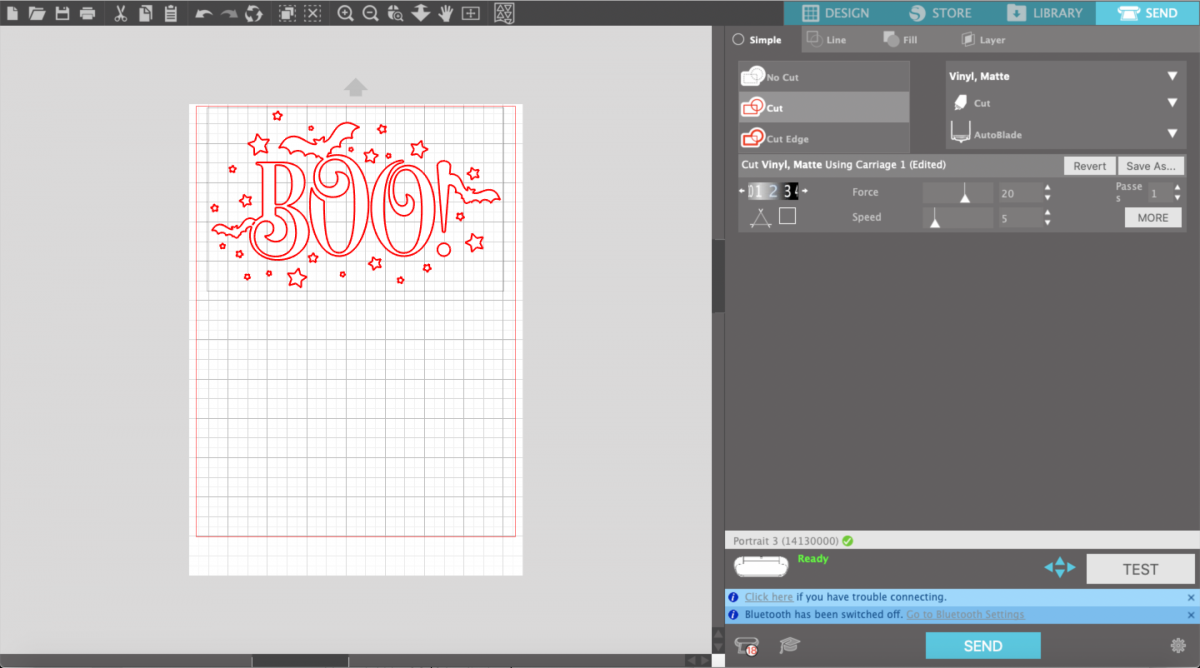
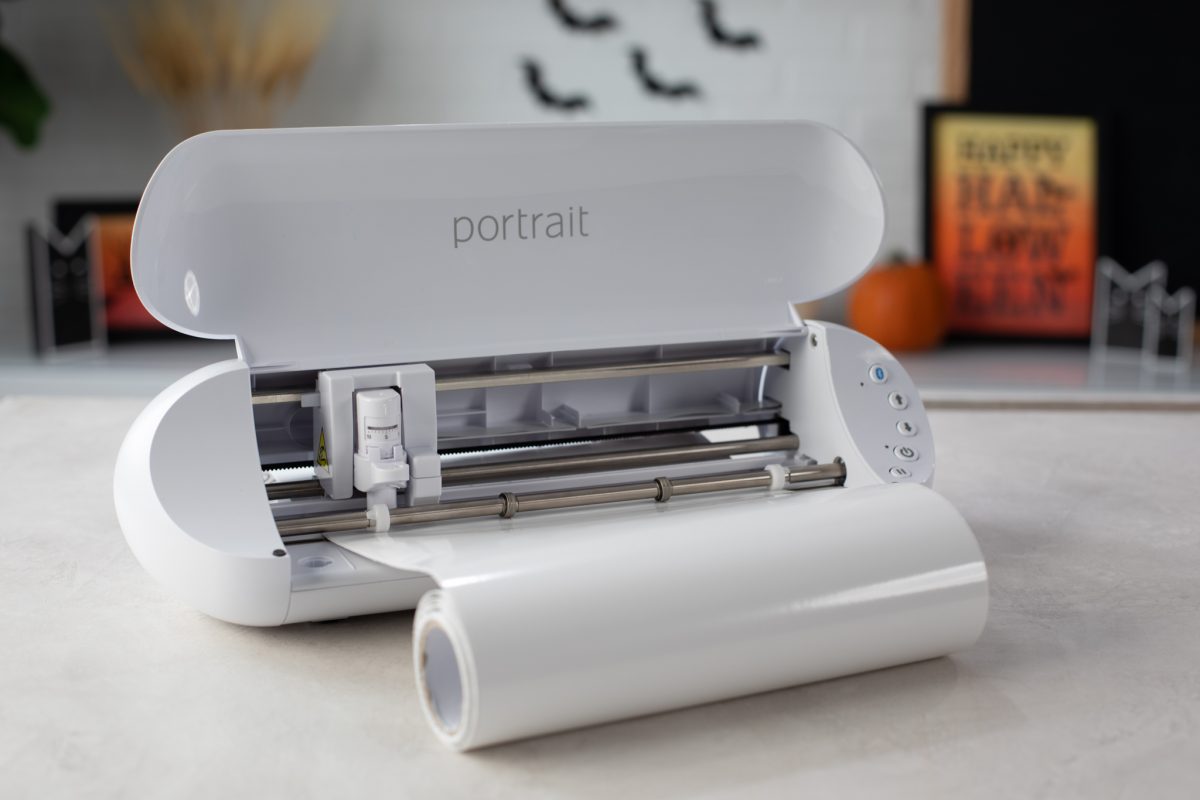
1. Load the vinyl. Adjust it if necessary so it fits nicely between the 2 rollers
2. Click Send
3. Weed the vinyl. Be sure that all pieces of the vinyl are intact. Double check that no small pieces are being pulled up with the weeding.
4. Apply transfer tape
Step Three: Apply the Vinyl
With the vinyl applied to the transfer tape, you are now almost ready to apply the vinyl to your cauldron! Before the application process, I’m going to walk you through a few steps that will hopefully make it easier to apply your vinyl to a curved surface.
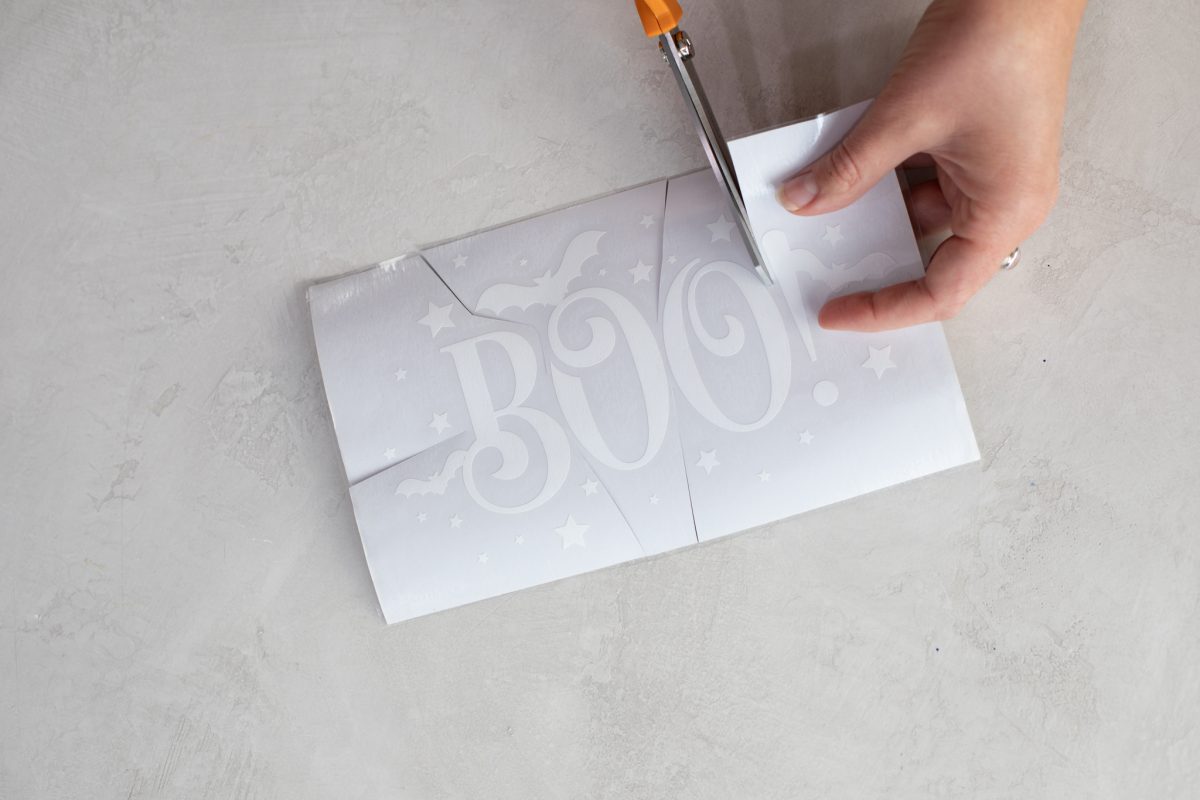
1. Cut the transfer tape around the design while you are holding the design. This will help you avoid creases and bubbles.
2. Start by applying the vinyl from the center and working outward. The other edges need to be free so they can conform to the curve.
- The letters may distort a little since they’re detached, but this will allow them to mold to the curve
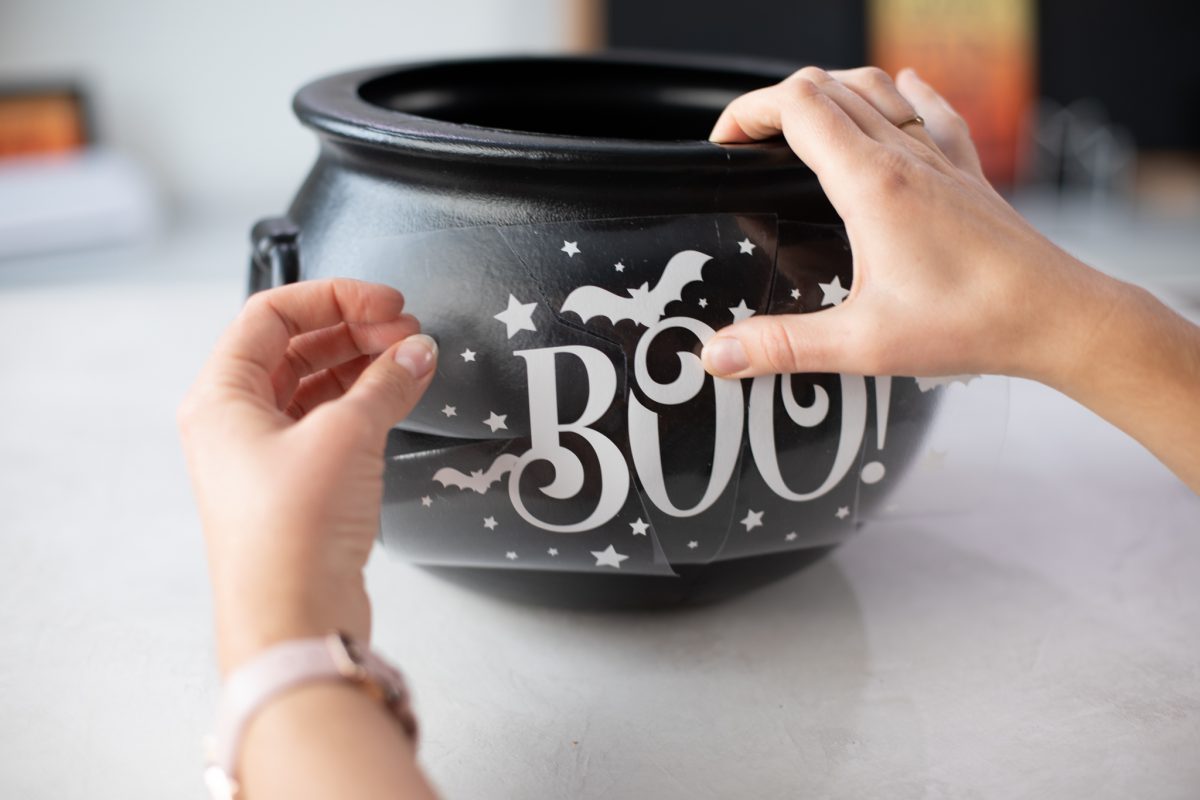
3. Continue working out from the center of the design until all the stars are applied.
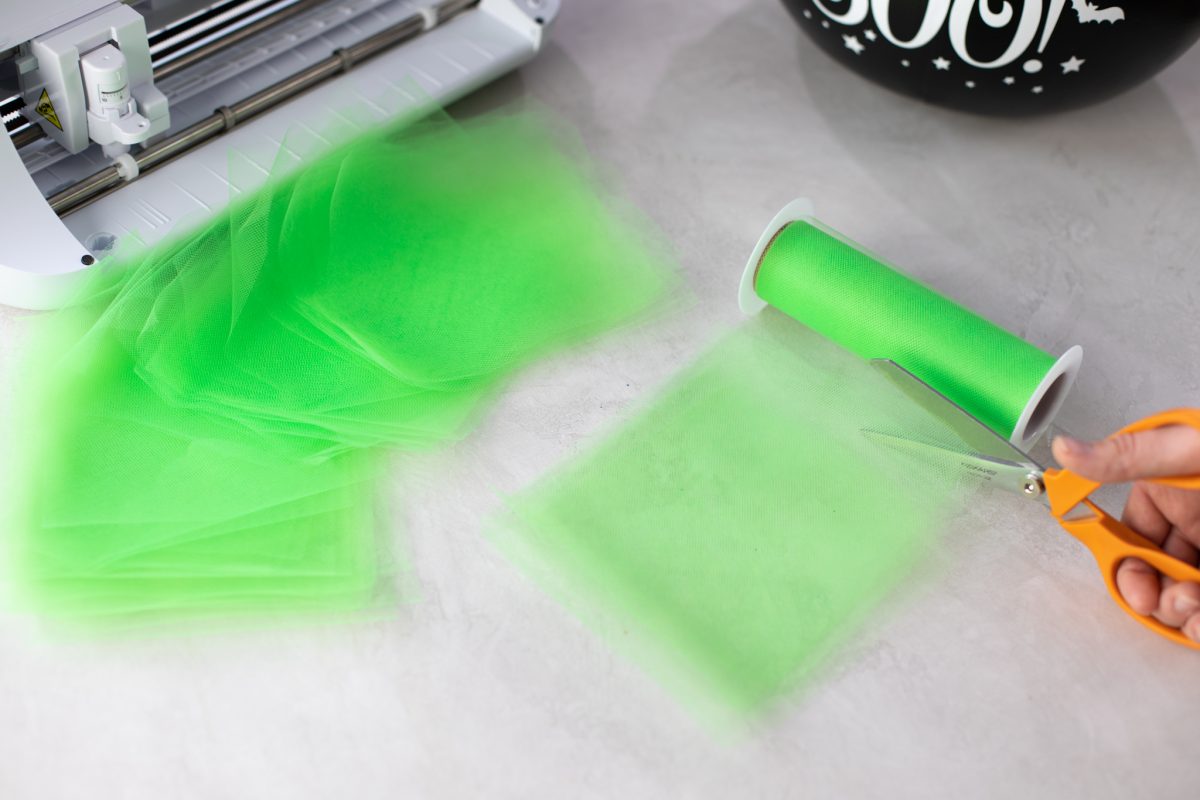
Step Four: Cut the Tulle
This part of the project requires a little sewing and a little math. The green tulle is meant to look like smoke/fumes escaping from the witches’ brew and adds a fun twist to a classic Halloween prop. You can pick up tulle from any craft store off a bolt or from small rolls. I used a green roll to minimize the amount of measuring and cutting.
1. Cut 50 squares of green tulle, roughly 6 inches long. This doesn’t have to be exact, and the cuts don’t have to be straight. In fact, I would encourage not having straight lines because the crookedness will add to the look of the wild smoke.
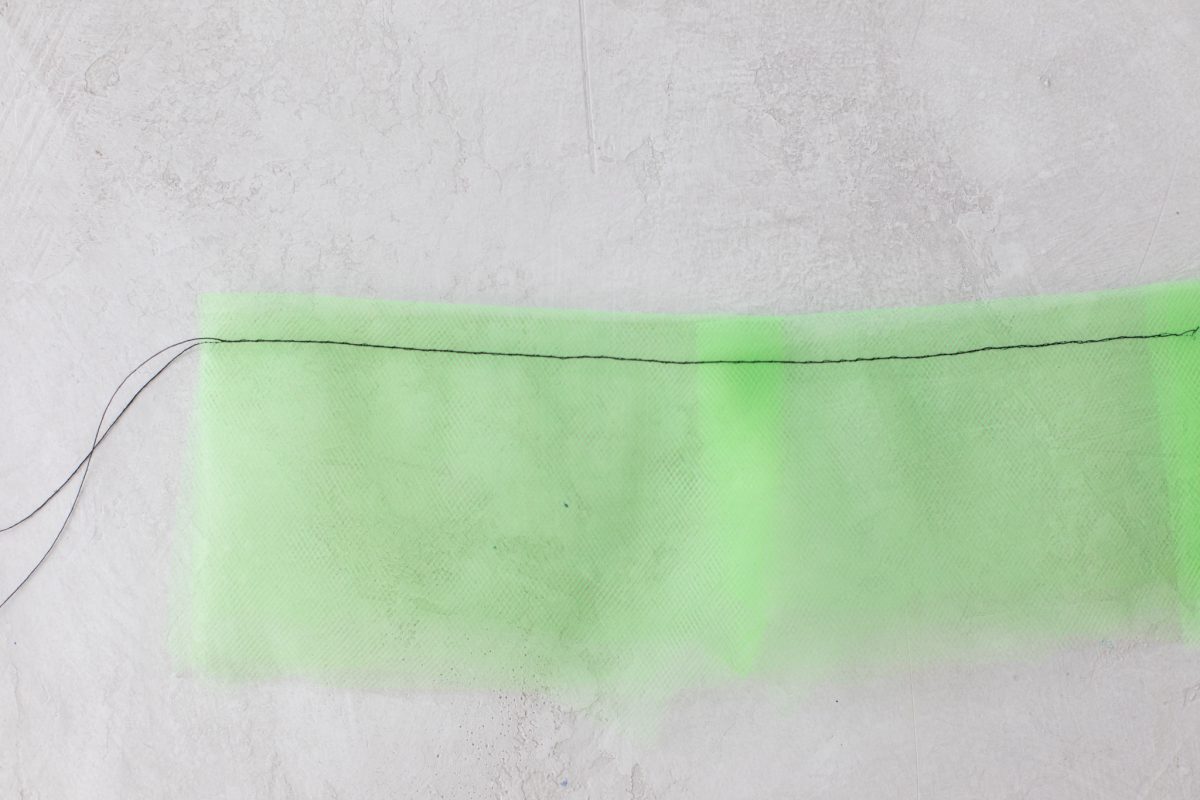
Step Five: Sew the Tulle
1. Fold the tulle in half widthwise.
2. Sew a baste stitch down the folded side of the tulle with a half-inch seam.
- Baste stitch – stitch length as high as you can make it
- ½ inch seam
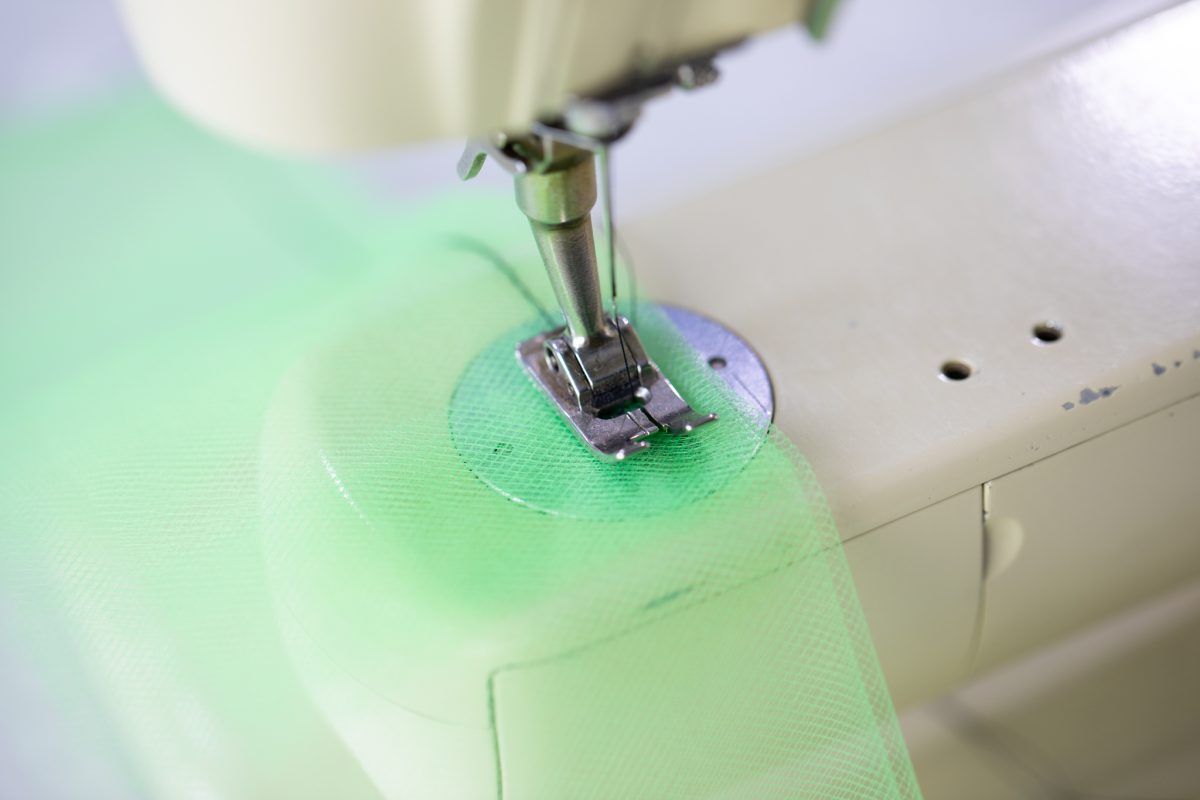
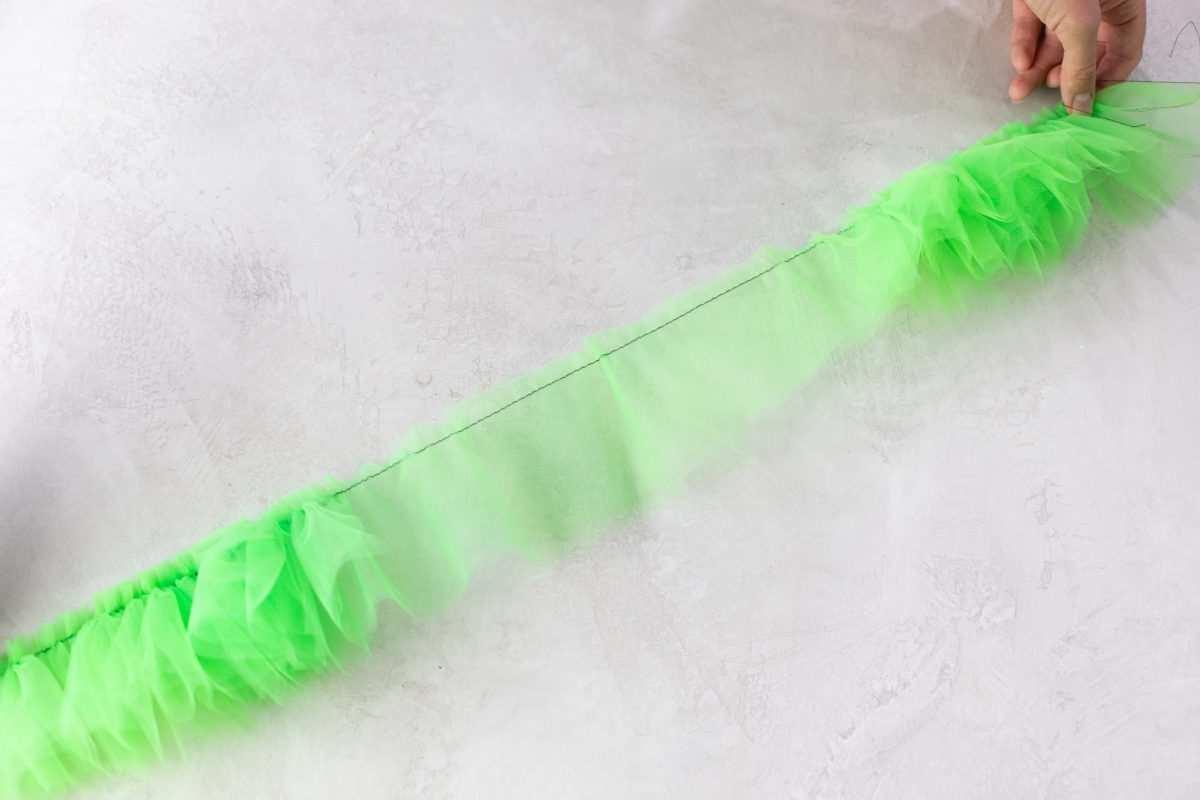
3. Baste all the tulle together. DO NOT CUT THE THREAD AFTER EVERY PIECE OF TULLE. Instead continue sewing the folded edge of all 50 squares of tulle. It’s okay to overlap, and actually encouraged. It’s very important that all the tulle is all on the same thread because that’s how you’re going to gather it. Make sure before you start sewing that you have enough thread on your bobbin and top stitch so you won’t run out.
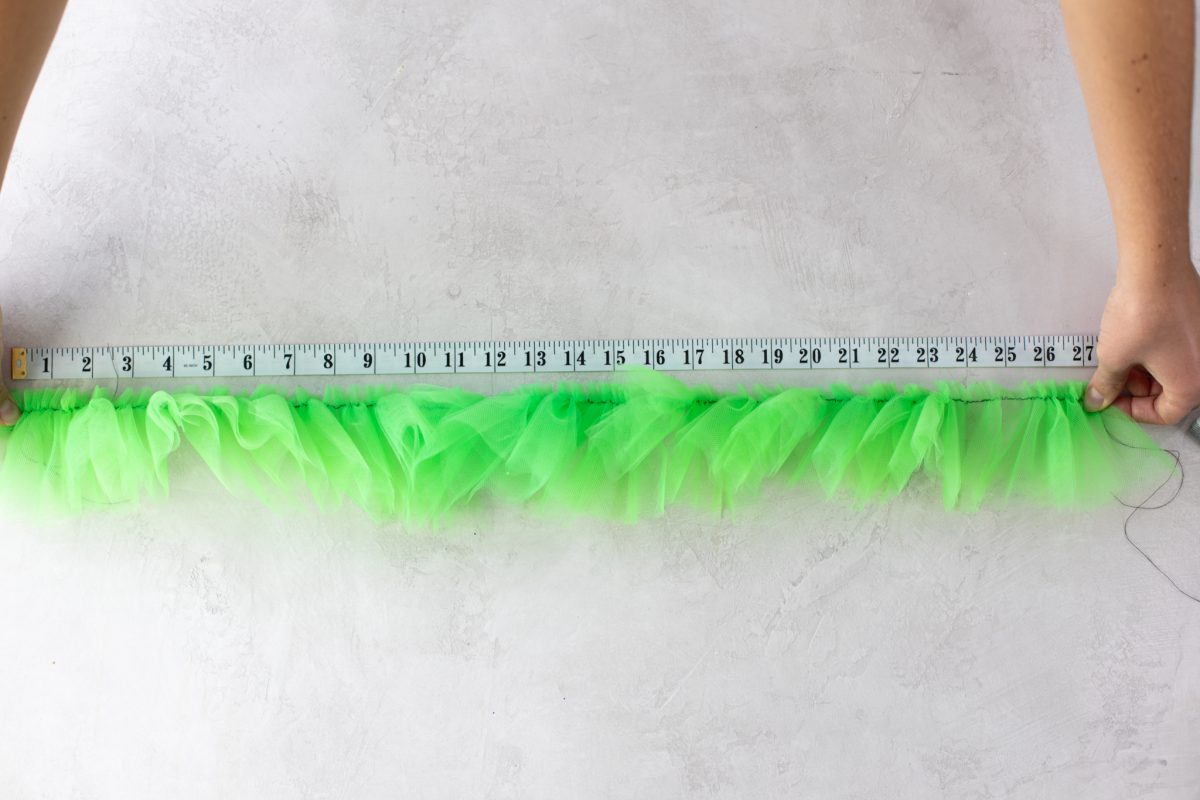
3. Find the circumference of the inner circle of your Cauldron. (Circumference = 2πr or 2 times the radius times by pi.) My cauldron’s circumference was 26 inches but I made it 27 so I had a little bit of overlap.
4. Using the top-stitch thread, gather the tulle until it is the length of the circumference of the inner circle. (26–27 inches if you used the same cauldron as me.)
Tip: Gather from both ends of the tulle. MAKE SURE YOU ARE USING THE TOP STITCH OF THREAD FROM BOTH ENDS. Otherwise the tulle won’t gather correctly and you’ll have to start over.
5. Take care to not break the thread. You may even want to sew 2 lines of basting stitch ¼ inch apart for the gather in case one breaks.
It’s okay if the tulle is longer than 26–27 inches. It’s better to have more than not enough.
Step Six: Apply the Tulle
With your tulle basted and gathered, you’re ready to apply it to the inner circle of your cauldron.
1. Start with a thick line of hot glue directly on the inner edge of the cauldron.
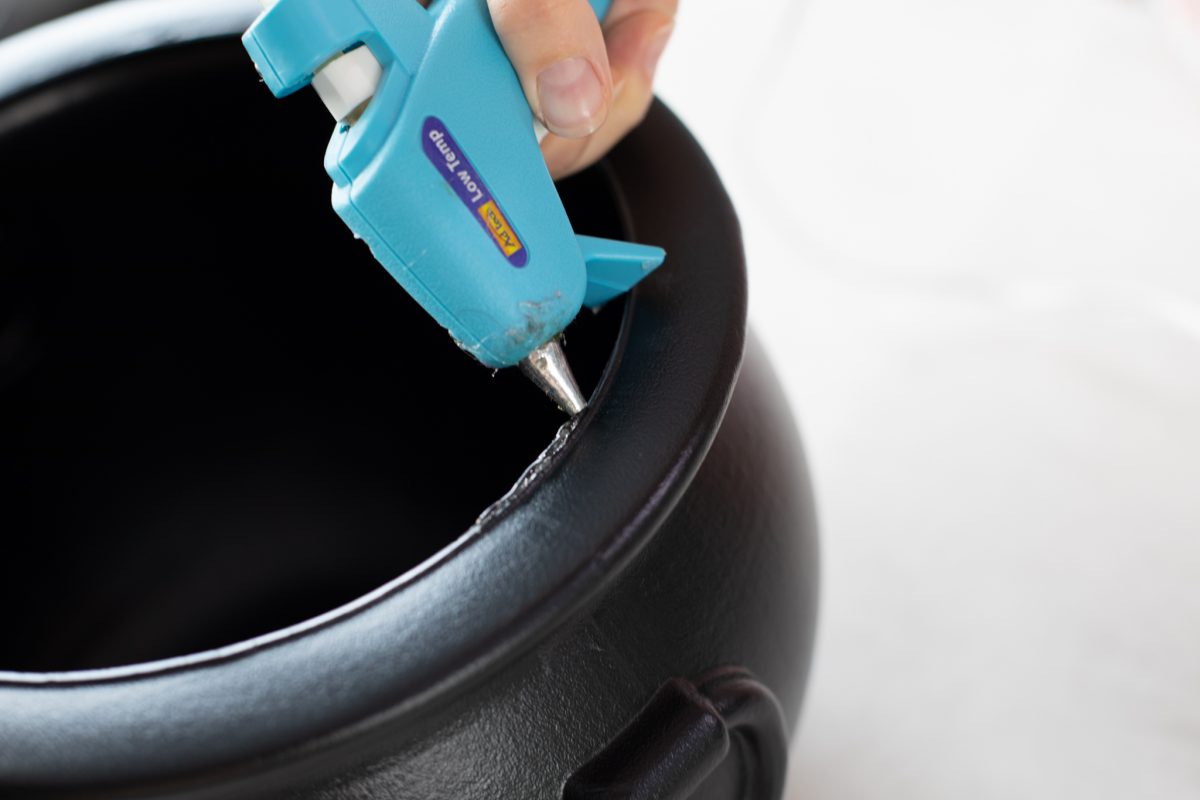
2. Glue the tulle to the cauldron using the stitching as a guide.
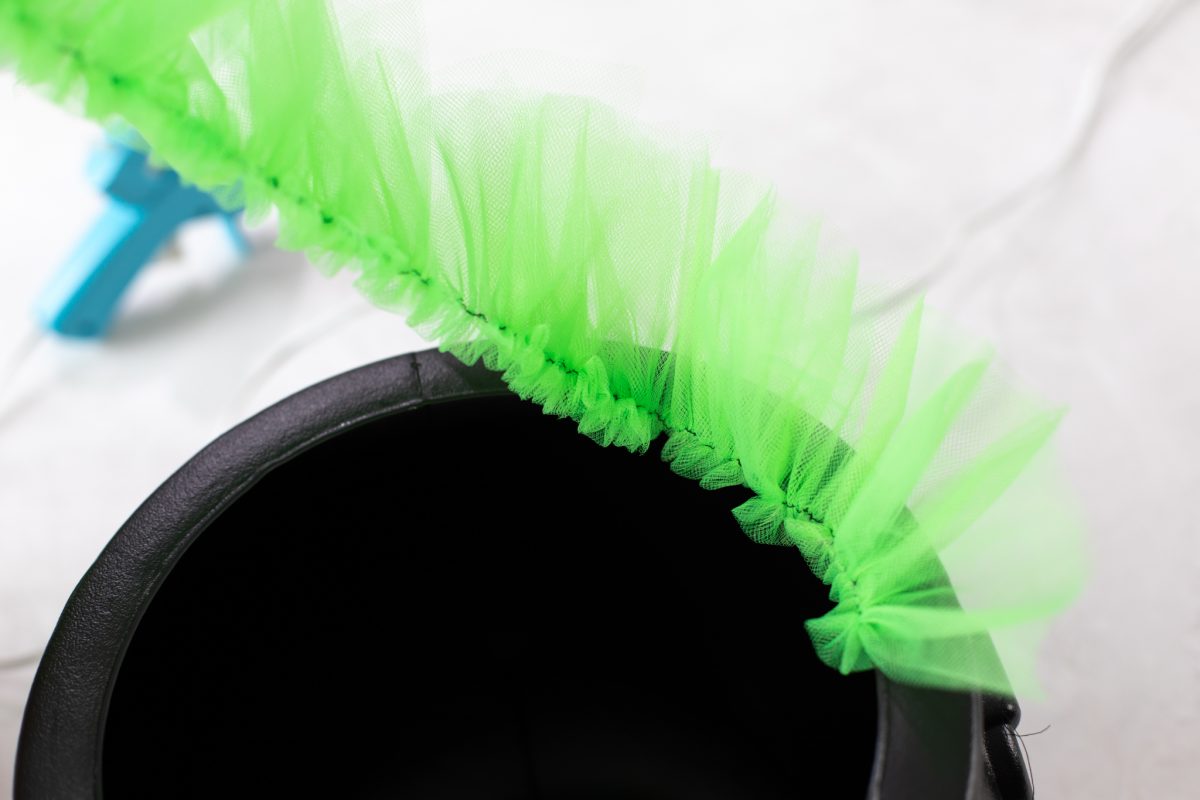
3. Continue the process until all the tulle is glued to the inner circle.
4. Position the tulle to your liking.
5. Stand back and admire your hard work.
Dry Ice Tips
- Purchase right before you need it. Dry ice doesn’t last very long, even when stored properly.
- Don’t touch the dry ice with your bare skin. Dry ice is frozen carbon dioxide and goes straight to a gas instead of turning to a liquid. It’s about -109.3°F and could cause frostbite if you touch it without proper handling equipment.
- Use heavy gloves, tongs, or both to handle the dry ice.
- Dry ice is dense and will sit at the bottom of the container.
- Do not swallow dry ice or let it touch lips. This could cause internal frostbite.
- Do not store in an airtight container. As the dry ice goes from solid to gas it can cause the container to explode if it doesn’t have a vent for the gas to expand.
- Do not store in the freezer. Dry ice is much colder than the freezer and will melt in the enclosed space and may cause the freezer to malfunction.
- It’s best to store the dry ice in an insulated or Styrofoam cooler with the lid ajar, thus allowing the gas to escape while maintaining the temperature.
- Make sure the room you’re in is well ventilated. The dry ice will turn to carbon dioxide, and you don’t want it to build up and replace the oxygen. Keep a window open to keep air flowing.
- Do not throw leftover dry ice in the trash or down the drain. It could cause the trash can to explode or cause serious damage in the pipes.
- To dispose properly, poor warm water over the pieces until they’re completely dissolved.