
Rise and shine glampers! Okay, glamping isn’t for everyone. Neither is camping. But free designs are! Make this custom heat transfer tee with this week’s free design from Sophie Gallo. Plus, all Sophie’s designs are 25% off through 8/12. Now let’s get making!
Supplies Needed:
- Silhouette CAMEO® or Silhouette Portrait® or Silhouette Curio™
- Silhouette Heat Transfer – Black
- Design ID #210254
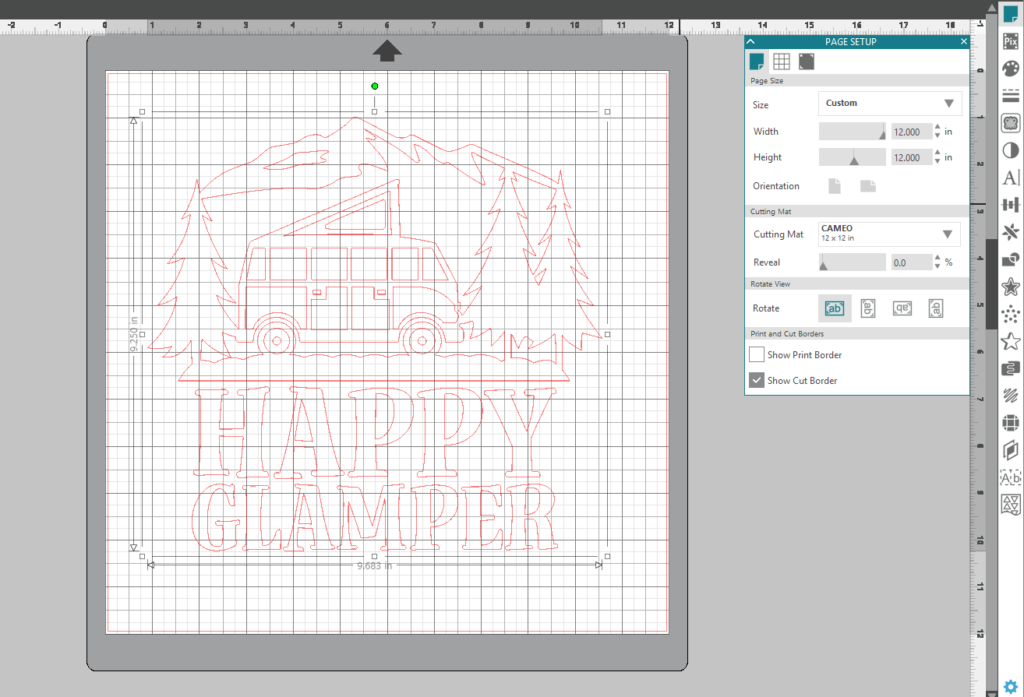
Step One: Adjust Your Design
- Select the Page Setup Window and adjust your width and height to 12 inches by 12 inches.
- Open Design ID #21025 in Silhouette Studio by locating the design in your library.
- Measure the area of what you’d like to place your design on. For this design, I chose to place it on the front of a t-shirt. I found that the best size was around 9 inches tall and 9 inches wide.
- Resize your design to the dimensions you got from measuring. In order to resize your design, you will select it and then drag in the outer corners. (Tip: If you drag the middle points you will warp the design. By selecting the outer corners you will keep the design proportionate.)
- When cutting the design out of heat transfer you have to mirror your design or your words will be backward. In order to mirror your design select your design, right click, and select flip horizontally.

Step Two: Cut Your Design
- Load your heat transfer material into your machine (If you are using a CAMEO or a Portrait you can load your material in without a cutting mat). You’ll notice Heat Transfer has a shiny plastic side and a matte side. You will want to place the heat transfer in shiny side down.
- In Studio select the send tab in the upper right-hand corner. For material select the Heat Transfer, Smooth (depending on which Heat Transfer you are using) cut setting. Adjust your blade to the cut setting and select start.
- After your machine is done cutting, unload the Heat Transfer from your machine and weed away unnecessary parts of the design.
- Place your weeded design on your shirt, right side up.
- Leaving on the clear protective on, iron your design onto your shirt. You may also choose to place a cloth barrier in between the design and the iron. Once the design is cooled peel away the clear plastic (Tip: If you pull away the clear plastic while your design is still hot, it will warp the Heat Transfer thus ruining your design).

Now that your shirt is done you’re ready to head to the mountains! What will you create with this week’s FREE Design of the Week?
Nasze Naturalne
September 3, 2025
Your authentic voice really shines through in everything you create and share
Naszenaturalne
September 2, 2025
Really love your style
Kelly Wayment
June 28, 2024
You can use it with vinyl as long as it is smooth and flat to allow the static charge to hold on to it. Rolled vinyl that wants to go back to its rolled shape will not necessarily work well, and it would need to be trimmed to fit the ES mat cutting area.
Kelly Wayment
June 28, 2024
Yes, you can use the heat pen while using the ES mat. 🙂
Yurii
March 2, 2024
Hello. May it be used with heat pen?
Thanks
Jerome
February 24, 2024
Hi, works this with the normal vinyl foils or only with printer papter etc?