
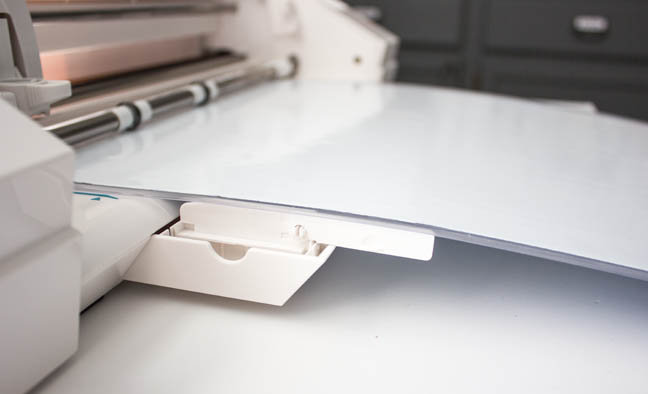
All you lucky people out there with the new Silhouette CAMEO® 3, have you discovered all of the new features? Sure we know about Bluetooth®, dual carriages, and the AutoBlade (oh my!). BUT have you noticed that hidden drawer below?

Go ahead, pull it out! Yes, storage for your hook and spatula!! I don’t know about you but as organized as I try to be I always waste 10 minutes searching for my lost tools. Not anymore! There’s also a spot for the crosscutter tool when working with vinyl.

Another “hidden” feature is those guides that unfold. You’re probably scratching your head saying, “What do these do?” Well…they are there to support your mat! Especially when using your long 24 in. mat. It helps prevent the mat from getting caught on the edge of the machine when you’re doing those long back and forth cuts.
I also want to mention that funky looking key in the storage compartment. That’s for removing the screw top to your AutoBlade and ratchet blades for easy cleaning, no more killing your finger tips trying to hold that tiny surface!! The two prongs are also there to remove the Bluetooth® in case you ever need to.
So about those guides…I have to admit they might be one of my favorite new features because I like big cuts and I can not lie. 🙂 I am always pulling out my 24 in. mat to make longer cuts.
I recently decided our area in our house lovingly referred to as the “front room,” which has been overtaken by our boy’s million toys needed to become an official playroom. The former adult paint color scheme and shelving decor needed to go and in place a fun and welcoming room for little minds to grow and play.
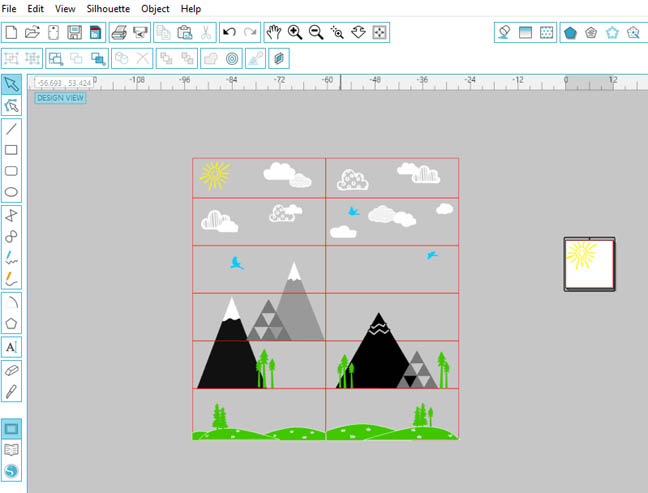
I created a fun mural for the back of our built-in shelving unit to peek out from behind the toys. I used Silhouette Studio® to design the look I wanted and several Silhouette Design store files to come up with this playful scene.
Supplies Needed:
- Silhouette CAMEO® 3
- Assorted Vinyl colors
- Transfer Tape
- Hook Tool
- 24 in. Cutting Mat
- Design ID #16119, Design ID #41955, Design ID #21227, Design ID #83429, Design ID #12989, Design ID #34595, Design ID #112594, Design ID #29200
Step One: Organize Cut Files Per Color Onto Mat
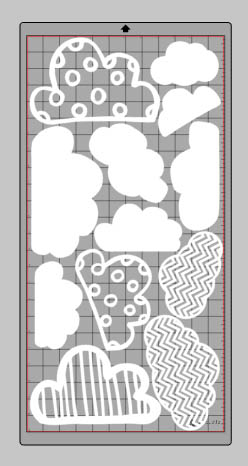
After I had the design the way I wanted it I copied the files and nested them all onto the cutting mat area per color to make it easy to cut. Once I liked the way it all fit I grouped all of the designs together and moved them off the active area until I was ready to cut them.
I filled the shapes with the vinyl colors I wanted to use for my own memory; all I had to do was look at the screen to know which vinyl color I needed to load on my mat.
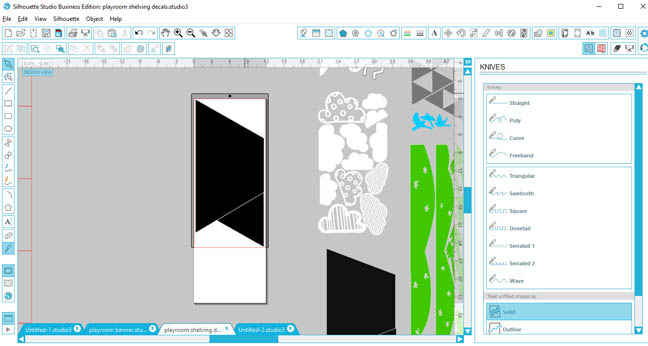
For the mountains that were wider than 12 in., I had to cut them into two pieces using the knife tool.
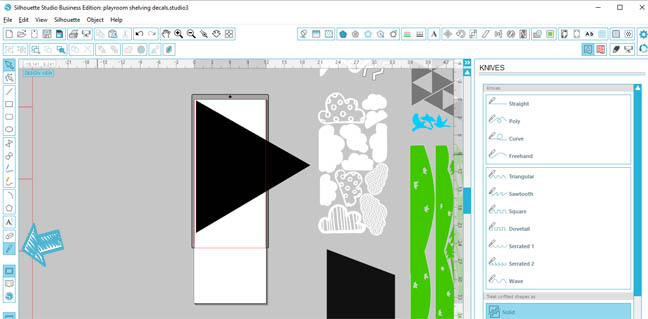
Tip: To get a straight cut hold the shift key as you drag the line to “snap” it in your current direction.
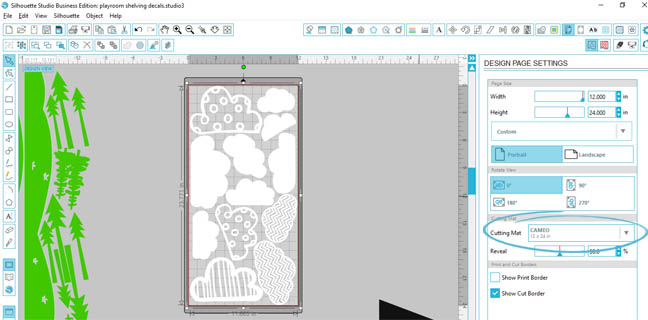
Step Two: Set Up Your Design Page Settings
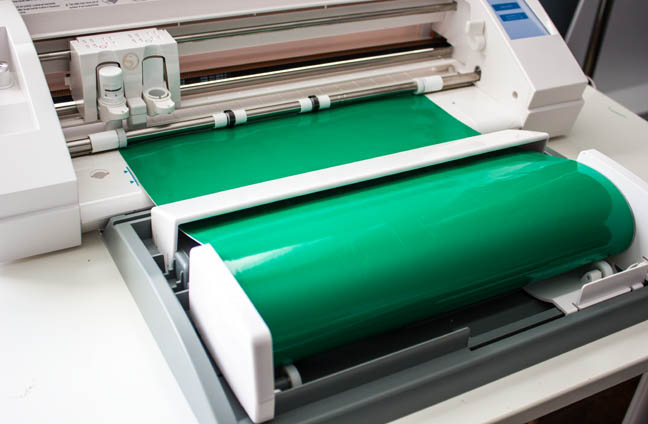
Since the CAMEO®3 only has the load option you need to make sure that you have your design page settings correct. I did need to cut the grass and one of the mountains using my roll feeder instead of the mat, so I had to make sure when I wasn’t using the mat I let the machine know.
Don’t forgot to move the roller over too.

When I was using the mat, I made sure to change it back to the 24 in. mat in the design page settings.
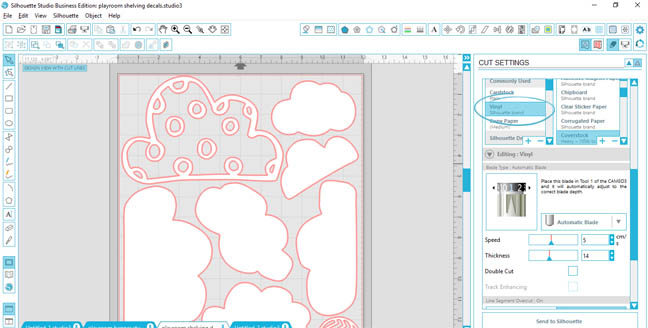
Step Three: Cut Your Designs
Go to your cut settings and make sure you have it set for vinyl, I always adjust my thickness up to 14 to make sure I have a nice clean cut.
(Thickness tells the machine how much force to push down with)
Look how nicely that 24 in. mat sits on those guides!
The roll feeder is your best friend for those vinyl cuts longer that 24 in. I would never attempt a mat free cut without using it ever again. I highly recommend buying one if you are a big vinyl cutter.
Use your transfer tape and scraper tool to apply the decals to the wall.
Here’s the final look!

With toys on the shelves….
Nasze Naturalne
September 3, 2025
Your authentic voice really shines through in everything you create and share
Naszenaturalne
September 2, 2025
Really love your style
Kelly Wayment
June 28, 2024
You can use it with vinyl as long as it is smooth and flat to allow the static charge to hold on to it. Rolled vinyl that wants to go back to its rolled shape will not necessarily work well, and it would need to be trimmed to fit the ES mat cutting area.
Kelly Wayment
June 28, 2024
Yes, you can use the heat pen while using the ES mat. 🙂
Yurii
March 2, 2024
Hello. May it be used with heat pen?
Thanks
Jerome
February 24, 2024
Hi, works this with the normal vinyl foils or only with printer papter etc?