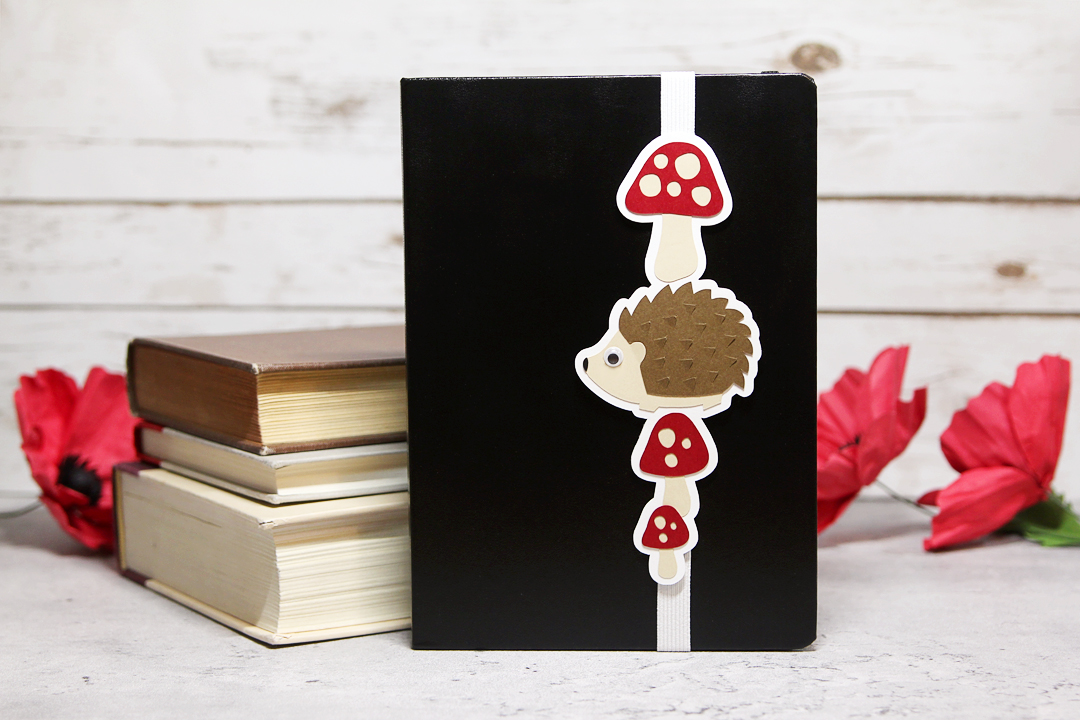
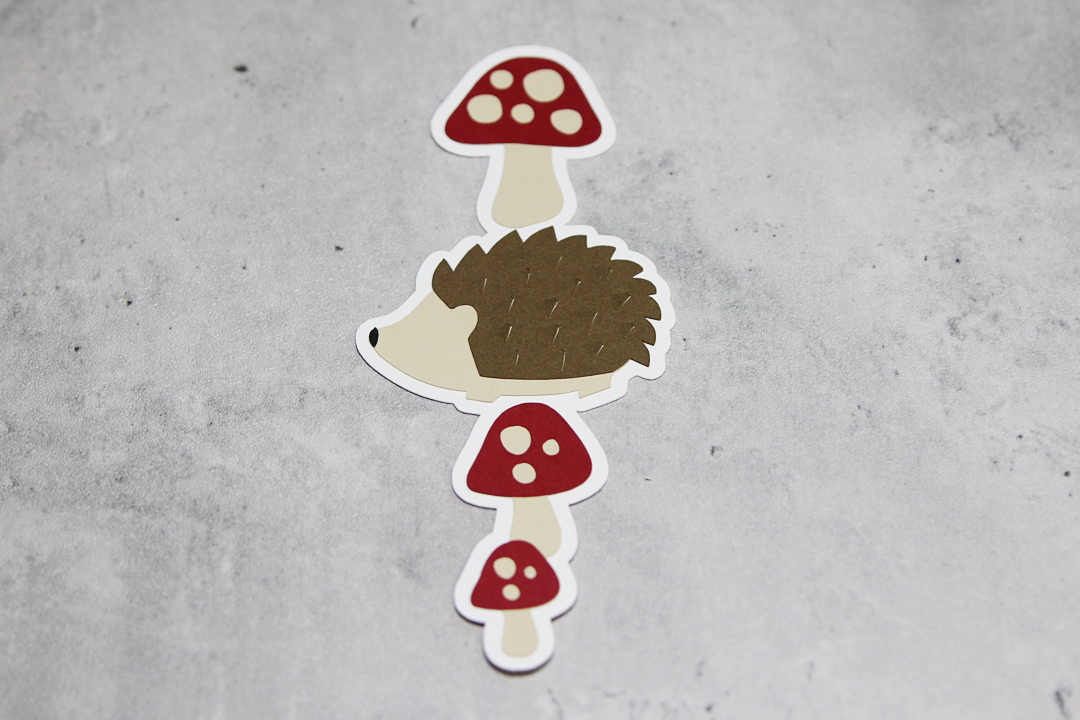
With many kids now on summer vacation, I think it’s time for a DIY bookmark to encourage reading, don’t you? This is a layered paper craft that you can customize with different designs. I’ll take you step-by-step through making this adorable hedgehog bookmark.
You will need:
- ¼ in. or ½ in. wide elastic
- Cardstock in white, tan, brown, red, and black
- Google eye (7mm) – optional
- Hot glue
- Strong white glue
- Silhouette Studio® Software
- Silhouette Cameo® or Portrait®
- Design ID #276988 by Pebbles in my Pocket
Step One: Set up Design
In Silhouette Studio®, open the Hedgehog Set (Design ID #276988) from your Library.
Ungroup the design.
Group the ear mark with the hedgehog body.
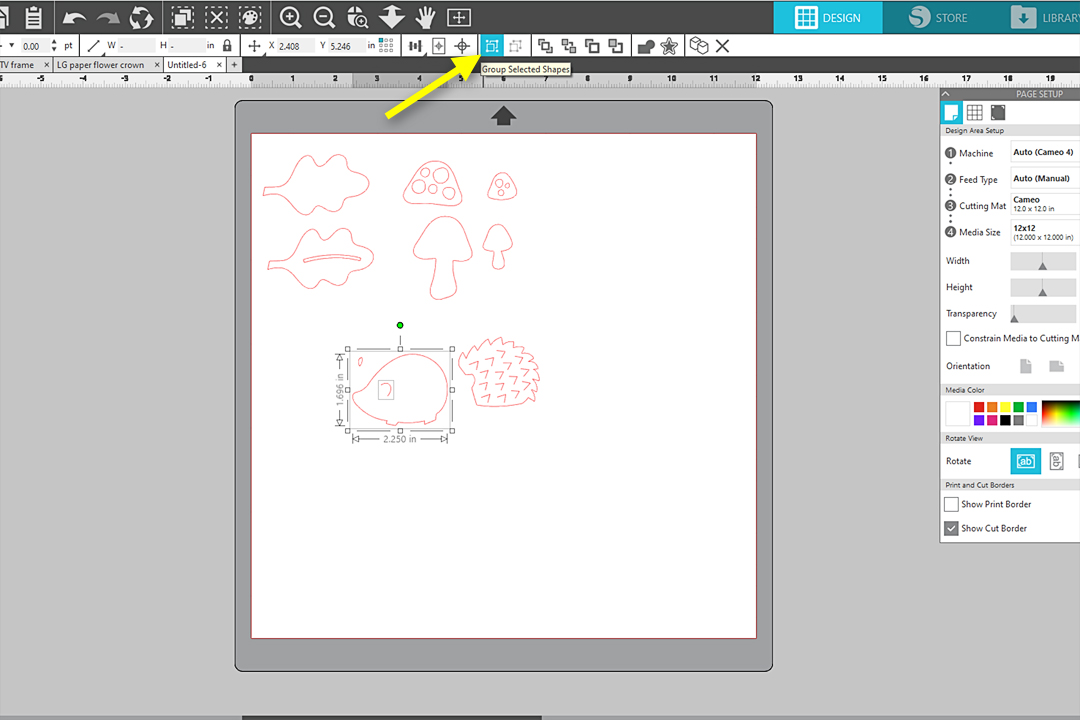
Select the smallest mushroom main piece and cap, and make a copy to the side.
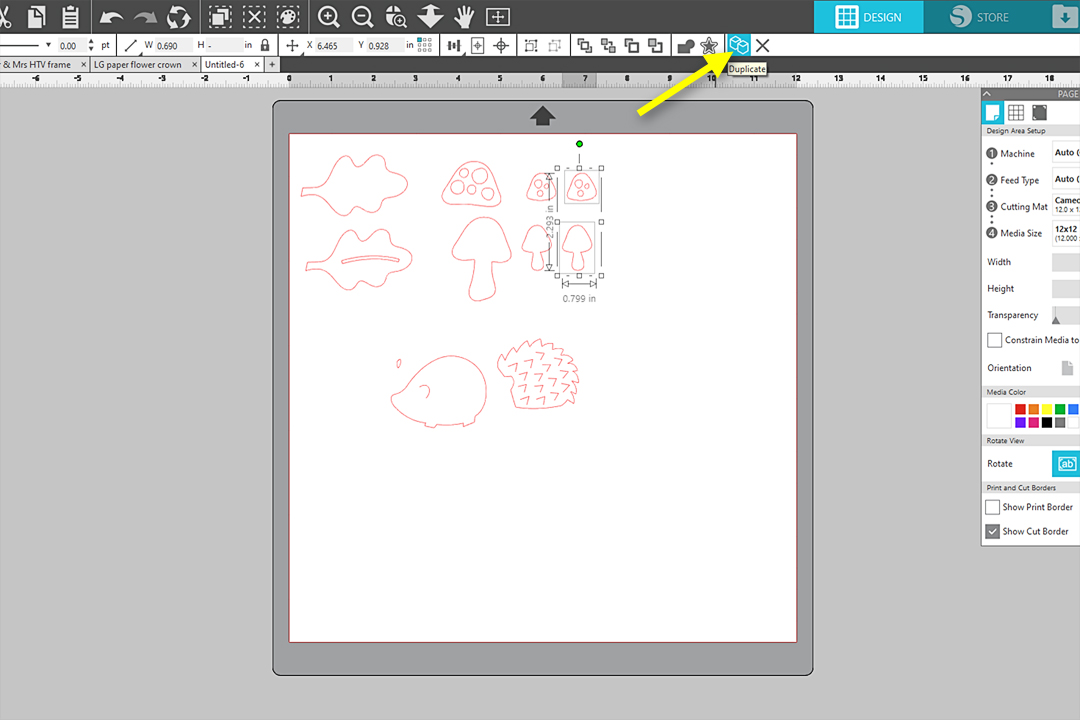
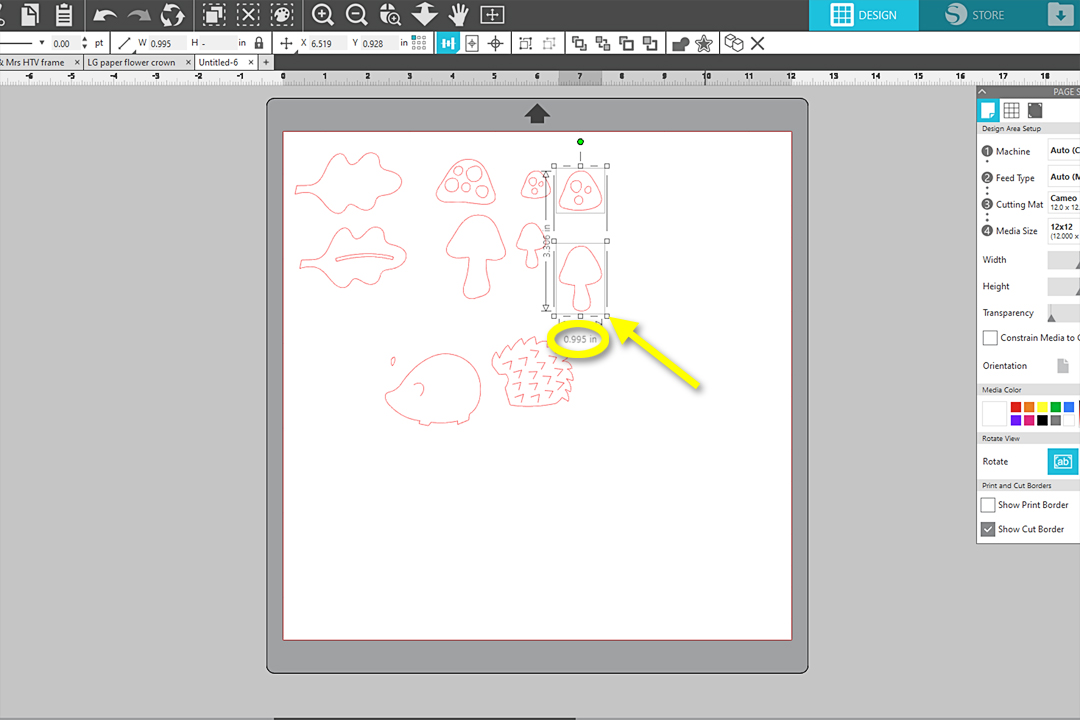
Drag a corner handle to enlarge the copy so you end up with a medium-size mushroom somewhere between the size of the largest and smallest mushrooms.
Note: Mine is just under 1 in. wide.
Delete the leaf pieces, unless you really want to use them.
Recolor the designs on the page to match the color of cardstock from which you will cut them.
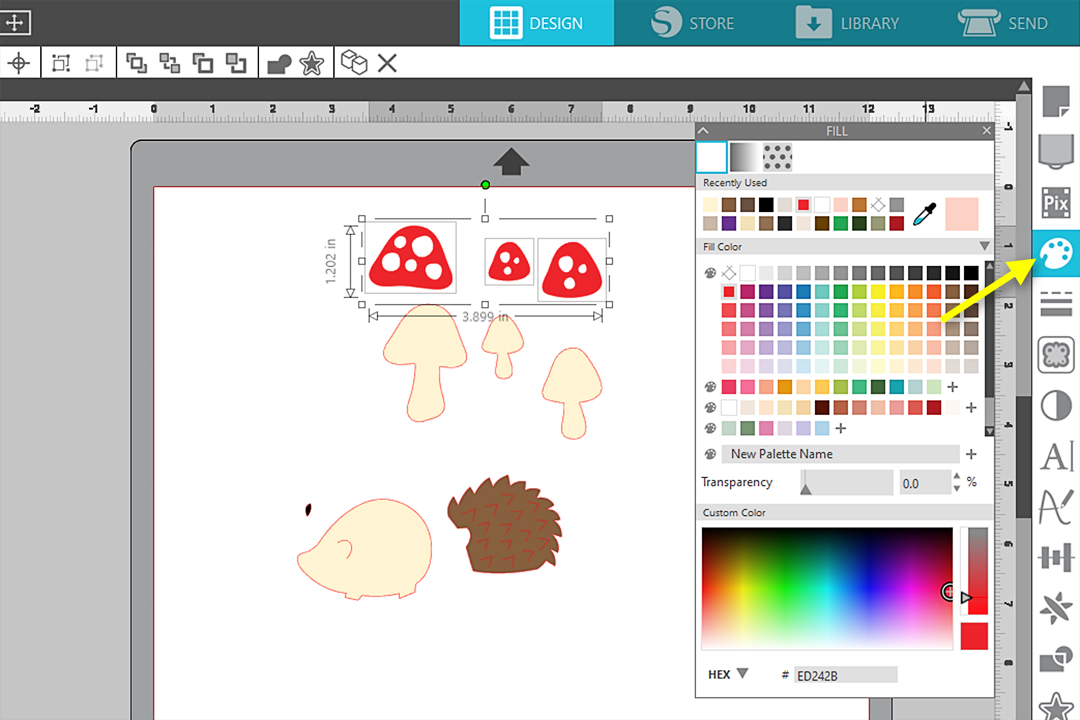
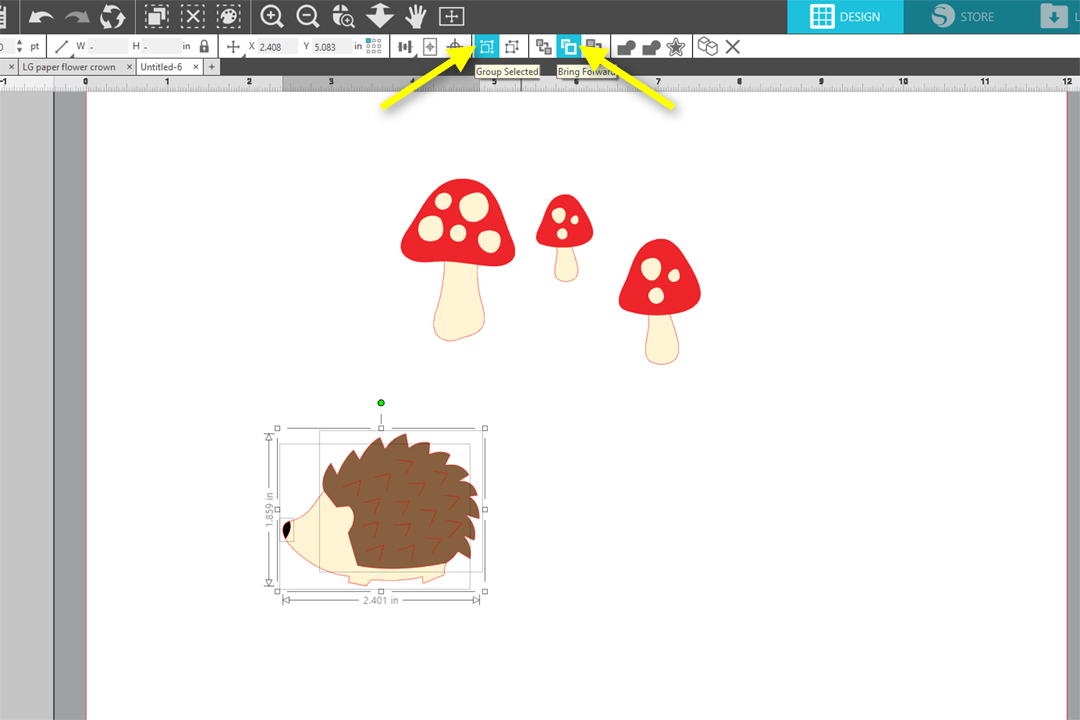
Move the associated pieces together so you can see what the pieces will look like. Use “Bring Forward” and “Send Backward” commands as necessary. Group the hedgehog fur and nose to the body, and Group each mushroom cap to its stem.
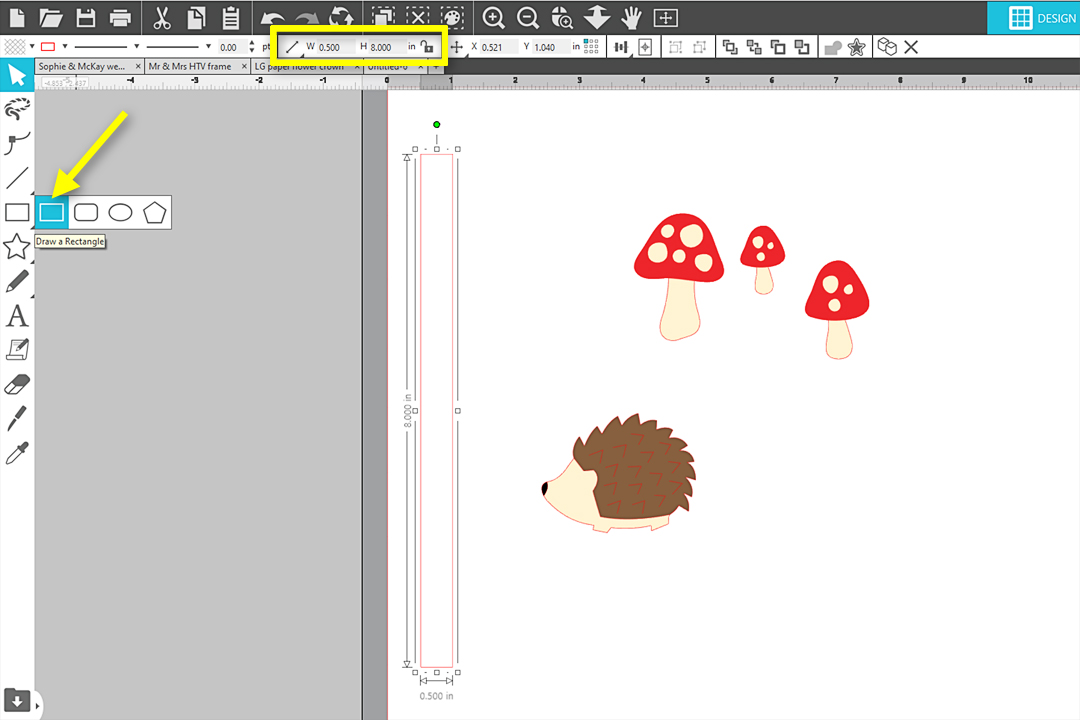
Draw a tall skinny rectangle to represent your bookmark band, 0.5 in. (or 0.25 in.) wide and about 8 in. high.
Arrange the pieces into a vertical line as you want them to be on your finished bookmark. Yours does not have to look exactly like mine.
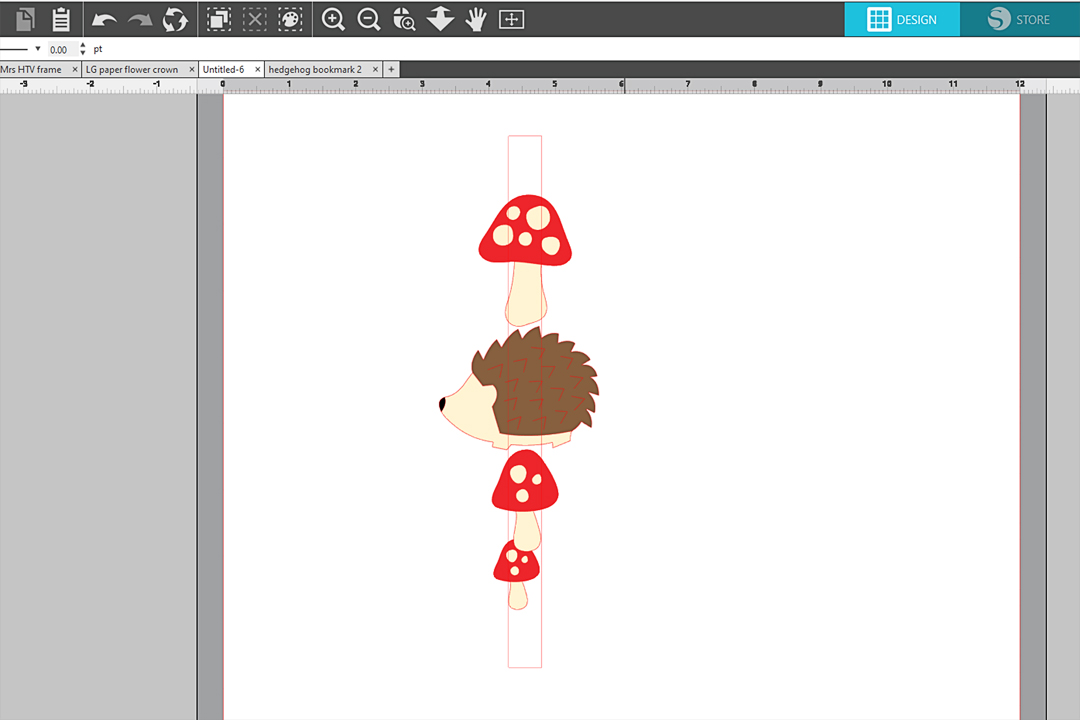
Move the rectangle band away to the side, off the virtual mat.
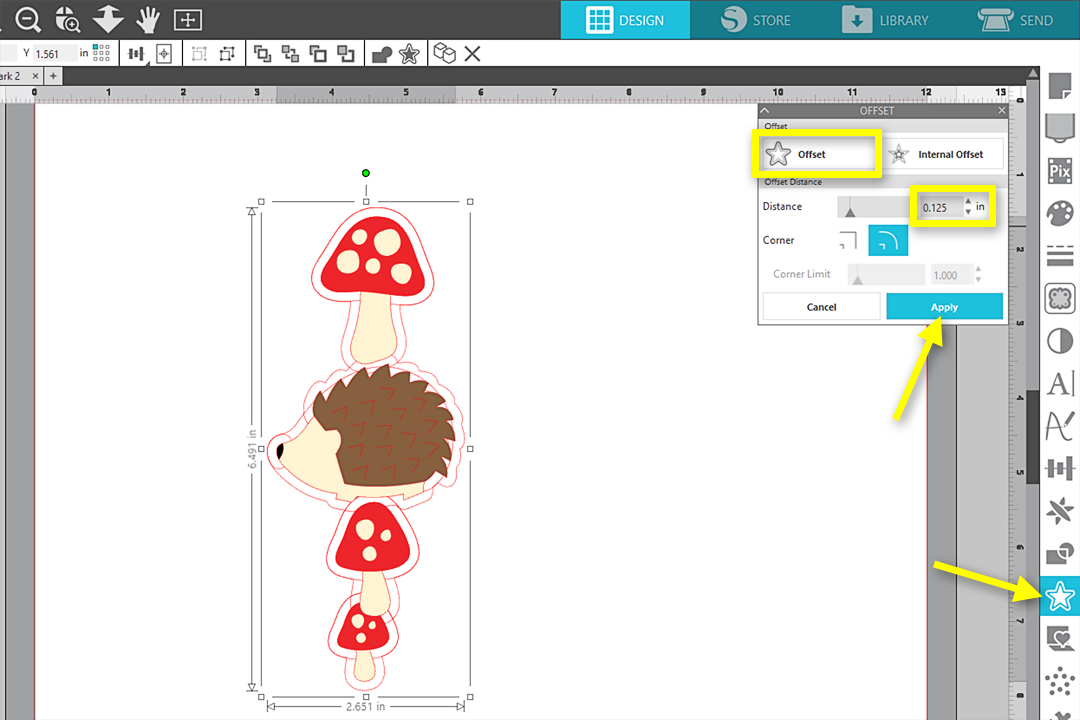
Select all the hedgehog and mushroom pieces and open the Offset Panel.
Choose Offset and input the Distance value as 0.125 in. and Apply.
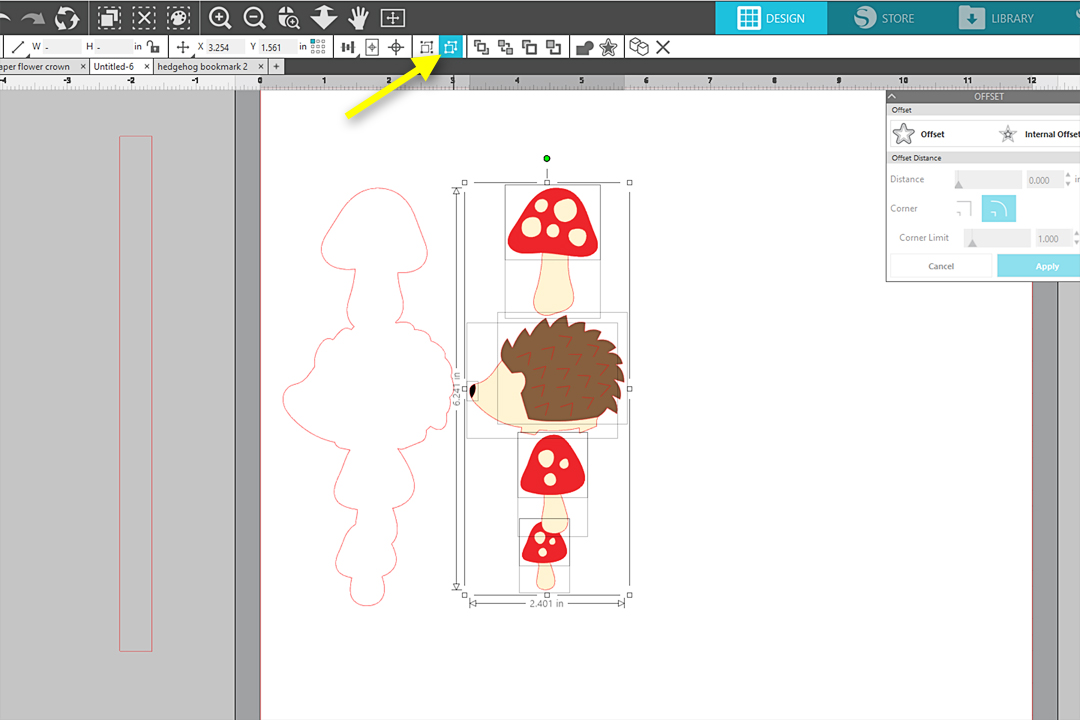
Move the offset to the side of the hedgehog and mushrooms.
Note: If your Offset created holes inside the offset piece, you’ll want to remove those. Select the offset, right click and choose “Release Compound Path,” then select and delete each inner cut piece. The final offset should be one solid piece.
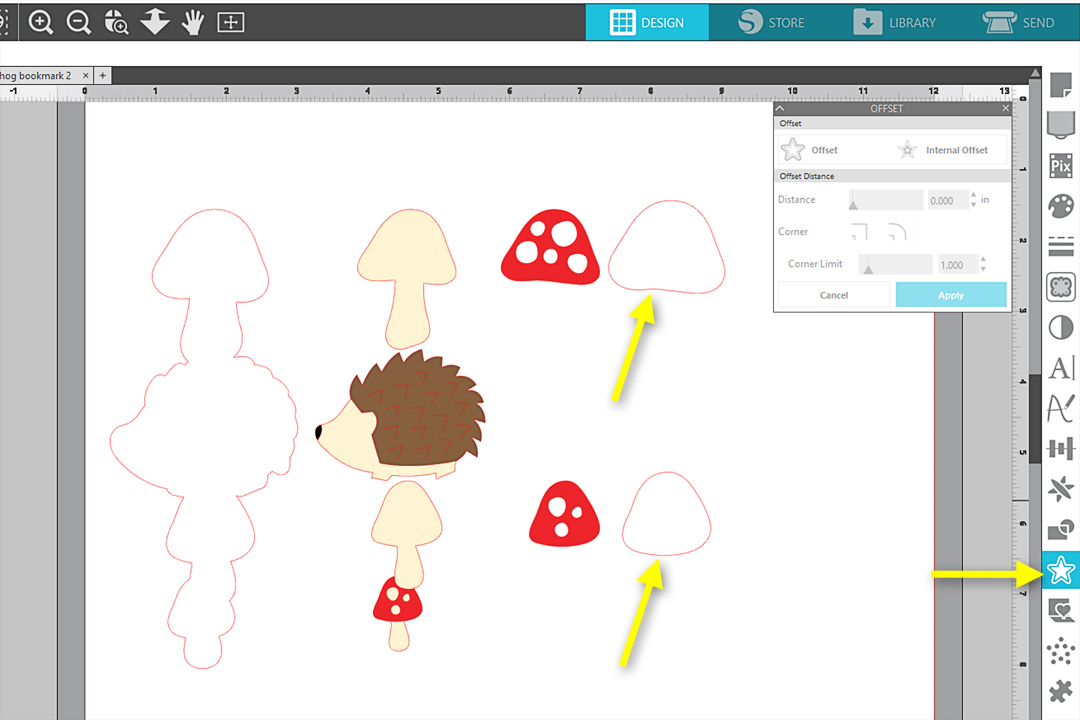
Select the mushrooms and hedgehog, and Ungroup all the pieces once. (You do not want to ungroup the ear slice from the hedgehog body or the triangle slices from the hedgehog fur piece.)
Select the largest mushroom cap and the medium mushroom cap and create another 0.125 in. Offset the same as before. Again, remove any inner cut lines by releasing the compound path if necessary. (See note above.)
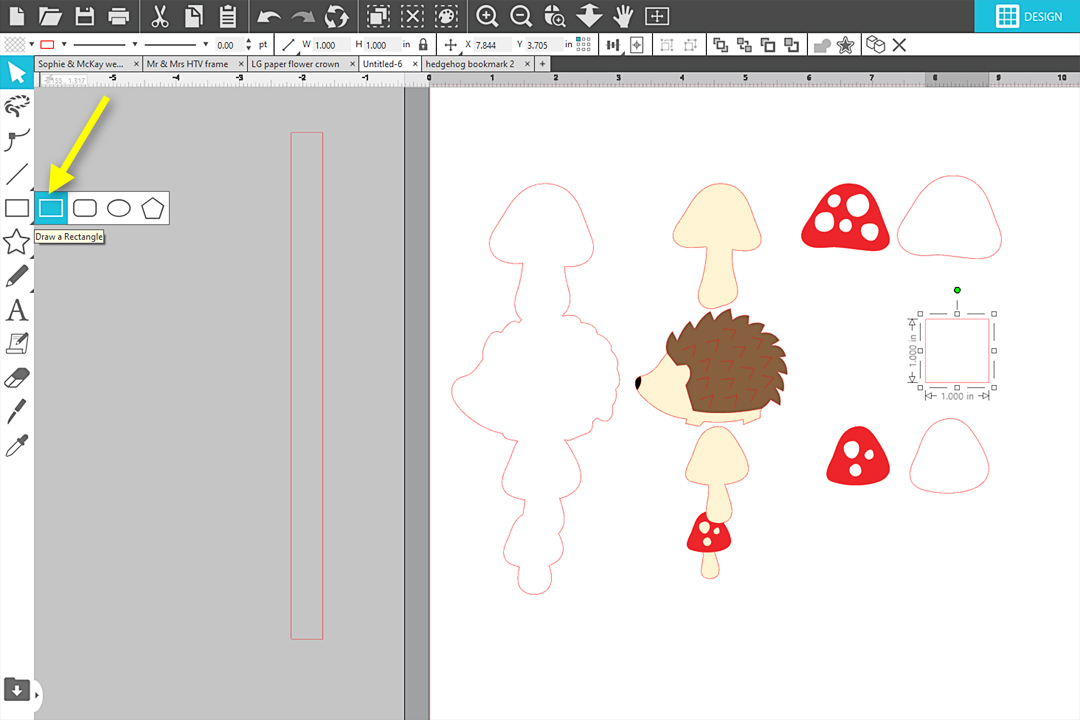
Draw a 1.0 in. square with the rectangle drawing tool.
I’ve adjusted the transparency slider on my mat so you can see the colors of my elements on the image below. We’re ready to cut the pieces from the following colors:
- Background offset pieces and square from white cardstock
- Cut the mushroom bases and hedgehog body from tan cardstock.
- Cut the fur piece from brown.
- Cut the mushroom caps from red.
- Cut the tiny nose from black. You may also wish to draw a tiny circle to cut an eye from black, if you are not using a google eye.
Step Two: Cut Cardstock Pieces
In the Send Panel, place only the objects you wish to cut on the virtual mat. Anything you wish to cut later can be placed off to the side of the virtual mat and it will not cut.
Place your cardstock on the mat, ensuring it is large enough and in the correct position on the mat. What you see on the virtual mat will match exactly how it will cut on your physical mat.
Choose your Material settings for Carriage 1. When using my favorite 65 lb. cardstock, I choose “Patterned Paper, Medium (65 lb)”, then adjust my blade depth to 3 or 4, depending on how sharp my blade is.
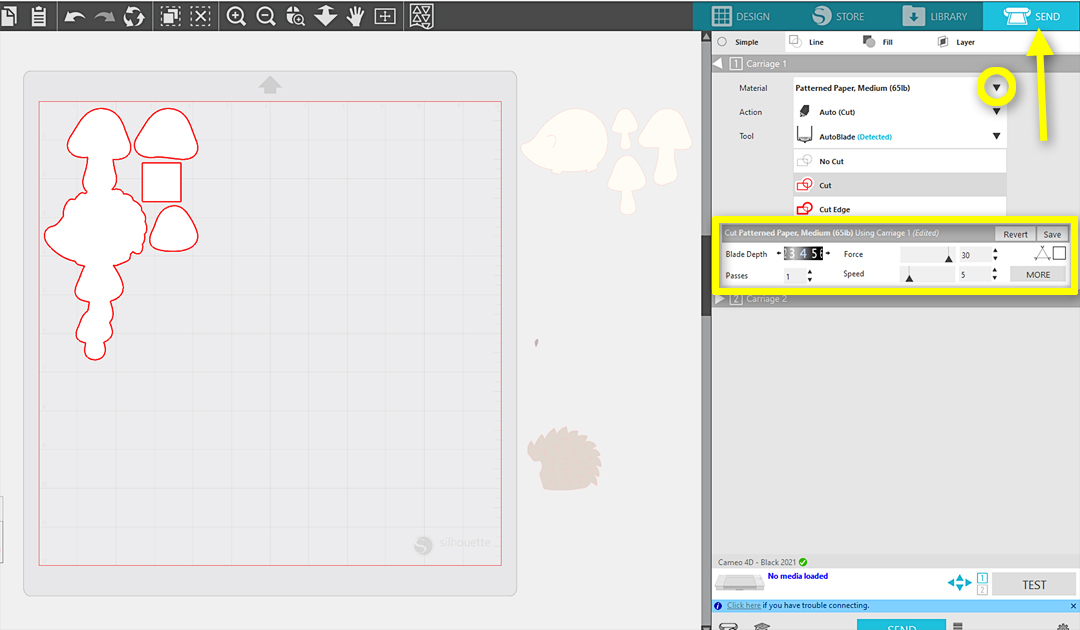
Note: It’s a good idea to perform a test cut, especially with materials you haven’t used before.
When your media is on your mat and your mat is loaded into your Silhouette machine, click Send.
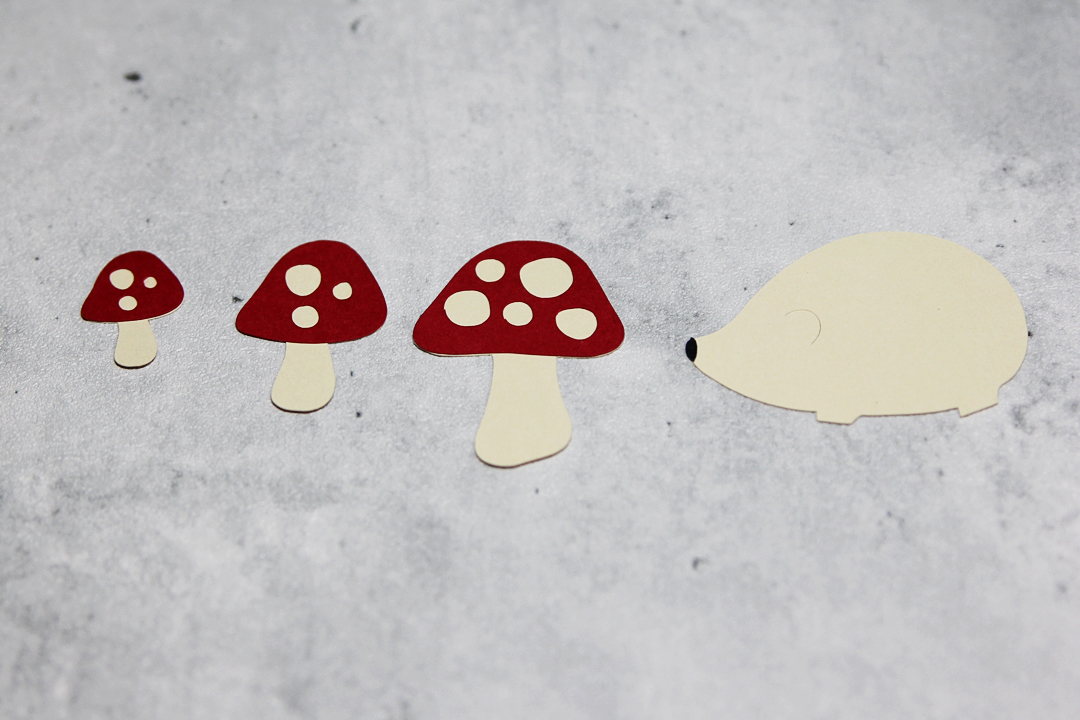
Repeat with the different colors until all the pieces are cut.
Step Three: Assembly
Glue the mushroom caps to their bases with white glue or other favorite adhesive.
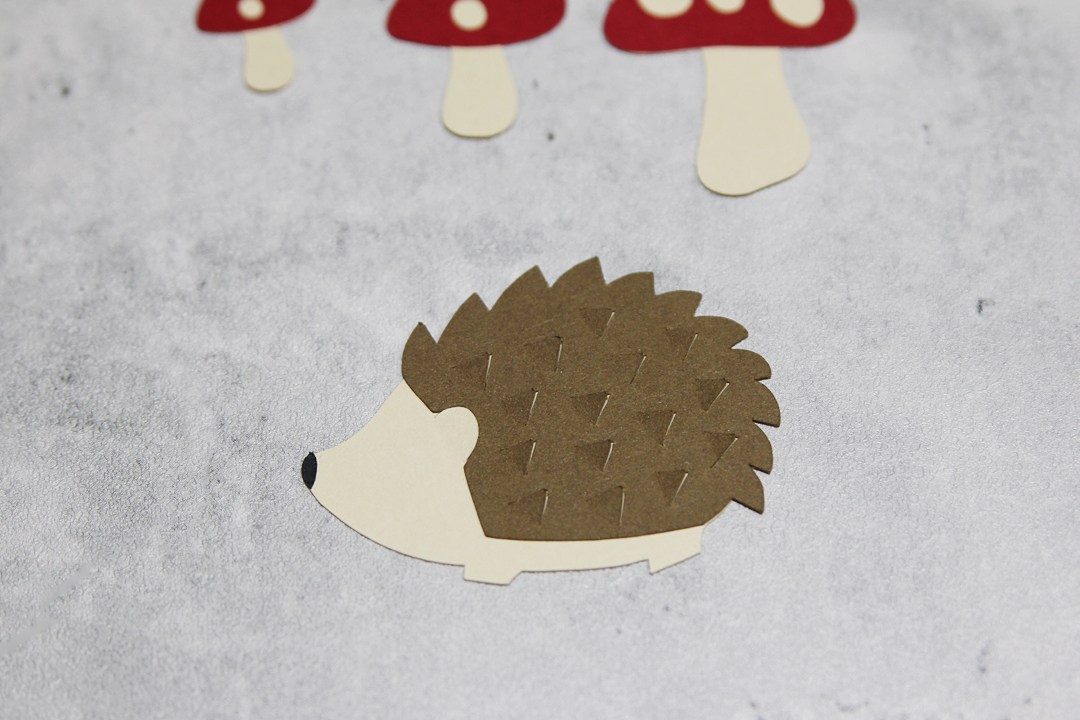
Glue the hedgehog’s nose in place.
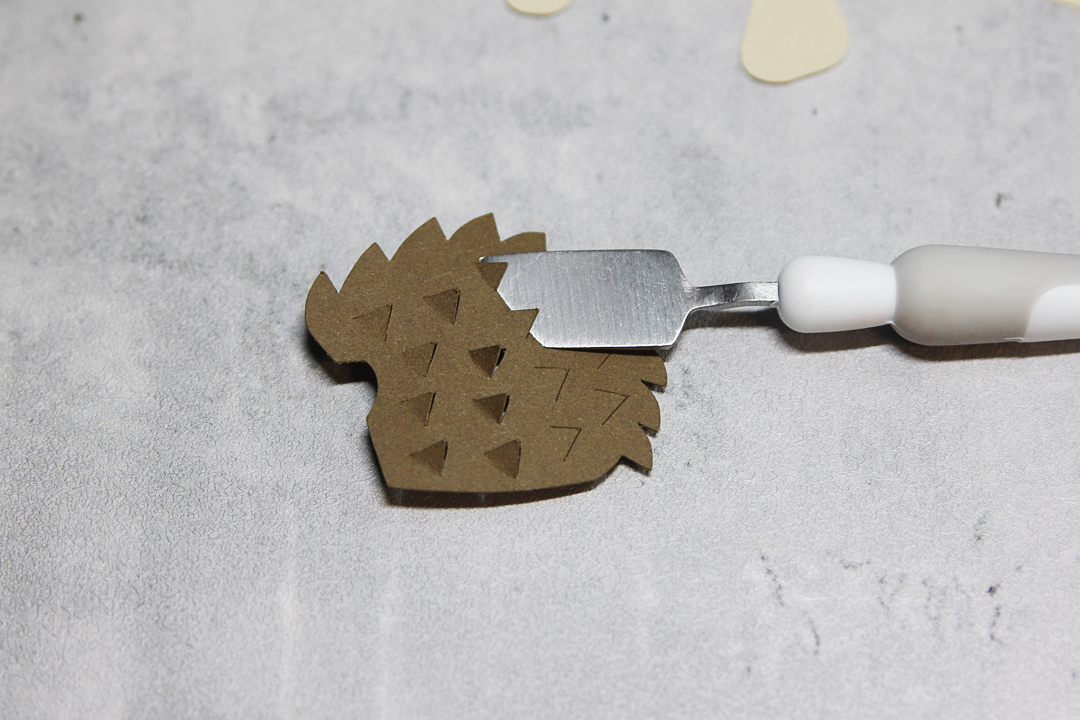
For the brown hedgehog fur, gently pull the triangular tips outward to add dimension and avoid adding glue to those tips.
Gently pull the ear away from the hedgehog body and tuck the fur piece behind the ear as you glue it in place.
Line up the correct pieces for the hedgehog and mushrooms against the offset white background piece and glue them in place.
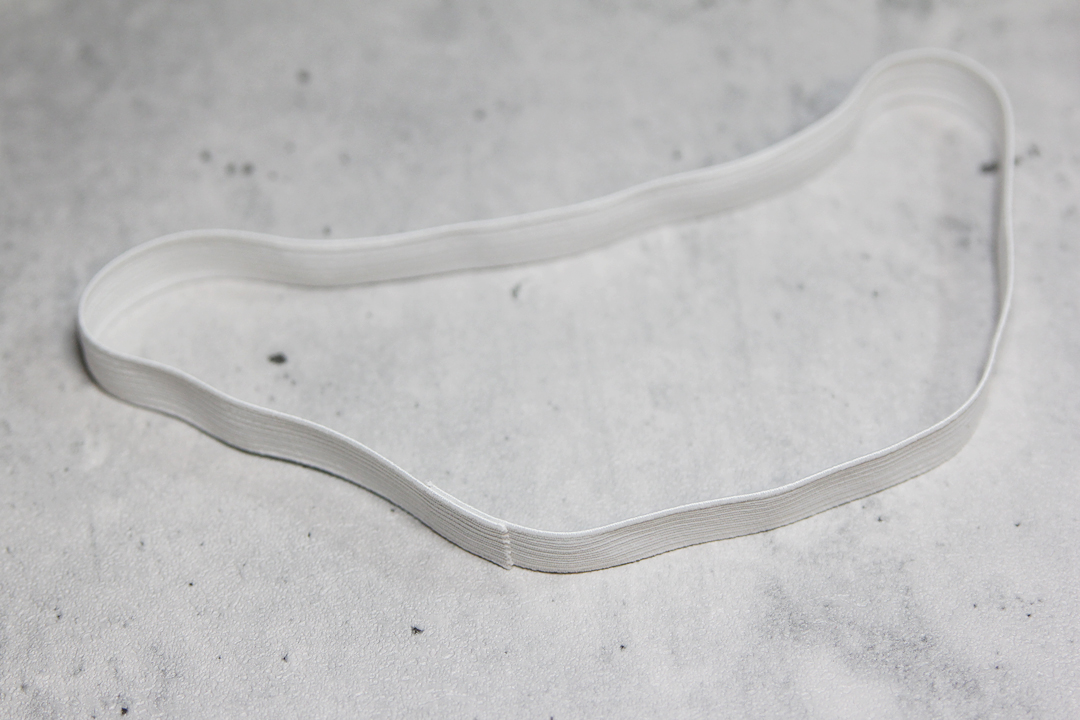
Trim a piece of ¼ in. or ½ in. elastic to 17 in. long.
Tip: Measure the height of the book cover you’re most likely to use the bookmark on. Double the height and add ½ inch. For an 8.25 in. book height, my elastic needs to be 17 in. long. (8.25 + 8.25 + 0.5 = 17)
Overlap the ends about ½ in. and hot glue together.
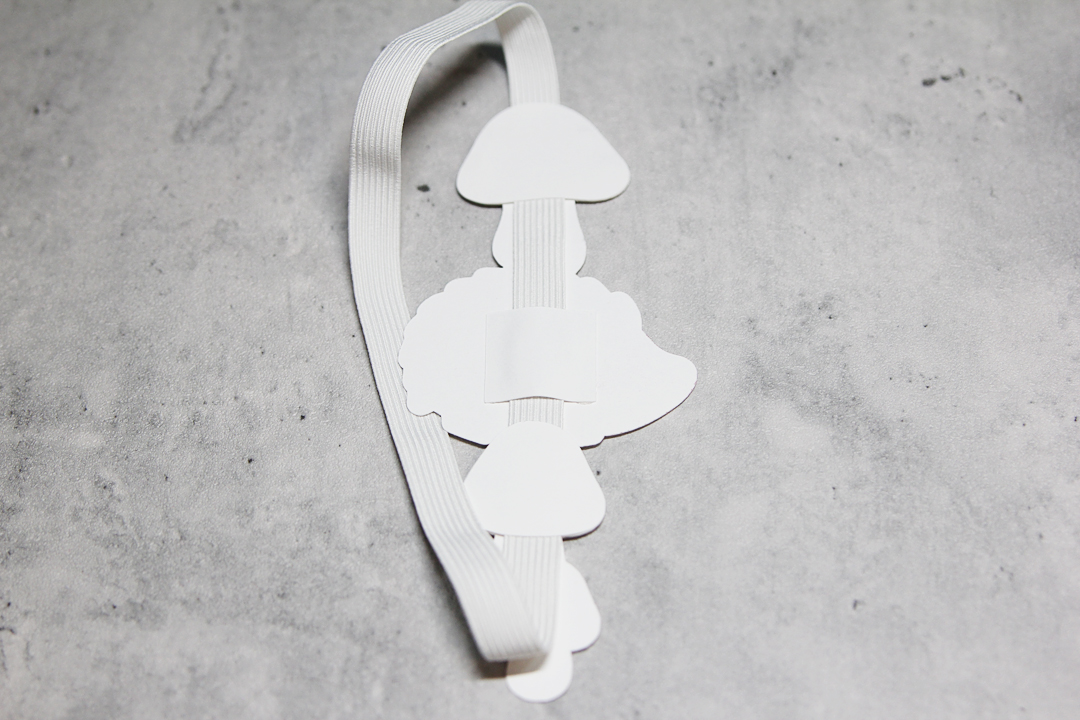
Line up the bookmark against the elastic and use hot glue at the seam to attach it to the back of the hedgehog area.
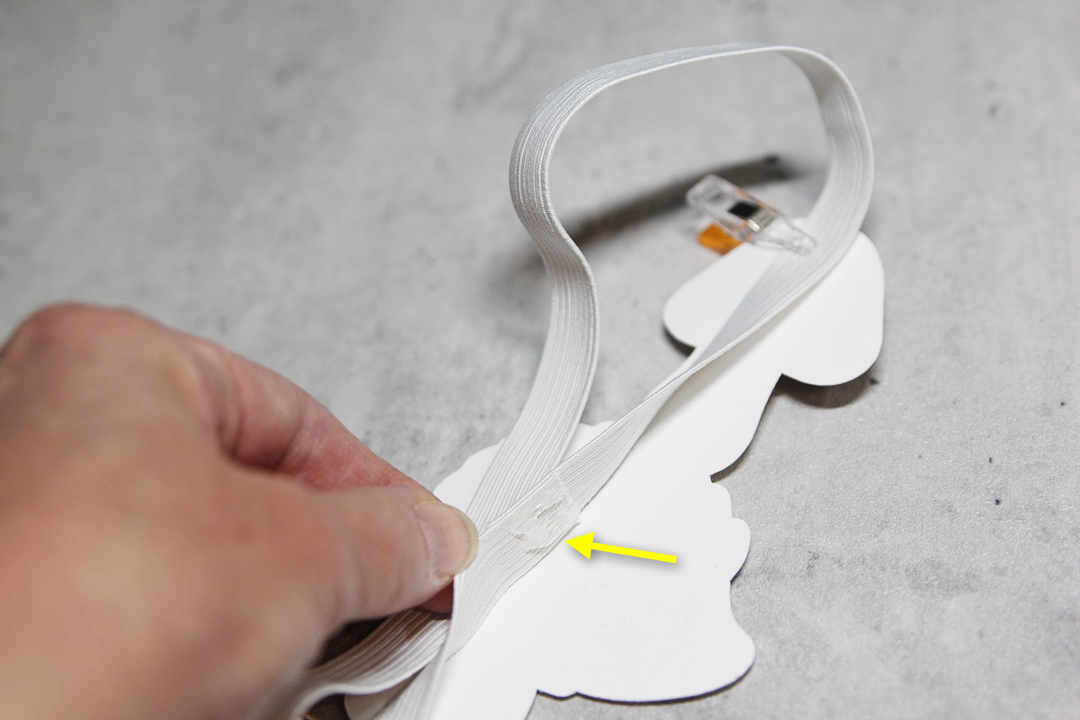
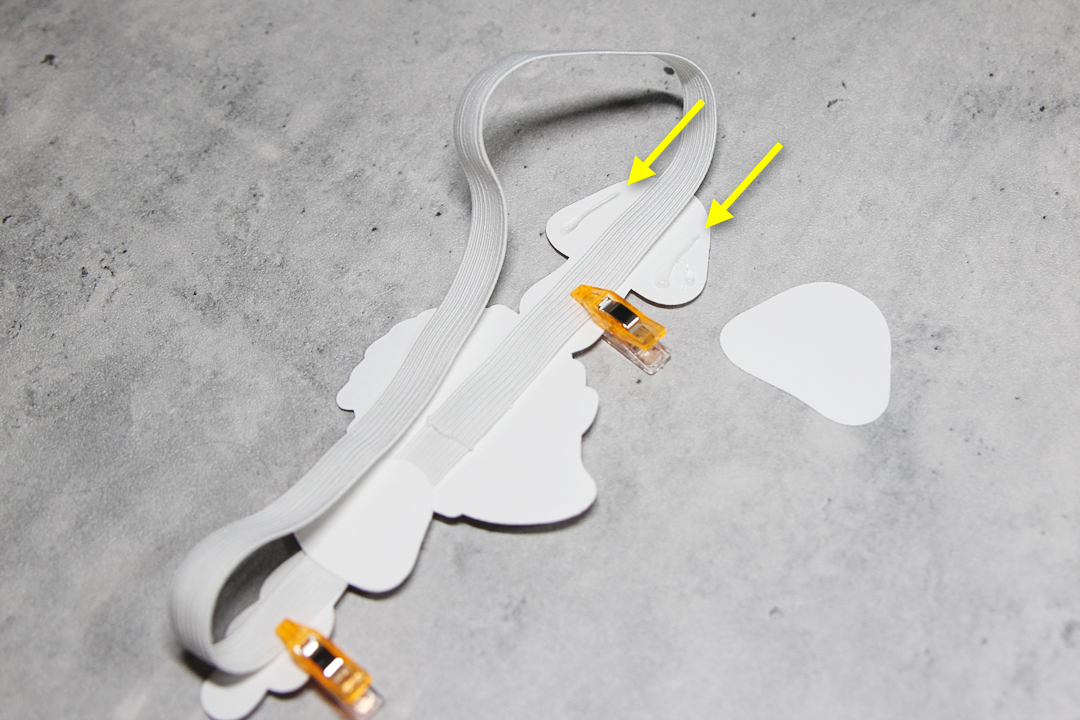
We only want it attached at this one spot to allow the elastic to move freely. Hot glue the extra white mushroom offset pieces so they are attached on either side of the elastic, and not glued directly to the elastic.
Add the white square over the glued elastic seam to cover it.
Finally, glue a google eye to the hedgehog to give it personality, and your bookmark is ready to use!
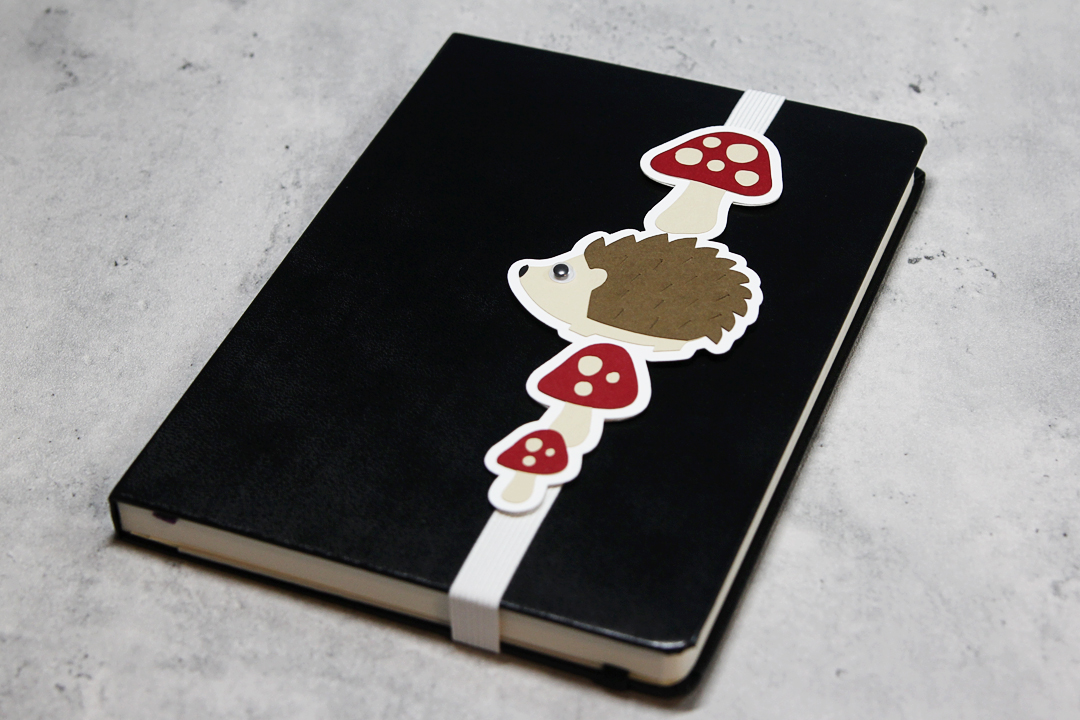
I hope this helps your kiddos enjoy their reading! You can use similar steps with other designs to create a variety of stretchy bookmarks.
 Free Class - Father's Day Apron Set
  Free Class - Custom Graduation Tumbler
Naszenaturalne
September 2, 2025
Really love your style
Kelly Wayment
June 28, 2024
You can use it with vinyl as long as it is smooth and flat to allow the static charge to hold on to it. Rolled vinyl that wants to go back to its rolled shape will not necessarily work well, and it would need to be trimmed to fit the ES mat cutting area.
Kelly Wayment
June 28, 2024
Yes, you can use the heat pen while using the ES mat. 🙂
Yurii
March 2, 2024
Hello. May it be used with heat pen?
Thanks
Jerome
February 24, 2024
Hi, works this with the normal vinyl foils or only with printer papter etc?
Kelly Wayment
February 16, 2024
Once you’ve pushed the mat up against the rollers, just press the “Load” arrow button (bottom right on the display). Does a regular sticky mat load into the machine for you?