
Are you the type of person who waits until after Thanksgiving to deck the halls? We’re already in full holiday swing over here, so what better way to kick off the decor than with a wreath! One of our favorites. 🙂 All you need is cardstock and some acrylic paint for this project, so it’s very simple!
Supplies Needed:
- Silhouette Cameo®
- Silhouette Studio®
- Silhouette Cutting Mat
- Silhouette AutoBlade or Silhouette AutoBlade for Cameo 4
- Cardstock in various shades of light blues and greens and pink for the berries
- White acrylic paint
- Paintbrush
- Hot glue gun or adhesive
- 3D Holly Wreath by Amanda McGee: Design ID #103717
Step One: Adding Texture to Your Paper (Optional)
1. This step is totally optional, but adds nice color and texture to the wreath. To simply add texture, add a few tablespoons of water to a bowl with a small amount of acrylic paint. Mix it to water the paint down. Then apply a mixture of splatters and brushstrokes to your paper. Let dry.

Step Two: Formatting the Design
1. Insert your wreath design into Silhouette Studio®. Increase the size of the design so that the wreath frame measures about 11.845 in diameter (or as large as you can go on a 12-inch-by-12-inch sheet of paper). Then ungroup your design.
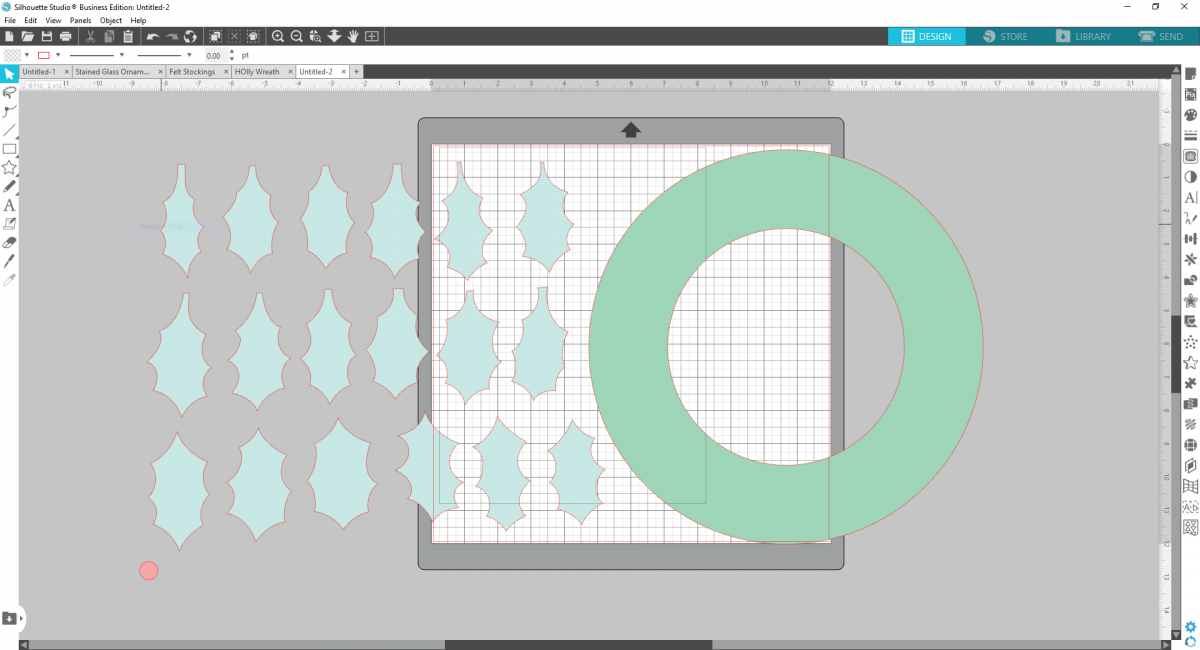
2. Cut one wreath frame from stiff cardstock or even matboard. Then cut around 100 holly leaves total from your various colored and textured cardstock and 30 berries out of pink cardstock. (You can texture the pink paper as well!)
Step Three: Assembling Your Wreath
1. Fold your holly leaves in half to give them some dimension. Then begin to glue your leaves around your wreath frame, just adding glue to the base of the leaves and then overlapping them slightly as you go.

2. Continue adding more leaves until you’ve filled your whole wreath frame.

3. Then add your berries! We used some foam risers to give them a little lift off the leaves.

And you’re done! Happy Holidays!

 Free Class - Shaker Card with the ES Mat
  Free Class - Foiled Gift Tags with the Heat Pen
Nasze Naturalne
September 3, 2025
Your authentic voice really shines through in everything you create and share
Naszenaturalne
September 2, 2025
Really love your style
Kelly Wayment
June 28, 2024
You can use it with vinyl as long as it is smooth and flat to allow the static charge to hold on to it. Rolled vinyl that wants to go back to its rolled shape will not necessarily work well, and it would need to be trimmed to fit the ES mat cutting area.
Kelly Wayment
June 28, 2024
Yes, you can use the heat pen while using the ES mat. 🙂
Yurii
March 2, 2024
Hello. May it be used with heat pen?
Thanks
Jerome
February 24, 2024
Hi, works this with the normal vinyl foils or only with printer papter etc?