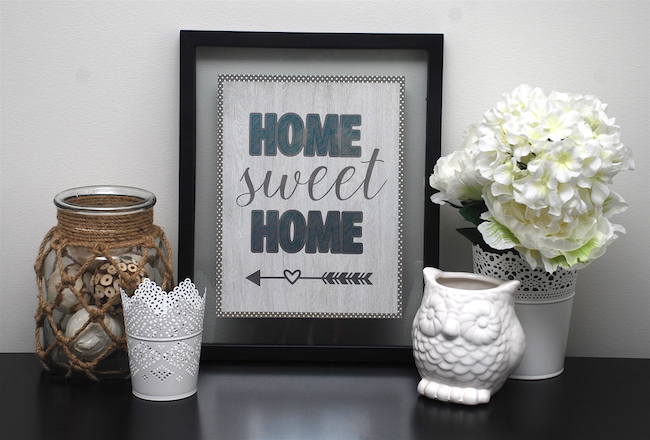
Today I’m sharing with you this cute little home decor project using the Printable Foil. These foils are so easy and fun to use because not only can you cut pretty designs out of them but you can also print onto them!

Supplies needed:
Silhouette Printable Foil
Silhouette Cameo
12×12 cutting mat
Frame & patterned papers
STEP ONE: Create design/text
- Open up Silhouette software and create your text using the “A” box on the top bar or left side bar.
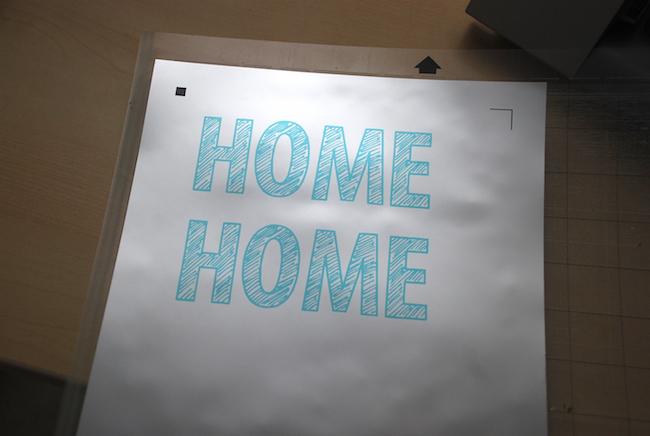
- type the word “HOME”, highlight the font, then select your choice of font. I used SD Sketchy.
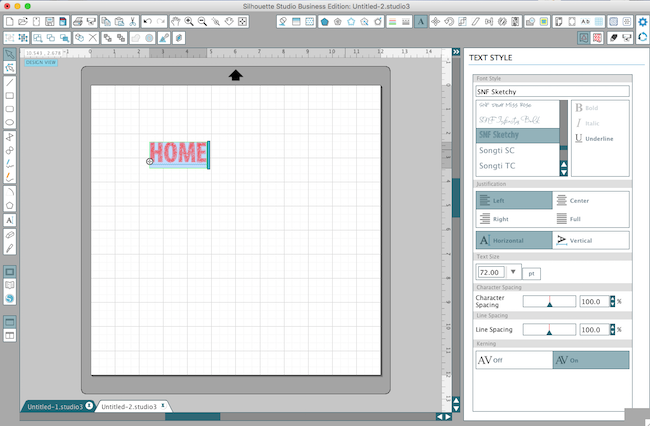
- duplicated this text box
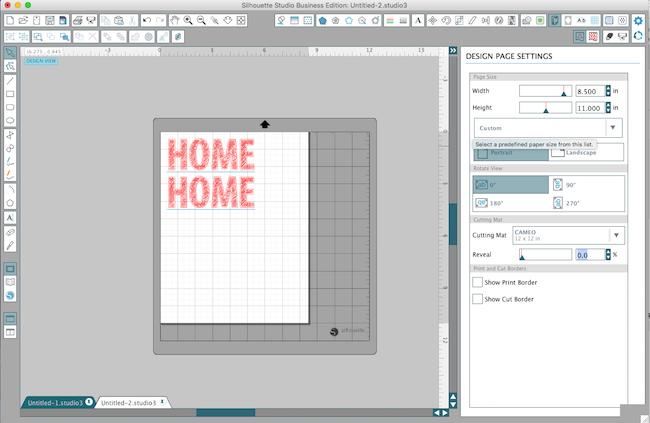
- change paper size in Design Page Settings (to 8 1/2″ x 11 because that is the size of the Printable Foils)
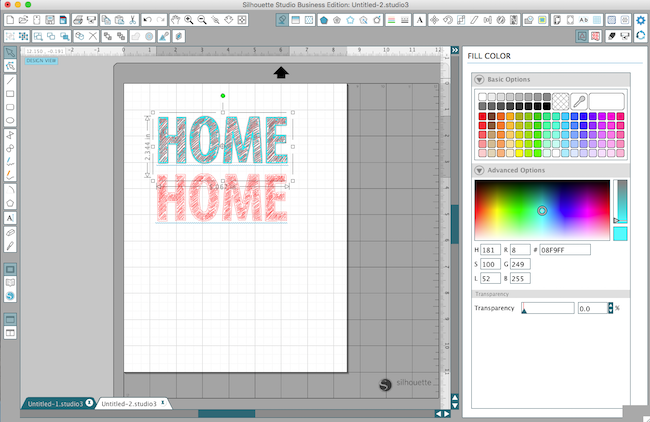
STEP TWO: Change color & Print
- In order to print you will need to add some color to the text. You can do this by heading into the Fill Color window and choosing your color.
- In order to print you will need to add some registration marks.

- Then select the printer icon (located on the top left menu bar) and feed the foil paper through your printer. (tip: I selected glossy paper to print and made sure it was completely dry before I touched it)
STEP THREE: Create an offset and cut out words
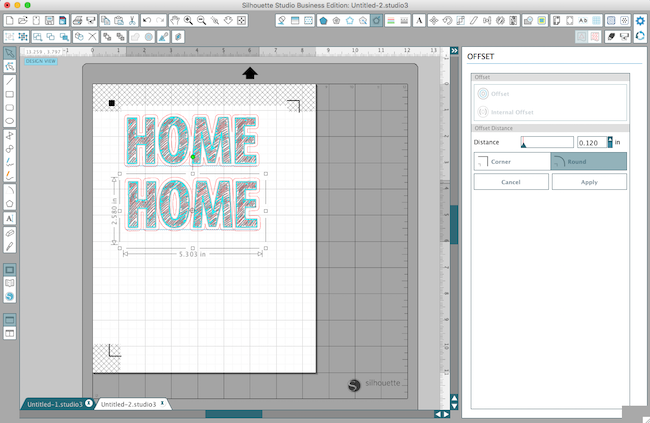
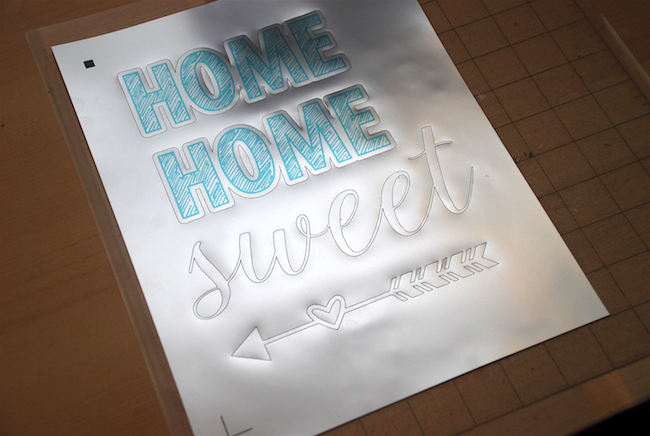
- In order to cut out the “HOME” words you will need to create an offset image.
- in the Offset window, click on image, then select Offset. Use the slide button to create a thin or thick outline edge. I chose to have a thicker one because I wanted the entire shape cut out as one – not individual letters)
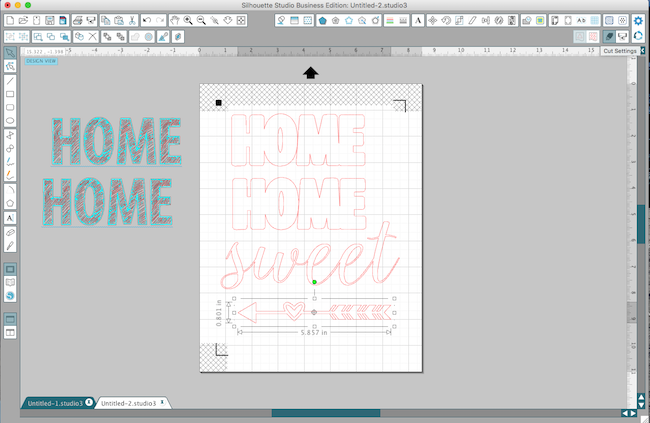
- Create another text box for the word “sweet” and add an arrow design.
- Move the “HOME” text box away from the offset image.
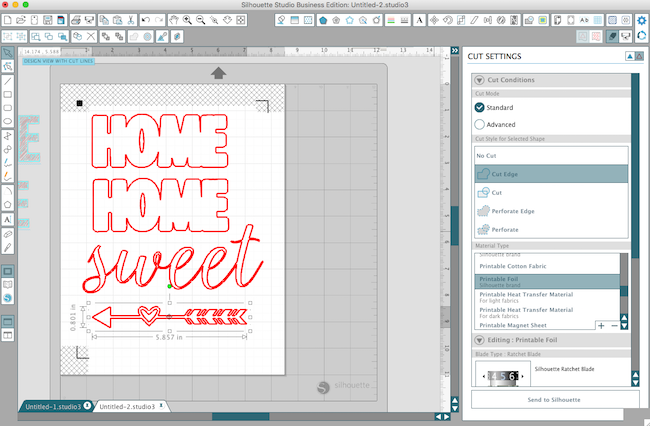
- Now head into the Cut Setting window and select CUT EDGE and Material – Printable Foil.
- Remember to change your blade depth.
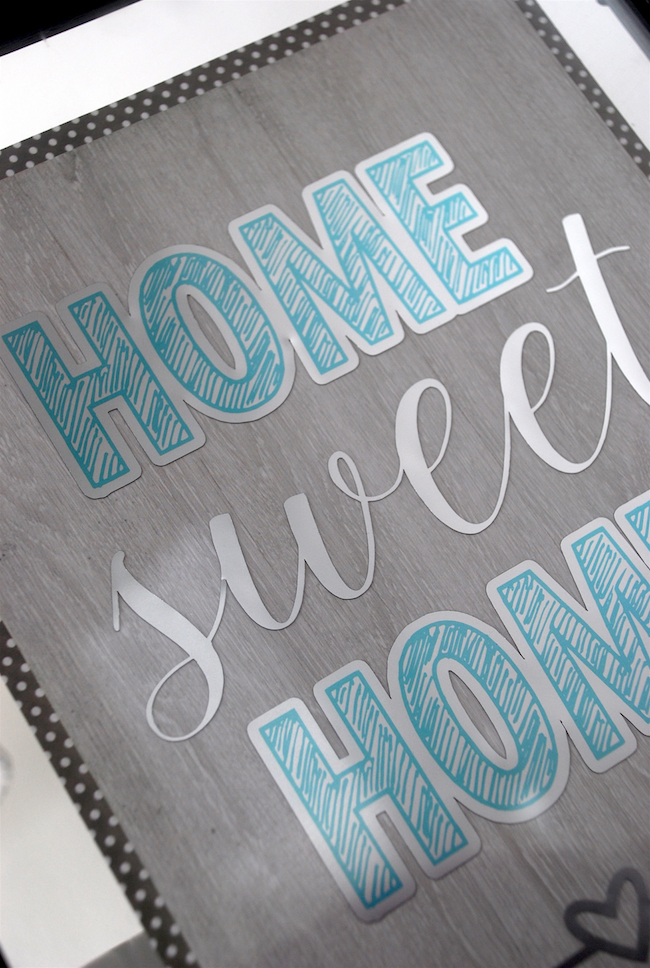
Once your image is cut out you are ready to decorate your paper. I chose some patterned papers and then entered the words on it.
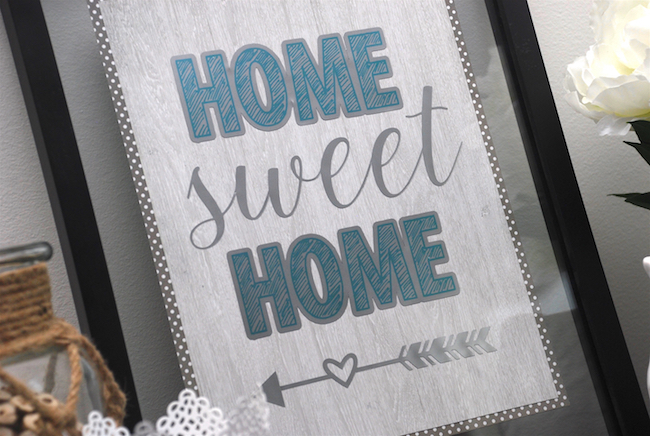
STEP FOUR: Assemble your project
Here’s a close-up shot of how cool the printed foil is. I love that sketched font!
I hope that I’ve inspired you to try printing on the silver & gold foils – they can add a big ‘wow’ factor to your projects!
Nasze Naturalne
September 3, 2025
Your authentic voice really shines through in everything you create and share
Naszenaturalne
September 2, 2025
Really love your style
Kelly Wayment
June 28, 2024
You can use it with vinyl as long as it is smooth and flat to allow the static charge to hold on to it. Rolled vinyl that wants to go back to its rolled shape will not necessarily work well, and it would need to be trimmed to fit the ES mat cutting area.
Kelly Wayment
June 28, 2024
Yes, you can use the heat pen while using the ES mat. 🙂
Yurii
March 2, 2024
Hello. May it be used with heat pen?
Thanks
Jerome
February 24, 2024
Hi, works this with the normal vinyl foils or only with printer papter etc?