Have you ever made a project using only fonts? They open up so many possibilities! We’re going to show you how you can make a custom hoodie appliqué using two different fonts, heat transfer, and—of course— your Silhouette cutting machine. Let’s get started!
Supplies Needed:
- Silhouette Cameo® or Silhouette Portrait®
- Silhouette Studio®
- Silhouette Cutting Mat
- Silhouette Cutting Blade
- Silhouette Printable Heat Transfer – Fabric
- Silhouette Metallic Heat Transfer – Gold
- Inkjet Printer
- Iron
- Hoodie
- Design IDs #343785, #276399
Step One: Making the Print & Cut Design
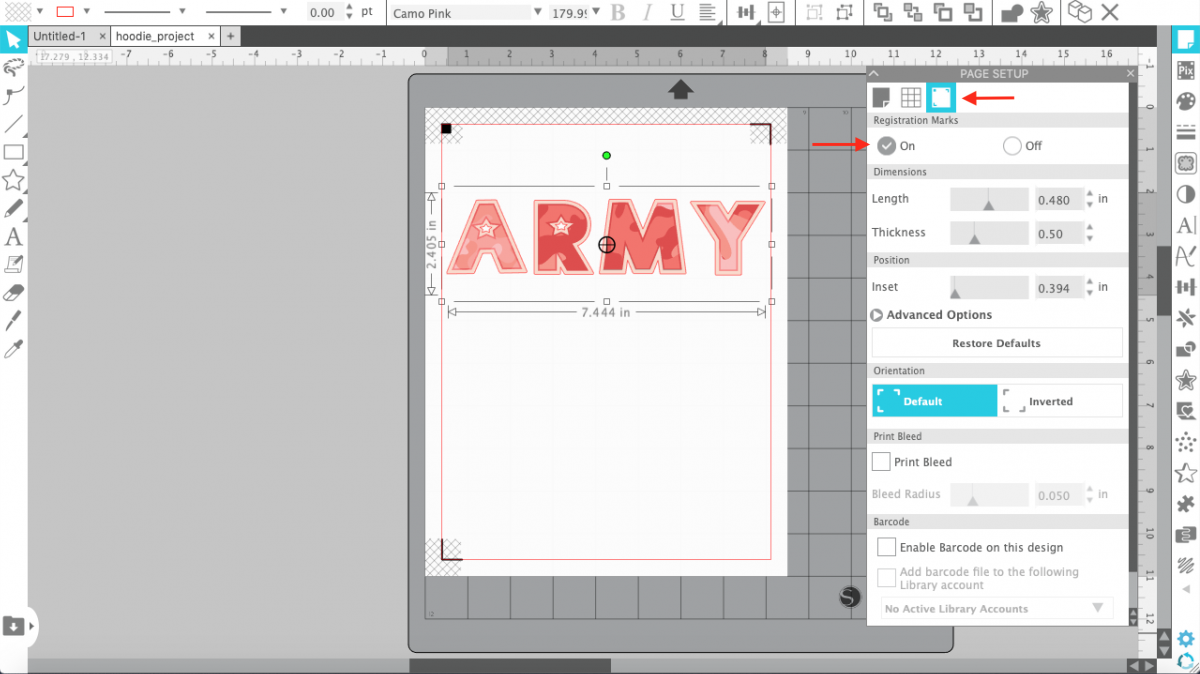
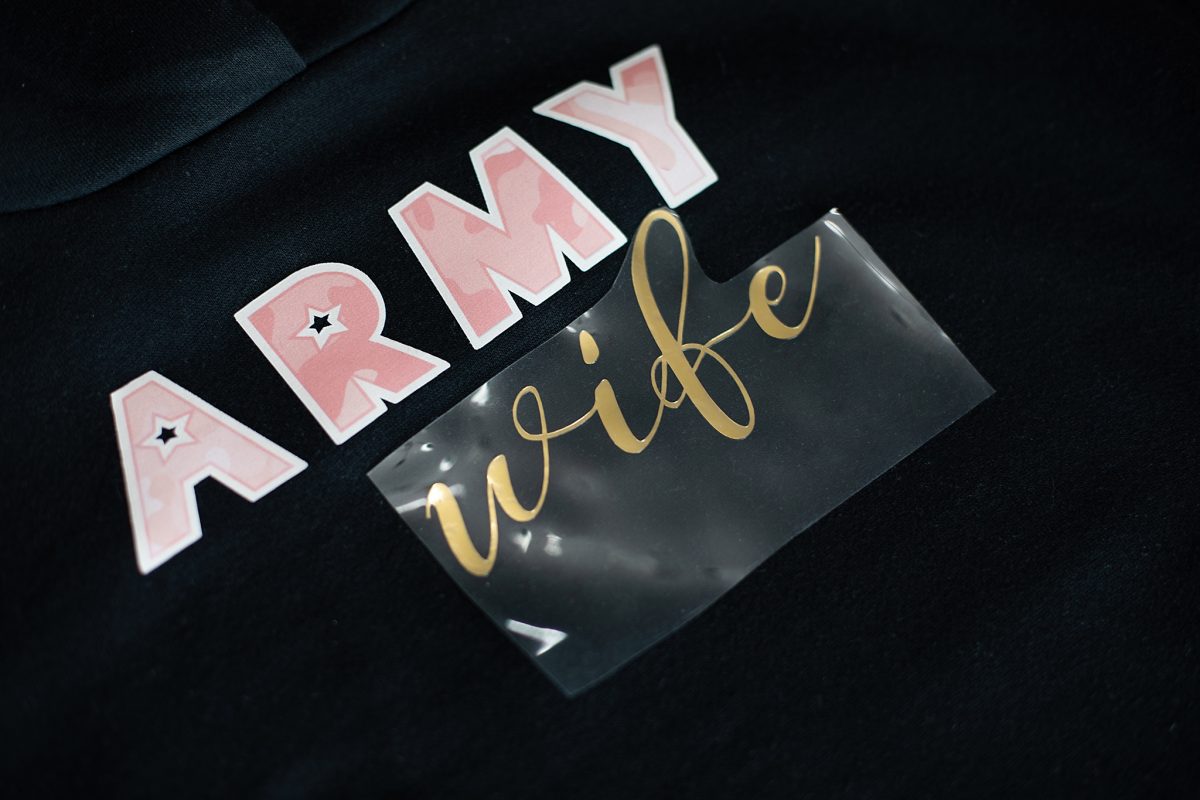
1. Download the Camo Pink font (Design ID #343785) and follow the font installation instructions. Click the Text icon, which is located on the left-hand side of the screen and type the word “ARMY,” select it, and choose the Camo Pink font in Text Style panel. Increase the Character Spacing up to 115%.

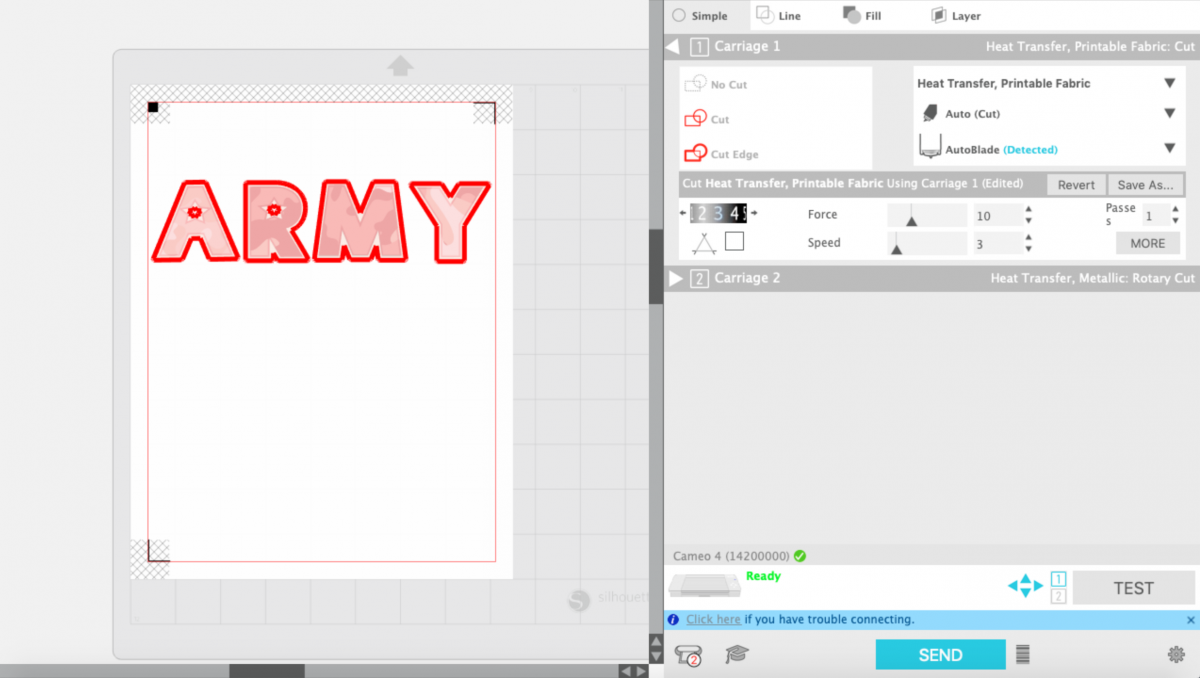
2. Resize the word so that it fits in a your hoodie. Make sure your workspace matches the size of the printable heat transfer you will be printing on (letter size). Add registration marks (open the Page Setup panel, click on the Registration Mark icon, and click on the “ON” button). Make sure that your design does not overlap into the crosshatched area or else your Silhouette machine will have trouble reading your registration marks.
3. Once your design is ready to go, feed the Printable Heat Transfer material into your inkjet printer so that it will print on the fabric side, and click on the Print icon in Silhouette Studio®.
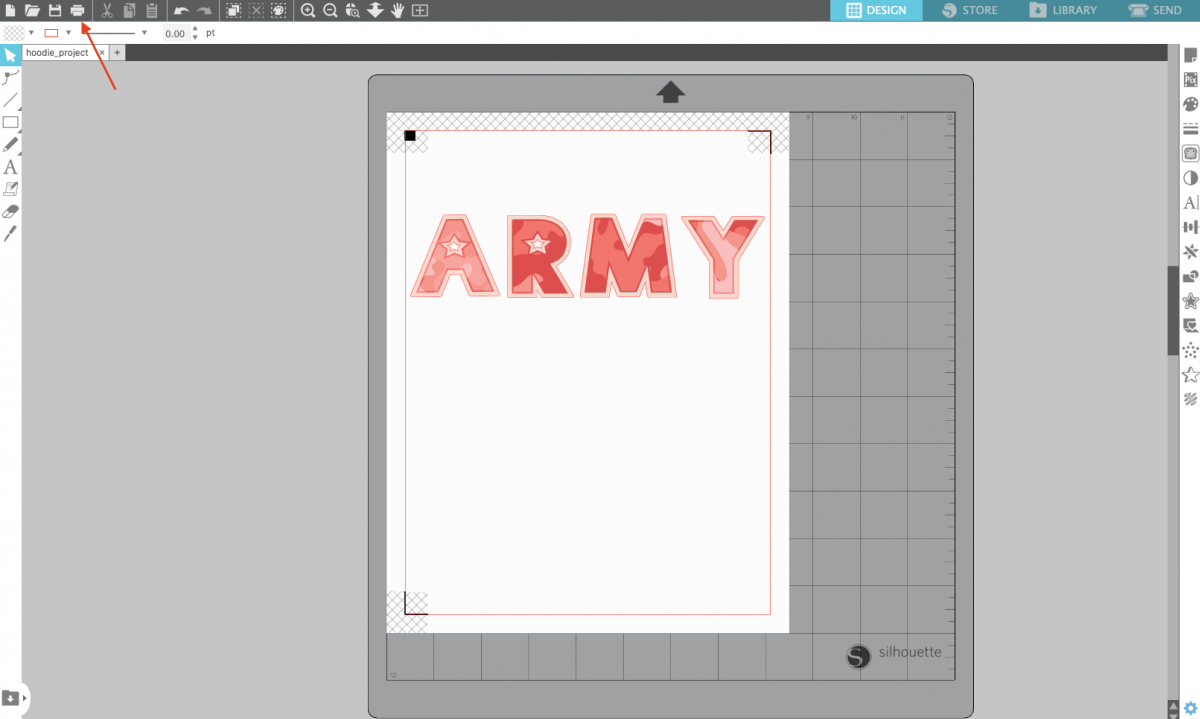
4. Place the printed sheet on your cutting mat and load the mat into your Silhouette machine.
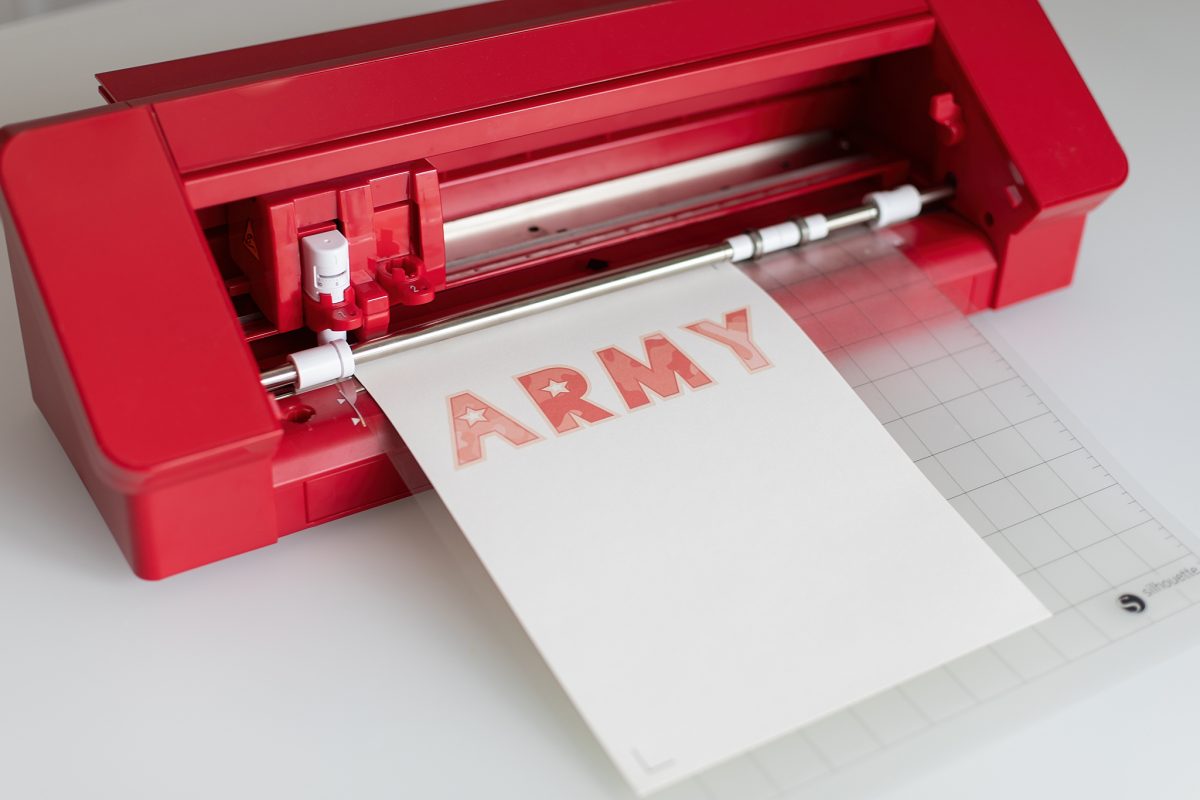
5. Select “Heat Transfer, Printable Fabric” from the media list in the Send tab (here are the cut settings we used—Blade: 3, Force: 10, Speed: 3 and Pass: 1). Click “Send,” and your Silhouette will begin scanning the page for the printed registration marks. After the registration marks are found, the Silhouette will proceed to cut as usual.
Step Two: Applying the Printable Heat Transfer
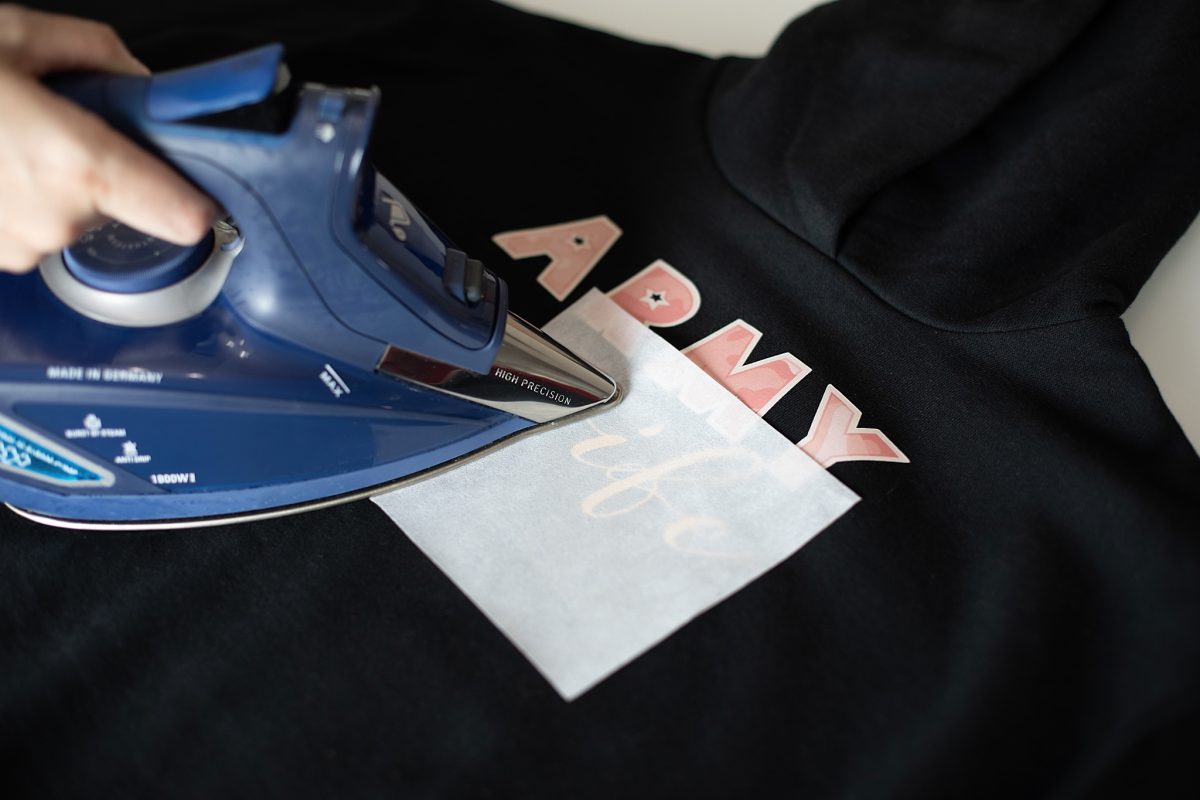
1. Peel the printed image off of the backing and place it printed side up on your project.
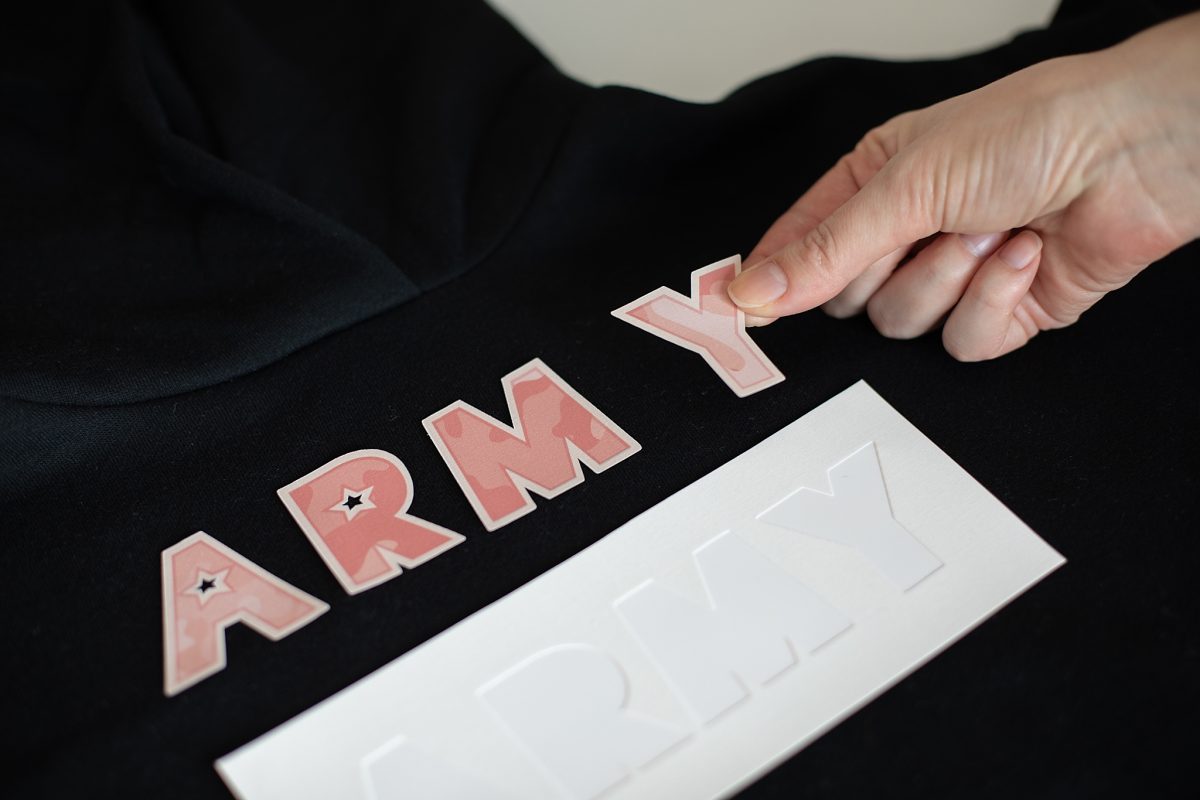
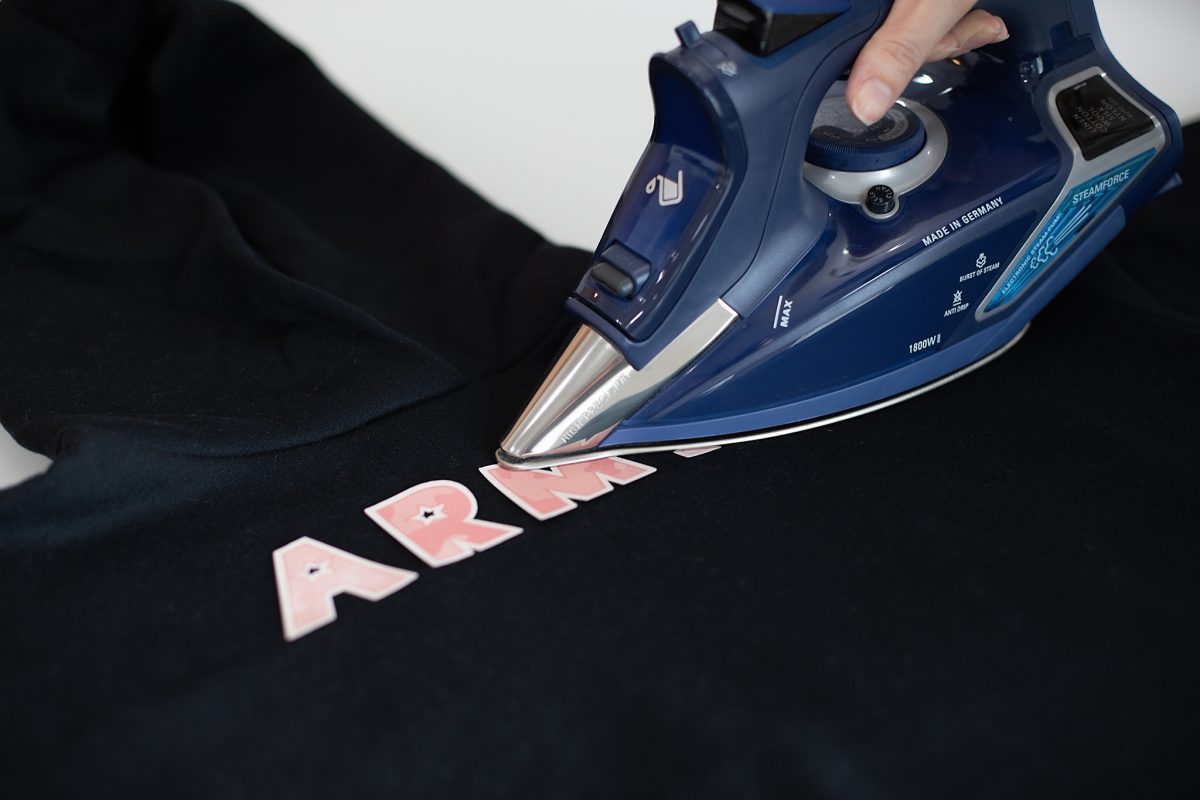
2. Apply your design onto the project surface by using an iron set to the “Cotton” setting. Press down directly on the heat transfer material and iron each part of the design for a couple of seconds. Iron longer if needed.
Step Three: Preparing the Design and Cutting the Metallic Heat Transfer
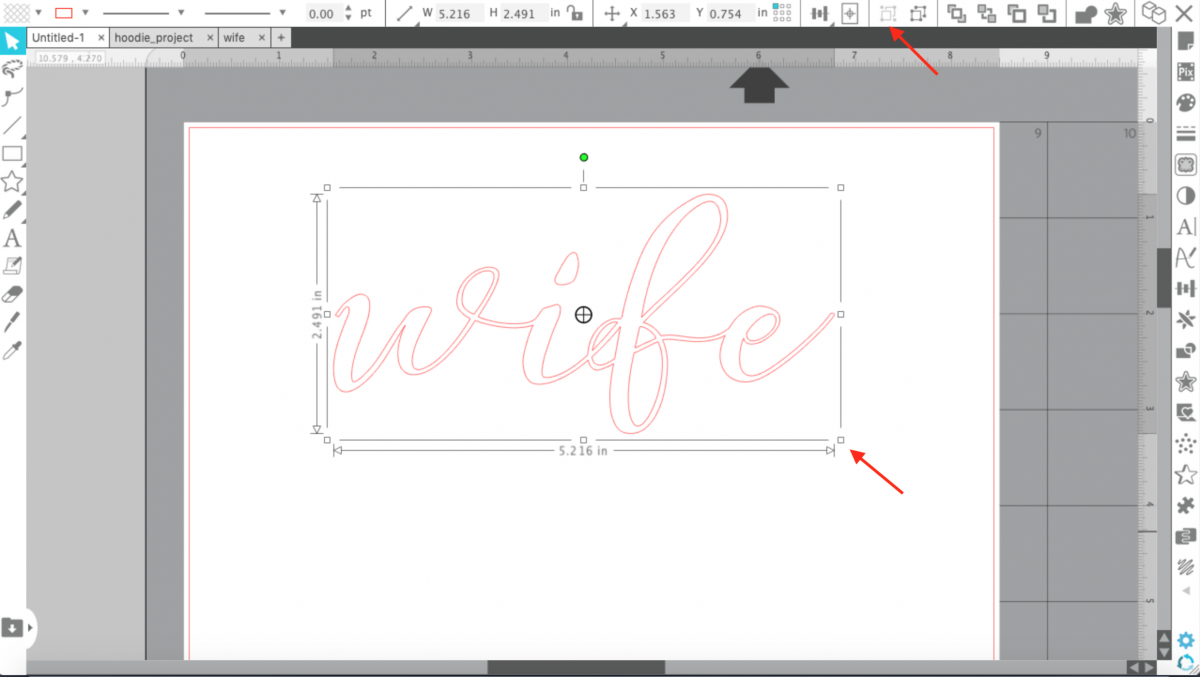
1. Type the word “wife” using the Lonelly Girl font (Design ID# 276399). Select the text and weld it together using Shift+Command+W (Mac) or Shift+Control+W (Windows), right-clicking the text and selecting Weld, or clicking Weld in the Modify panel. This makes the word a single object instead of individual, overlapping letters.
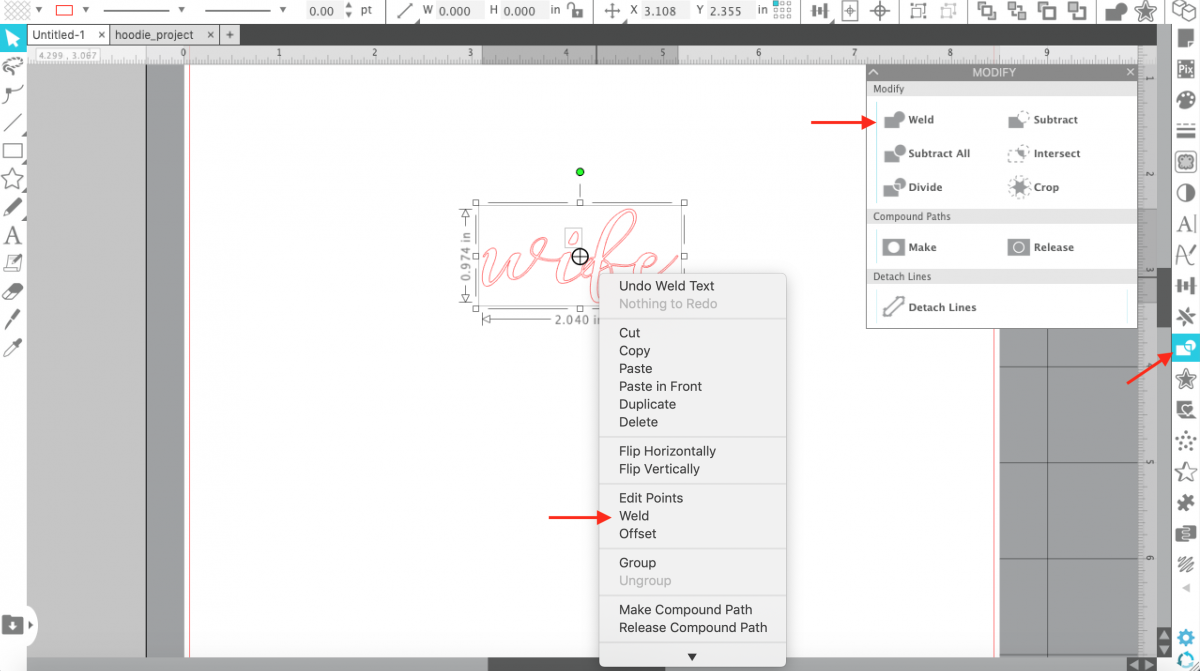
2. Group the design together. (To group, select the object and either click the Group icon, which is located along the top right-hand side of the screen, or right-click and select “Group.”) And resize it. In order to resize your design, you will need to select it and then drag out the outer corners.
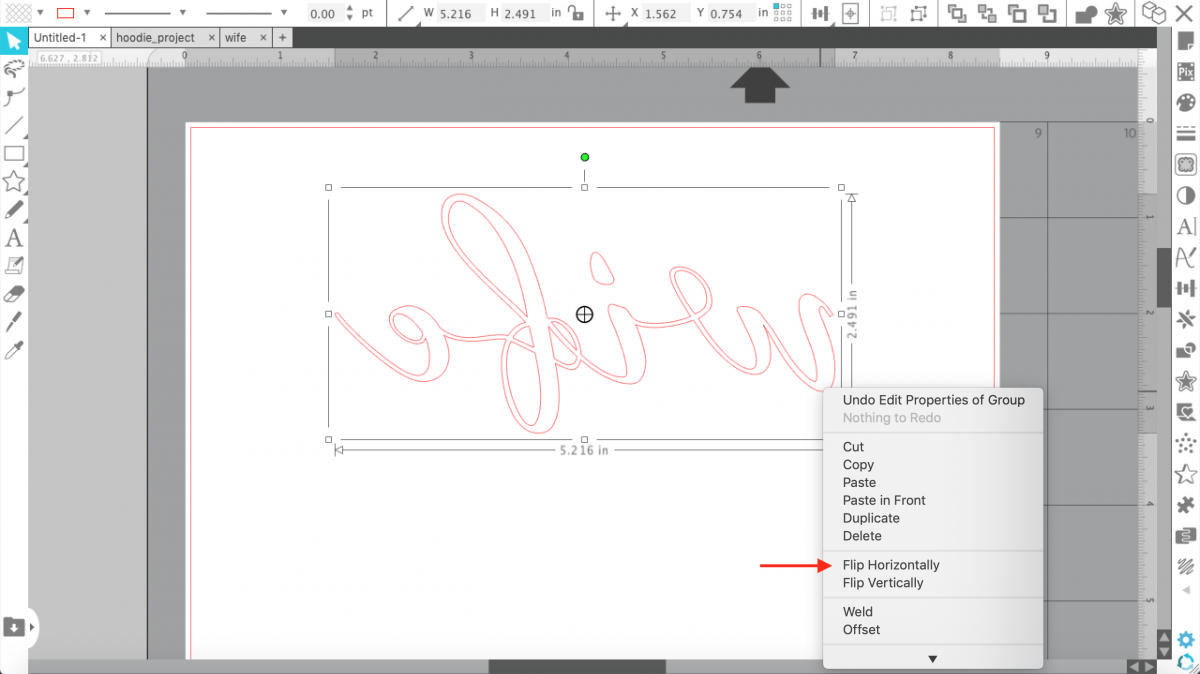
3. Before you send your design to your Silhouette machine, make sure to MIRROR IT. When you are using heat transfer, you must mirror the design. Otherwise, all of your text will be backward. The easiest way to mirror your design is to right-click your design and select “Flip Horizontally” or go to Object > Mirror > Flip Horizontally.
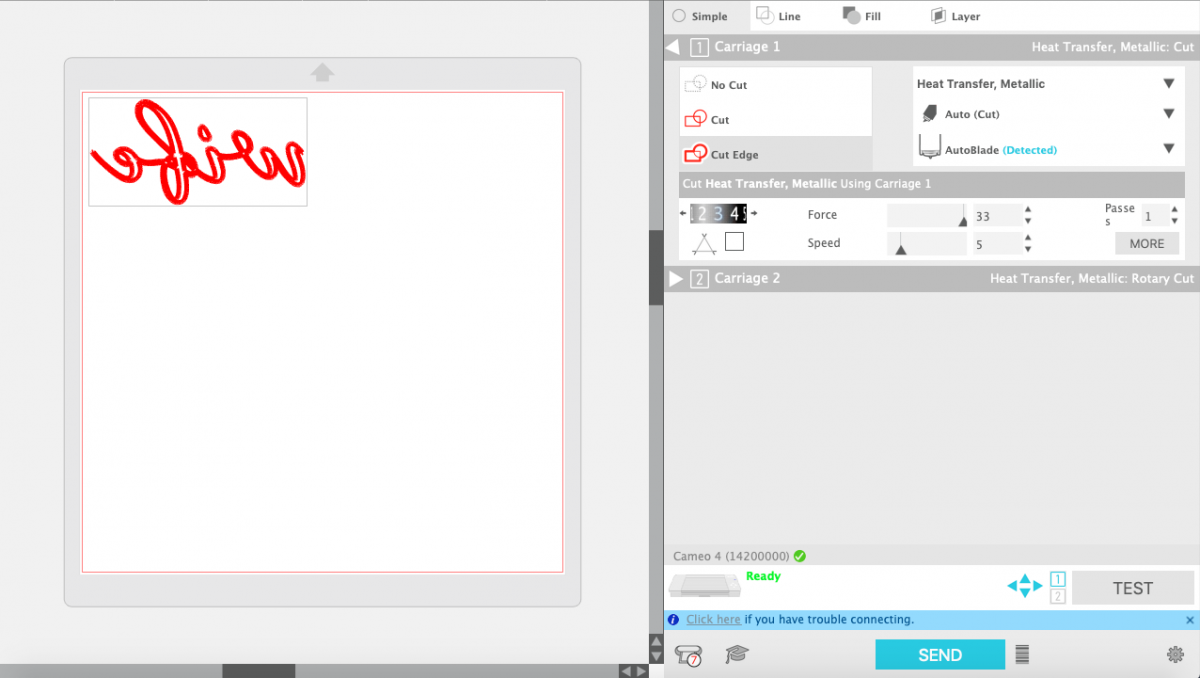
4. Place the piece of the metallic gold heat transfer (glossy side down) on the cutting mat and feed it into your Silhouette machine.

5. Under the Send panel, select “Heat Transfer, Metallic” as your material type and click Send. Silhouette Studio® will ask you if you need to mirror your design. Since we already did, we can click “Send As-Is” when the message pops up.
6. Once the image is cut, select Unload on your machine and remove the heat transfer from the cutting mat.
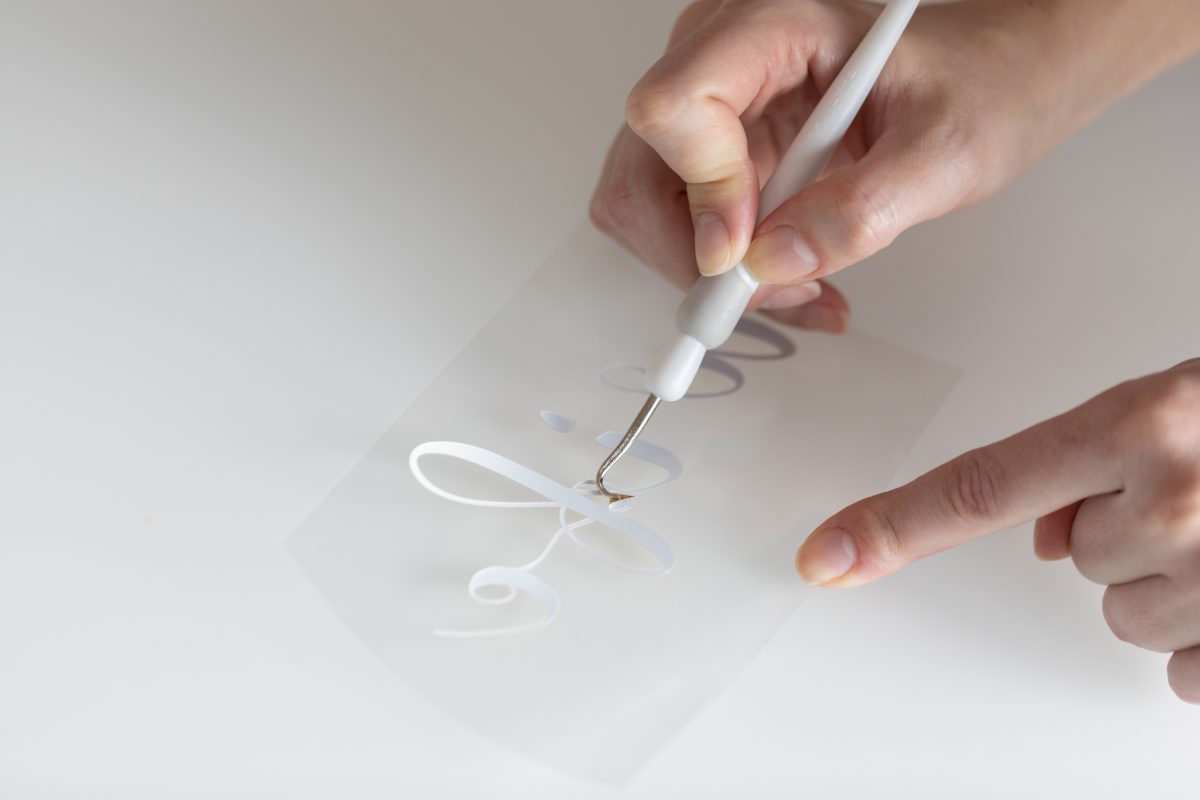
7. Remove the excess heat transfer from your design in a process called weeding with your Silhouette hook tool. Don’t forget to take out the middles of the letters.
Step Four: Applying the Metallic Heat Transfer
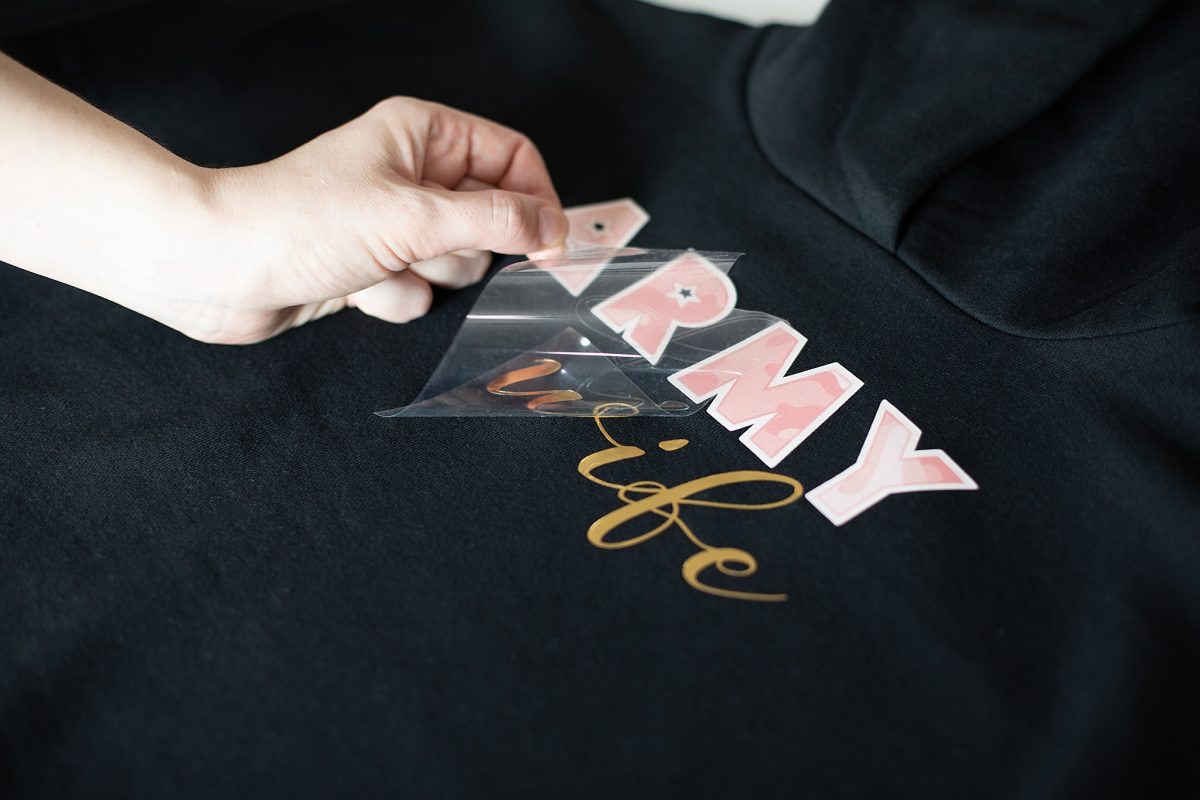
1. After the design is weeded, flip the clear plastic sheet the design is on. With the clear plastic sheet facing up, position the design onto the hoodie. The design should no longer appear to be reversed.
2. Use an iron (or a heat press) to adhere the heat transfer for 45–60 seconds. The iron should be set to no steam on a “Cotton” setting. It shouldn’t be set higher than 300 degrees Fahrenheit. We recommend using a piece of light-weight fabric between the iron and the heat transfer material.
3. Once the design has cooled, peel away the clear plastic liner. If the heat transfer material continues to stick to the liner, then lay it back down, replace the protective sheet or cloth, and iron some more.
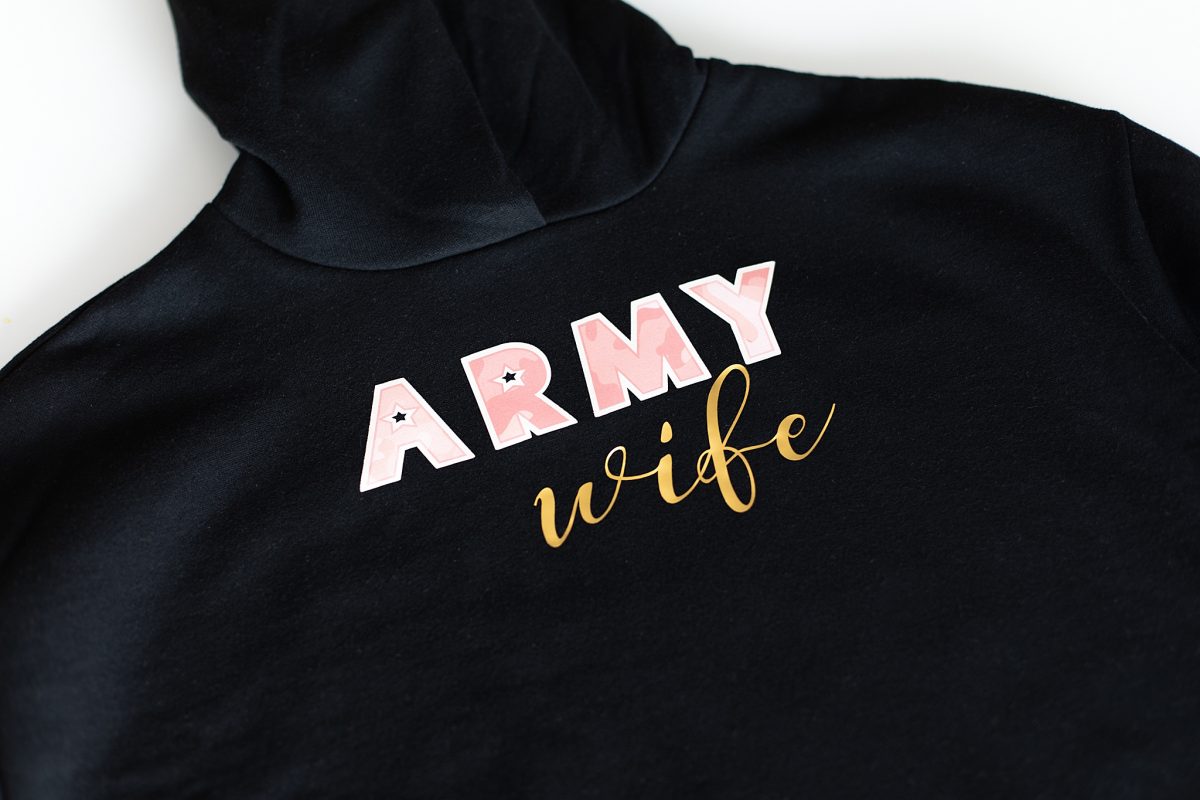
Now our project is complete!