The offset tool is your best friend when it comes to paper crafting. It adds dimension, depth, and interest to every single project that otherwise might end up flat and boring. No one wants boring.
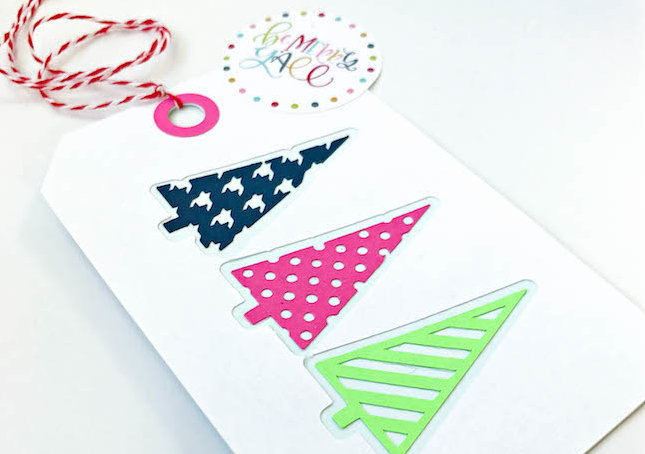
Today, I’ll show you how to use the offset tool to create these inset holiday gift tags that put the fun in funky. 😉
Here’s the cast of characters:
- Cardstock (various colors)
- Silhouette CAMEO®
- Glue
- String

STEP ONE: SETTING UP DESIGNS
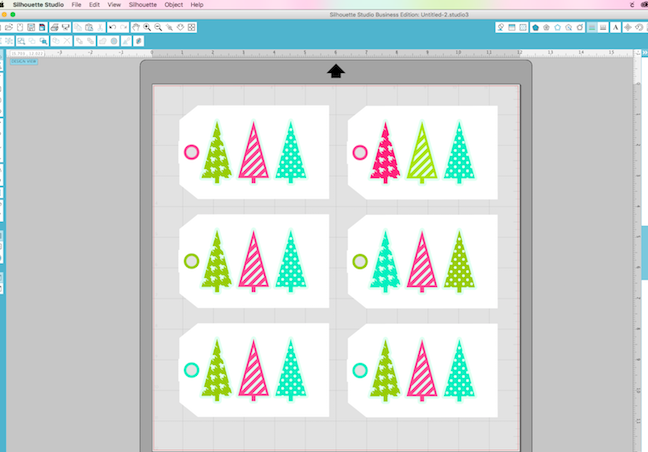
As always, I started by setting up my designs in Silhouette Studio®. It always helps me to set up everything in the design space before actually cutting. That way I can get a preview of sorts and fix anything I don’t like.
To create the offset around the trees I followed these steps:
- Group the trees together by right clicking and selecting group in the drop down menu.
- Right click again and select offset or click the offset button in the top right corner.
- Adjust the distance to 0.175 to create a small offset around the trees.
The black you see in the example below is the offset.

4. Separate the offset from the trees and center it on the tag. Create a single cut path by selecting both the tag and the tree outlines and selecting make compound path.

STEP TWO: CUTTING OUT DESIGNS
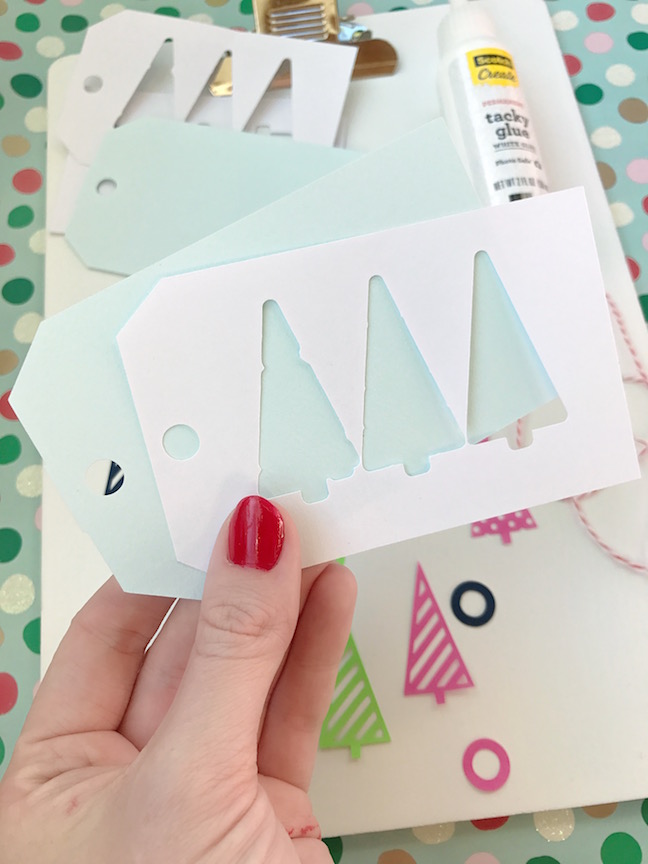
At this point, you need to separate each element of the design before cutting. The tags themselves have two layers, a solid bottom layer and the top layer that has the cut outs for the trees. I used a light contrasting color on the bottom layer so the trees would pop. These were cut out of a heavy weight card stock for stability.
Cut Settings:
- Blade setting:4
- Thickness:20
- Speed:4
- Double cut
Cut the trees and circles out of brightly colored sheets of regular card stock.
STEP THREE: EMBELLISH AND ENJOY!

I used a little bit of tacky glue to put everything together but a regular glue stick would work as well. Just be sure you glue the two parts of the tag together first and then add the trees and circle. Tie a fun string on and you are DONE!
These tags come together so fast, you’ll be able to make a whole bunch in a short time.
There are many ways to incorporate an offset into your daily crafting and designing. For example, this post shows you how to use the offset feature to make a word stand out against a busy background. Then, in this post, Brittany shows you how to use the offset tool to thicken a thin font that doesn’t have a bold option. Lastly, this post shows you how to use an internal offset to create a frame for a photo. These are just a few examples of what you can do with this handy tool.
Nasze Naturalne
September 3, 2025
Your authentic voice really shines through in everything you create and share
Naszenaturalne
September 2, 2025
Really love your style
Kelly Wayment
June 28, 2024
You can use it with vinyl as long as it is smooth and flat to allow the static charge to hold on to it. Rolled vinyl that wants to go back to its rolled shape will not necessarily work well, and it would need to be trimmed to fit the ES mat cutting area.
Kelly Wayment
June 28, 2024
Yes, you can use the heat pen while using the ES mat. 🙂
Yurii
March 2, 2024
Hello. May it be used with heat pen?
Thanks
Jerome
February 24, 2024
Hi, works this with the normal vinyl foils or only with printer papter etc?