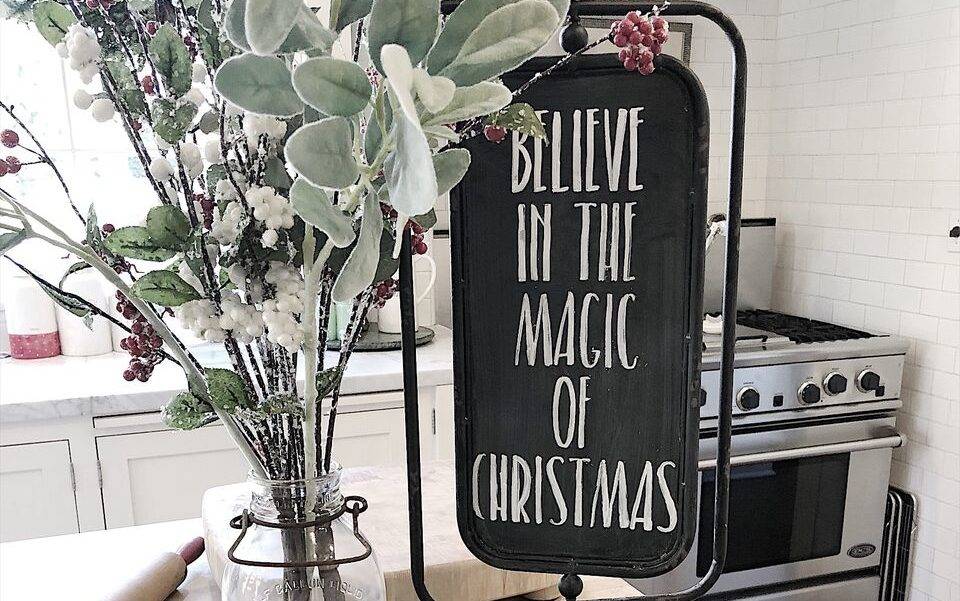
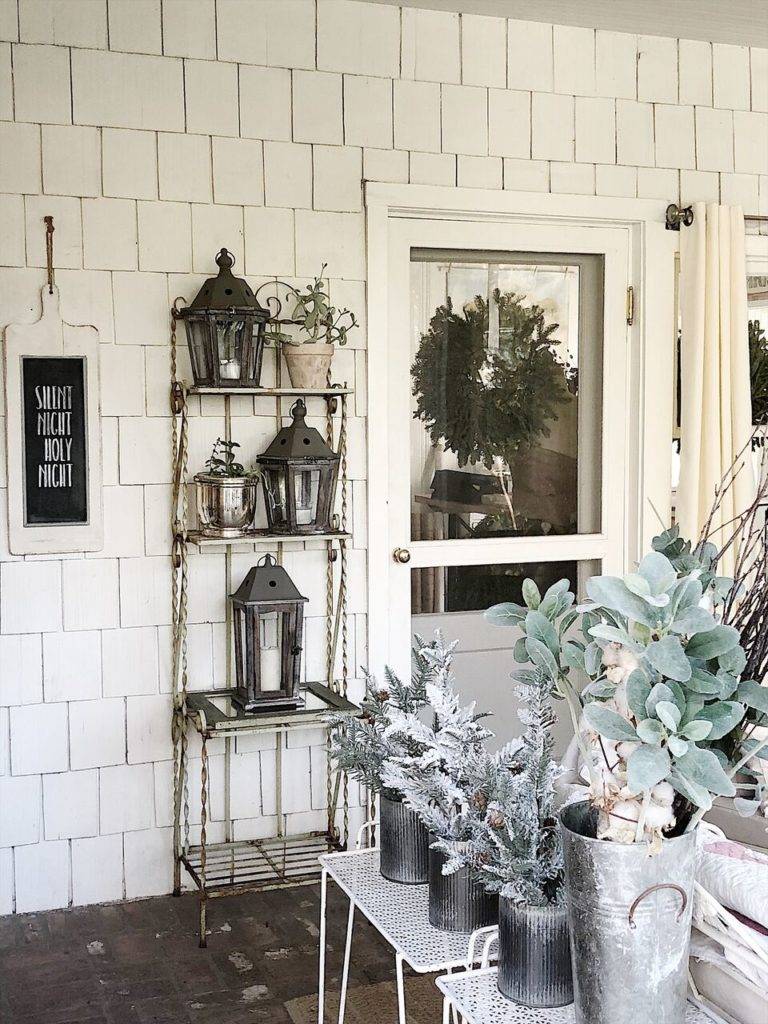
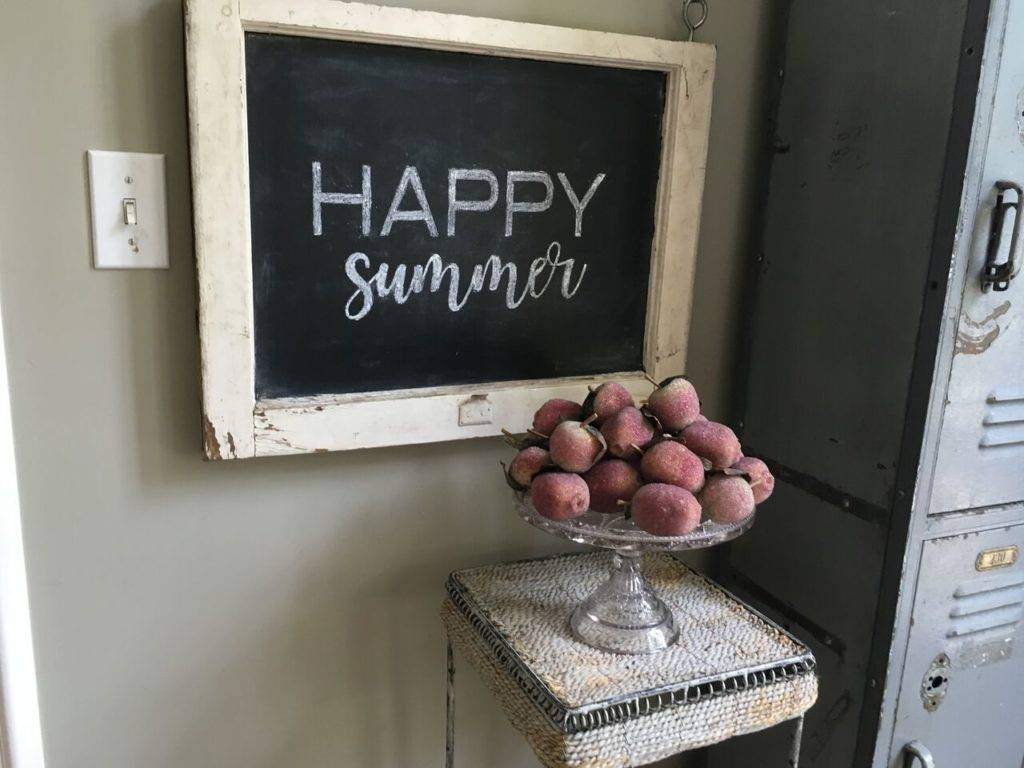
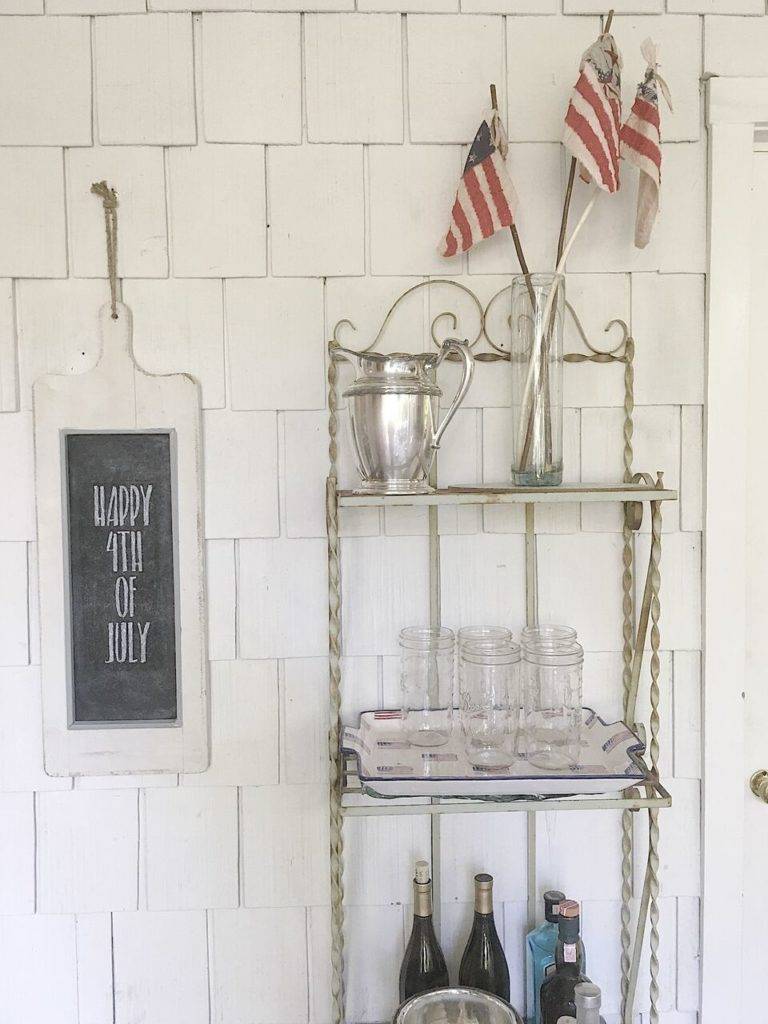
I love using my Silhouette CAMEO® to spruce up the decor in my home. My home is decorated in a farmhouse/flea-market style, and I love hunting for treasures at our local antique flea market every month. One of my favorite things to collect are chalkboards.
As much as I think I have decent handwriting, I needed a better solution for writing words on my chalkboards. Fortunately, my Silhouette machine gives me the extra help.
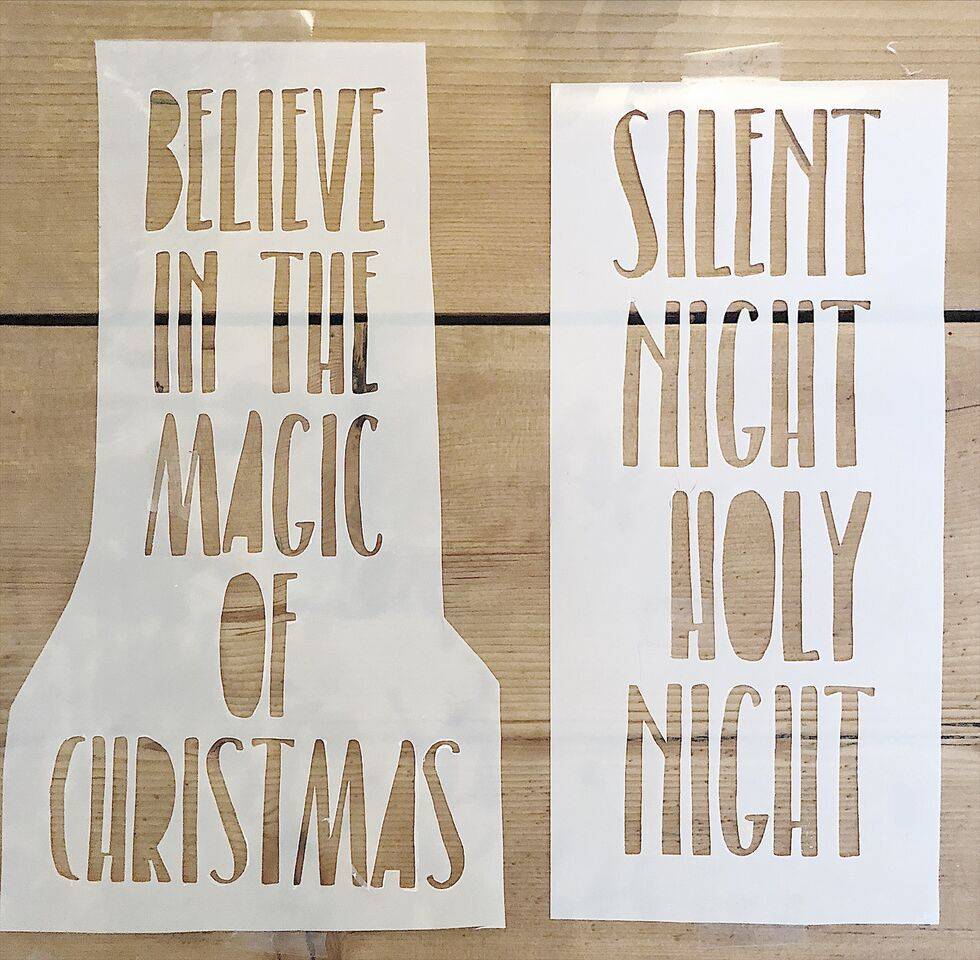
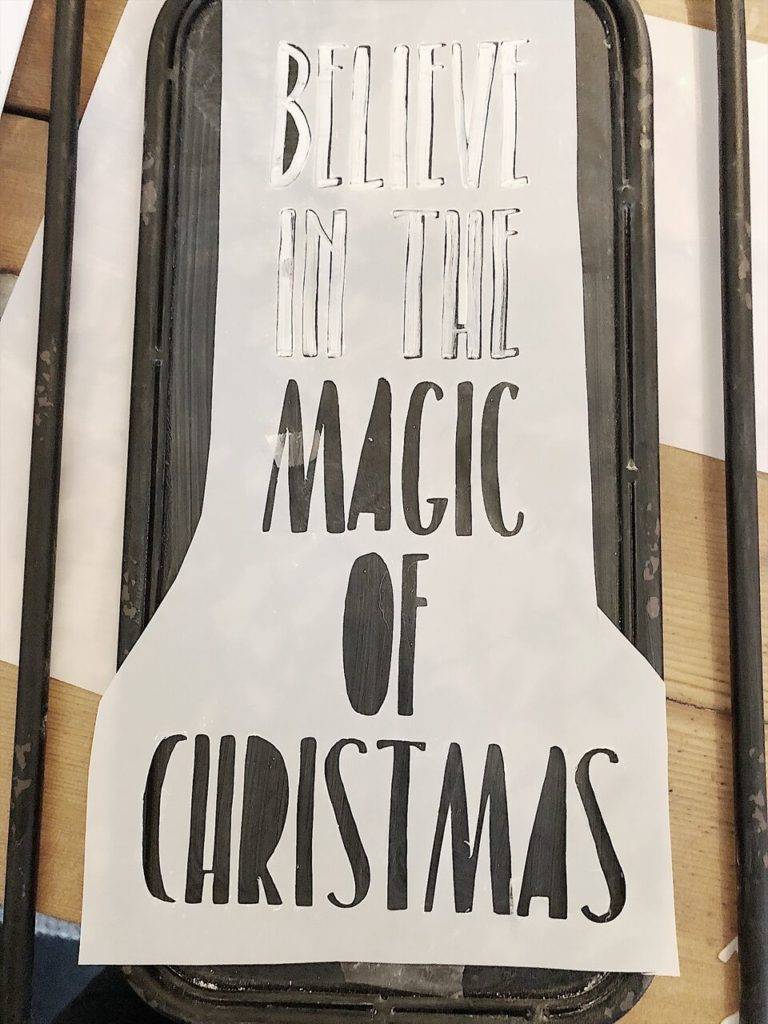
I have been making stencils for my chalkboards for a few months now, and the stencils help the chalkboards look so much better than if I were to handwrite the letters. I have even simplified the process so that I don’t even need to edit the letters. When I first started making stencils, I had to edit many of the letters because fonts don’t cut as stencils. You lose the centers of many letters, so I had to edit them and attach the centers so that they were part of my stencil. As you can see in this photo, the center parts of the letters B, A, O, and R are missing.
Then I discovered that I don’t even need to do that step. Because it’s easy to draw the letters just by looking at them!
Supplies Needed:
- Silhouette CAMEO® or Silhouette Portrait® or Silhouette Curio™
- Silhouette Cutting Mat
- Silhouette Cutting Blade
- Silhouette Studio®
- Stencil Material (I have used both the Silhouette Stencil Material and the Show-Off Stencil Blanks)
- Liquid Chalk Markers
Step One: Create the Chalkboard Stencil
- Measure your chalkboard so you know how much space you have to work with. Select a font that fits with the words and size available on the chalkboard. I happen to have a lot of skinny chalkboards, so I like the Belacu font. You can also use any of the designs in the Silhouette Design Store to add to your stencil.
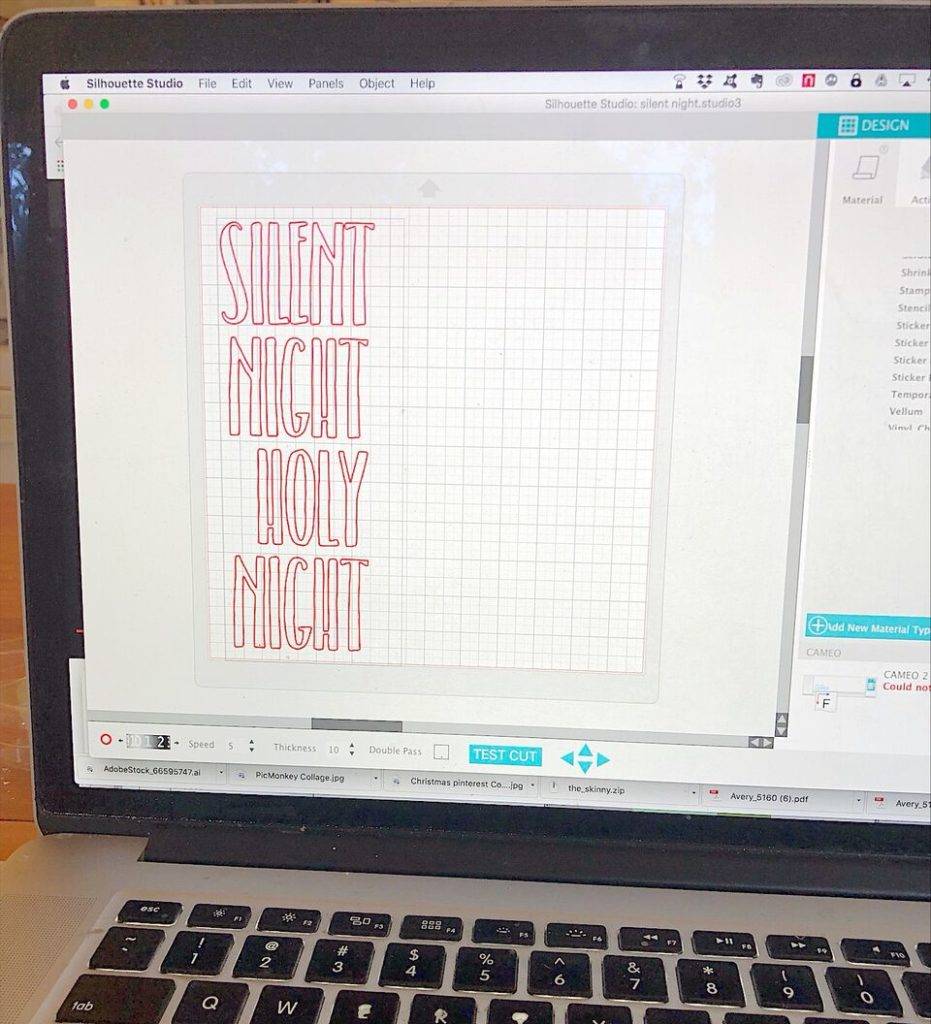
- Using Silhouette Studio®, lay out your design and size it to fit your chalkboard.

- Be sure to select “Stencil Material” as your cutting material. If you are using the heavier Show-Offs stencil blanks, use the following settings: Blade – 10, Speed – 5, Thickness – 33, and Passes – 2. The thicker stencil material is great because you can easily save your stencils and reuse them.
- Once you cut the stencil, tape it to your chalkboard. Using a liquid chalk marker (or regular chalk), fill in the letters. When drawing the “B”, as seen in the photo below, just draw in the letter as seen on your computer screen.
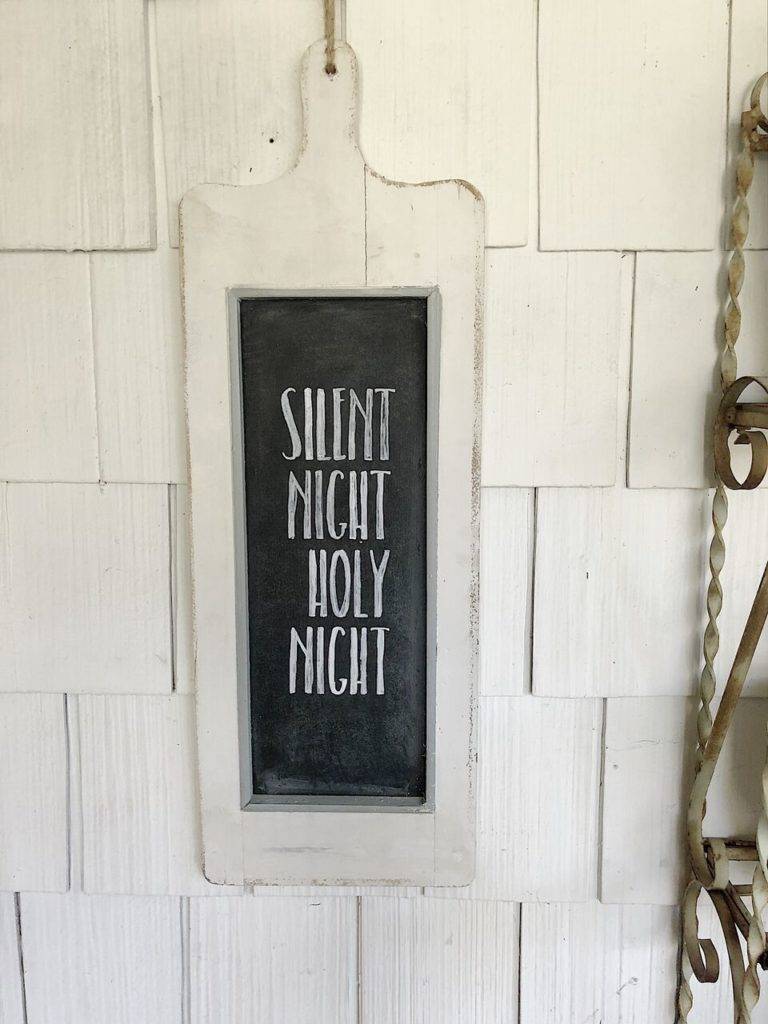
- When you are finished, your chalkboards will look amazing! This trick works for anything you want to write for each season.
This blog post was contributed the blog My 100 Year Old Home. It has been edited and republished with permission from the author.
Nasze Naturalne
September 3, 2025
Your authentic voice really shines through in everything you create and share
Naszenaturalne
September 2, 2025
Really love your style
Kelly Wayment
June 28, 2024
You can use it with vinyl as long as it is smooth and flat to allow the static charge to hold on to it. Rolled vinyl that wants to go back to its rolled shape will not necessarily work well, and it would need to be trimmed to fit the ES mat cutting area.
Kelly Wayment
June 28, 2024
Yes, you can use the heat pen while using the ES mat. 🙂
Yurii
March 2, 2024
Hello. May it be used with heat pen?
Thanks
Jerome
February 24, 2024
Hi, works this with the normal vinyl foils or only with printer papter etc?