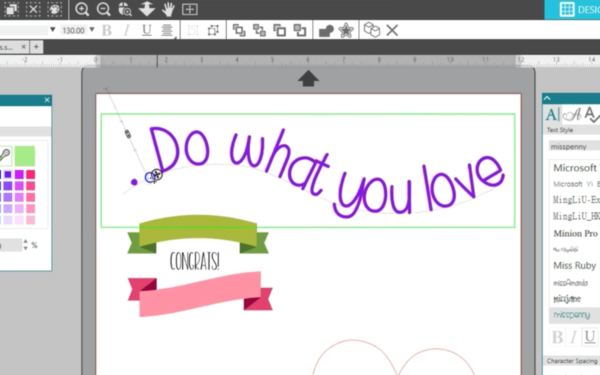
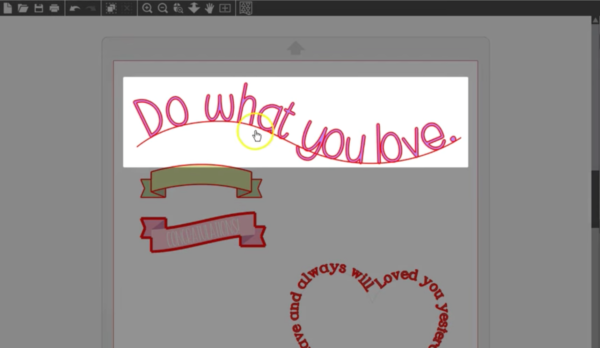
Silhouette Studio® is a great design software that has some fun ways to work with text. One feature is called Text To Path, which lets you curve text you’ve typed by dragging it to any shape or line to follow its contours. Double-click the text to enter text-edit mode. You’ll see a colored bounding box and a small four-point arrow.

Grab the four-point arrow and drag it to any shape or line.
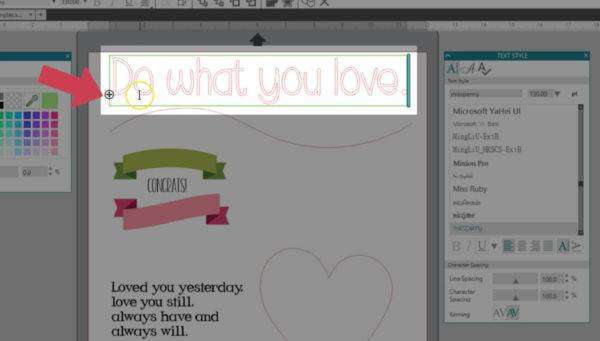
It will “snap” to the shape. If your text snaps to something you don’t want it to, just drag it away by using the four-pointed arrow again.
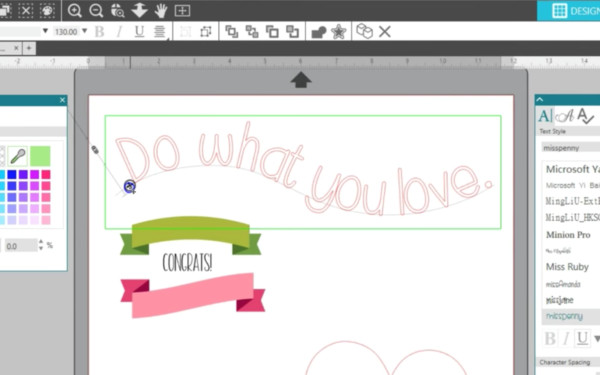
Once the text has snapped to your shape in generally the right position, find the slider bar on the left with your mouse. The slider looks like a vertical double arrow. Hover your mouse over that slider or along the slider’s line until you see another four-pointed arrow. Sometimes the little arrow doesn’t show up exactly on that slider icon, so just hover your mouse along the line until you see it. Zoom in, if necessary. When that four-pointed arrow appears, drag upward or downward with your mouse, and the text will move above, within, or below that line or shape that’s now called a path. That path has turned gray, indicating the line is now turned off for cutting purposes.
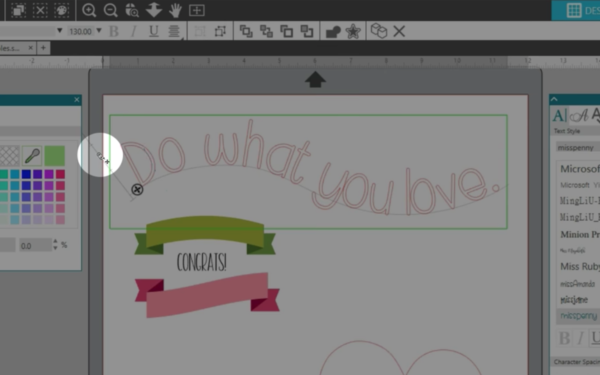
At this time, you can fine-tune the look of your text by adjusting the Character Spacing.
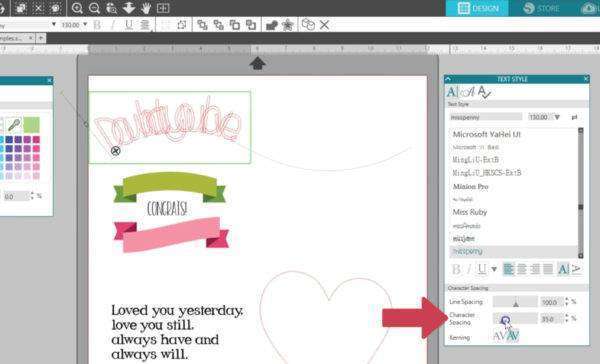
You can also change the font’s other properties, such as fill color, font size, or the font itself, either in the text-edit mode or with the text selected as an object.

You can still drag the text right and left along the shape’s curve by dragging the first four-pointed arrow we used when in text-edit mode. Remember, you can get there with a double click on the text.
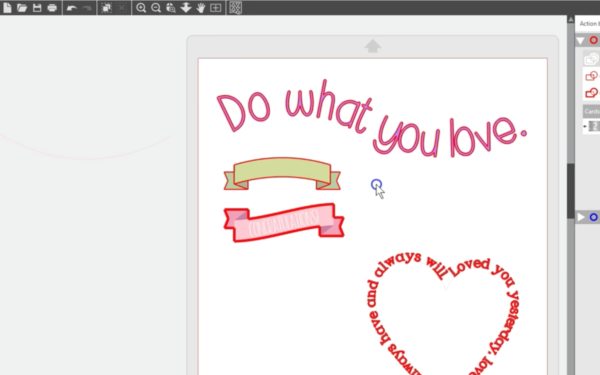
Let’s look at another example. We want to put this saying we’ve typed onto one of these banners so that we can make it into a Print & Cut design.
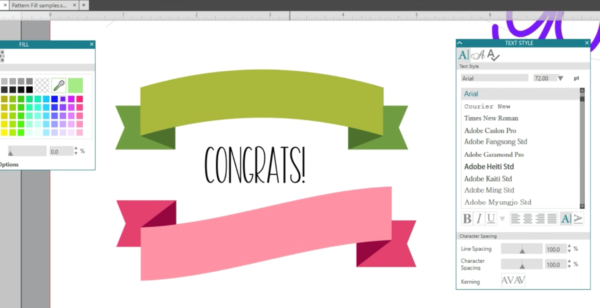
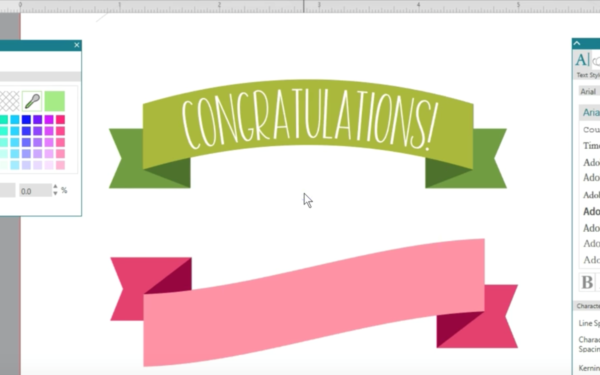
While in text-edit mode, we will drag the arrow over to this top banner. It’s a good idea to zoom in to the design for more precise control.
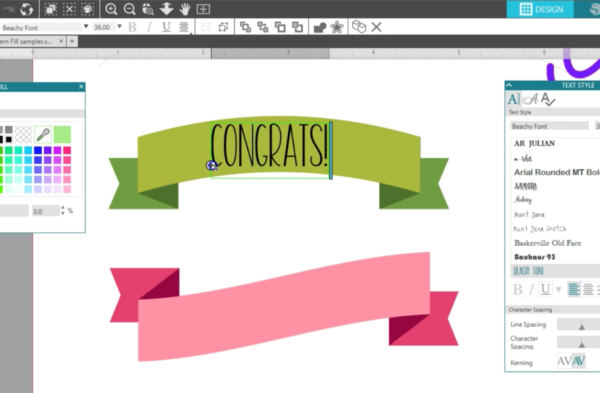 We will just keep dragging the text until it snaps to the bottom edge. Now we will hover near the slider and watch for the tiny arrow so that we can drag the slider and raise it into the inside of the banner, while keeping the text’s perfect curve.
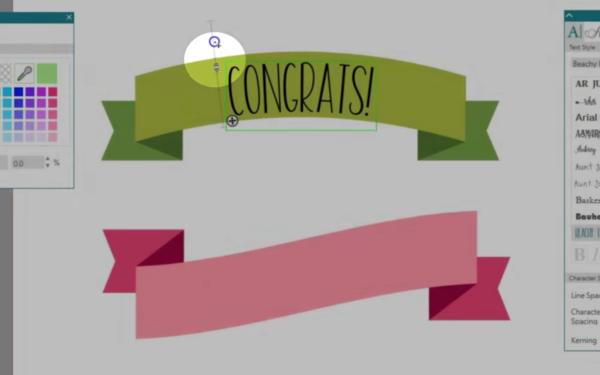
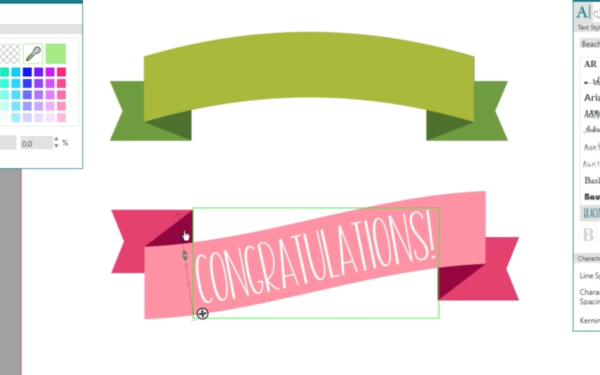
We can still edit this text, so we will change what it says just a little bit, change the fill color to white, and adjust anything else so that the text looks centered and well spaced.
If we want, we can drag the text to this other banner instead.
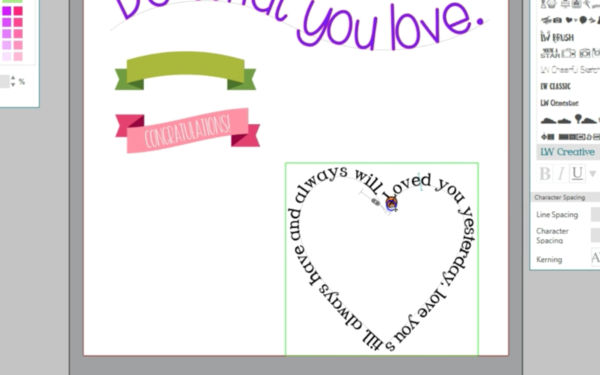
Let’s look at one last example for a fun way to curve text. We are going to drag this long phrase over to a heart shape so we can have it curve around the outside in the shape of a heart. Remember, you can change the font size and spacing and drag the arrow until it looks the way you want it to.
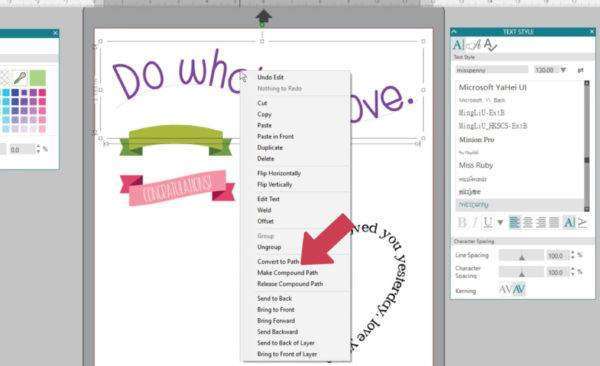
If you are happy with the way your text looks and want to commit the text permanently to that path, right-click and select “Convert to Path.” Now you can make copies, mirror the design, etc. Once the text is converted to a path, you can no longer edit the text.
There are a couple final points to know about Text to Path, and we will show you in the Send panel.
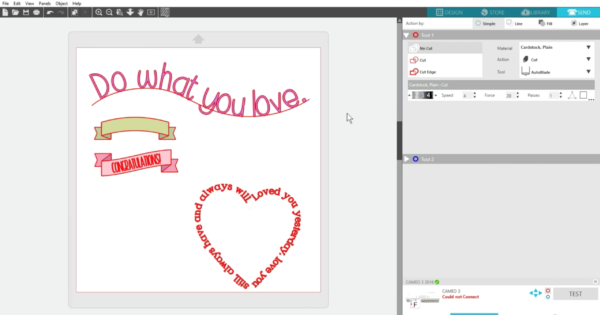
When the object you are dragging it to is filled with color, that object will remain a cuttable object, so you can Print & Cut the whole design.
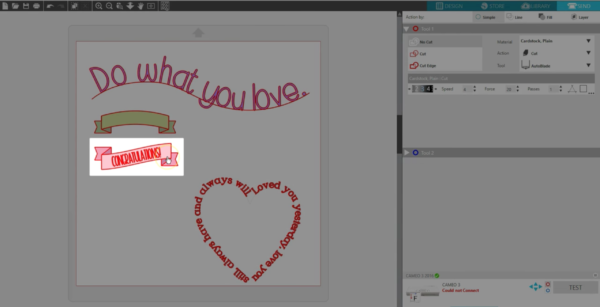
You will need to set the cut lines to Cut Edge if you’ve placed text in the center of an object.
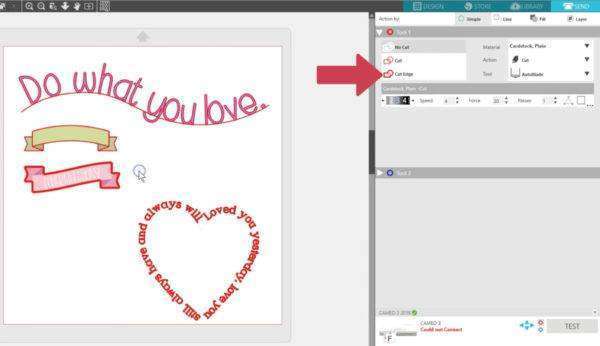
If the line or shape you are dragging the text to has an empty fill, that object will convert to a path and will not cut.
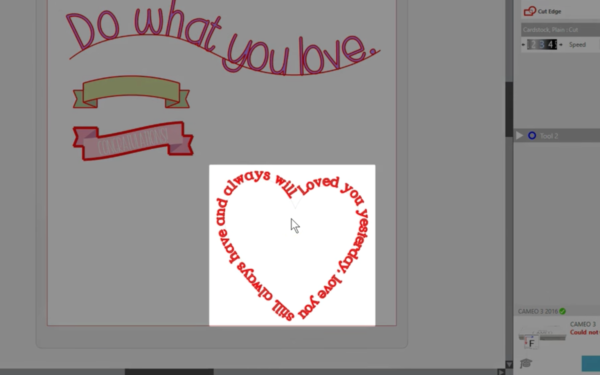
If you have used the “Convert to Path” function, the path becomes cuttable again, so you can use it or delete it.
Using Text to Path to curve text is a great feature in Silhouette Studio®, so we encourage you to play with it and have fun!

Nasze Naturalne
September 3, 2025
Your authentic voice really shines through in everything you create and share
Naszenaturalne
September 2, 2025
Really love your style
Kelly Wayment
June 28, 2024
You can use it with vinyl as long as it is smooth and flat to allow the static charge to hold on to it. Rolled vinyl that wants to go back to its rolled shape will not necessarily work well, and it would need to be trimmed to fit the ES mat cutting area.
Kelly Wayment
June 28, 2024
Yes, you can use the heat pen while using the ES mat. 🙂
Yurii
March 2, 2024
Hello. May it be used with heat pen?
Thanks
Jerome
February 24, 2024
Hi, works this with the normal vinyl foils or only with printer papter etc?