
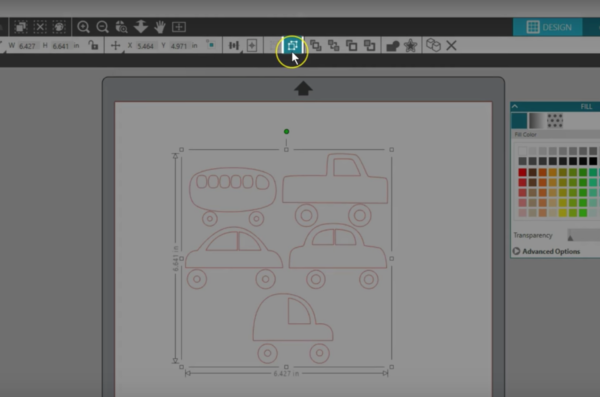
In this tutorial, we want to show you basic but essential functions in Silhouette Studio®—grouping and ungrouping. As you work with designs in Silhouette Studio®, you may notice that some designs have either a lot of pieces that are separate and can be moved individually or a lot of pieces that all move together as one piece. When you have a set of pieces that move together as one, they could be grouped or they could be a Compound Path. We are going to focus on Grouped objects in this tutorial. (To learn more about compound paths, check our tutorial on the Modify panel.)
To see if you can Ungroup a set of shapes, the easiest thing to do is to look at the Quick-access Toolbar while the set is selected and see whether Ungroup is an option. It will be grayed out if the objects are not grouped.
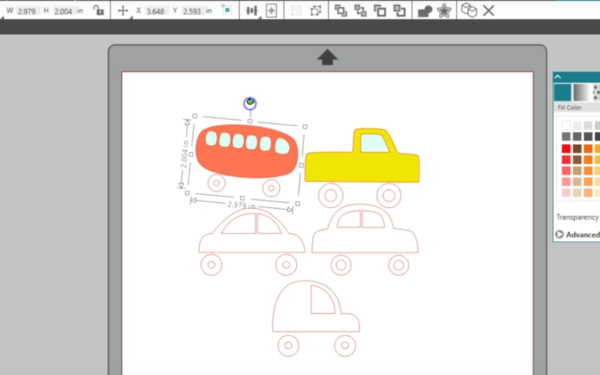
When we click Ungroup with this car set, we immediately get a lot of selection boxes, one for each individual shape in this set.
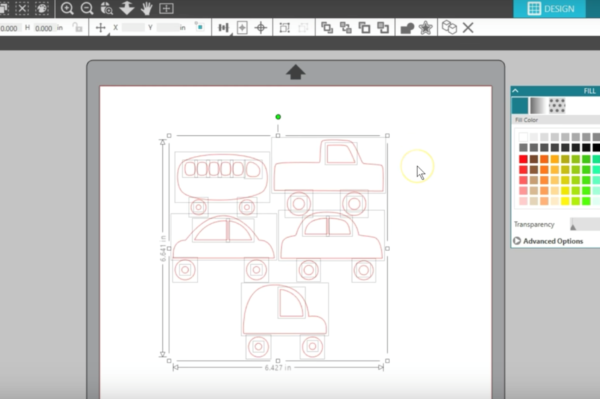
That is great because now we can recolor, move, or even delete individual pieces.
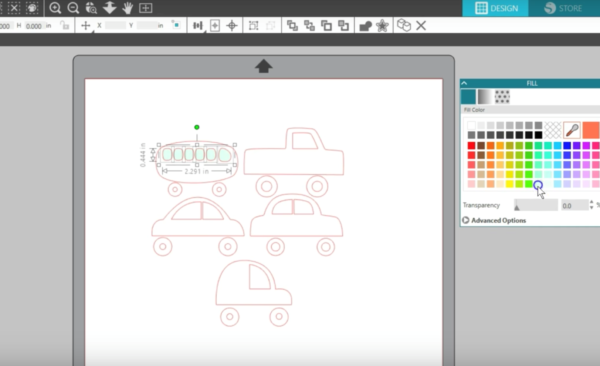
You can select several pieces at a time by dragging a selection box around them, or you can hold the Shift key while individually clicking shapes to select multiple pieces at the same time. If you select too many, you can hold Shift while clicking on a piece you want to deselect.
I’ll add Fill Colors to the windows and to the vehicles.
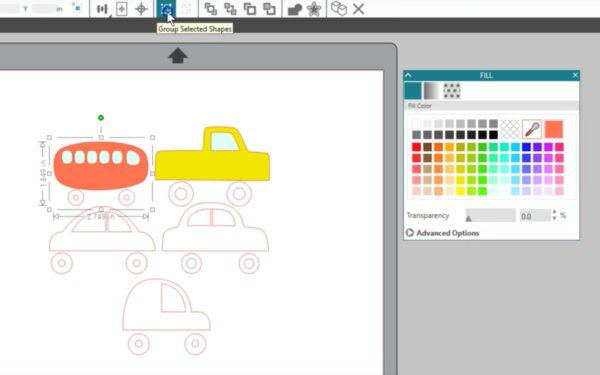
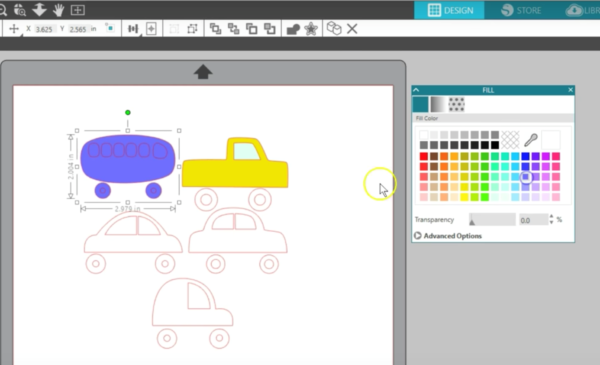
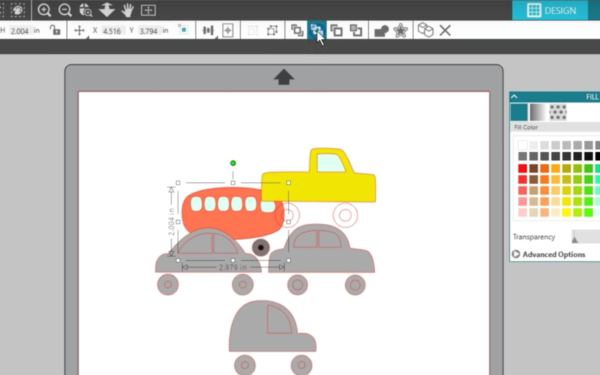
If you want to move the cars, though, there are a lot of pieces to keep track of. This is when it’s time to Group again. You can select all the parts to this first vehicle and click Group on the Quick -access Toolbar. Now you can click and drag anywhere on that grouped set to move it around together. You can move, resize, rotate, and apply effects all at once to the entire group.
Sometimes this is not what you want. One thing to note with Grouped objects is that if you apply an effect like a Fill Color to one piece of the group, it applies to the entire group.
If you decide you want to recolor just the tires, you need to Ungroup and select individual pieces to recolor.
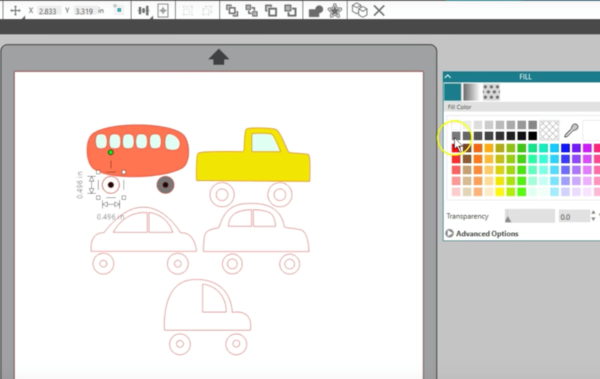
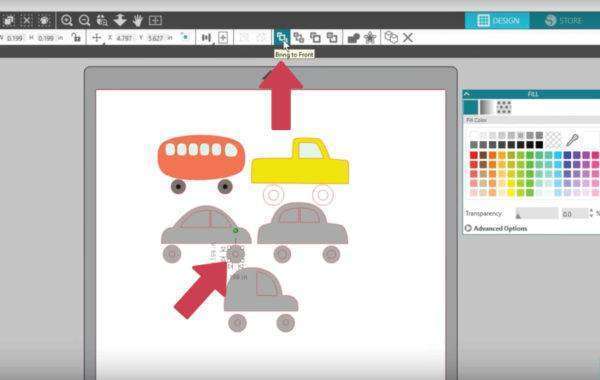
Then you can Group the whole thing again. Something you might encounter while working with a lot of shapes you are recoloring is that an item becomes hidden by another shape. We are going to select the rest of these cars and fill them with color. Notice on this one tire that we’ve lost the inside wheel portion. You can tell it’s still there because it has a selection box, but it’s behind the rest of the tire.
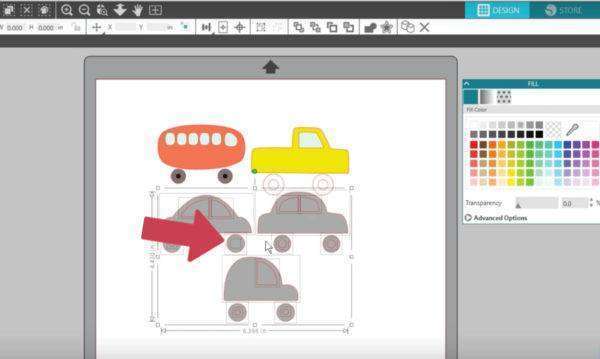
We want to select just that piece, so we can either give a blank fill to those two pieces, or remember you can hold Shift key and click on the piece you want to deselect. Now that we have this single piece selected, we can bring it forward layer by layer or simply choose Bring to Front. There it is!
These Bring Forward and Backward commands work for grouped objects, too. If I select a set that’s grouped and choose Send to Back, it will move the whole grouped set to the back.
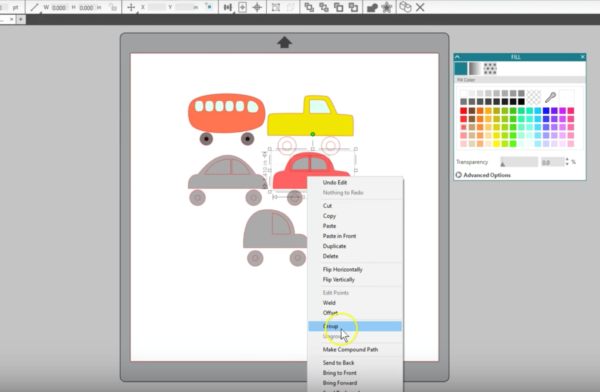
Now we can continue recoloring and grouping all these cars the way we want for my project. If you like shortcuts instead of finding the icon, note that you can right-click on selected objects to access Group or Ungroup.
Also, you can use the keyboard shortcut of Ctrl or Cmd G to Group, and Ctrl or Cmd + Shift + G to Ungroup.
Knowing how and why you Group and Ungroup objects is so valuable when it comes to manipulating designs in Silhouette Studio®.