We’re going back to basics today, my friends. The Test Cut feature is a great tool to help fine tune your cut settings and improve your overall cut quality. With this handy-dandy feature you can find the right settings to cleanly cut all the different materials you want to try.
What is a Test Cut?
The Test Cut is an option in the Cut Settings panel. Once you have selected a material and adjusted your blade to the suggested depth for that material, you have the option to perform a Test Cut. Your Silhouette machine will cut a square with a triangle inside, using your chosen settings.
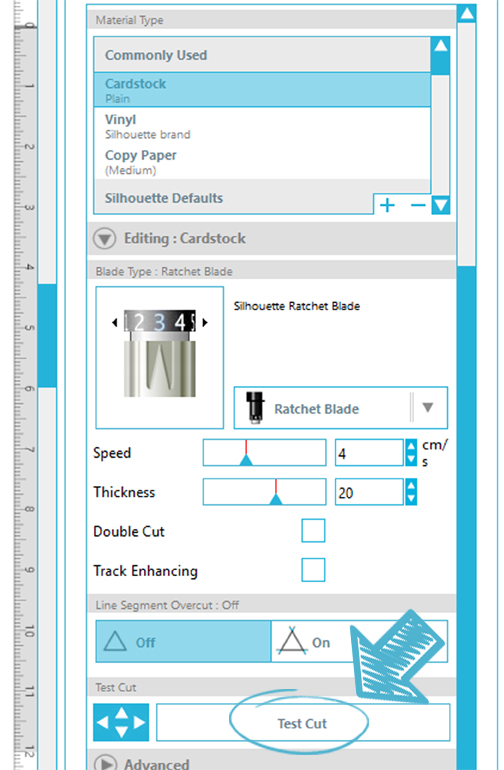
You may need to click on the material and scroll down to see the “Test Cut” button below the cut settings of blade, speed, thickness, etc.
The purpose of a test cut is to check whether the settings you have chosen for a specific material are appropriate. If the test cut doesn’t cut all the way through or doesn’t cut cleanly, then you know you should alter the blade depth, thickness, or speed.
How do I move the Test Cut?
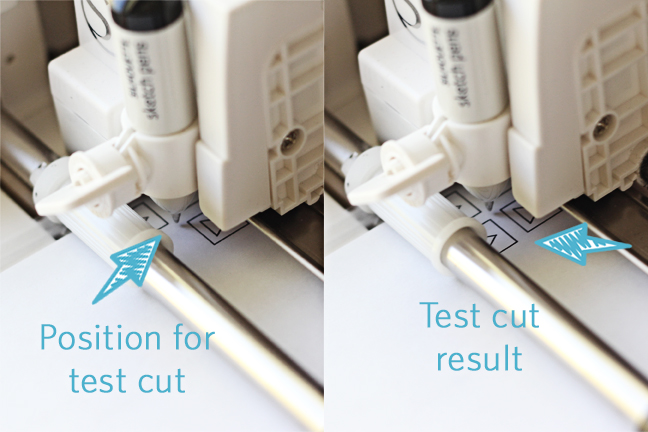
If you simply load your mat or material and click on the “Test Cut” button as shown above, the cut will be made at the upper left corner of your media, right where the blade is positioned.
But what if the test cut fails?
If it doesn’t cut all the way through or doesn’t cut cleanly, you need to adjust your settings and test cut again. Do not perform a test cut in the same place as before.
Depending on your machine, there are various ways to move the test cut. This will move the actual blade holder of your machine.
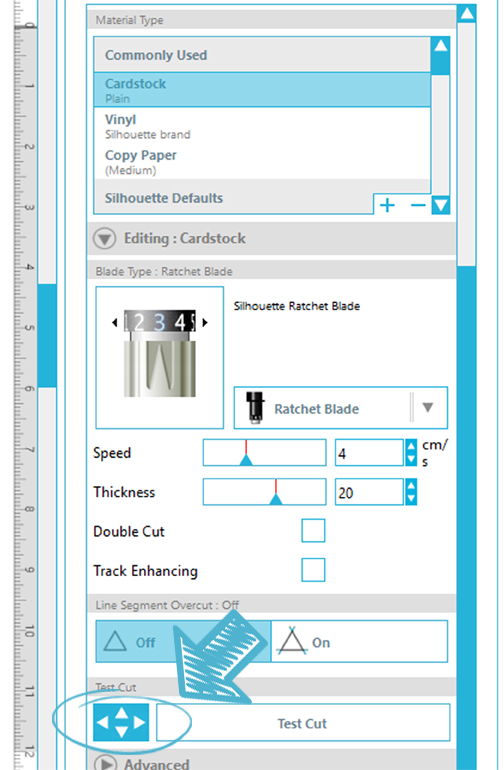
- Use the arrows in the software, just to the left of the “Test Cut” button. This is the only way to move the test cut on the Portrait or Curio.
Note: See our tutorial on the deep cut blade for more helpful information on test cuts with Curio.
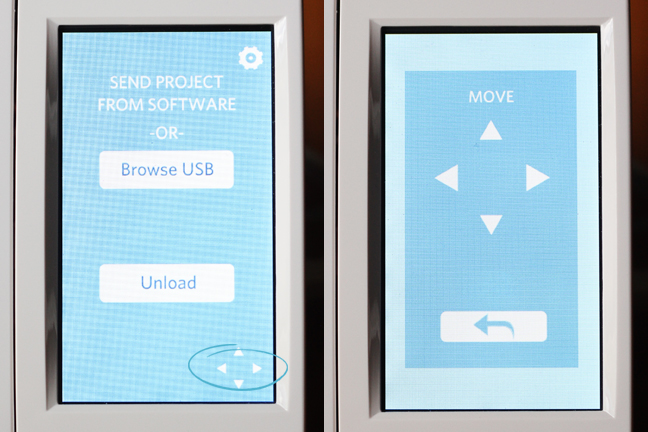
- Use the arrows on the touchscreen of the CAMEO 2 or CAMEO 3. Unload the mat, then load again. You can press on the small arrows icon of the main screen to access the touchscreen arrows.
- Use the physical arrow buttons on the original CAMEO machine.

Where do I position a new Test Cut?
- To find a clean spot for subsequent test cuts, simply reposition the blade so it is to the right of or below any other cutouts. (See photo below.)
- The position of the blade will become the upper left corner of the test cut square. Technically, it will actually cut a millimeter or two further right and down of the exact blade position.
- Be sure to position the test cut so it won’t interfere with the layout of your actual project. You don’t want little squares missing from your final design!
- You will need about a half inch of clear space for the test cut.
For illustration purposes, I’ve used a sketch pen in the photos below. You can see I positioned my blade/pen to the right and underneath previous test cuts. The resulting test cut has plenty of room.

Note: See our tutorial on the deep cut blade for more helpful information on test cuts with Curio.
Write down your successful Test Cut settings!
When you find a good setting combination for a certain material, record your successful result—record the blade depth, speed, thickness, and whether to use the double-cut feature or not.
A few helpful tips:
- Use a sticky note and attach it to the pack of paper
- Keep a spreadsheet of successful settings for your machine
- Add a custom setting for new materials in the Cut Settings Window by clicking on the “+” sign, typing in the material type, and using your mouse to change blade/speed/thickness
How can Test Cuts help me?
If you are willing to do a little experimenting, you can really dial in great cut settings for materials that may not cut perfectly for you on the default settings.
Test it, tweak the settings, test again.
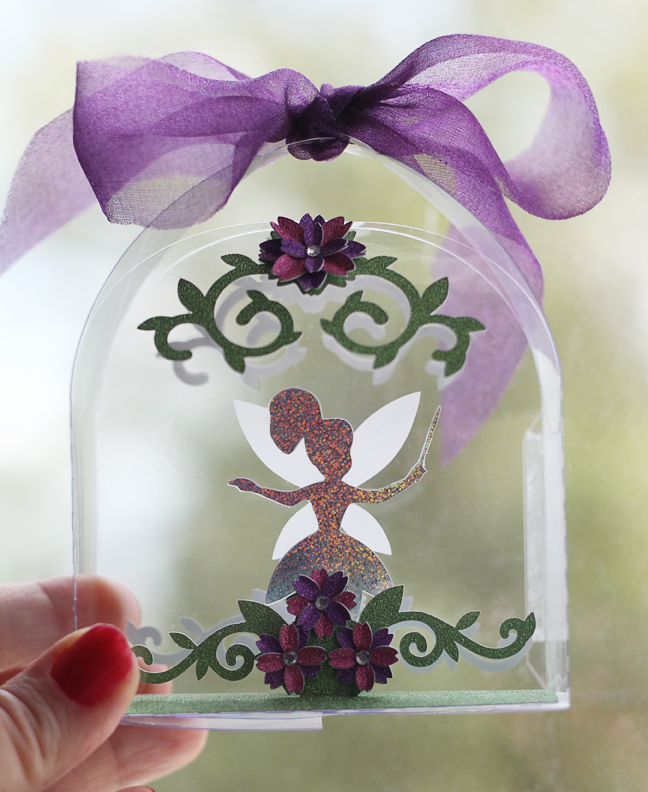
You can also gain confidence in trying new materials that are not in your default list. For example, look at my fairy project below; I used thin glitter cardstock, clear presentation covers, and holographic paper. Look at these intricate cuts!
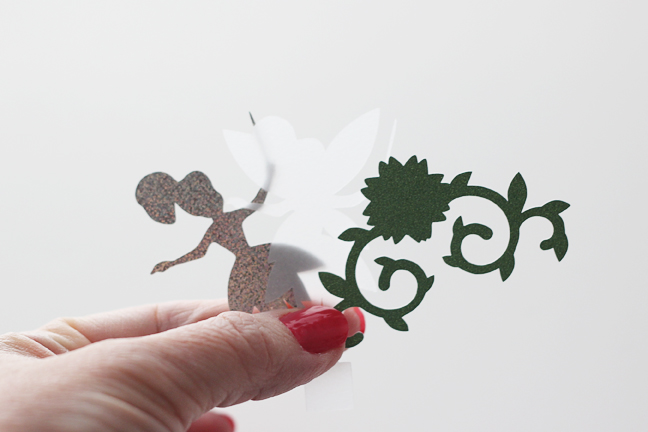
Green fairy in a bottle (design ID #140636)
None of the materials mentioned above are in the Silhouette Studio® default list, and sometimes you might even find that the default settings don’t work for the specific materials you’re using. (For example, the default vellum settings were way off for me.) But multiple test cuts got my settings where they needed to be without wasting a lot of specialty paper.
 Free Class - Father's Day Apron Set
  Free Class - Custom Graduation Tumbler
Kelly Wayment
June 28, 2024
You can use it with vinyl as long as it is smooth and flat to allow the static charge to hold on to it. Rolled vinyl that wants to go back to its rolled shape will not necessarily work well, and it would need to be trimmed to fit the ES mat cutting area.
Kelly Wayment
June 28, 2024
Yes, you can use the heat pen while using the ES mat. 🙂
Yurii
March 2, 2024
Hello. May it be used with heat pen?
Thanks
Jerome
February 24, 2024
Hi, works this with the normal vinyl foils or only with printer papter etc?
Kelly Wayment
February 16, 2024
Once you’ve pushed the mat up against the rollers, just press the “Load” arrow button (bottom right on the display). Does a regular sticky mat load into the machine for you?
Michelle a goodall
January 24, 2024
Hello! I just got my new electrostatic mat and have watched every video i can find on it. However, what i can t find is why it wont feed into my cameo 5/ it slides right up the rollers but wont go any further. and yes- iam pushing the into button. help!