Hola! Happy almost Cinco de Mayo everyone. I’m here today showing you how to put together a fun fiesta for your friends and family with your CAMEO®.
Cinco de Mayo also happens to be my sister-in-law’s birthday so we always have a good reason to celebrate. I threw her a tiny little party at our house and I also managed to do it on a tight budget! How you ask?
With my Silhouette CAMEO®, paper, balloons, and clear printable window cling. Yep! That’s it! (well I used some cute dishes I found for about a dollar each too from that “spot” in our favorite store….they get me every.single.time!)
I’m going to show you the fun decorations I made and will teach you one fun “hack” for your decorative light box.
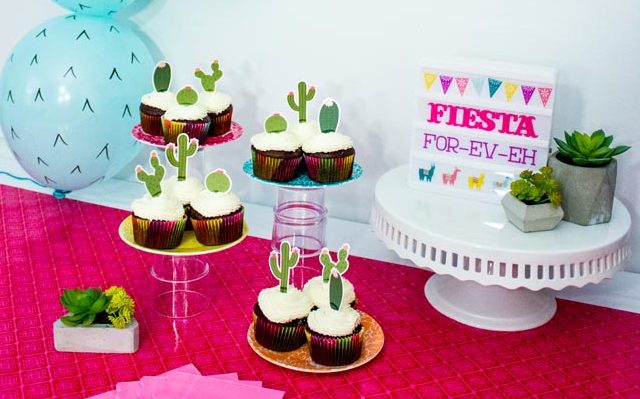
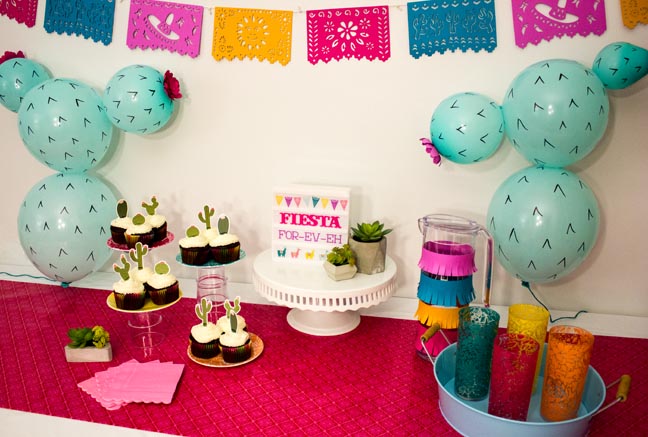
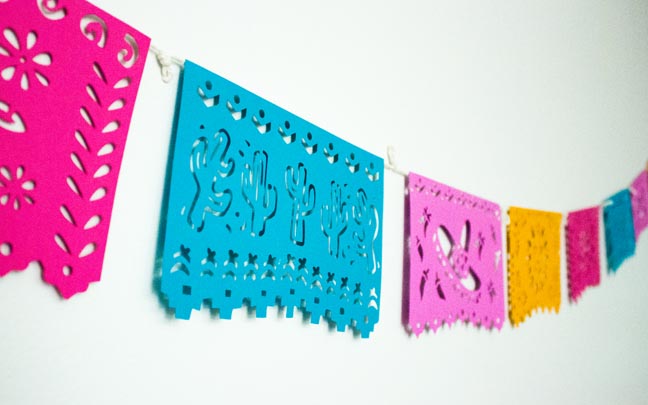
Here is the overall party look:
Did you notice most of the decor involves paper?
Here are some close up shots of the various elements:
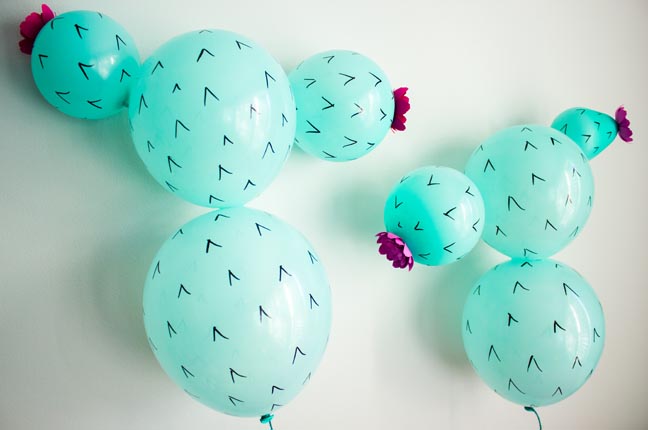
Cactus Balloons: These are simply balloons I blew up in different sizes, then drew the spikes on with a black sharpie. The balloons are held together with hot glue and I made paper flowers with my CAMEO®.
Note: I didn’t double up the flower cuts as noted for this design for the full dahlia look, this is a single layer.
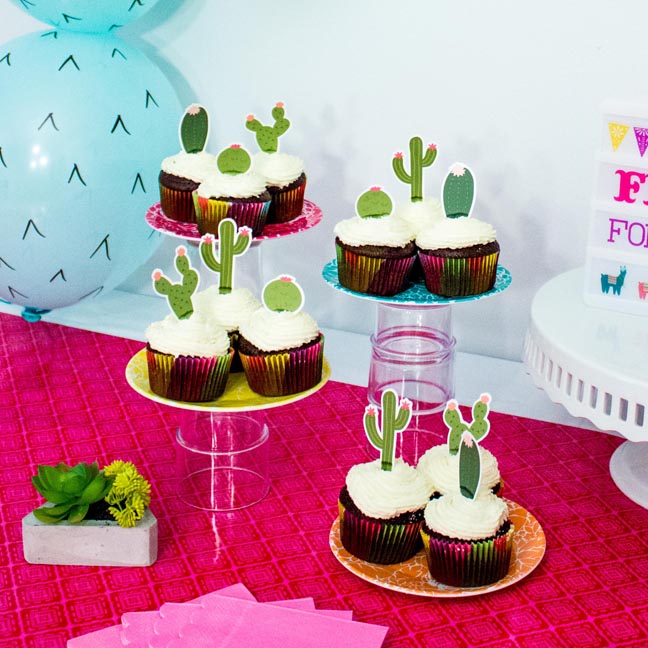
Cupcake Toppers: I absolutely love these adorable cactus designs. All you have to do is print and cut on white cardstock.
Note: Those are cute little plastic plates I found and I turned them into stands by simply using clear cups beneath, some are stacked to make them different heights.
Paper Banner: This is just four different coordinating cut files cut out of colored cardstock. I used white cotton cord and hot glue to attach them.
Note: I also used that paper to cut fringe and wrapped it around my pitcher with little dabs of hot glue.
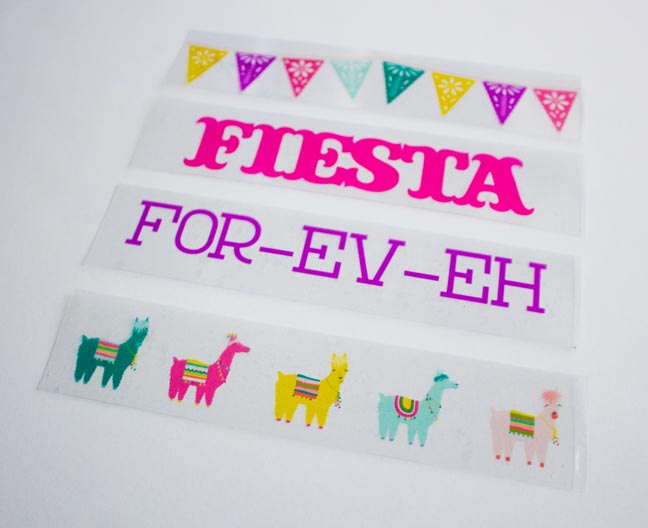
Here is the fun “hack” for creating your own custom light box inserts:
Can you guess what product I used?? Clear window cling!
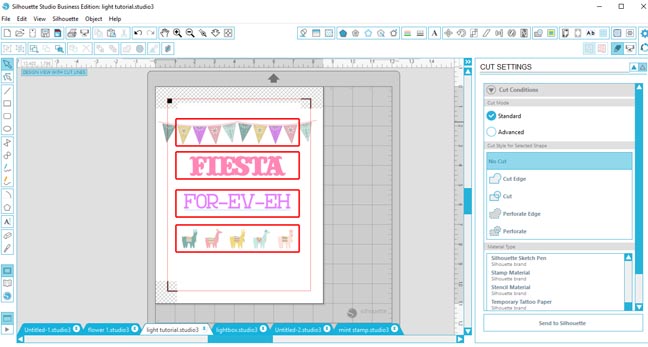
I found four design files in the Silhouette Design Store and simply wrote out the other phrase.
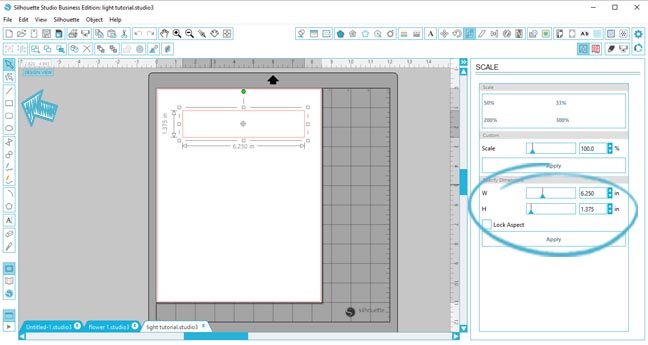
Step One:
Measure the size of your light box insert and draw a rectangle to the correct size. Replicate them as many times as needed.
Note: I attached mine to transparency paper so they were easy to slide in and out. If you want to attach your cling directly to your light box make sure to measure the space between the bars instead.
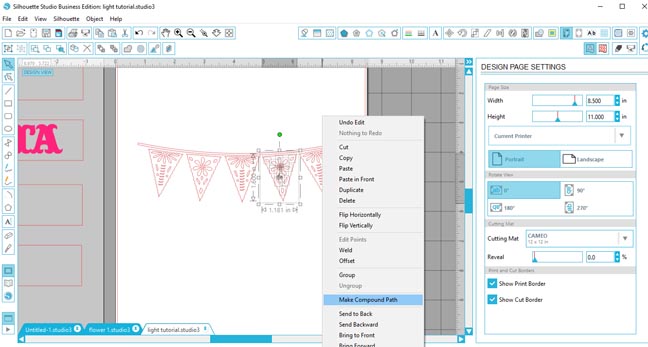
Step Two:
Add the design store files and scale them to fit inside the rectangles. You can fill them with any color (or pattern) you want.
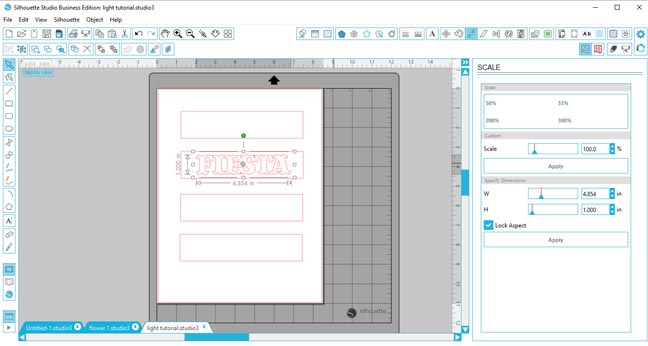
This design needs to be made into a compound path to correctly fill with color. Simply select the whole flag then right click to pull up the menu. Repeat this for each flag design.
The llamas are actually a cupcake topper design that I ungrouped to get the llama design only.

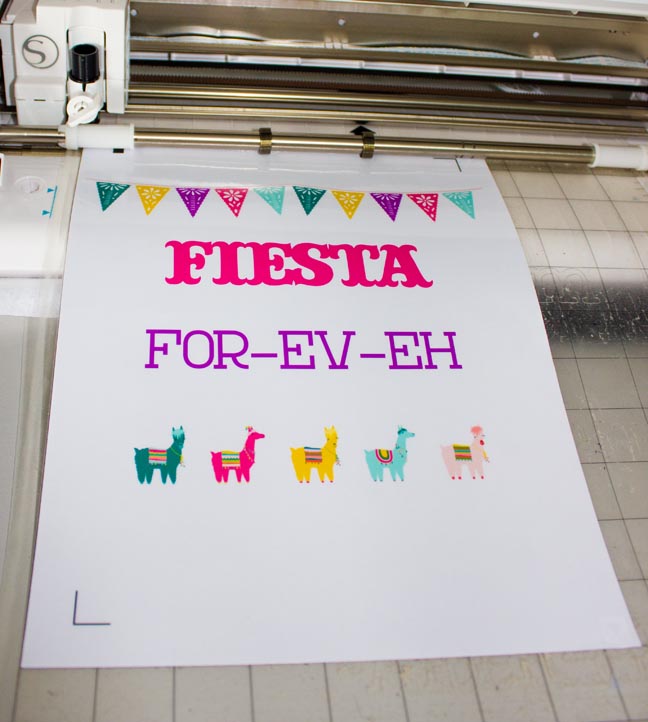
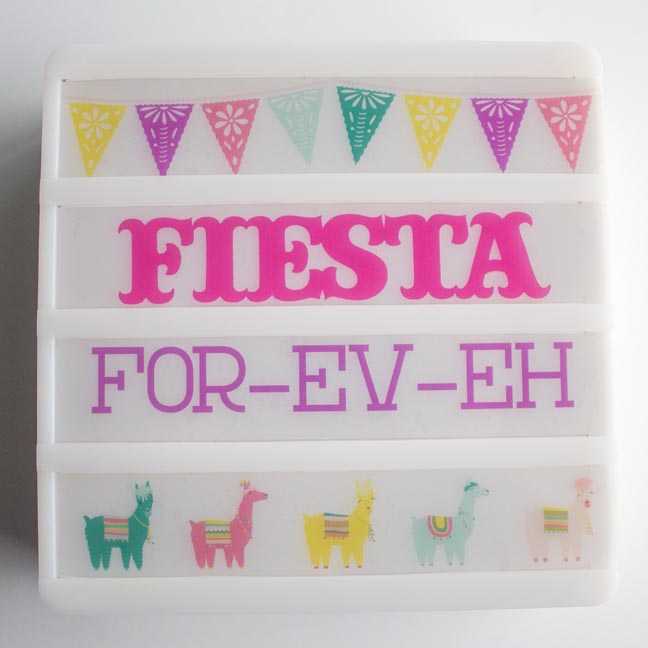
Here’s the complete design all put together:

Step Three:
Add your registration marks and make sure to change your cut settings to only cut out the rectangle shapes.
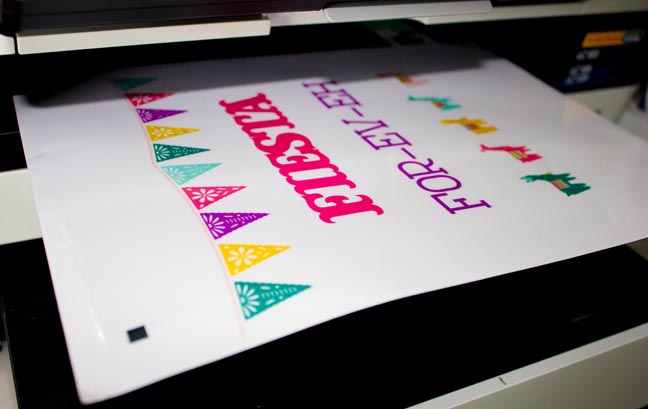
Step Four:
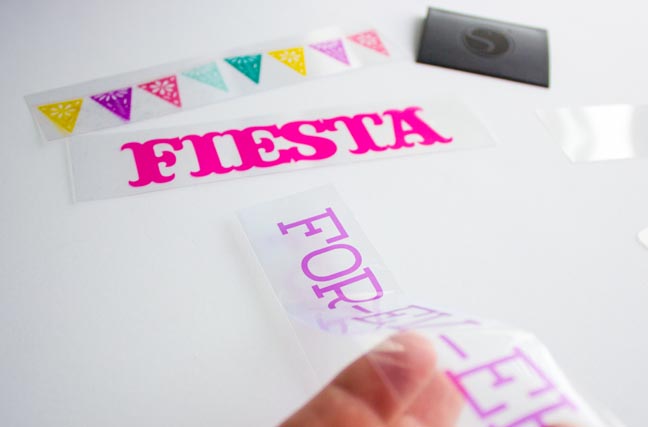
Print your design onto your window cling and then cut them out.
Step Five:
Attach the window cling to your clear transparency (pre-cut to size). The scraper tool is helpful for getting a smooth application.
Note: This is the step you can skip if you chose to attach the window cling directly to your light box.
They fit beautifully into the slots!!
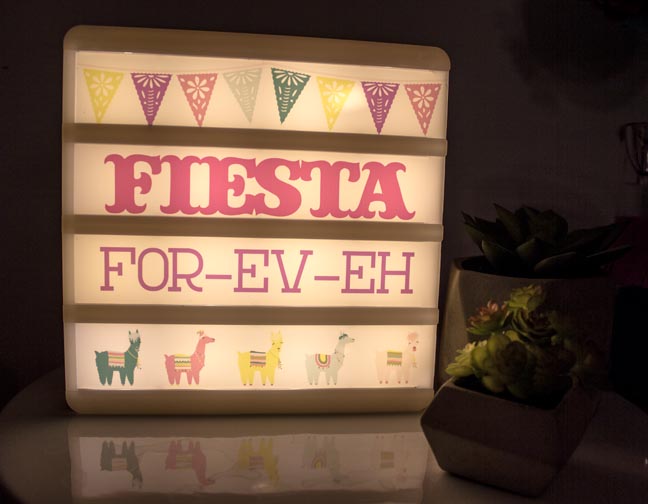
Here is a night shot showing it lit up in all it’s light box glory!!
Seriously how easy is all of this!?! It only took a day to put together and less than $20.00 in materials.
What is the next celebration you’re going to throw?
Nasze Naturalne
September 3, 2025
Your authentic voice really shines through in everything you create and share
Naszenaturalne
September 2, 2025
Really love your style
Kelly Wayment
June 28, 2024
You can use it with vinyl as long as it is smooth and flat to allow the static charge to hold on to it. Rolled vinyl that wants to go back to its rolled shape will not necessarily work well, and it would need to be trimmed to fit the ES mat cutting area.
Kelly Wayment
June 28, 2024
Yes, you can use the heat pen while using the ES mat. 🙂
Yurii
March 2, 2024
Hello. May it be used with heat pen?
Thanks
Jerome
February 24, 2024
Hi, works this with the normal vinyl foils or only with printer papter etc?