Are you excited about the new products showing up in the Silhouette Online Shop? I am! Among the first new and unique products, I tried are the cork sheets, and I’m here to show you how to use them.
What You Should Know About the Cork Sheets: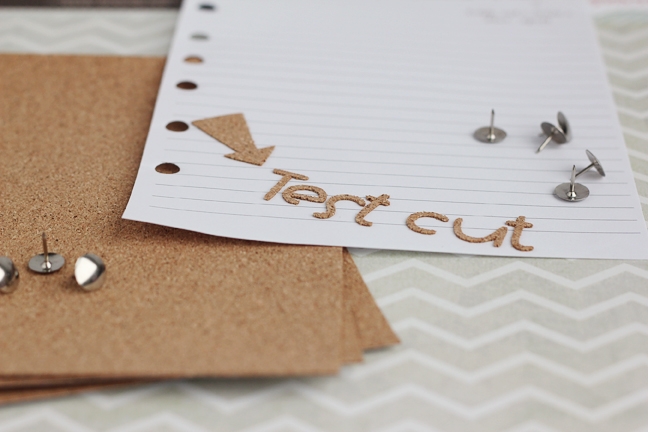
- Adhesive backed and ready to stick anywhere
- Size is 5 in. x 7 in. (eight sheets per package)
- Quite thin, so they are more like cork stickers than thick cork board
- My successful cork settings: Blade 10, Speed 1, Thickness 33, Double Cut
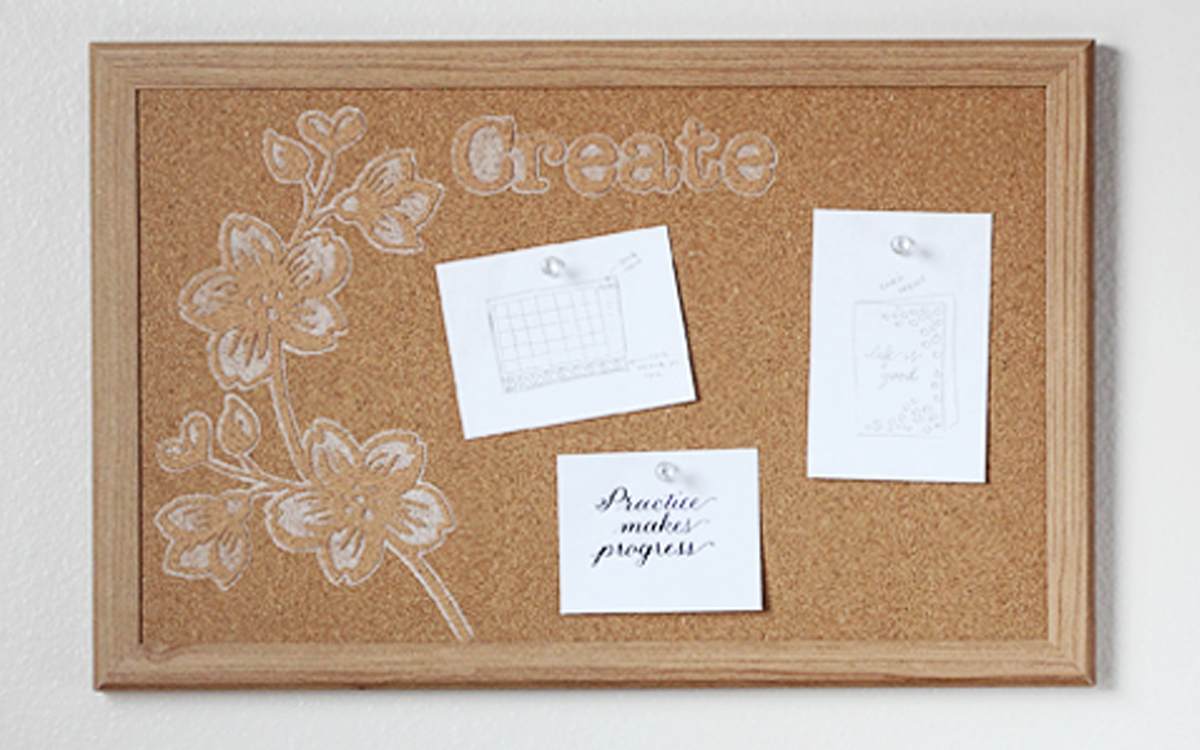
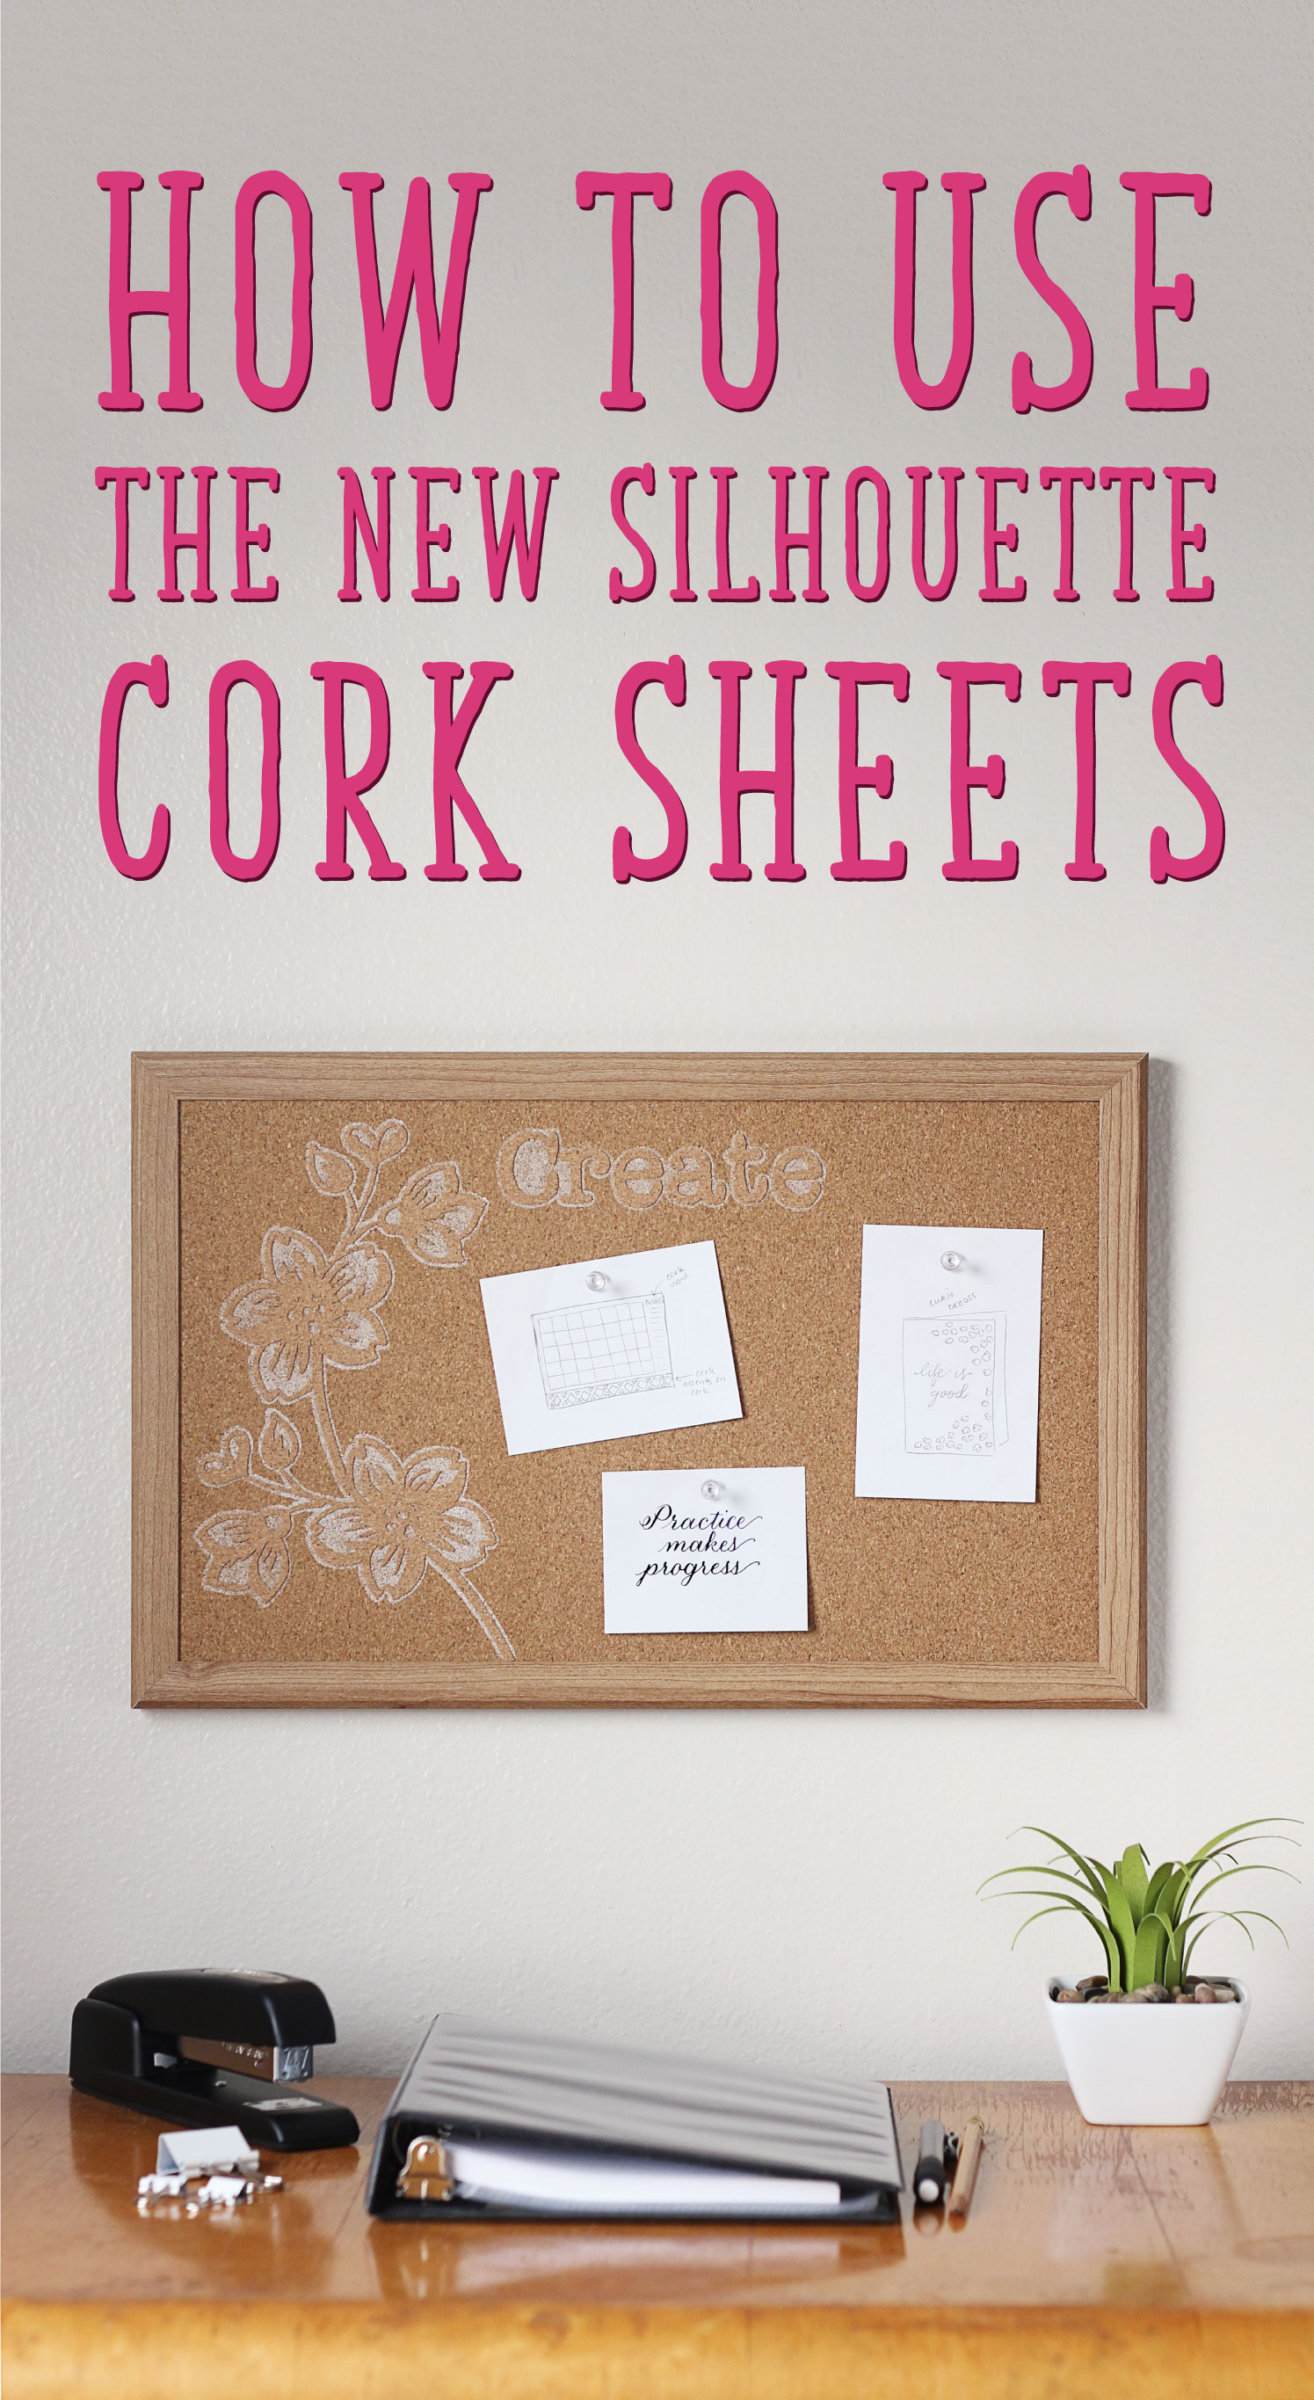
Out of all the options I could think of for using cork stickers, I decided to use them as embellishments on an existing cork bulletin board. It really adds some fun visual interest to an otherwise-boring board (no pun intended).
What You’ll Need For This Project: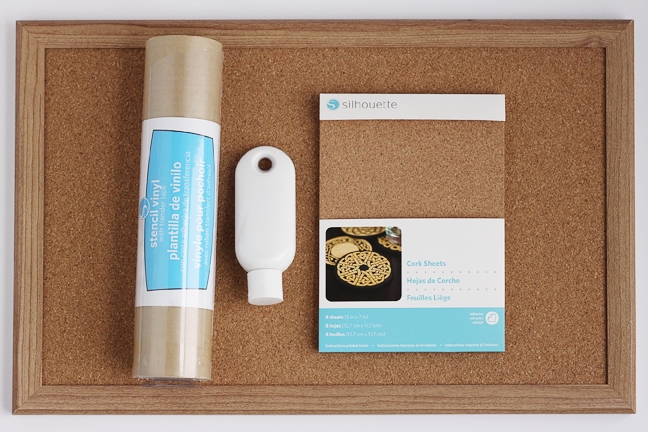
- Cork Sheets
- Stencil Vinyl
- White paint or fabric ink and sponge applicator
- CAMEO, Portrait, or Curio
- Cork bulletin board (mine is 11 in. x 17 in.)
- Branch in Bloom (design ID #147869)
- MK Thick Type Font (design ID #57181)
STEP ONE: CREATE CORK DESIGN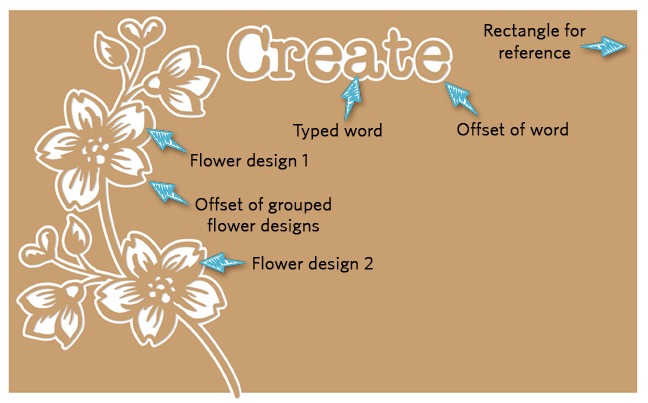
I tested a range of designs and realized quickly that the soft cork is a little picky with how small it will cut. You will probably not have a lot of success cutting really intricate shapes like you can with other materials like vinyl, but you can easily cut thin designs and fonts that are simple.
I chose some flowers and a word to place on the cork bulletin board, but I also wanted to have a little outline so you could see some definition around the cutout layer.
- Draw a rectangle 15.375 in. wide x 9.375 in. high as a reference for the final bulletin board (measure the exposed portion of your bulletin board and use those measurements).
- Resize the branch in bloom design so it fits within the 7 in. x 5 in. cork sheet.
- I made two flowering branches (one mirrored horizontally from the other) and the word “create,” which will use three cork sheets.
- Arrange the flowers and words on the reference rectangle to make sure they will fit on the board and look appealing. Rotate and resize as necessary.
STEP TWO: CREATE STENCIL OFFSET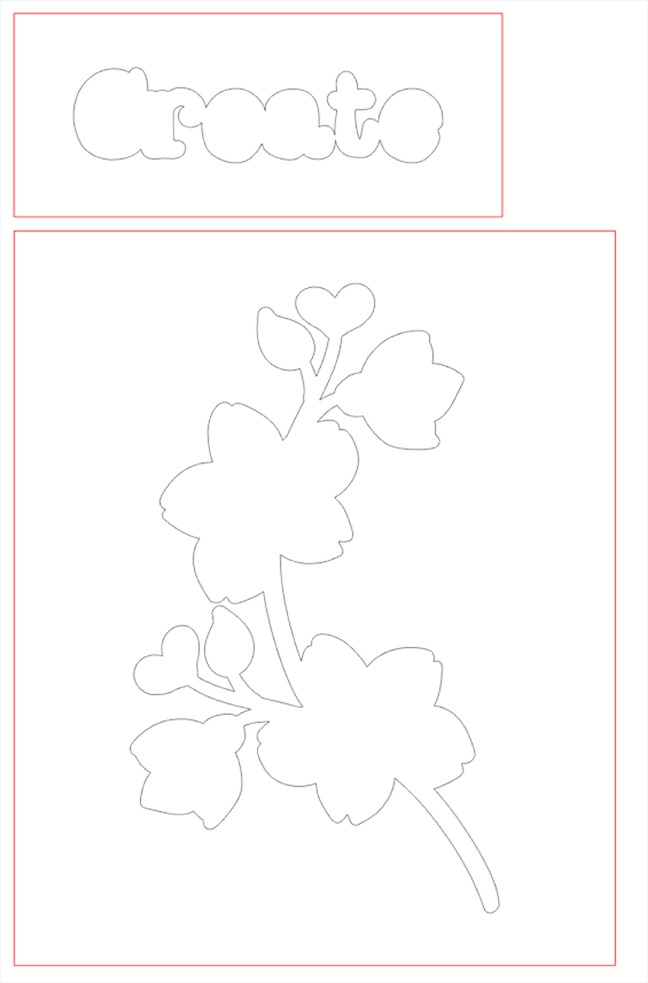
Once the flowers and words are correctly arranged and sized, it’s time to create an offset.
- Group the flowers together.
- With the flowers selected, create an offset with a distance of 0.066 in. in the Offset Window.
- Remove the centers of the offset and keep just the outer edge by releasing the compound path (Object>Release Compound Path).
- Repeat steps 2 and 3 for the word “create.”
- Draw a rectangle around the flower offset and another around the word, leaving about an inch minimum for the stencil to protect your surface from stray paint. (See image below.)
- Note: the rectangle must still fit within the 9 in. width of the stencil vinyl.
STEP THREE: CUT STENCIL AND CORK MATERIALS
- Cut the offsets and their outer rectangles from stencil vinyl using vinyl cut settings (I used blade 2, speed 8, thickness 9).
- Cut the flower designs and the word from cork sheets. (I used blade 10, speed 1, thickness 33, double cut.) It’s a good idea to do a test cut first in an area of the cork sheet that won’t be used.
- Hint: Set your page size to 7 in. x 5 in. in the Design Page Settings Window to match the cork sheet, or use your workspace grid (Right Click > Show Grid) as a reference to make sure your design stays within the cork sheet.
- To weed the cork material, I find it easiest to leave the main design on the cutting mat and pull away the outer edge of the cork sheet, then use a hook tool to weed away any inner pieces. You can see in my photo above I’ve weeded out all the excess cork and have started weeding out the sticker backing.
- Use a spatula tool to gently lift the finished design with its backing off the cutting mat.
STEP FOUR: APPLY PAINT AND CORK DESIGNS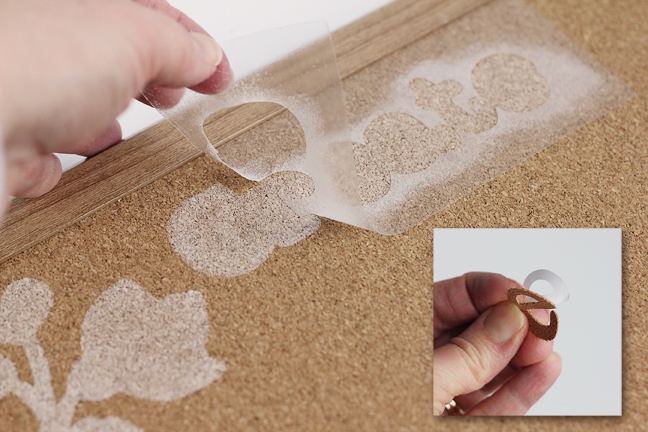
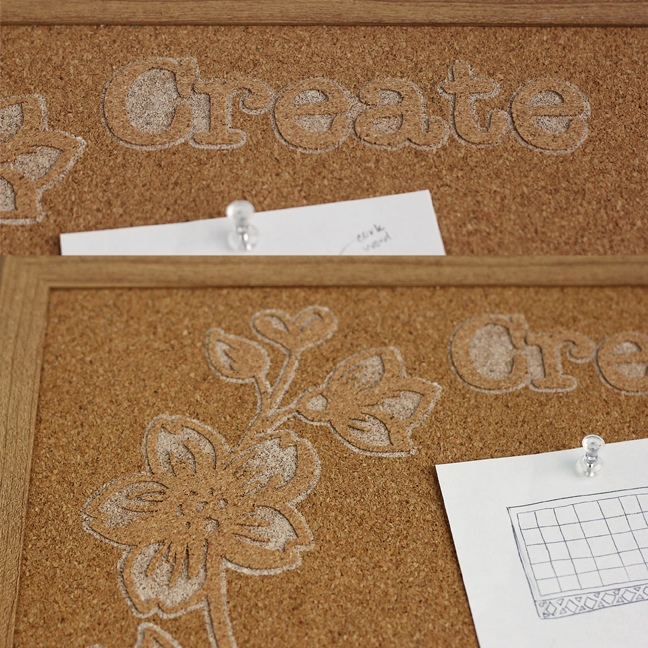
- Use the stencil to apply a light coat of paint or fabric ink to the bulletin board, then remove the stencil.
- Once the paint is dry, peel away the cork’s sticker backing and use the painted offset as a guide for placing your cork stickers on the bulletin board.
- Note: The cork stickers are briefly removable while applied fresh with a light touch, but then stick permanently to the painted cork background after a few minutes or when pressed firmly.
Don’t you think the cork-on-cork look is fun?
I can think of several more projects I’ll be trying with these new cork sheets. What ideas do you have in mind?
 Free Class - Father's Day Apron Set
  Free Class - Custom Graduation Tumbler
Nasze Naturalne
September 3, 2025
Your authentic voice really shines through in everything you create and share
Naszenaturalne
September 2, 2025
Really love your style
Kelly Wayment
June 28, 2024
You can use it with vinyl as long as it is smooth and flat to allow the static charge to hold on to it. Rolled vinyl that wants to go back to its rolled shape will not necessarily work well, and it would need to be trimmed to fit the ES mat cutting area.
Kelly Wayment
June 28, 2024
Yes, you can use the heat pen while using the ES mat. 🙂
Yurii
March 2, 2024
Hello. May it be used with heat pen?
Thanks
Jerome
February 24, 2024
Hi, works this with the normal vinyl foils or only with printer papter etc?