Have you ever wondered what the small plastic tab that came with your machine is for? A lot of new Silhouette users will unpack this tool out of the machine and aren’t sure what it is or how to use it.
This is the blade adjustment tool. It’s primarily used to care for and adjust the blades you use with your cutting machine, though you might be surprised at the other ways you can use it. In this blog post, we’ll go over what the blade adjustment tool is and three of the ways you can use it with your blades and your machine.
Which Tool Do You Have?
First things first. There are two versions of the blade adjustment tool: type A and type B. They’re used in the same way, but they’re compatible with different blades. If you take a closer look at the top hole on the tool, you’ll see that the tool on the left has a flat side at the top and bottom, while the tool on the right has a perfect circle with two notches on the top and bottom instead.
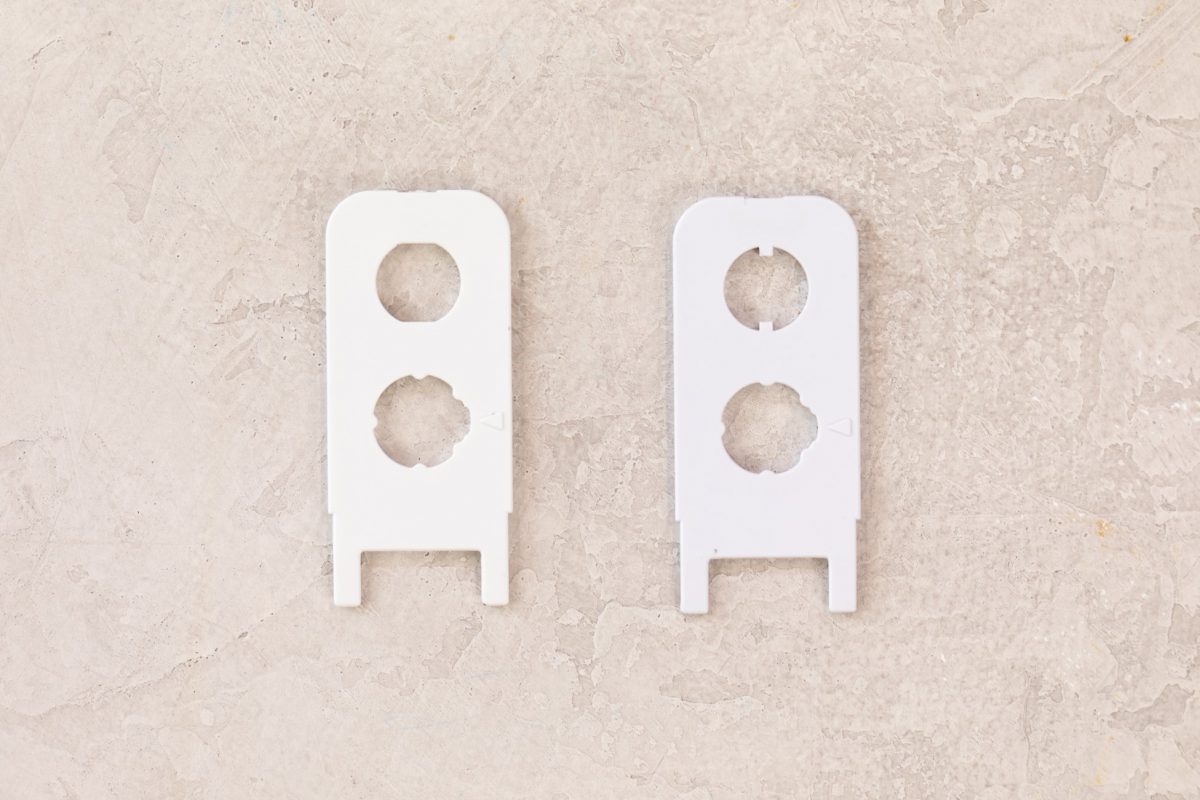
Type A, the first blade adjustment tool, is used for blades compatible with the Portrait 2 and Cameo 3. The flattened circle matches the cap shape on these older blades. On the other hand, Type B is used with newer blades made for the Portrait 3 and Cameo 4. The bottom hole on both tools is identical and can be used with the ratchet blade.
Your machine came with the correct blade adjustment tool, but it’s helpful to know which one you need for a few reasons. You’ll want to make sure that any blades you buy are compatible with your machine, and if you ever need to purchase a replacement blade adjustment tool, you’ll know which one you need to buy. To learn more about Silhouette blade compatibility, check out this comparison chart.
Other than being used with different blades, both versions of the blade adjustment tool are the same. We’ll be using a Type B tool to show you how we adjust the blades we use with the Cameo 4, but you can use this guide to help you care for all of your blades!
Adjust Blade Settings
This function is clear from the tool’s name. Most tools, particularly older blade models, need to be manually adjusted to the correct cutting depth for different materials. Your machine has an adjustment socket on the front panel’s left side, but we’ll be showing you how to find the necessary cut settings in Silhouette Studio and how to adjust your blade accordingly.
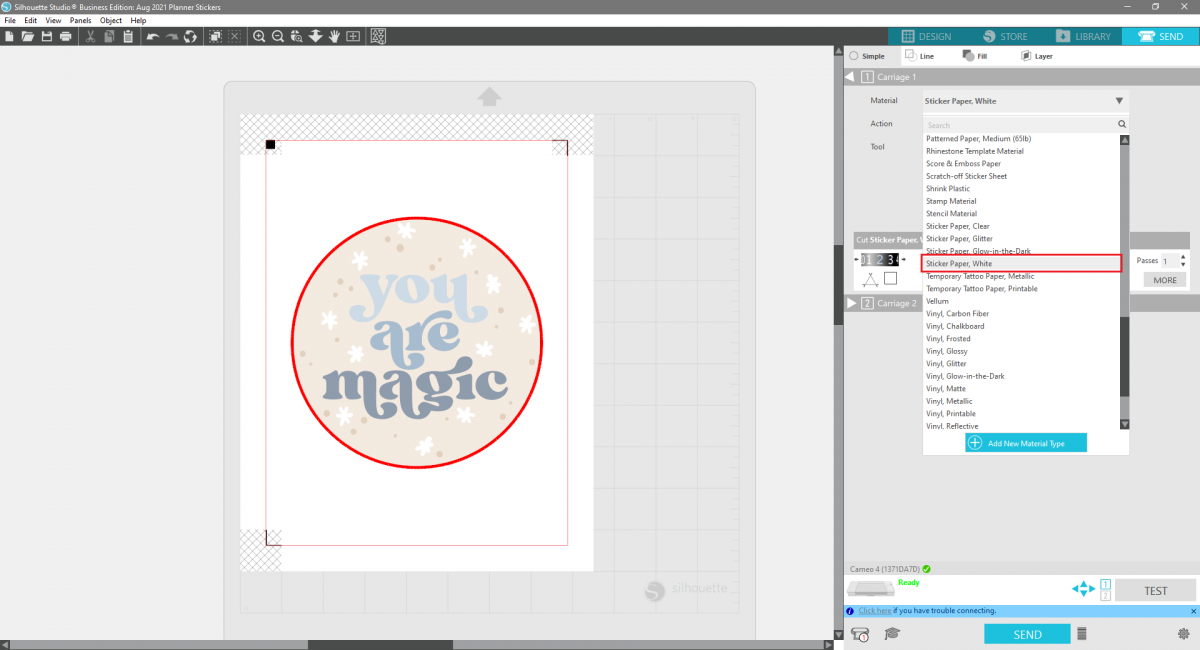
First, we need to select the material we’re cutting so we can find the depth setting we need to adjust our blade to. Go to the Send panel in Silhouette Studio. At the top of the panel, select the correct material under the Material dropdown. For this project, we’re using the Silhouette Printable Sticker Paper. While you’re here, make sure the tool selected matches the tool you’re going to use.
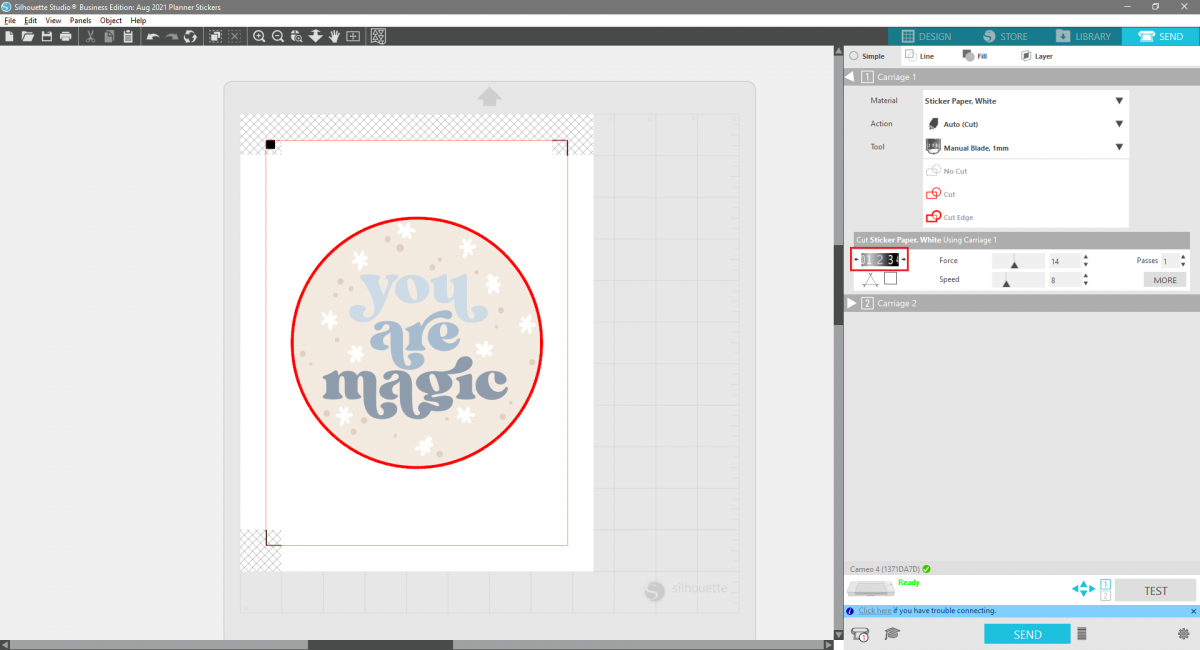
When you select your material type, the default cut settings will appear underneath the section where you selected your material type. Your Silhouette machine will automatically use the correct force and speed for this project, but we need to adjust the blade depth. This setting is on the left side of this section as a rectangle with several numbers. The highlighted number in the center is the setting we need to adjust the blade to match. Don’t worry if your rectangle looks slightly different from ours—different blades will display their depth settings slightly differently within Studio, but the setting you need to use will be clear.
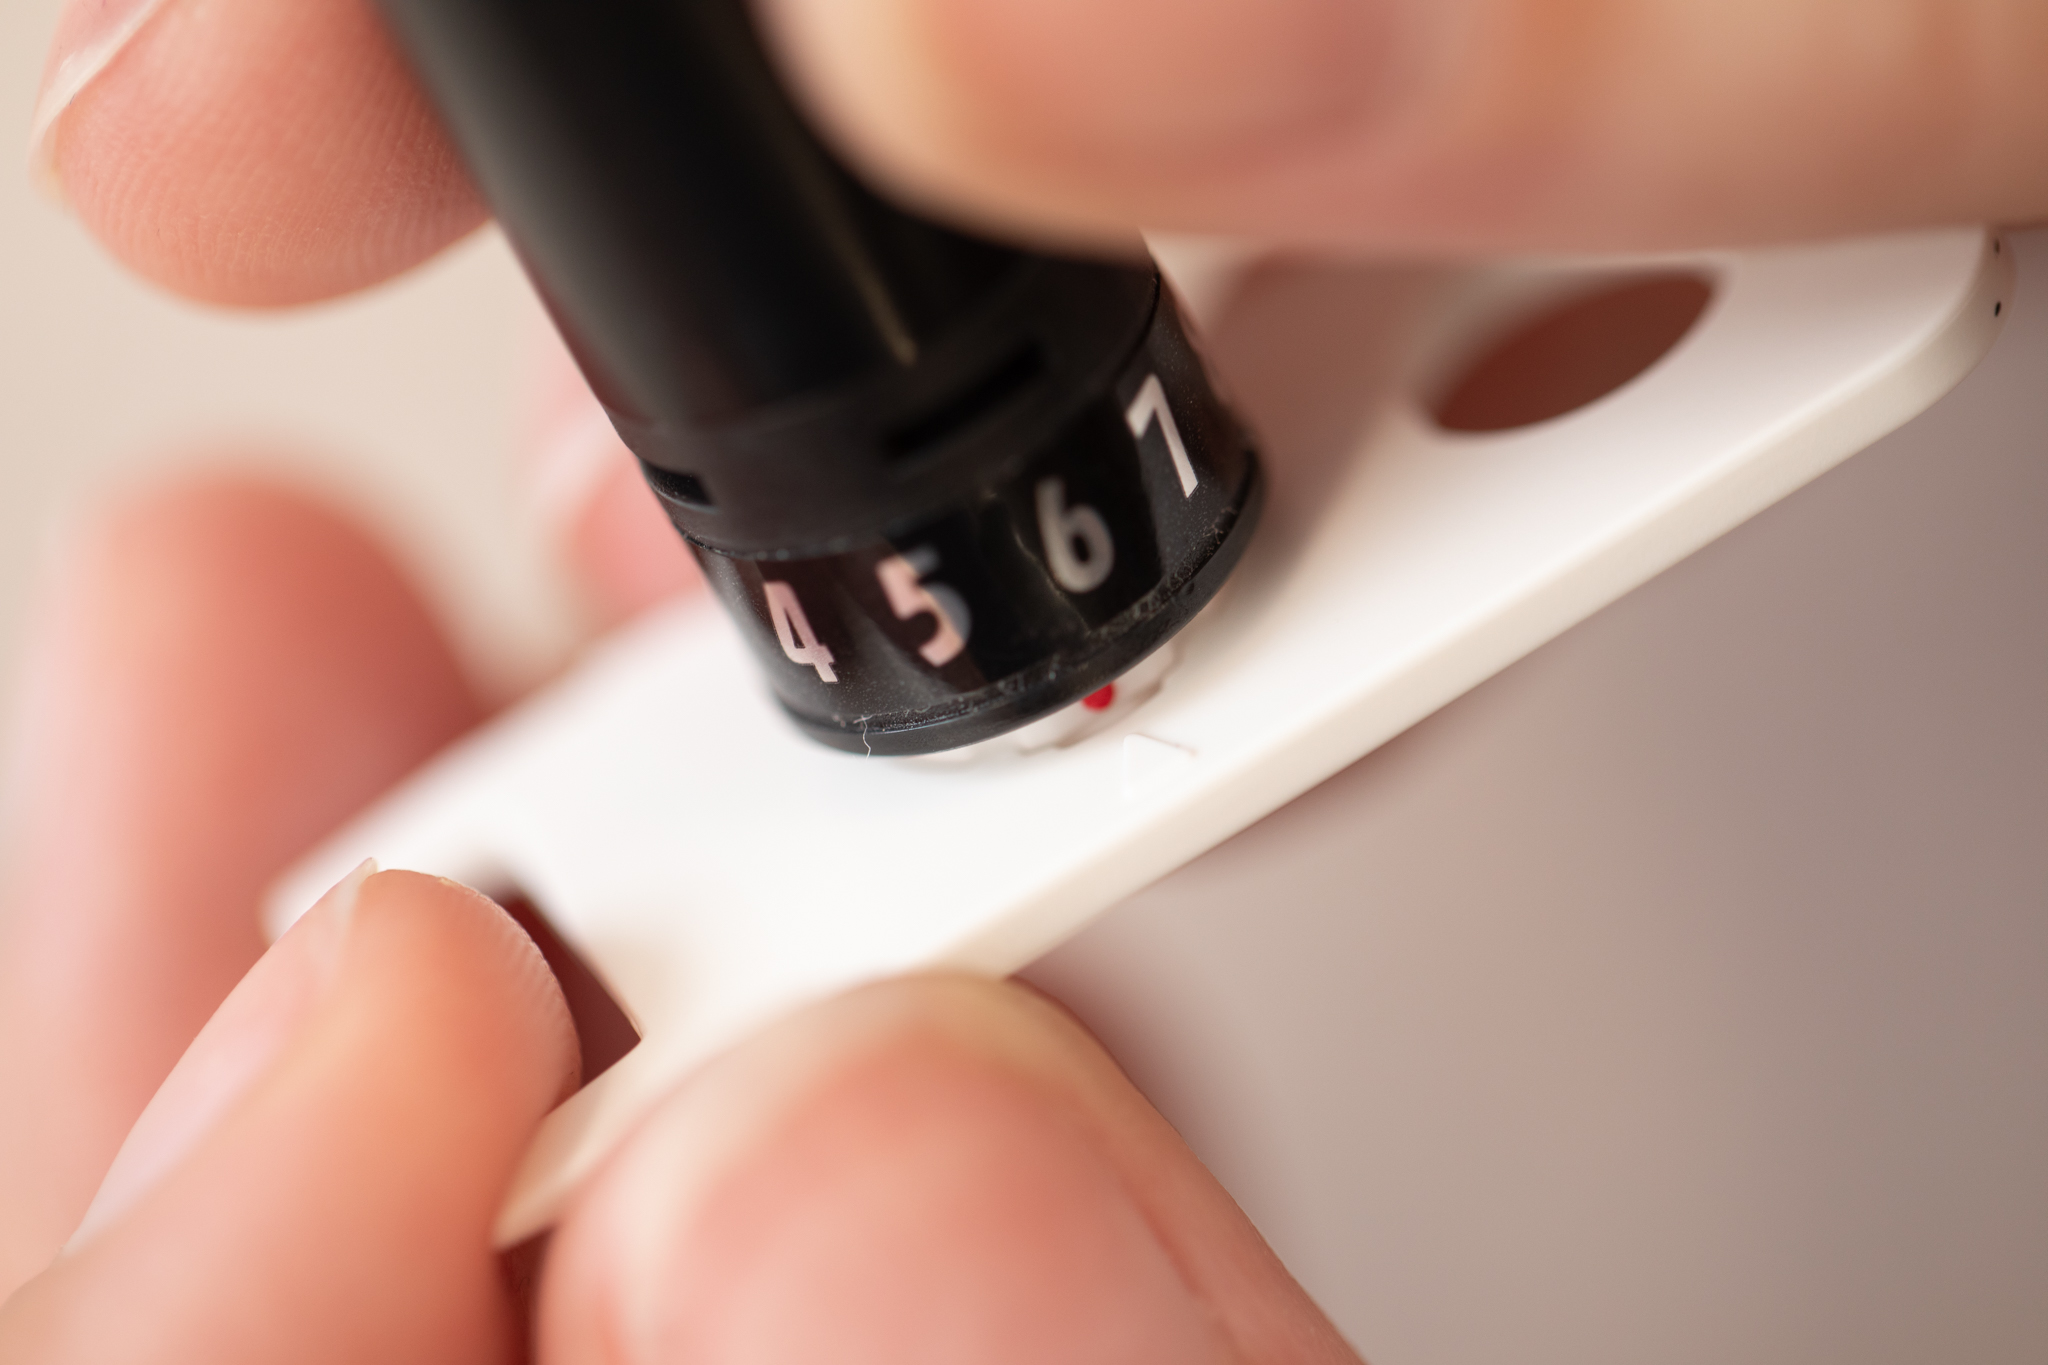
Get your blade and insert it into the blade adjustment tool, using the hole that matches the shape of your blade cap. You might need to turn it a bit so the shape of the blade cap matches up with the correct hole. If you’re adjusting a ratchet blade like we are, align the vertical red line with the arrow on the tool. The blade should fit snugly into the blade adjustment tool.
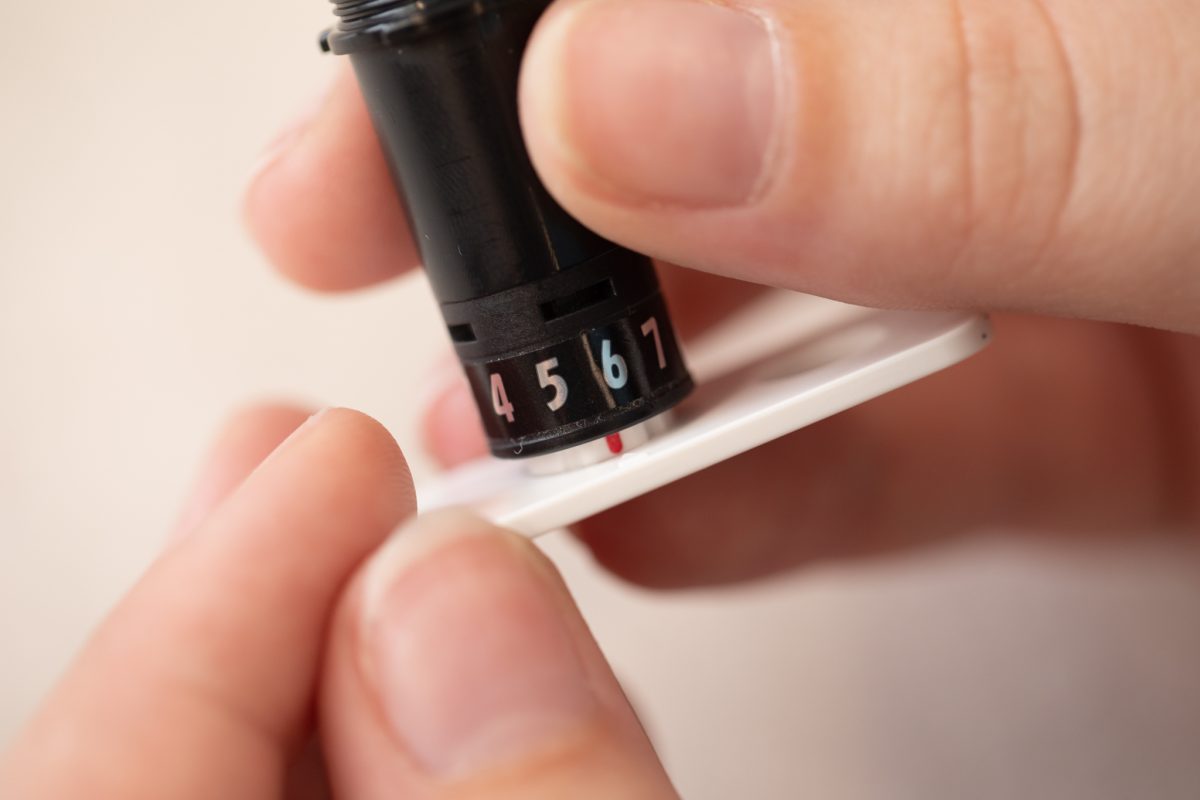
Adjust the blade depth by twisting the blade body so the number above the red line or lined up with the arrow on the tool matches the highlighted number in Silhouette Studio.

Note: You will never need to use this method to adjust the AutoBlade’s cutting depth. One of the benefits of using the AutoBlade is that the machine will automatically set your blade’s depth for each of your projects, making your cutting experience even easier.
Unscrew Blade Cap
You can also use the blade adjustment tool to take the cap off of the blade tip. Doing so will expose the entire blade, which is very sharp. Use caution and take care not to cut yourself when taking off the blade cap. Only remove the cap when you need to clean the blade by removing dust or material scraps that may be preventing it from making clean cuts.
Note: While you never need to adjust the depth setting of your AutoBlade, you may need to remove the blade cap to clean it occasionally. Be sure to keep your blade adjustment tool for this purpose, even if you don’t use manual blades that require adjustment.
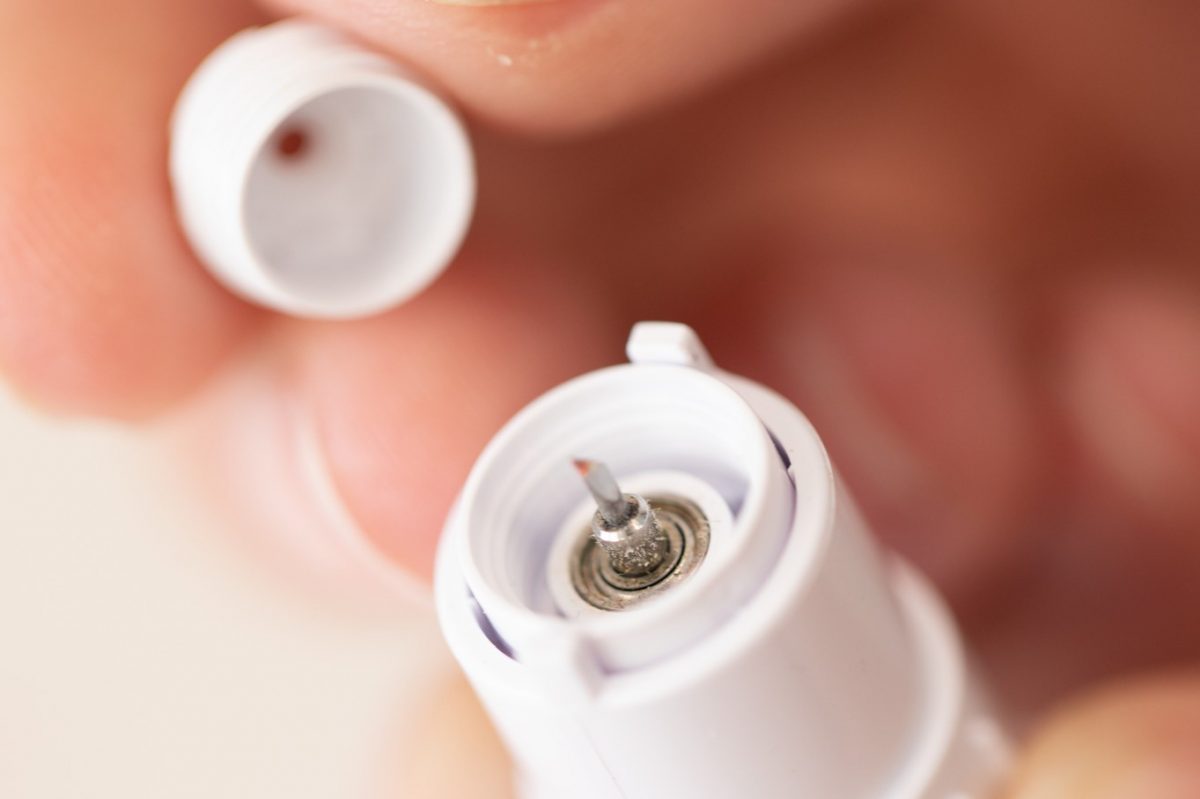
First, place the blade into the blade adjustment tool, using the correct hole. Then, twist the adjustment tool counter-clockwise to loosen the blade cap. Continue twisting the tool or the blade until the cap is loose and comes off of the blade.
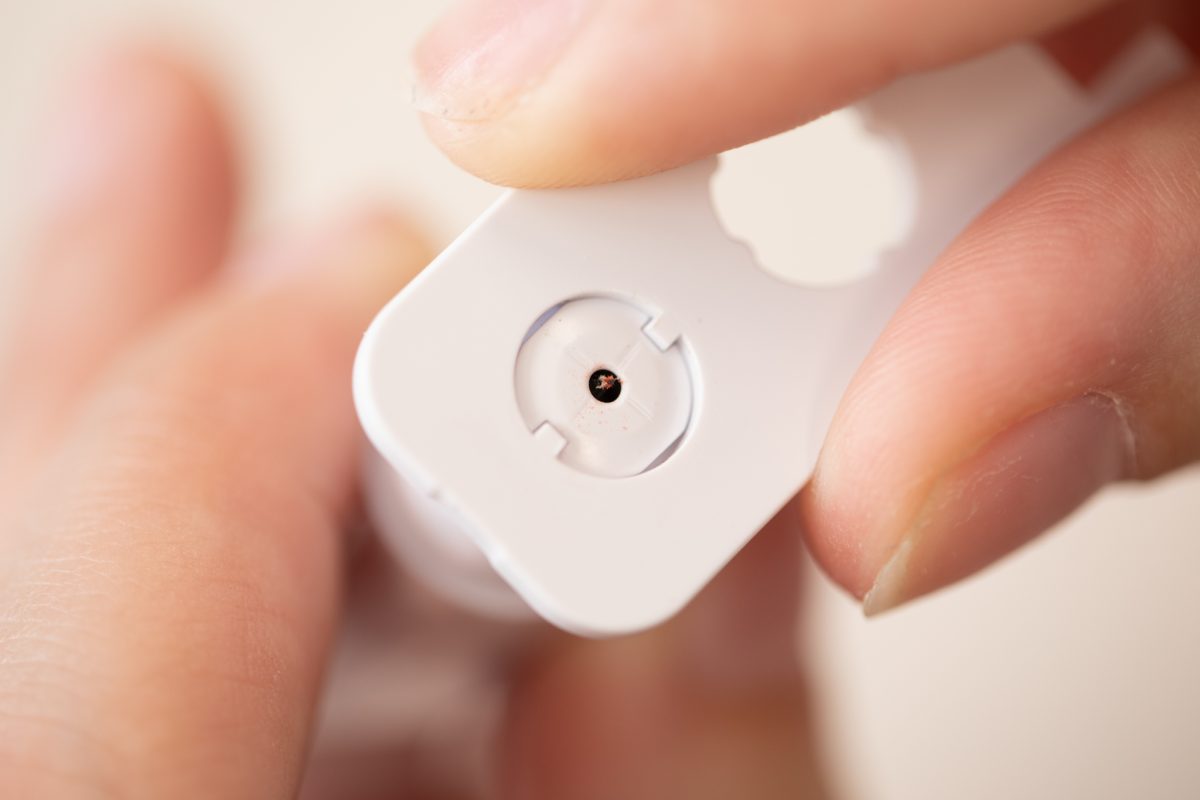
This is what the Cameo 4’s AutoBlade looks like when the blade cap is removed. Ours was looking pretty dusty, so we used a cotton swab to clean it up. You can also use a lint-free cloth or compressed air to clean the blade.
When you’re ready to put the cap back onto your blade, simply twist it back into place using your fingers. You may also want to use the blade adjustment tool to make sure the cap is secure.
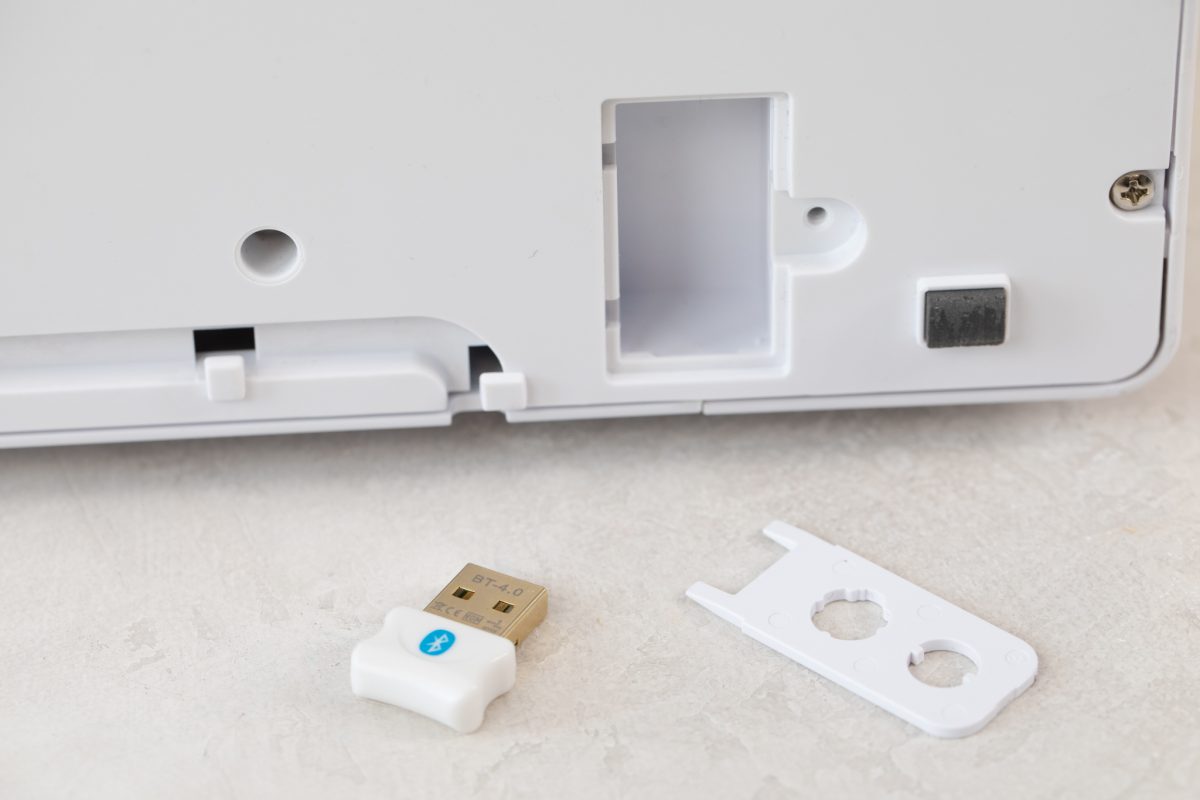
Remove Bluetooth Adapter
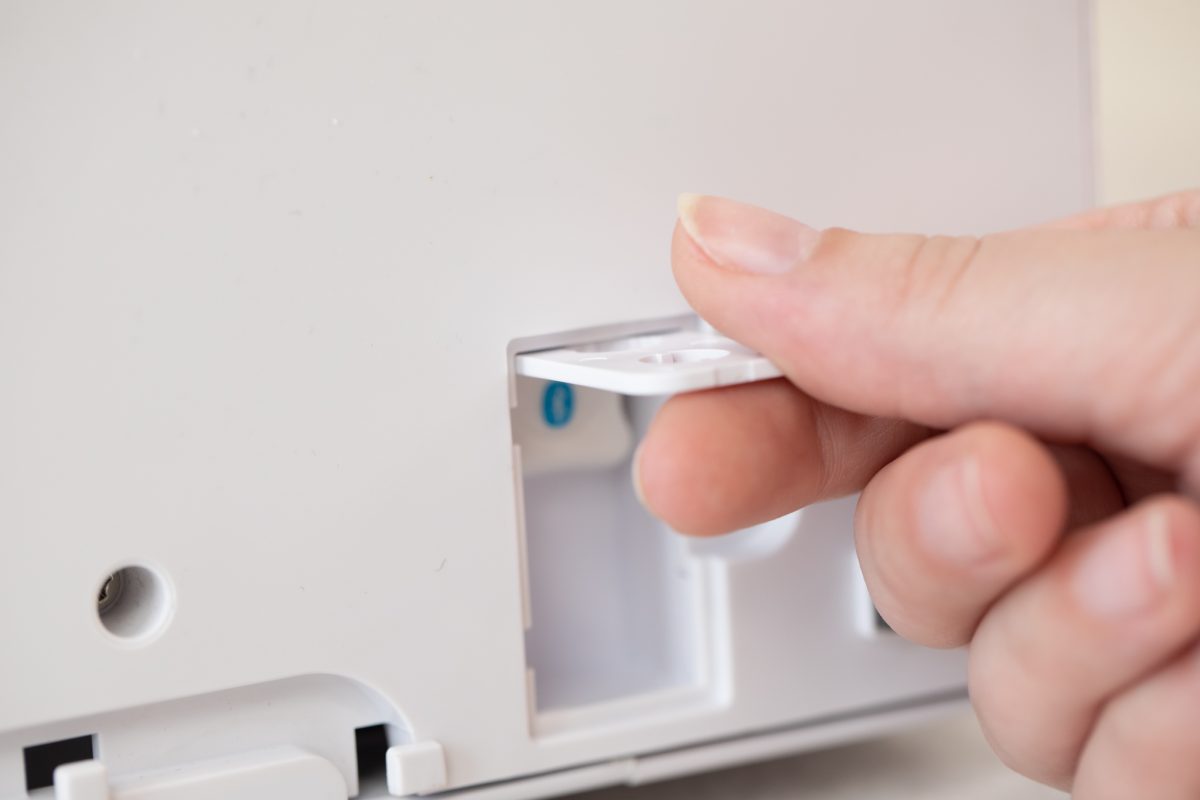
Something you might not know about your blade adjustment tool is that it can be used in other ways besides caring for your blade. The two prongs at the top of the tool are used to remove the Bluetooth adapter from the bottom of your machine. This is helpful if you need to troubleshoot your machine’s wireless connection or replace the adapter.
The Bluetooth adapter is located at the bottom of your machine. Use a screwdriver to remove the cover, and you’ll see the adapter plugged into a USB port. Position the tool’s prongs on both sides of the adapter tip and pull it out.

The blade adjustment tool comes in handy in a lot of situations. We hope you learned something new about this tool today!
Nasze Naturalne
September 3, 2025
Your authentic voice really shines through in everything you create and share
Naszenaturalne
September 2, 2025
Really love your style
Kelly Wayment
June 28, 2024
You can use it with vinyl as long as it is smooth and flat to allow the static charge to hold on to it. Rolled vinyl that wants to go back to its rolled shape will not necessarily work well, and it would need to be trimmed to fit the ES mat cutting area.
Kelly Wayment
June 28, 2024
Yes, you can use the heat pen while using the ES mat. 🙂
Yurii
March 2, 2024
Hello. May it be used with heat pen?
Thanks
Jerome
February 24, 2024
Hi, works this with the normal vinyl foils or only with printer papter etc?