Hey everyone! Are you getting spring fever like I am? Where the weather teases you with a beautiful warm day and then dumps snow a day later? Well that’s how it’s been for me this spring so far!
With my kids itching to play outside again, the chores around our house tend to get forgotten. As a solution, I created a fun magnetic chore chart for them to have that would motivate them to work hard so they could then play hard! Printable Magnet Paper makes doing chores a little more fun, (or a little less un-fun), especially when sweet treats are involved.
Let me show you how you can make your own interactive chore chart using the Printable Magnet Paper.
You Will Need:
- Silhouette CAMEO® (or Portrait)
- Personal Printer
- Design ID #42595 (or a design of your choice)
Step One: Edit Your Design
(1) Open Silhouette Studio with your page settings set at 8.5 in. x 11 in.
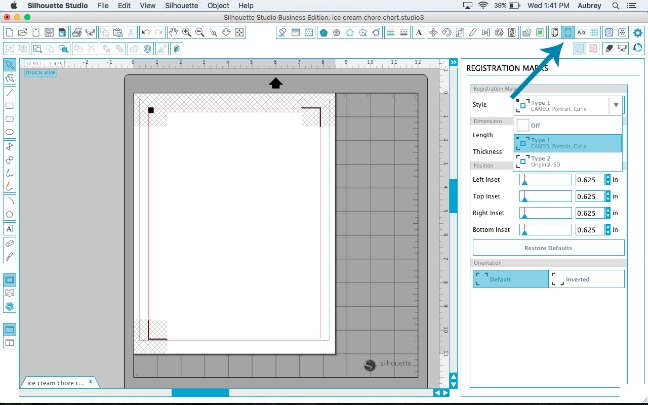
(2) Add registration marks.
NOTE: I like to add my registration marks before opening up my design because then I know what space I have to work with!
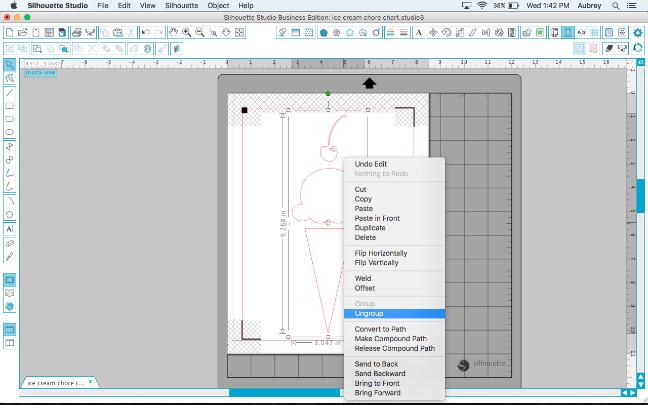
(3) Open up your ice cream design (Design ID #42595)
(4) Right click on the design and select “Ungroup” so that we can work with each piece individually.
Step Two: Color Your Shapes
(1) Click the paint bucket icon and select your favorite color to fill the shapes.
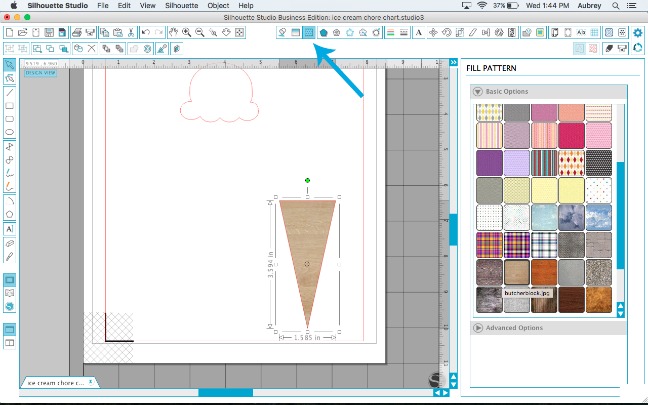
(2) Add a pattern to the cone by clicking the dotted icon (Fill Pattern).
(3) Select a pattern.
I selected the butcher block pattern. I thought this one most resembled a cone!
I don’t know about you, but I’m pretty sure no one likes a one-scoop sundae, so we are going to add more scoops by
(1) Clicking on the ice cream scoop shape.
(2) Selecting “Duplicate.”
You can add as many scoops as you want for however many chores you’d like to be on the chart.

Now you can add color and fill patterns to your scoops to make them bright and tasty-looking!
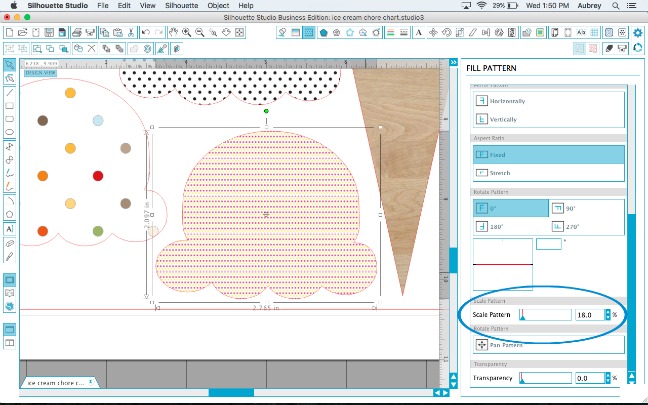
For one of my scoops I chose a yellow and pink dotted pattern. However, the dots were too big for my taste so to change it in your Fill Patterns menu
(1) Click on “Advanced Options > Scale Pattern.”
(2) Play around with the amount.
The Scale Patter feature will shrink or enlarge those dots to whatever size you prefer. It’s like magic in my eyes.
Step Three: Add Text
To add your chores:
(1) Click on the text icon on the left-hand side. You can choose whatever font you like and size it to fit your cone.
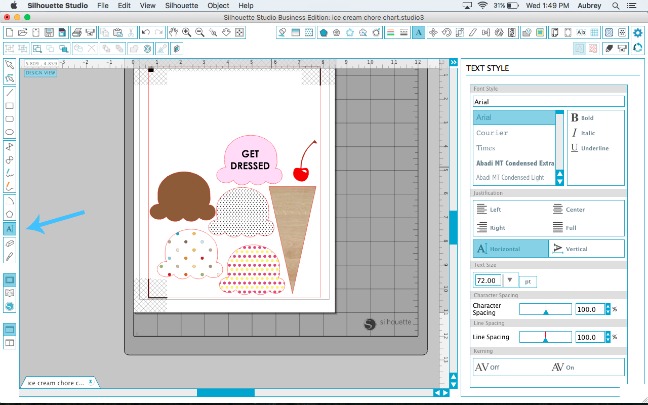
(2) Continue for the rest of the scoops.
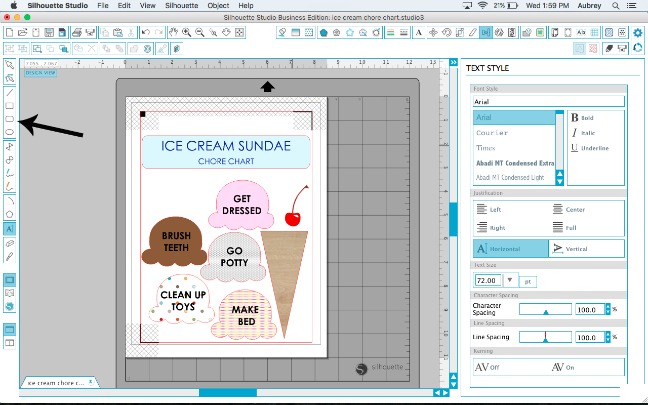
To make the Chore Chart title:
(1) Draw with the Rounded Rectangle tool to create your title box.
(2) Add text to the shape in the same way we added the chores.
Step Four: Print & Cut
Once everything looks beautiful, you’ll need to print your design.
(1) Place your Printable Magnet Paper into your printer so the ink prints on the white glossy side (this will depend on the kind of printer you have, so make sure you check!).
(2) Adjust your personal print settings.
(3) Print your design with the registration marks.
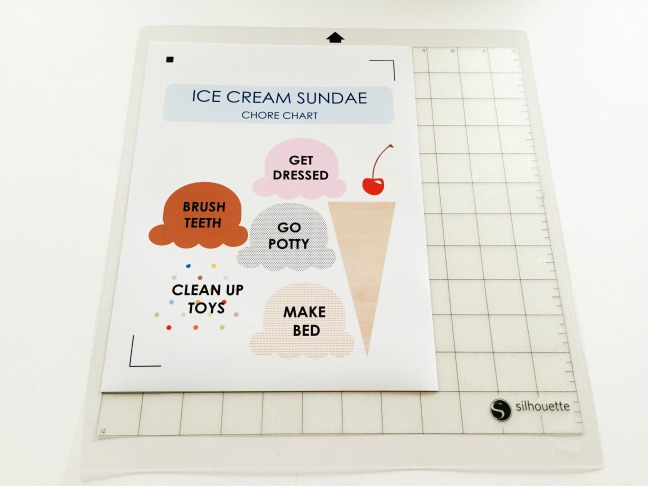
To cut out your newly printed design:
(1) Place your printed magnet paper onto your cutting mat.
(2) Make sure you line up everything as it shows on your screen.
(3) Load your mat into your machine.
In the Cut Settings panel, you will see all your cut lines show up on your design. Anything with a dark red line will be cut.

As you can see, our text will be cut and we do NOT want that!
To avoid cutting our text:
(1) Select your text by holding down your Shift key while clicking on each text piece.
(2) Select “No Cut” in the Cut Settings panel.
Now we should be left with just the outlined shapes being cut.
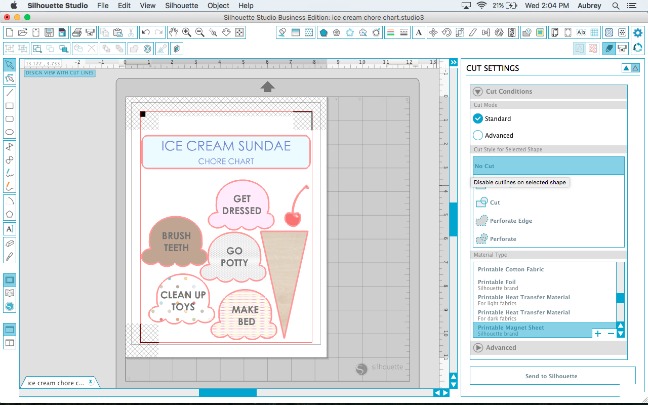
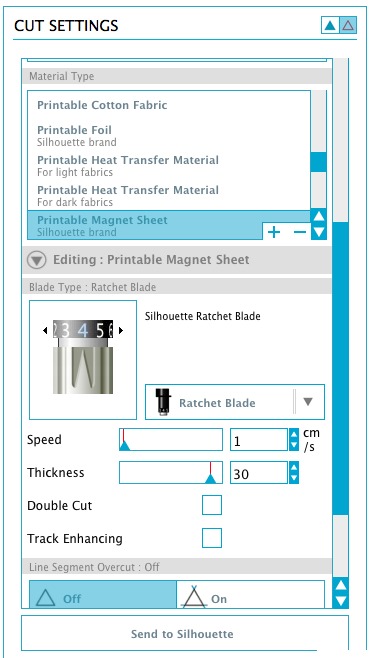
Now under Material Type:
(1) Select “Printable Magnet Sheet.”
(2) Change your blade to be at a 4
(3) Place it back into your machine.
(4) Click “Send to Silhouette”
Your machine will read the registration marks to know exactly where to cut.
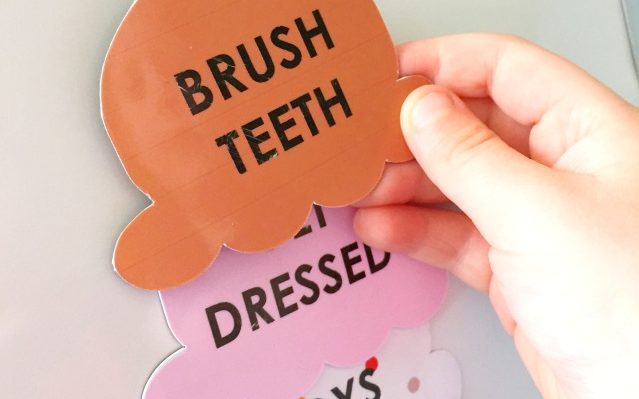
Once your magnetic sheet is cut, you can pull the pieces out and place them on your magnet board. This material is wonderful because it’s thin enough to cut, but has a good magnetic backing that sticks right to your magnet board or fridge.
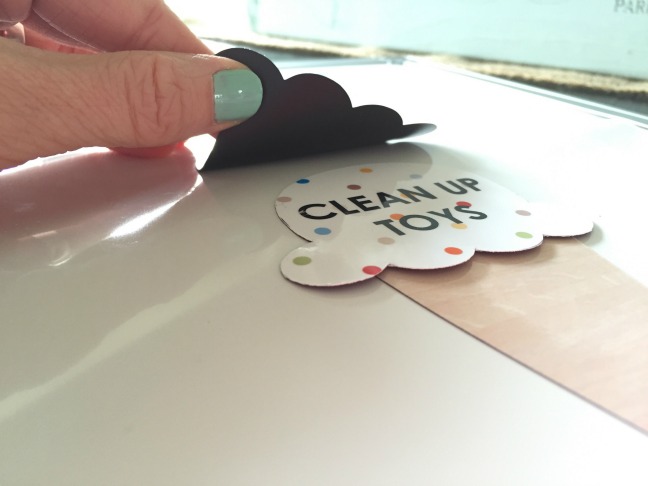
Your child will have so much fun making a tall ice cream sundae as they complete their chores. Once they’re done, they can add the cherry on top and celebrate!

Nasze Naturalne
September 3, 2025
Your authentic voice really shines through in everything you create and share
Naszenaturalne
September 2, 2025
Really love your style
Kelly Wayment
June 28, 2024
You can use it with vinyl as long as it is smooth and flat to allow the static charge to hold on to it. Rolled vinyl that wants to go back to its rolled shape will not necessarily work well, and it would need to be trimmed to fit the ES mat cutting area.
Kelly Wayment
June 28, 2024
Yes, you can use the heat pen while using the ES mat. 🙂
Yurii
March 2, 2024
Hello. May it be used with heat pen?
Thanks
Jerome
February 24, 2024
Hi, works this with the normal vinyl foils or only with printer papter etc?