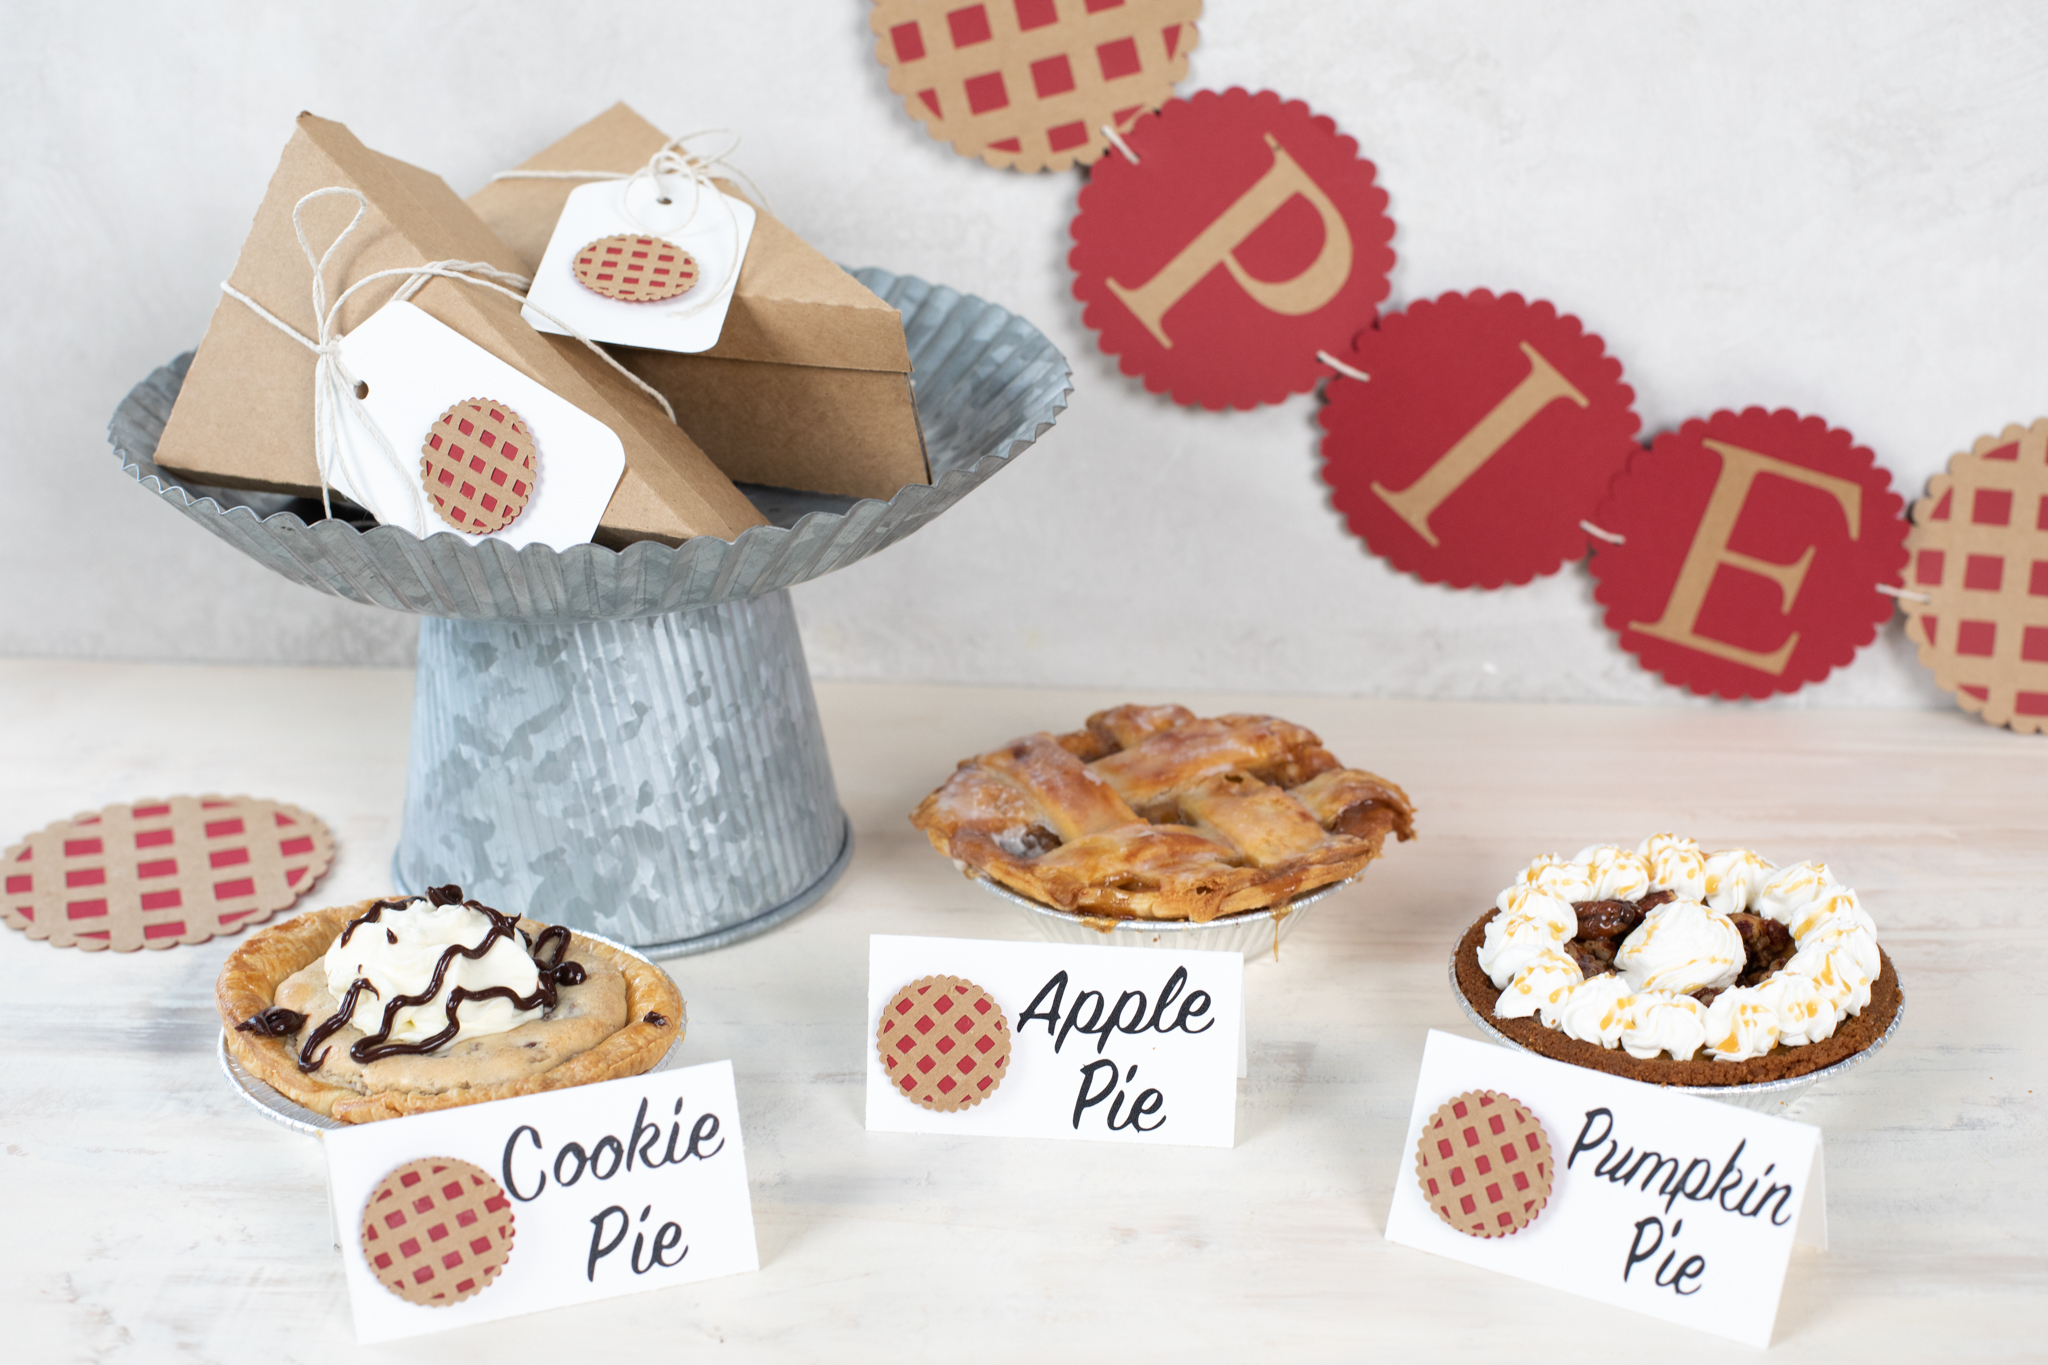
Nothing brightens someone’s day like a sweet, homemade present. This customizable pie slice box is the perfect way to gift a loved one just the right amount of pie. Create a couple boxes for a thoughtful way to bring leftovers to friends and family, or make enough for an entire bake sale—there are so many possibilities!
The box itself is fairly simple, both in how it looks and how you make it. But the great thing is that you can dress it up with homemade tags and designs that fit your style and flavor! We’re going to use a simple pie design and other craft supplies we have on hand to make these boxes absolutely adorable. Let’s get started!
Supply List
- Silhouette Cameo® 4
- Cameo Cutting Mat
- Cardstock—we used two 8.5 x 11 in. brown sheets for the box and 8.5 x 11 in. sheets in brown, red, and white for the tag
- Invisible tape
- Tacky glue
- Raised glue tabs
- Twine
- Design ID #382792 by Silhouette
- Design ID #51848 by Silhouette
- Design ID #20960 by Sophie Gallo
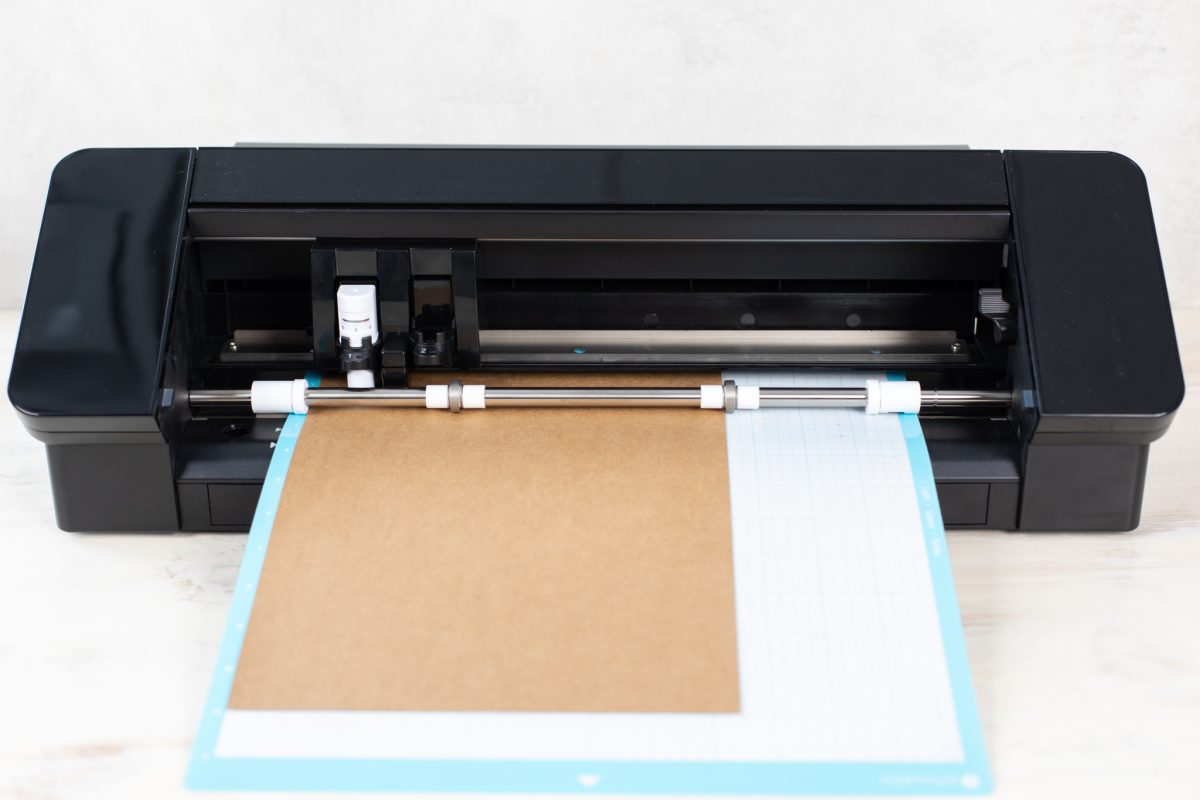
Step One: Set Up File
We’re going to start by creating the main box for our pie slice. Begin by opening Design ID #51848 in Silhouette Studio® and ungroup all of the pieces by right-clicking the design and selecting Ungroup. This file includes the box base, the lid, and a couple of optional labels. Because we’re creating our own gift tag, go ahead and delete the extra embellishments.
In the Page Setup Panel, use the following document settings. We’re using a Cameo 4 and letter-sized cardstock, but use the settings that work for your machine and material.
- Machine: Cameo
- Cutting Mat: Cameo
- Media Size: Letter

We’re going to start by creating the main box, so click and drag the lid to the holding area to the side of the virtual cutting mat. We don’t need to alter the file in any way, so we’re ready to start cutting out the box!
Note: The final box is 6 in. long and about 3.5 in. wide at the base. It’s possible to resize the box to fit a different sized pie slice, but it’s difficult to tell how large the final box will be because of the extra tabs and flaps. If you decide to scale the file up or down, click the lock icon to keep the aspect ratio the same and be prepared to experiment with the sizing.

Step Two: Cut Pie Box Base
Now we’re ready to cut out our pie box. Place your cardstock on the cutting mat so it matches the virtual media. The paper should line up with the top-right corner of the mat. Then, load the cutting mat into your machine.
In the Send Panel, confirm that your cut settings match your material and blade. Select “Cardstock, Plain” for the material. You might find it helpful to perform a test cut to make sure that the default settings for cardstock will cut your paper cleanly. If your test cut doesn’t cut cleanly or all the way through, adjust the settings accordingly.
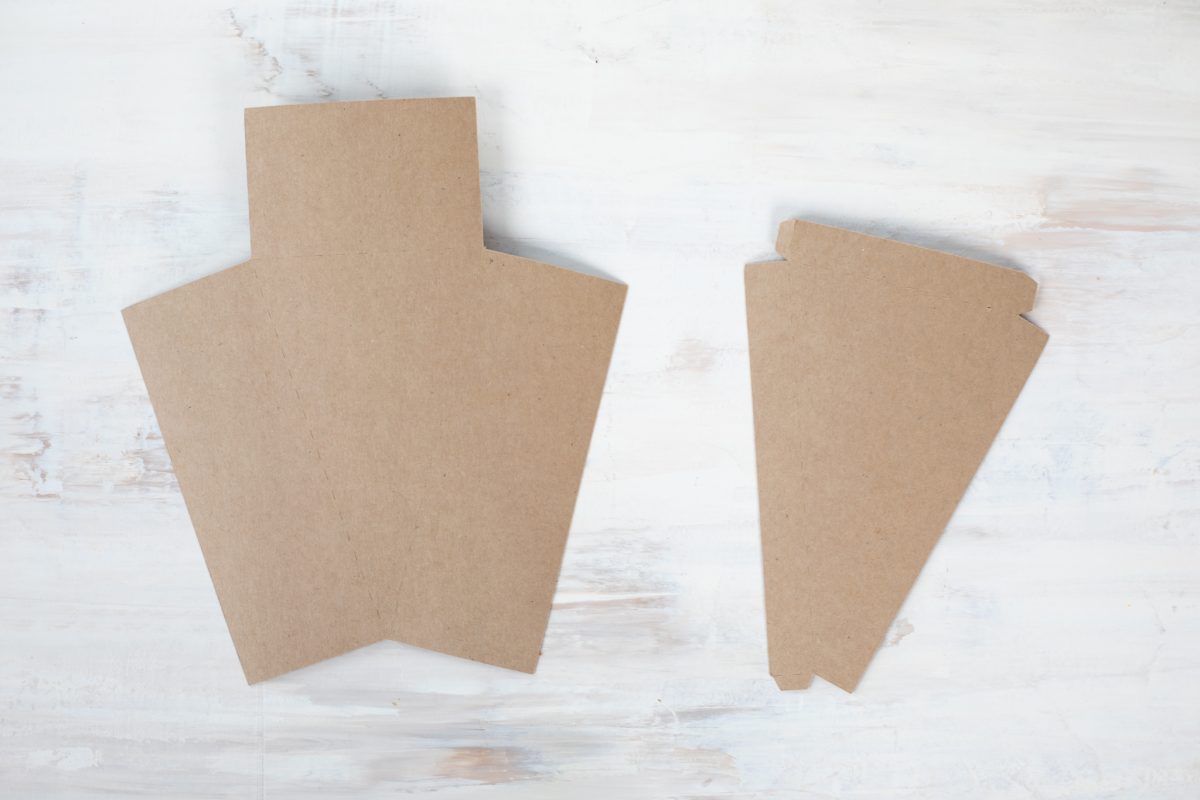
With that, go ahead and click the Send button to send the cut job to your machine. When it’s finished, remove the pie box from the cutting mat. You’ll notice that your cutting machine cut a clean edge around this piece and some dashed lines to form the triangle in the middle. These perforated lines will make it easier to assemble the box. For now, set this piece aside while we create the lid.
Step Three: Cut Pie Box Lid
Our next step is to create the lid for our pie box. Back in Silhouette Studio®, move the base to the holding area and bring the lid piece onto the virtual cutting mat.

Now, return to the Send Panel. All of the cut settings should be the same as they were when we cut the box base. Select the Send button and wait for your machine to cut out the lid. Once the cut job is complete, remove the box lid from the cutting mat.
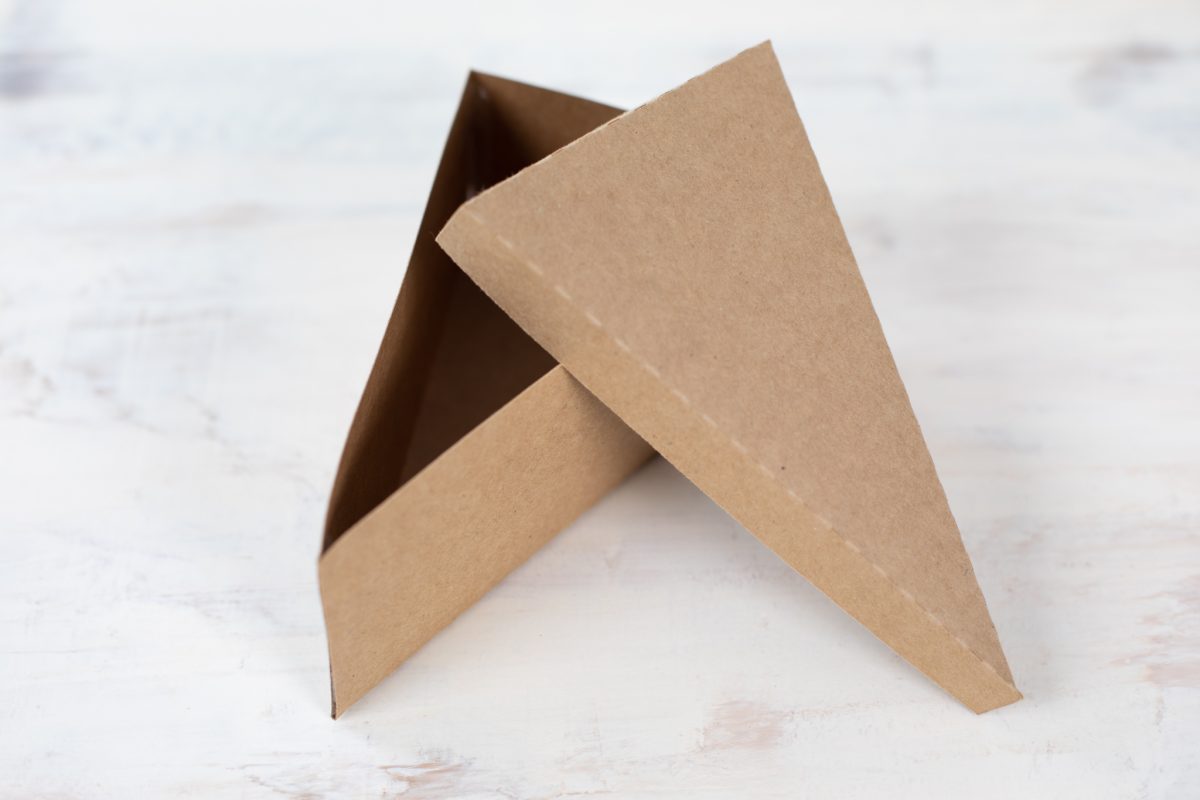
Step Four: Assemble Pie Box
We’re ready to put together our box! If you’ve ever folded a cardboard box or mailer, you know how simple it can be, and this pie box is no exception. Start by folding the bottom of the box along the perforated lines. Then, tape the three sides together from the inside. We used an invisible tape to secure the box.
For the lid, fold the perforated lines for the main lid and the sides. We used tacky glue to secure the flaps, but hot glue or double-sided tape would also work for the lid.
With that, our box is finished! If you’re looking for a quick and simple project, you can stop here. However, we’re going to create a cute tag to go along with our gift.
Step Five: Design and Cut Tag
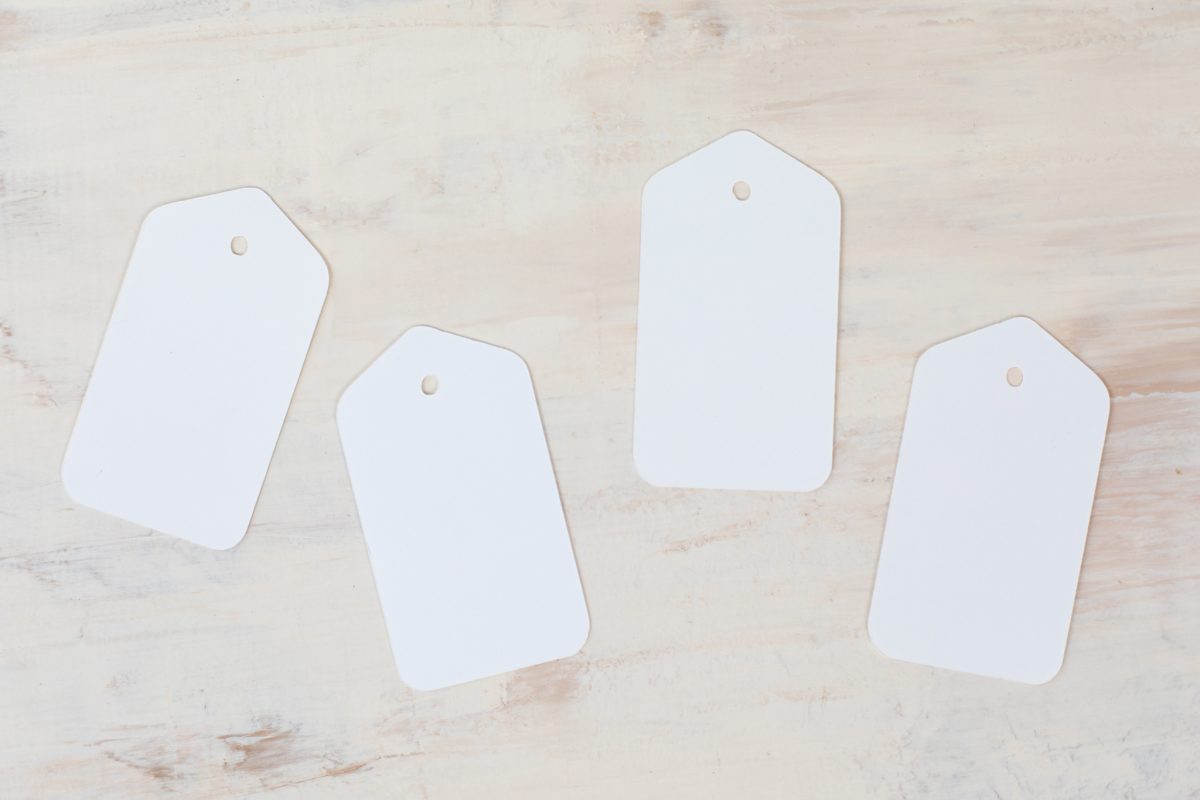
For our gift tag, we’re going to start by opening Design ID #20960 in our document. This file comes with five different tag designs, but we want to use the tag in the center. Ungroup all of the tags and delete the designs you won’t be using. You should be left with the rectangular tag with a triangle at the top.

Next, resize the tag to whatever size you’d like. We’re setting ours to about 1.9 x 3.5 in. Because there’s no folding involved, the exact size of your tag does not need to be exact. If you’re creating more than one box, feel free to duplicate this tag and fill up your page.

We’re ready to cut out this tag. Load a new sheet of cardstock onto your cutting mat; we’re using white. Then, go to the Send Panel, confirm that all of your cut settings are correct, and send the job to your machine. When it’s finished, unload the tag from the machine and make sure that the circle at the top is gone so you have a hole for your twine to go through later.
Step Six: Design and Cut Pie Decoration
The last element we need to cut out is our pie design. We think this lattice pie decoration is going to be a cute addition to our tag! Start by opening Design ID #382792 in Silhouette Studio®. The file comes with two pies, but like the tags, we’re only going to be using one. Ungroup the two pies and delete the one you don’t want.
You’ll notice that our pie is made up of two pieces: the filling, which is the solid shape, and the crust, the lattice shape on top. Make sure you have both pieces selected, then resize the pie so it will fit on your tag. Again, the exact size isn’t too important, but make sure that the pie is small enough to fit on the tag. We resized our pie to be about 1.3 in. around.
Let’s start by cutting out our pie filling layer. Temporarily move the crust piece to the holding area so you’re left with the solid pie shape. If you’re making more than one box, this is the time to duplicate your filling piece so you’ll have enough.

You know the drill by now! Place your filling-colored cardstock onto your cutting mat, and load the mat into your machine. Confirm that your cut settings are correct in the Send Panel, then send the pie fillings to your machine. Remove the pie filling pieces from the cutting mat.
Now, move the filling piece off of the virtual cutting mat in Silhouette Studio® and drag the crust piece back on. Follow the steps above to cut out your pie crusts, but use the cardstock color you want for the top layer. We’re using the same cardstock we used for the boxes.

Step Seven: Assemble Gift Tags
The last step for our project is to put together our gift tags! Let’s start by assembling our pies. Apply a thin layer of tacky glue onto the crust of your pie and line it up with the filling. Allow the glue to dry completely.
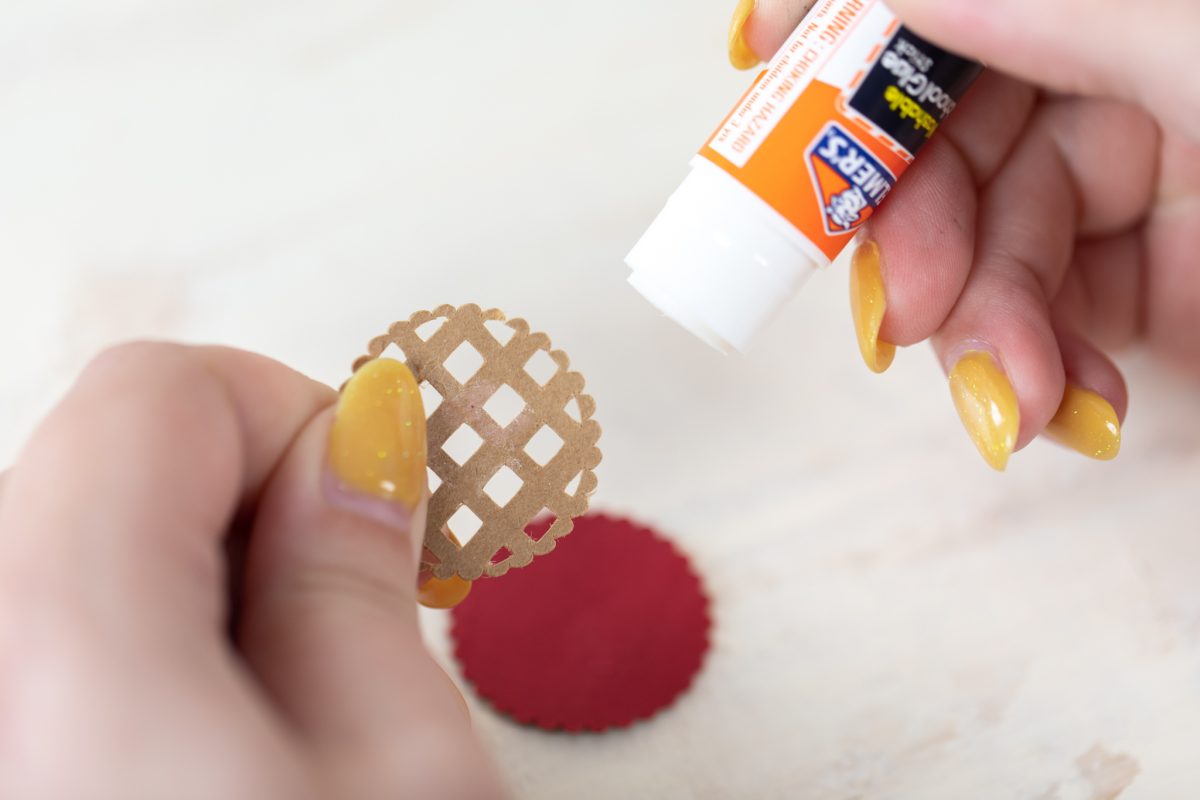
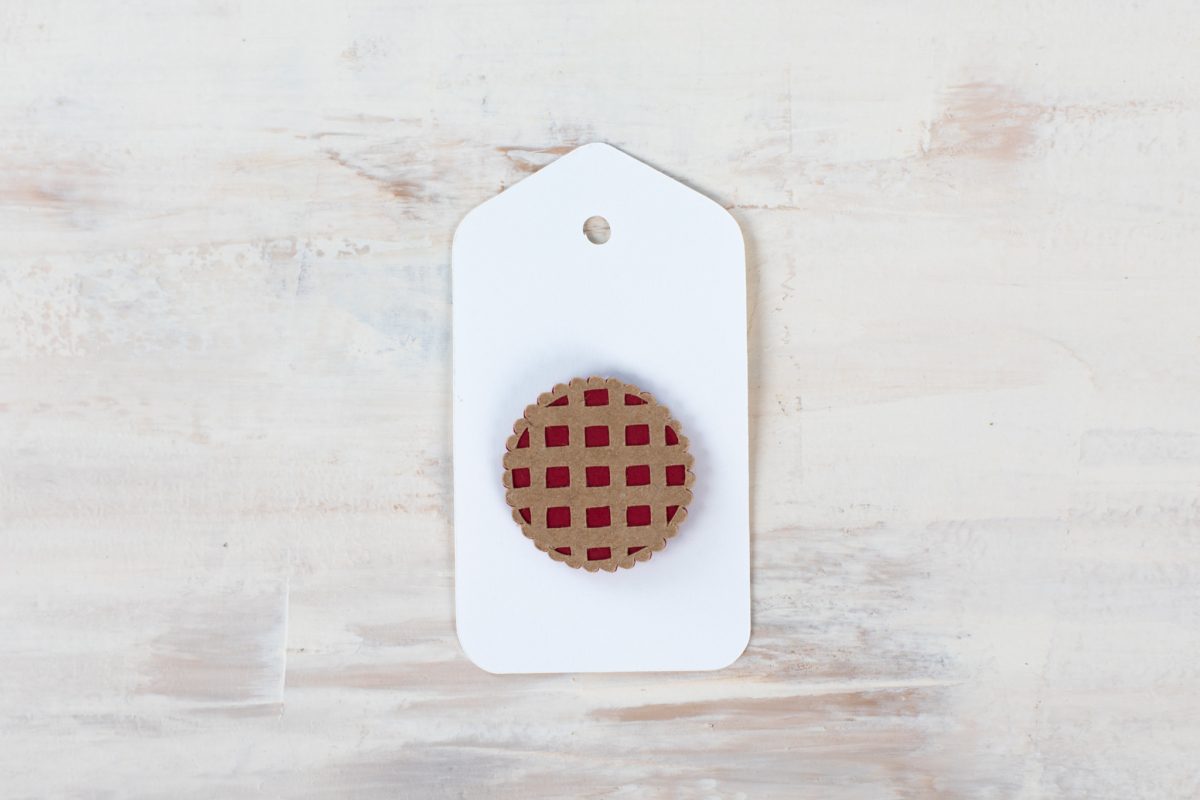
Finally, we used raised glue tabs to add our pie to the tag. This adds a little dimension to the tag that we really like, but you can also use tacky glue here if you’d like.
With that, our pie box is ready to fill and package! We put a slice of our favorite pie into the box and wrapped it with twine. Add your gift tag before tying the twine into a bow.

We hope you enjoyed this deliciously fun project! What pie flavors are you going to gift to your loved ones this autumn? Be sure to share your finished projects with us on social media, and check back here next week for another project tutorial.
 Free Class - Father's Day Apron Set
  Free Class - Custom Graduation Tumbler