In today’s papercraft project, I’ll show you how to create a layered card with hand-painted elements, and then use a PixScan™ mat to cut exactly where you need to! While you can cut this design with colored cardstock, and you can take more time to cut on a regular cutting mat, the way I will show you is a great use of the PixScan™ mat!
I will use the Cameo PixScan™ mat, but you should choose the correct PixScan™ mat for the machine you are using.
Supplies:
- Silhouette Cameo® or Portrait®
- Silhouette PixScan™ cutting mat (choose Cameo® version or Portrait® version for your machine)
- Silhouette Studio® Software
- Watercolor paper – 90 lb/190 gsm
- Watercolor paint and brush
- Adhesive
- 5-in. x 7-in. card base
- Design ID #440711 “Layered Peonies Cluster” by Tanya Batrak
Step One: Create Design
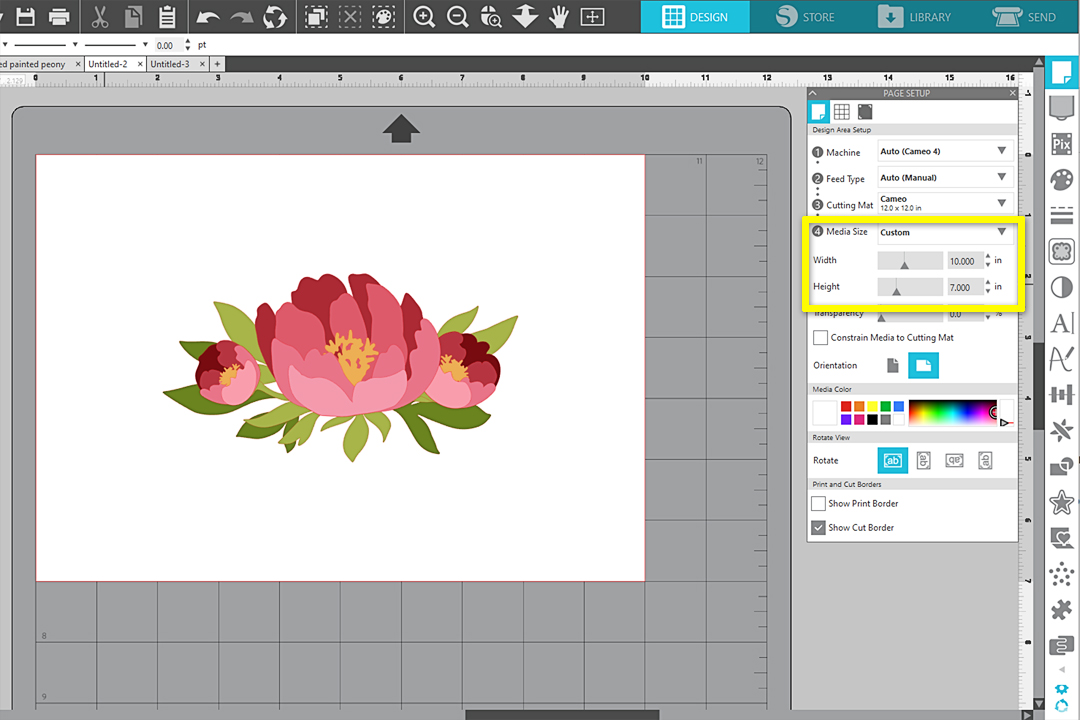
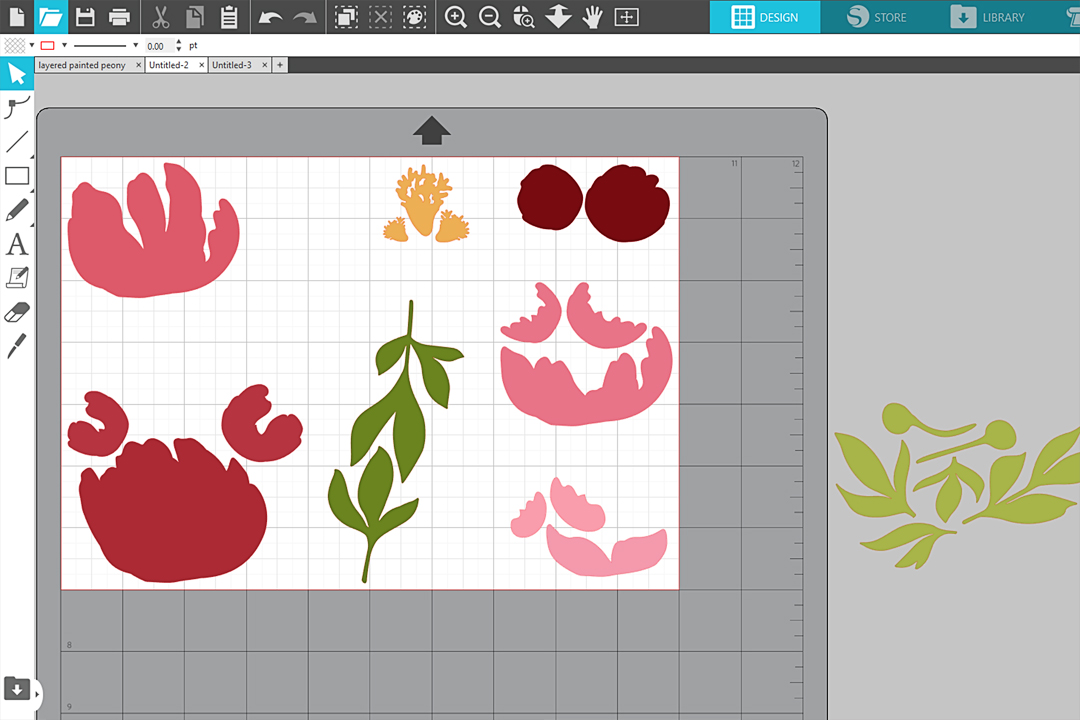
In Silhouette Studio®, open the Layered Peonies Cluster design after purchasing.
In the Page Setup Panel, set your Media Size to match the size of the watercolor paper you are using. If necessary, trim down your watercolor paper so it does not exceed the cuttable area of your PixScan™ mat.
Select and Ungroup all of the pieces so you can move them freely around the page. You will need to select and Ungroup several times for this design.
Click the Select by Color icon, then choose the By Fill tab in the panel.
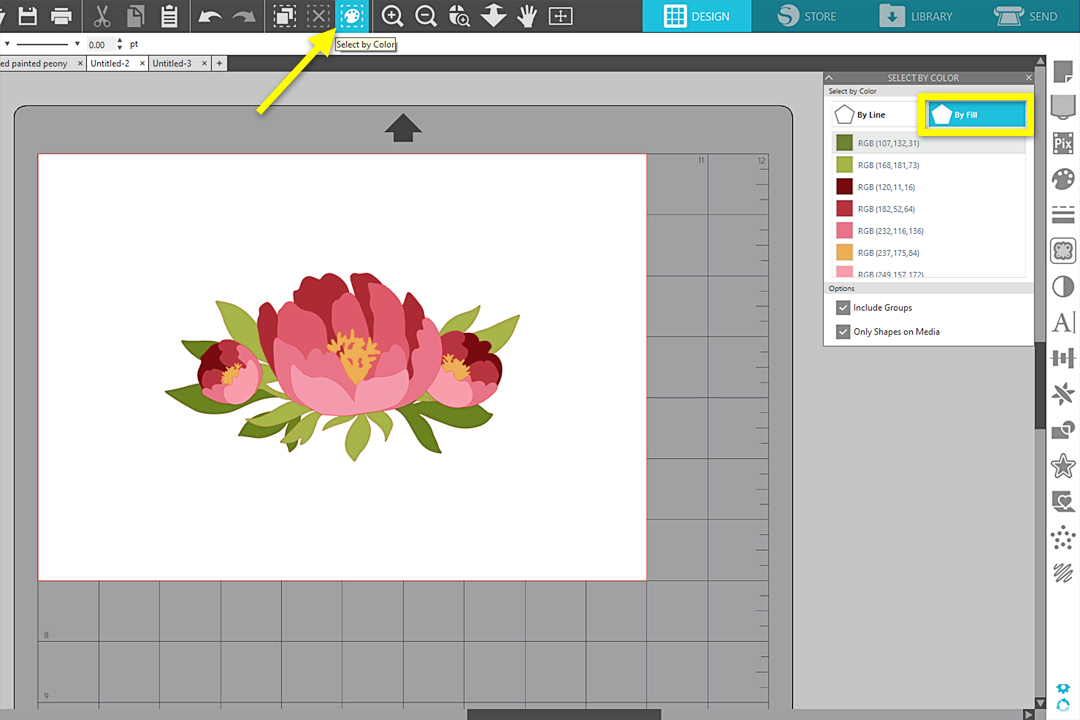
Click a color box to select the pieces, one color at a time, and drag to reposition them in color groupings. In this design, some of the colors look very similar so you can choose to put close colors together. However, you do want to differentiate between colors that will be stacked immediately on top of one another.
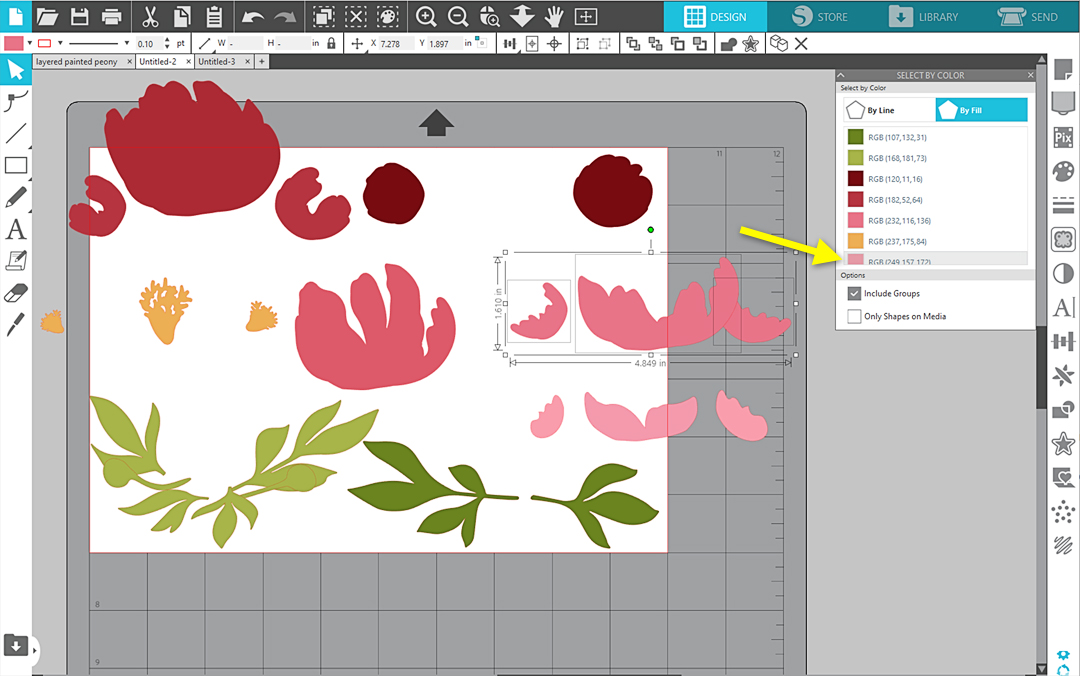
Continue to reposition the shapes so the pieces in each color group are relatively close together. You may need to use more than one sheet of watercolor paper to cut all the pieces. Turn on the Grid lines [press G on your keyboard] to help with positioning.
Step Two: Paint Watercolor Paper
Use the on-screen page as a guide to paint blocks of watercolor onto your watercolor paper. This is where having the software grid lines turned on is especially helpful. The color blocks do not have to be precise.
Tip: To assist in painting color blocks of the correct size, you may want to draw light pencil lines on your paper as guide marks. Or place your paper on an old cutting mat that’s ready to discard and use the mat’s grid lines to assist in where to paint, while also holding the paper in place.
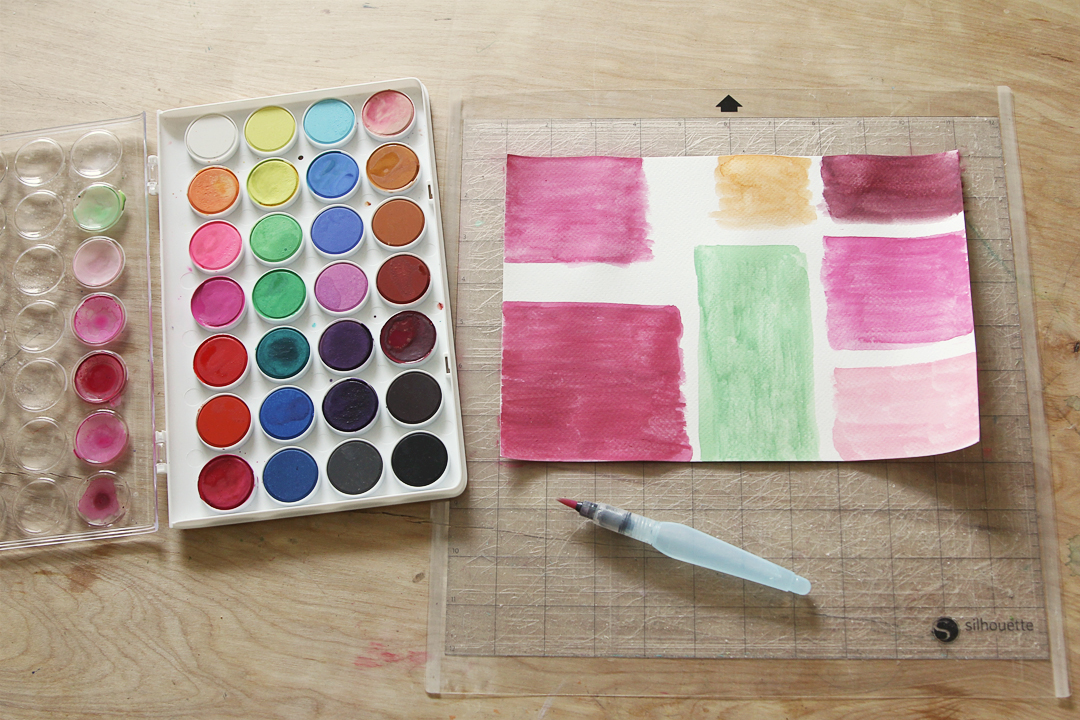
Let dry completely. You may need to iron the paper or rub it along a table edge to flatten the paper once dry.
Step Three: Scan Watercolor Paper
Place the painted paper onto your PixScan™ mat. The placement can be anywhere within the marked cut border.
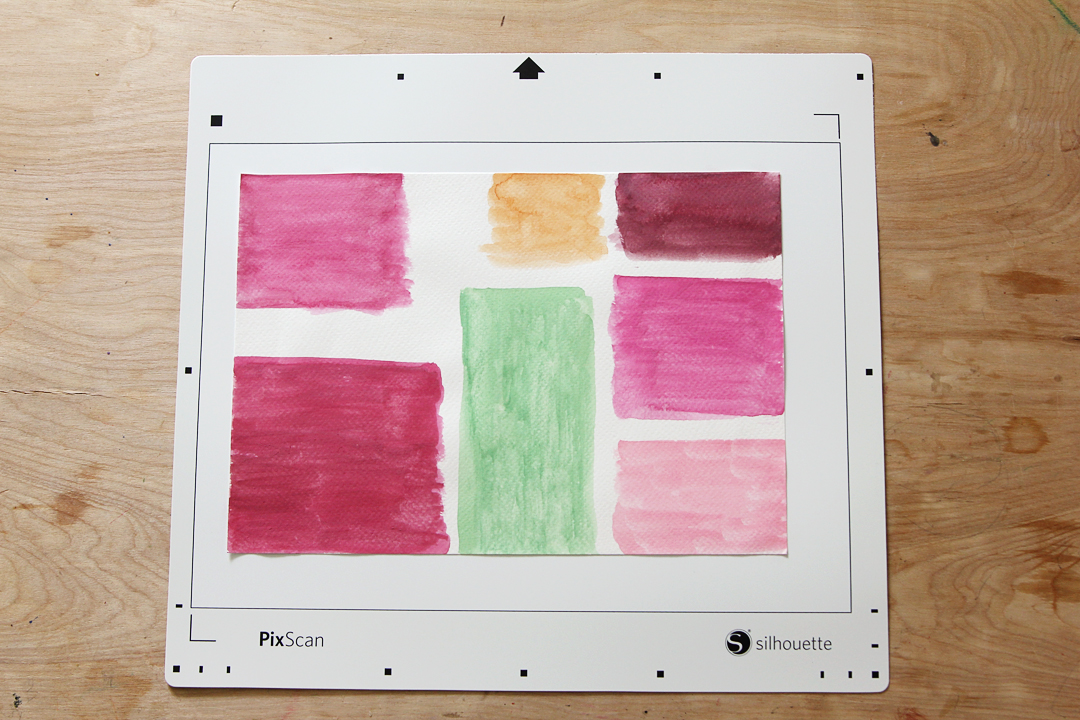
Take a photo of the PixScan™ mat with your smartphone, or place the mat and painted paper onto your flatbed scanner.
In Silhouette Studio®, click to open the PixScan™ Panel.
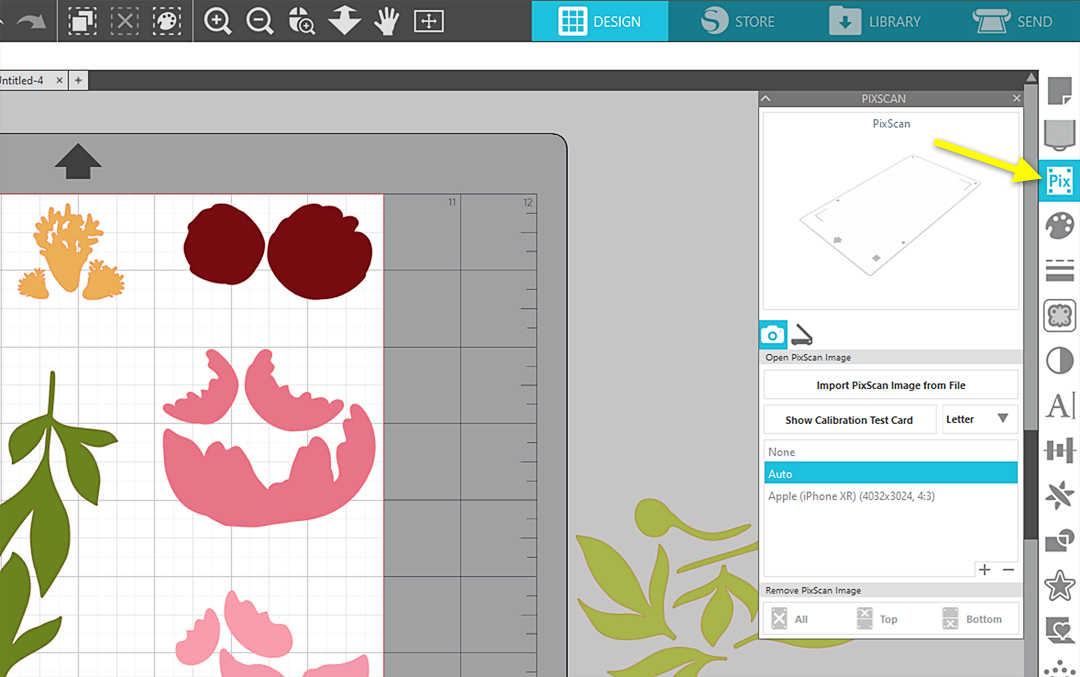
To use your scanner, click the icon on the panel to Import from Scanner.
Note: For instructions using the imported photo method, please see the links to helpful videos at the end of this post.
Select your connected scanner from the list, and click Import PixScan Image from Scanner.
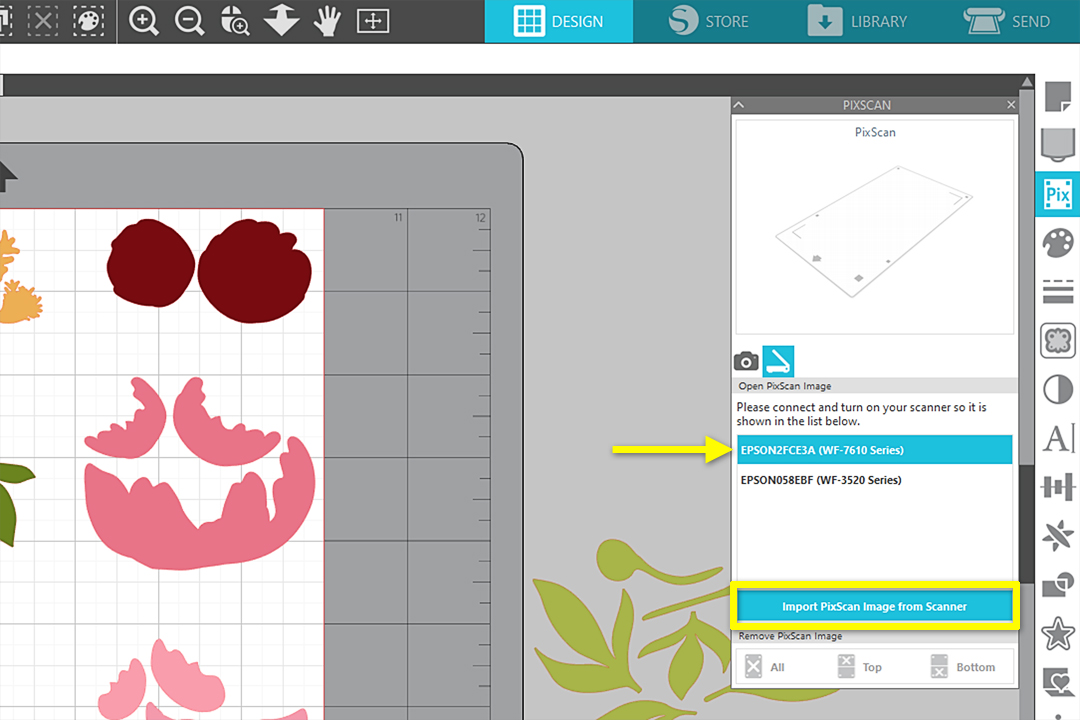
Follow any on-screen instructions that may ask for additional information or request a second pass if your scanner doesn’t fit the entire mat at once.
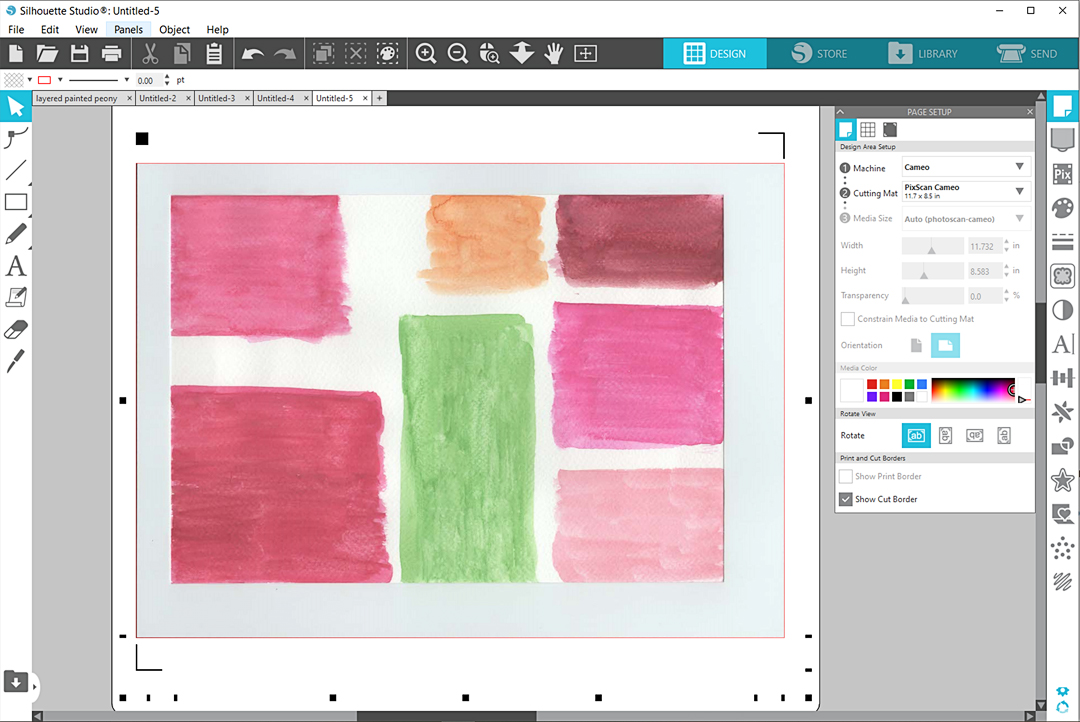
Once the scan is successful, a new document will open with an image of your painted paper on the PixScan™ mat. (Turn off the Grid Lines if they are still showing.)
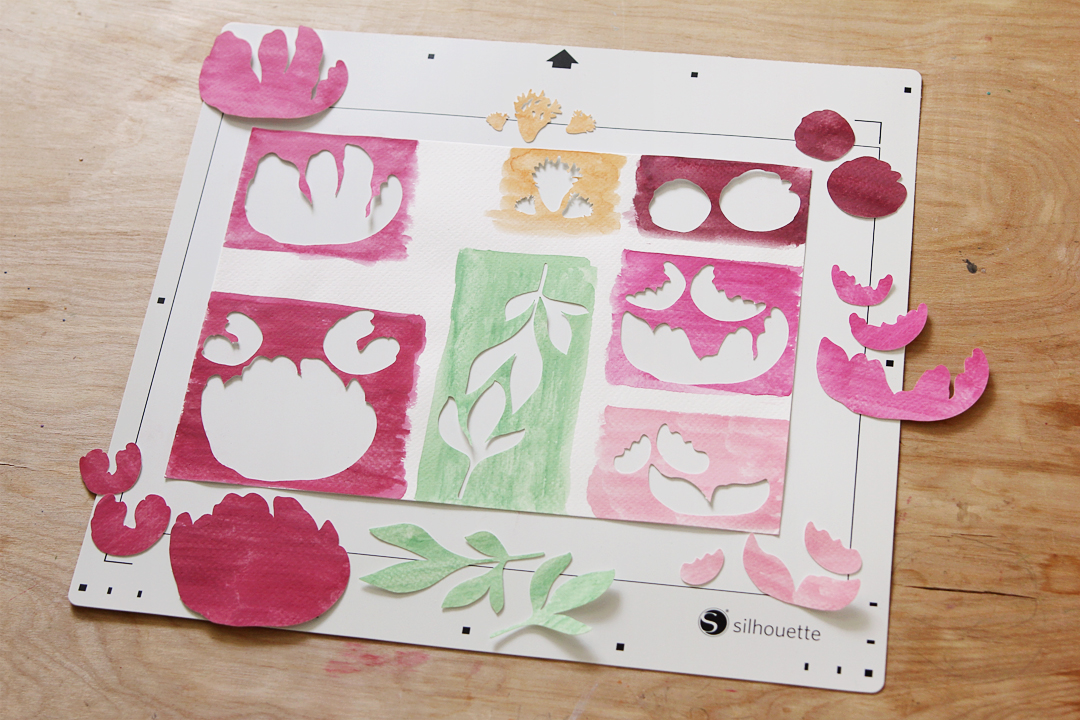
Step Four: Cut Designs
In order to cut the pieces from the PixScan™ document, go back to the document with all the peony layers, Select them all, and Copy [Ctrl/Cmd C].
Come back to the PixScan™ document and Paste [Ctrl/Cmd V] all those elements.
To see the pieces better, Select them all and choose a blank fill color, a black line color, and set the line thickness to 0.0. This can all be done in the Quick Access Toolbar.
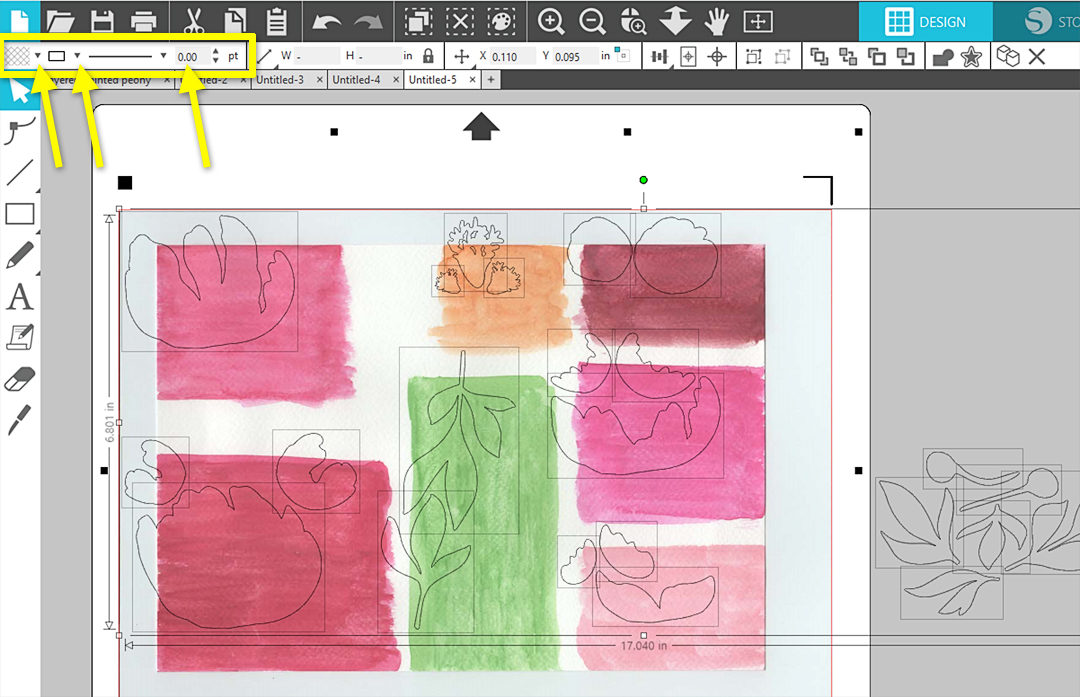
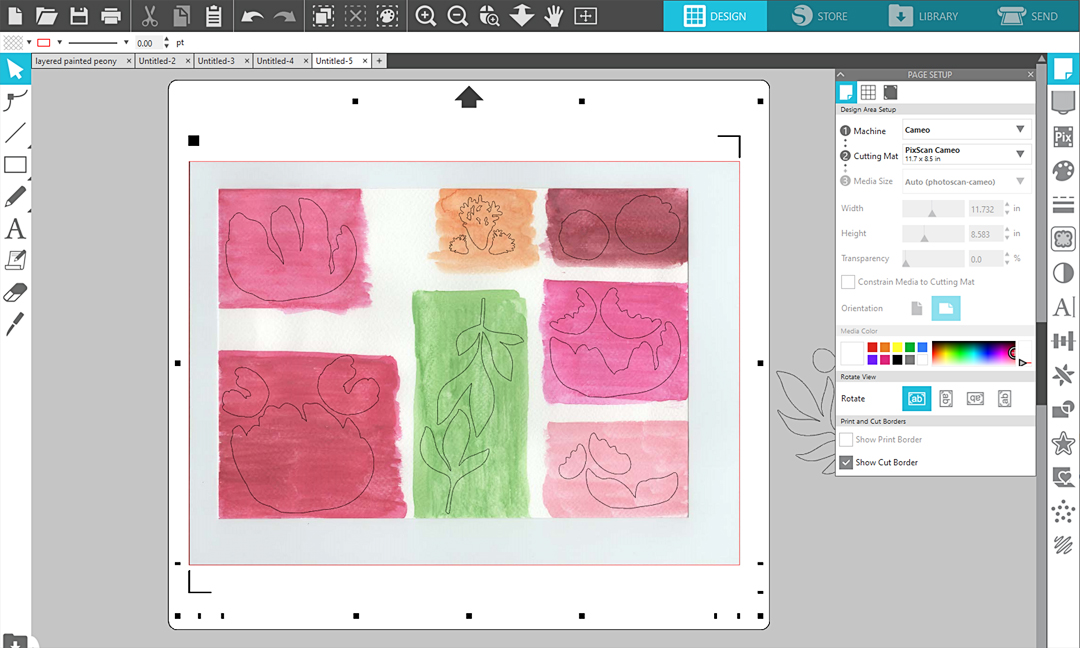
Click off to the side to deselect, then drag the shapes into position onto their correct color blocks. Make sure none of your cut lines go off the edge of the paper.
Load your PixScan™ mat with its watercolor paper into your Silhouette cutting machine.
Go to the Send Panel and choose appropriate settings for your watercolor paper. My 90 lb. watercolor paper works well with my typical cardstock settings:
- Blade Depth = 4
- Force = 30
- Speed = 5
Note: You should perform a practice cut and adjust the settings based on your own watercolor paper and blade condition. You may want to do this with the same type of paper on a regular mat, so you don’t disturb the scanned PixScan™ media.

Click SEND to cut when ready. Your machine will read the mat’s registration marks and then cut out the shapes exactly where you placed them on your painted page!
If you need to cut more shapes from a second page, repeat the entire process of placing the painted page onto your PixScan™ mat, import via scanner or smartphone photo, and placing the appropriate shapes on the color block before sending to cut.
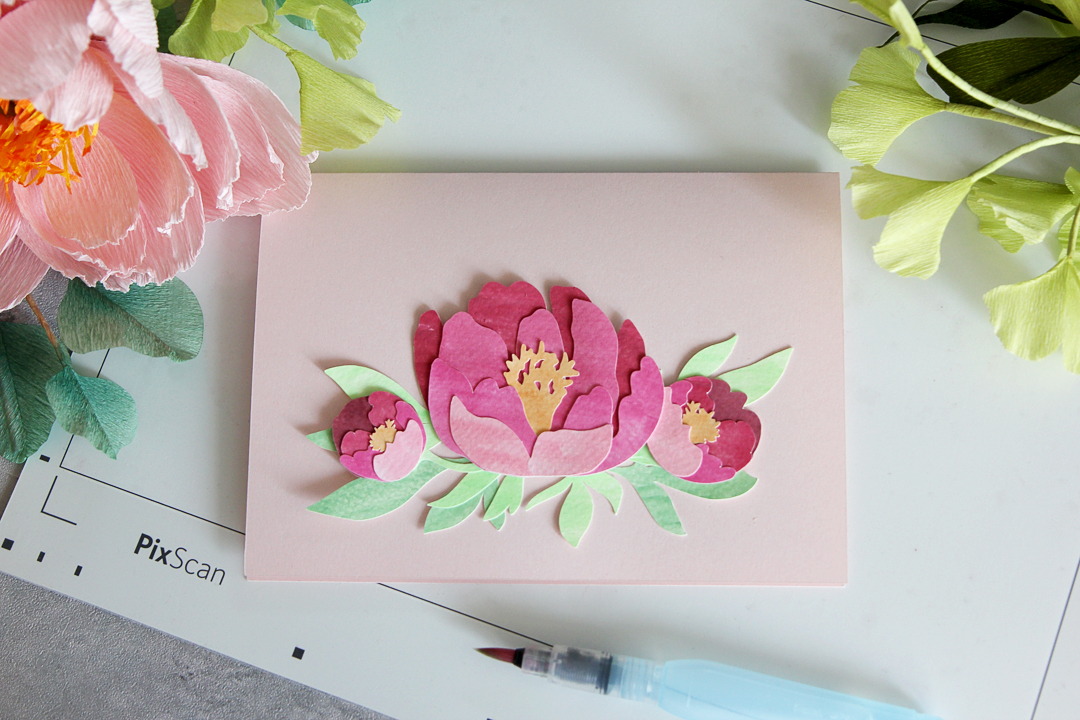
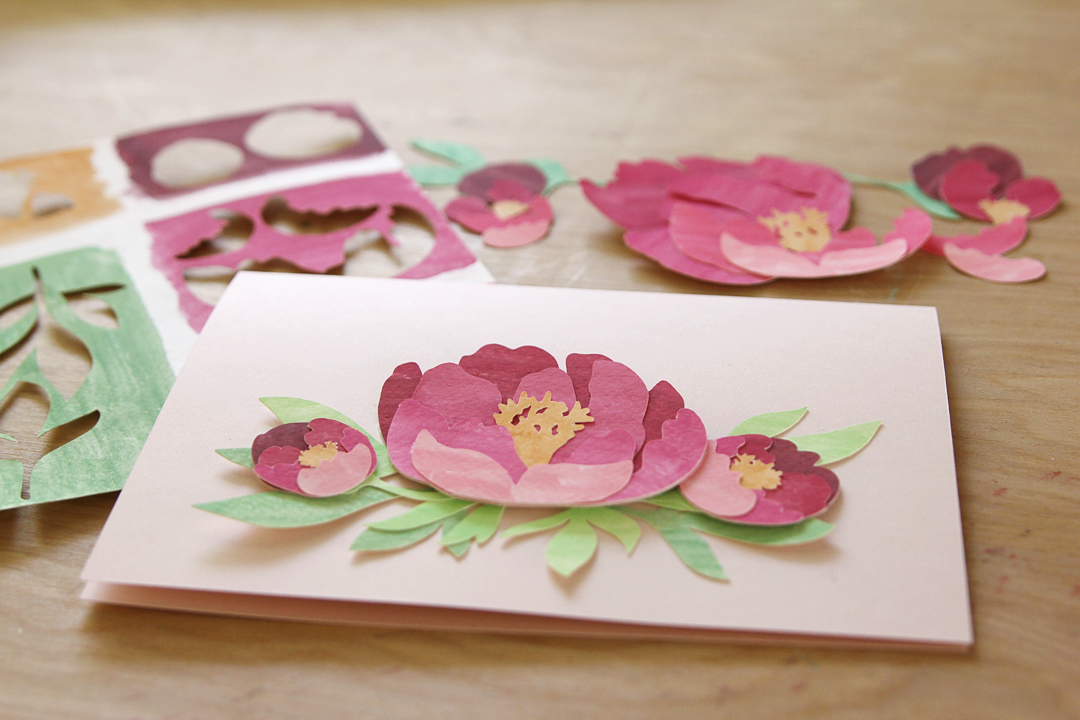
Step Five: Assemble Card
Place all of the layers together in a “dry fit” before adding glue.
Use liquid glue or tape runner adhesive to glue the layers into place.
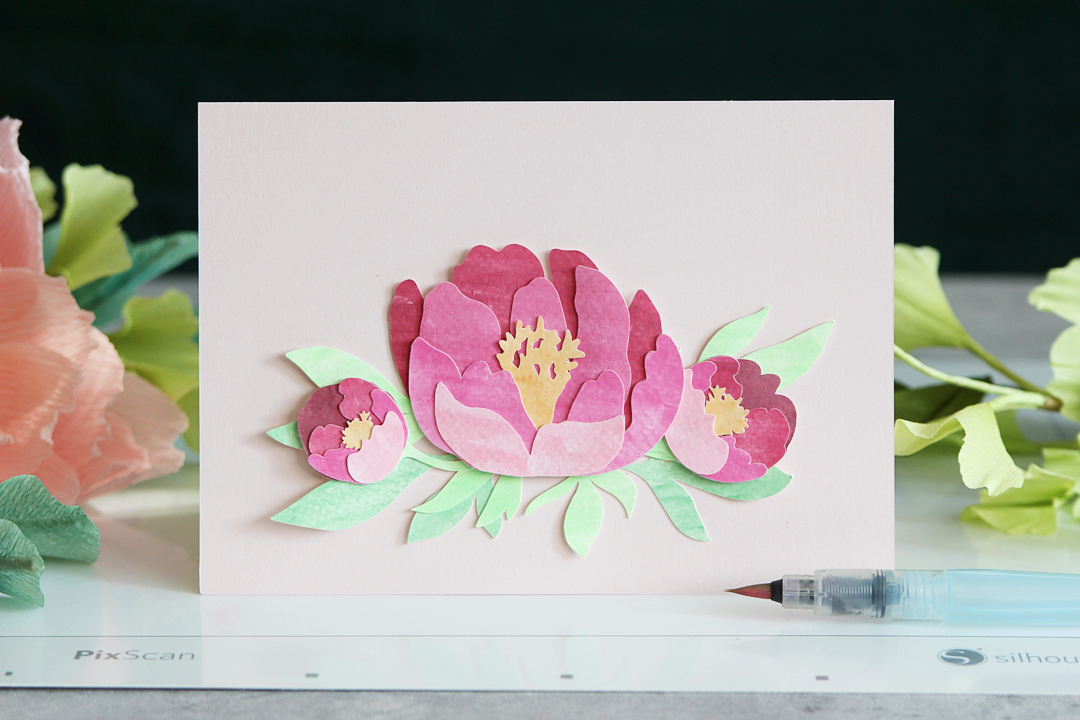
Attach the finished peonies onto a 5-in. x 7-in. card base and give it away to your favorite someone!
I hope you can see how using the PixScan™ mat can help you create unique cutouts for your paper projects!
To find out more about how to use the PixScan™ cutting mat, check out this short PixScan™ overview video, and our full class PixScan Like a Pro, on YouTube.
 Free Class - Father's Day Apron Set
  Free Class - Custom Graduation Tumbler