
When life hands you lemons, you make a paper lemonade stand! And invite your very best doll friends to enjoy! With this design, you will get all of the charm of a lemonade stand without having to sit out in the hot sun. So squeeze the day with this adorable 3D paper craft lemonade stand, which is perfect to add to your little one’s dollhouse.
Supplies Needed:
- Silhouette CAMEO® or Silhouette Portrait®
- Silhouette Studio®
- Silhouette Cutting Mat
- Silhouette Cutting Blade
- Silhouette Hook Tool
- Silhouette – Adhesive Cardstock
- Cardstock – Multiple Colors
- Adhesive
- Design ID #297113

Step One: Prepare the Design
1. Open the design (ID #297113) in Silhouette Studio®.
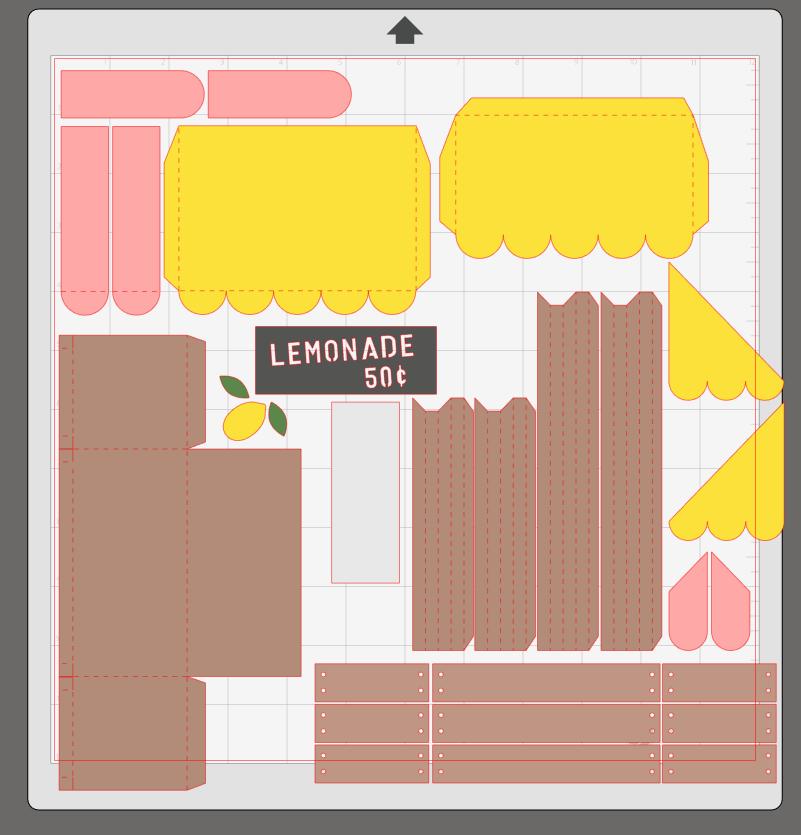
2. Then sort each piece by color, separating each piece according to the cardstock color you’re going to cut.
3. Send each sorted group to your machine to cut using the appropriate cut settings for each cardstock type and color.
Step Two: Assemble the Awning
Note: We cut our large pieces of awning out of regular cardstock and the detail striped pieces out of adhesive cardstock.
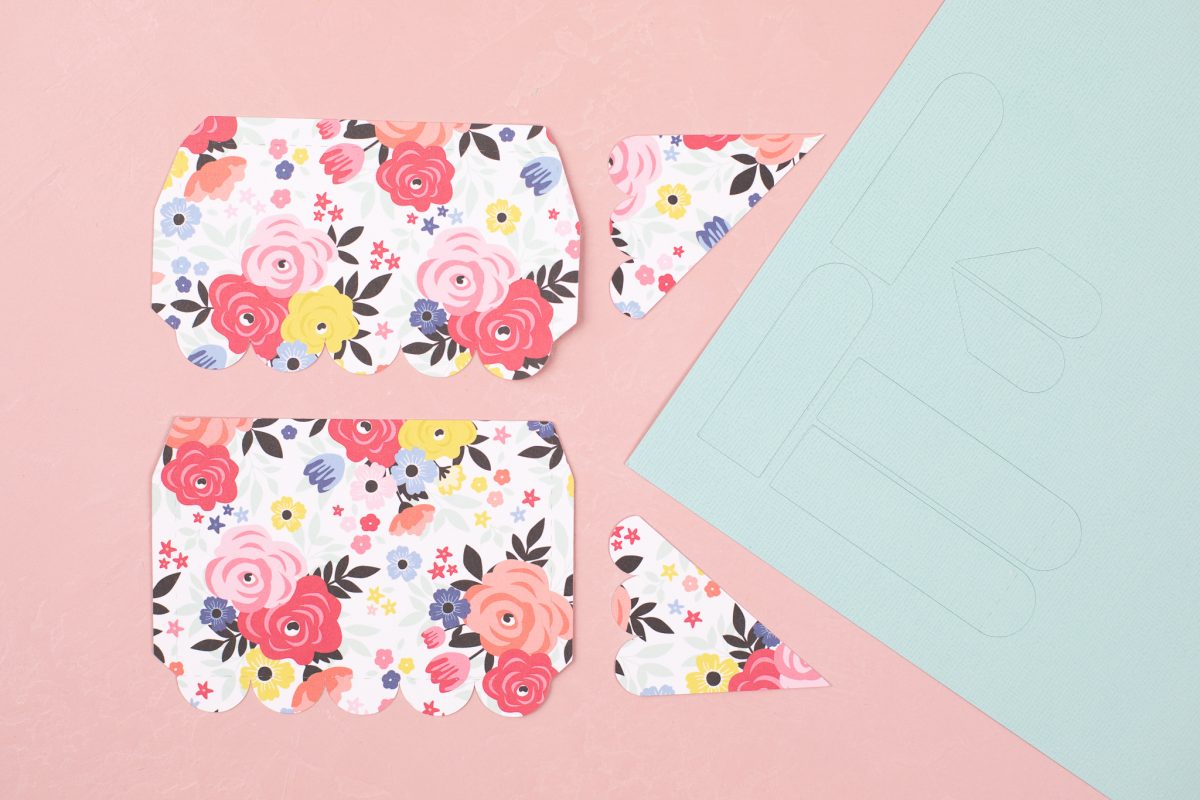
1. Peel away the adhesive cardstock from the backing.

2. Place those pieces on the large awning piece as shown below.

3. Now fold the perforated lines on the awning pieces.

4. Place adhesive on the tabs on either end of the folded awning and attach the back of the awning to the top and the small end pieces on either side.
Step Three: Cut and Fold the Stand
1. When the stand pieces are cut, sort them by size.

2. Fold the perforated lines on the pieces. The small rectangle pieces are the planks of the stand, so they will not be folded.

3. Once they pieces are folded, glue the tabs on the ends of the posts and the bottom of the stand.
Step Four: Attach the Awning
1. Place the post in the four corners, short posts up front. Tall posts in the back.
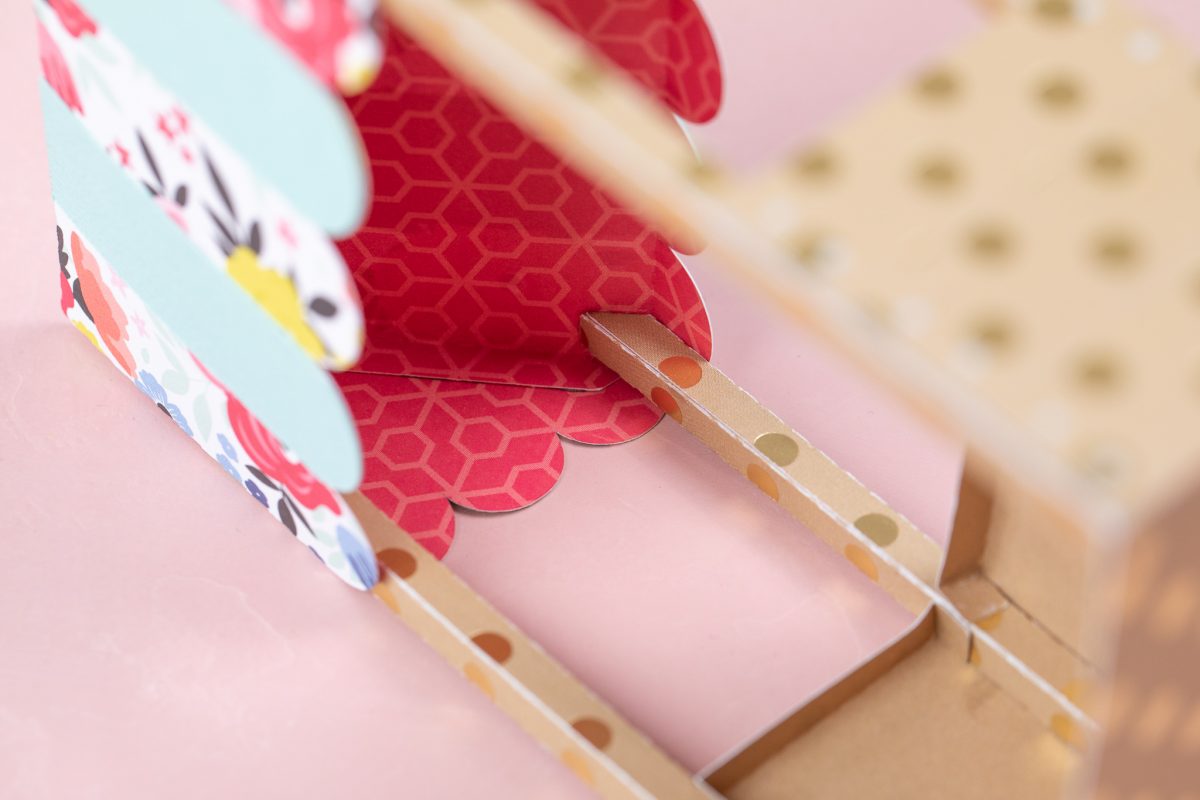
2. Then place glue in the inside corner of the awning and attach the stand to the awning.
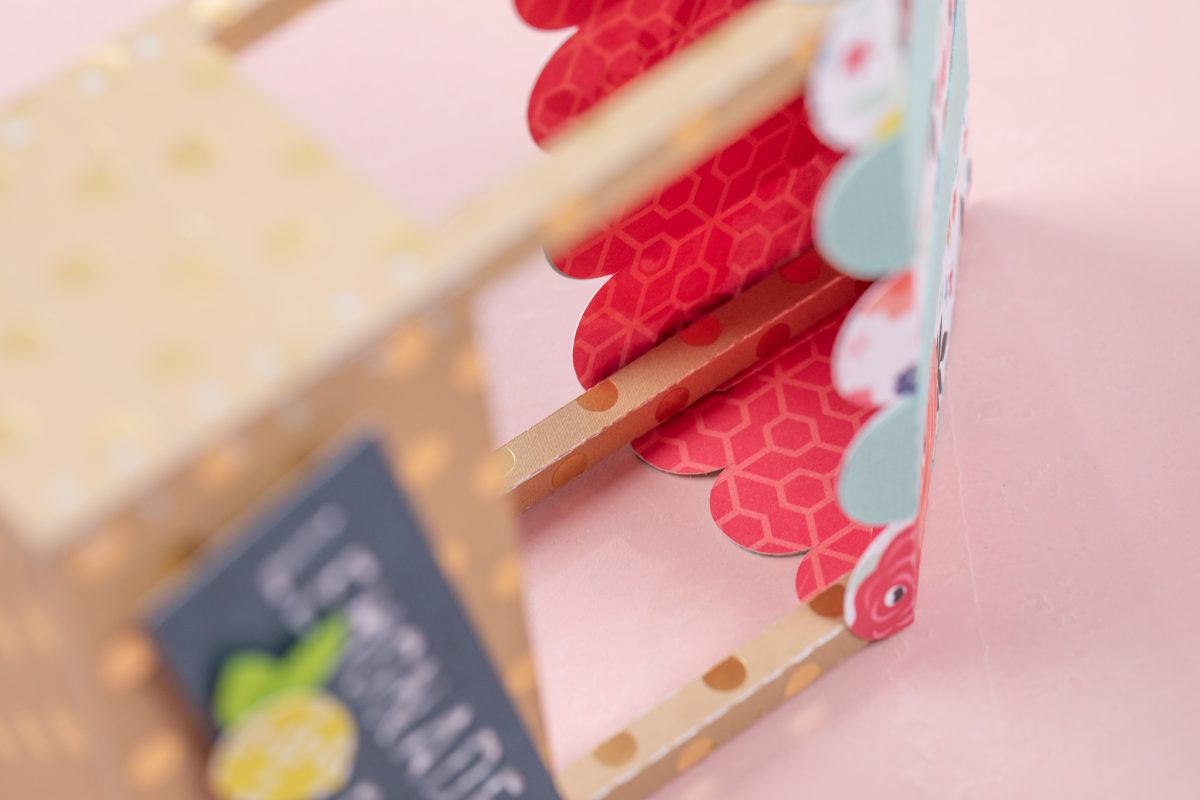
3. Glue on the planks, the sign, and the lemonade accents!

And enjoy some fresh-squeezed lemonade with your doll friends! We added a tiny pom pom garland to our awning just for fun. How will you accessorize your stand? We would love to know!
Kelly Wayment
June 28, 2024
You can use it with vinyl as long as it is smooth and flat to allow the static charge to hold on to it. Rolled vinyl that wants to go back to its rolled shape will not necessarily work well, and it would need to be trimmed to fit the ES mat cutting area.
Kelly Wayment
June 28, 2024
Yes, you can use the heat pen while using the ES mat. 🙂
Yurii
March 2, 2024
Hello. May it be used with heat pen?
Thanks
Jerome
February 24, 2024
Hi, works this with the normal vinyl foils or only with printer papter etc?
Kelly Wayment
February 16, 2024
Once you’ve pushed the mat up against the rollers, just press the “Load” arrow button (bottom right on the display). Does a regular sticky mat load into the machine for you?
Michelle a goodall
January 24, 2024
Hello! I just got my new electrostatic mat and have watched every video i can find on it. However, what i can t find is why it wont feed into my cameo 5/ it slides right up the rollers but wont go any further. and yes- iam pushing the into button. help!