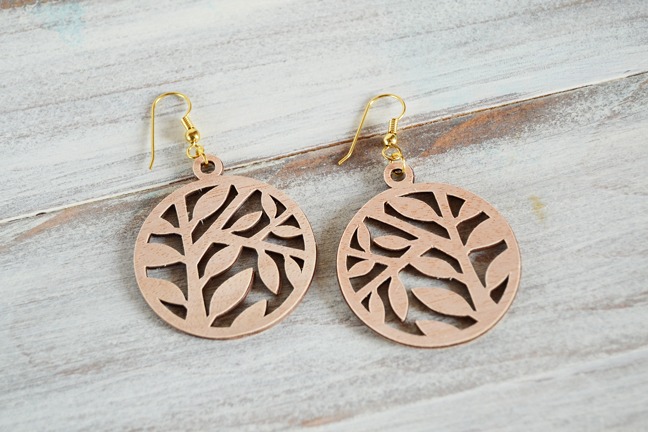
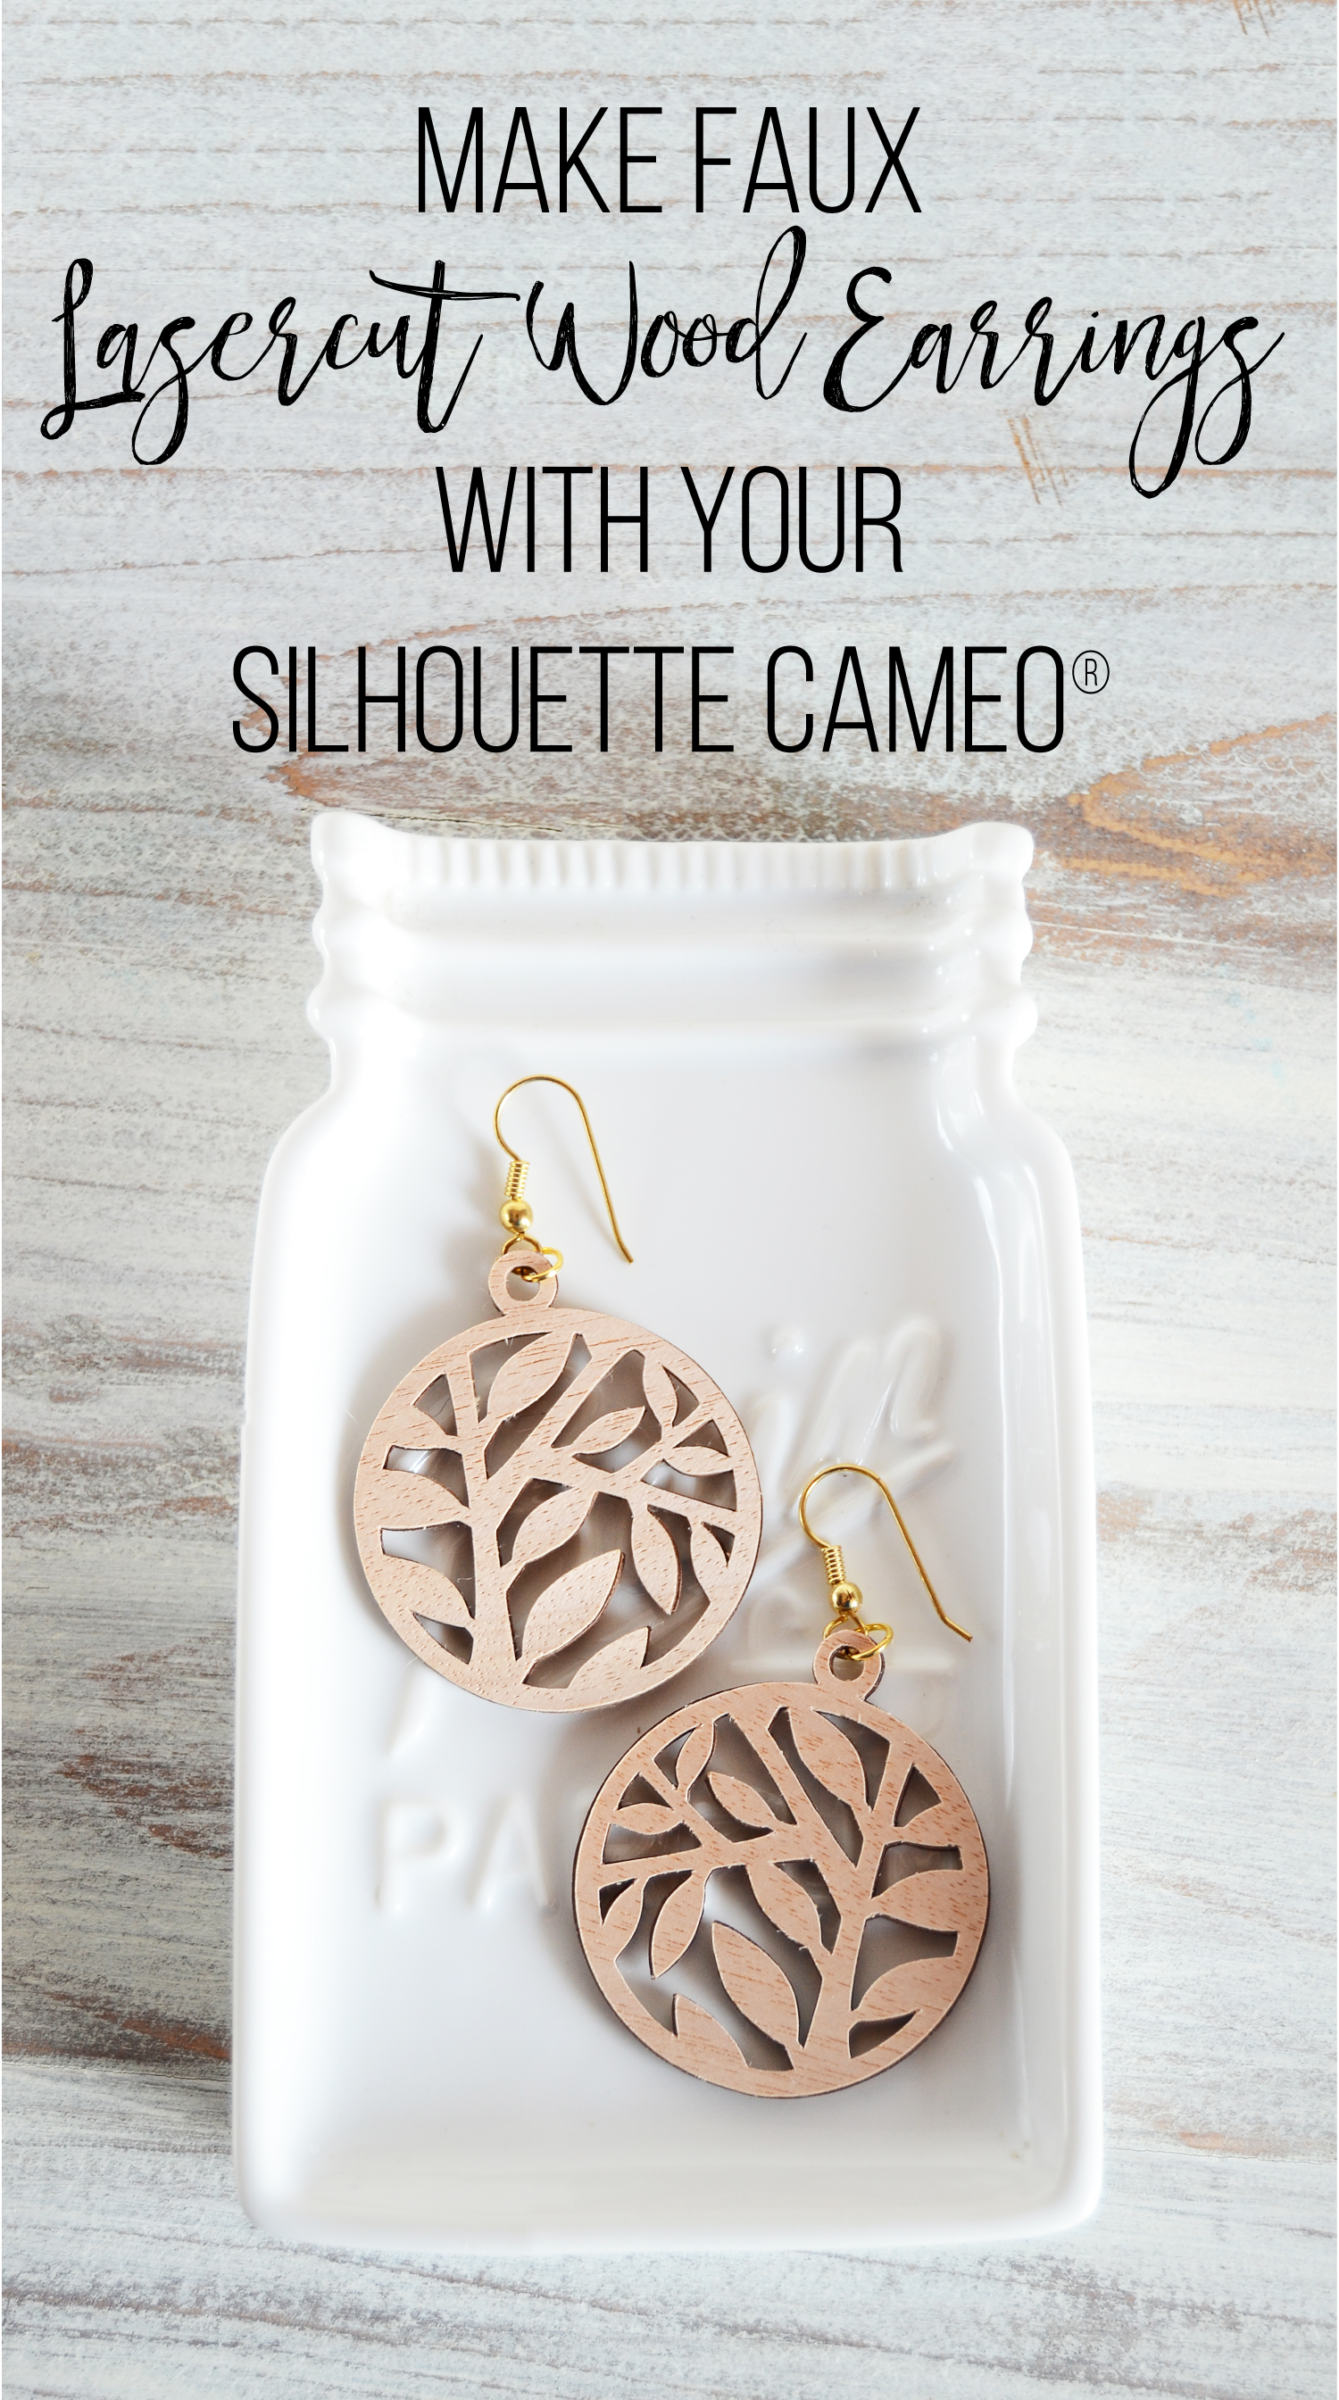
I’ve always admired lasercut items, specially jewelry. They just look so intricate and lovely! With your Silhouette CAMEO®, now you can create faux lasercut wood jewelry with just a few steps.
With the assortment of shapes you can select from the Silhouette Design Store (or maybe dream up your own?) you can definitely create one-of-a-kind, custom jewelry using this tutorial. So what are you waiting for, let’s jump in!
Supplies Needed:
- Silhouette CAMEO®
- Brown Cardstock
- Silhouette Wood Sheets
- Glue
- Jump rings
- Earring hooks
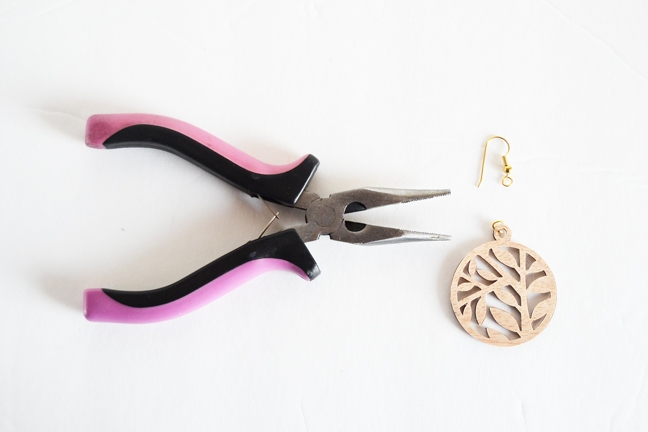
- Flat nose jewelry pliers
Step 1. Create you Earring Shape
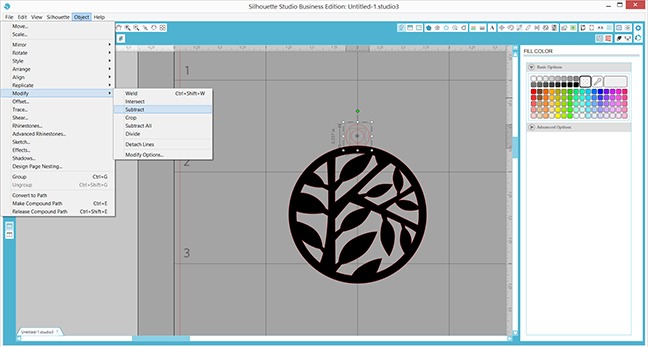
Size your chosen shape on Silhouette Studio®. I chose the fun Branches and Leaves design by A Little Hut (Design ID #27039) and sized mine around 1.5″ inches in diameter.

Add a loop for your earring hooks. Do this by creating two circles on top of your chosen design. Select both circles, go to Object > Modify > Subtract to merge the two objects together.
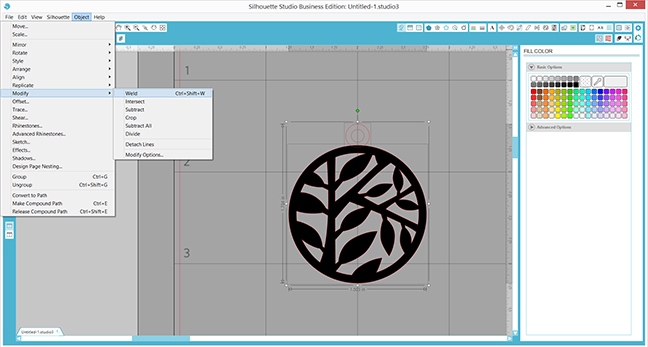
Select all your shapes, got to Object > Modify > Weld to attach your loop to your chosen shape and finalize the earring design.
Step 2. Cut your Earrings
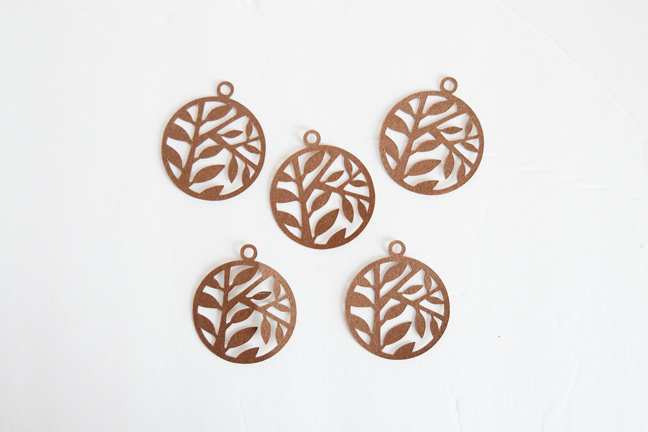
Cut ten (10) of your earring shape on brown cardstock – you will need at least 5 layers for each earring to create a thick and sturdy earring.

Why brown cardstock? It’s so that we create the ‘burnt effect’ on the edges when they are glued together – it looks more realistic when we have that burnt wood effect as opposed to have it in white or any other color, but you can have fun with it as well!
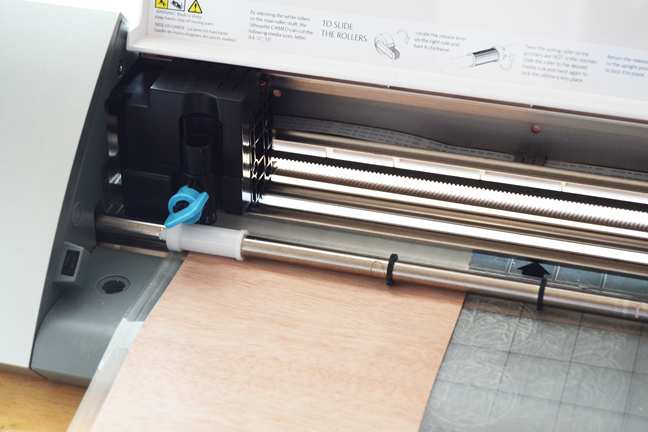
Cut four (4) pieces of your earring shape, two in the same orientation and two flipped on your wood sheet to create the frontside and the backside pieces of your earrings.
When cutting your wood sheet, secure the top and bottom of your sheet with some tape to prevent it from curling while cutting.
Step 3. Assemble your Earrings
Assemble each pair first by gluing 5 of the shapes together, making sure they are properly aligned. It helps if you use a fine-tip glue applicator if you are adhering intricate shapes together.

Now, starting from the top of the earring, carefully adhere the wood front and backside of your earring. It comes with an adhesive backing so we don’t have to worry about gluing it in place!
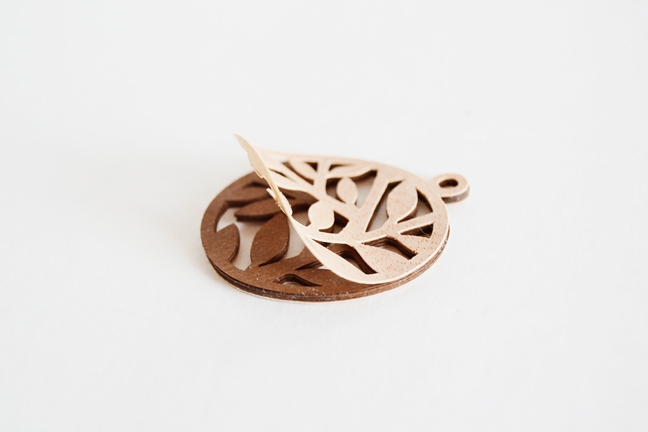
Make sure they are all adhered together – I like leaving them to ‘bond’ between pages of a really thick book to make sure they’re as flat as can be.
Finally, attach your earring hooks using a pair of flat-nosed pliers and a jump ring.
And voila! Custom earrings for yourself or for someone special. Choose from the assortment of shapes on the Silhouette Store and have fun, friends!

What type of jewelry would you make with this idea?
Nasze Naturalne
September 3, 2025
Your authentic voice really shines through in everything you create and share
Naszenaturalne
September 2, 2025
Really love your style
Kelly Wayment
June 28, 2024
You can use it with vinyl as long as it is smooth and flat to allow the static charge to hold on to it. Rolled vinyl that wants to go back to its rolled shape will not necessarily work well, and it would need to be trimmed to fit the ES mat cutting area.
Kelly Wayment
June 28, 2024
Yes, you can use the heat pen while using the ES mat. 🙂
Yurii
March 2, 2024
Hello. May it be used with heat pen?
Thanks
Jerome
February 24, 2024
Hi, works this with the normal vinyl foils or only with printer papter etc?