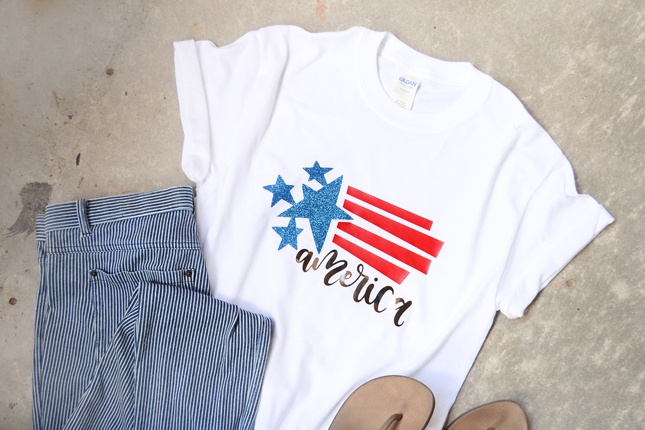
My mom wanted a shirt for her Fourth of July party she is hosting. It’s so easy to buy one, yes, but it’s so much more fun to have a one-of-a-kind shirt, don’t you think? Plus I just love making custom shirts so much that I had to create one for her. So join me as I show you how to create your own fun Fourth of July shirt!
Supplies Needed:
- Silhouette CAMEO®
- Silhouette Studio®
- Silhouette Cutting Mat
- Silhouette Hook Tool
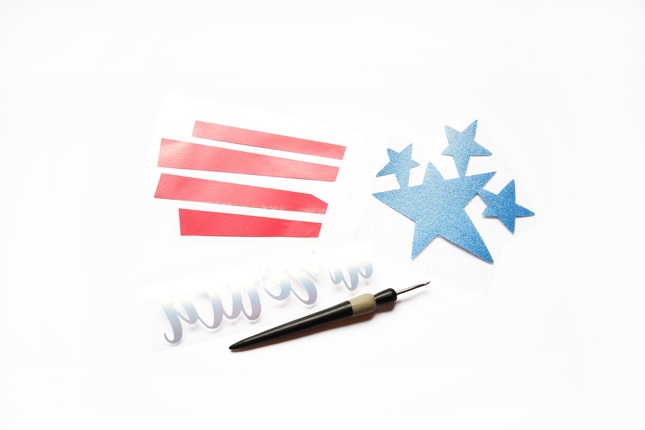
- 12-Inch Smooth Heat Transfer (in red)
- 12-Inch Glitter Heat Transfer (in blue)
- 12-Inch Metallic Heat Transfer (in silver)
- T-shirt
- Iron
- Cotton cloth or Teflon sheet
Step One: Create Your Design
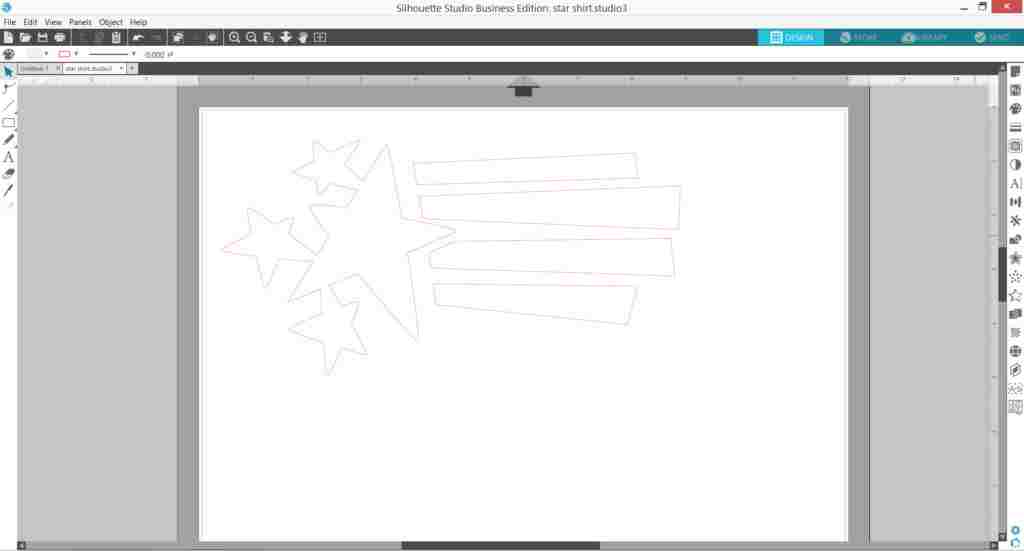
I chose this fun star cluster design (Design ID #18915) from the Silhouette Design Store. I just love the stylized flag design! Size your design in Silhouette Studio® according to the shirt size you are using. I used a small unisex shirt and wanted a fairly small design so I sized it around 9.25 in. across.
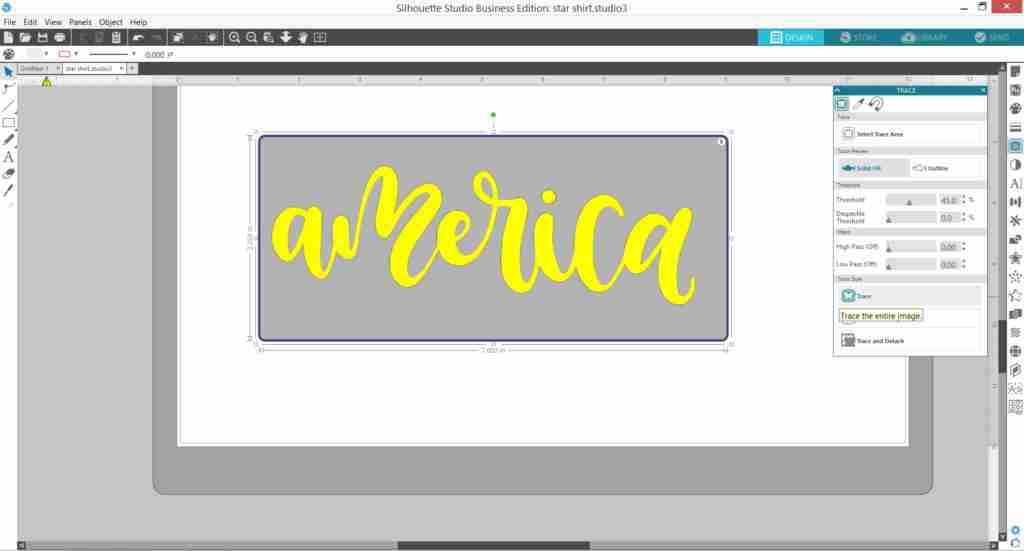
I wanted to add something of my own so I hand lettered ‘America’ and imported it onto Silhouette Studio®. To trace your own lettering, import the image of your lettering into Silhouette Studio® and use the trace feature to outline your design. For a more detailed tutorial on how to convert your own lettering into a cut file, check out this tutorial and scroll down halfway to read on how to do it!
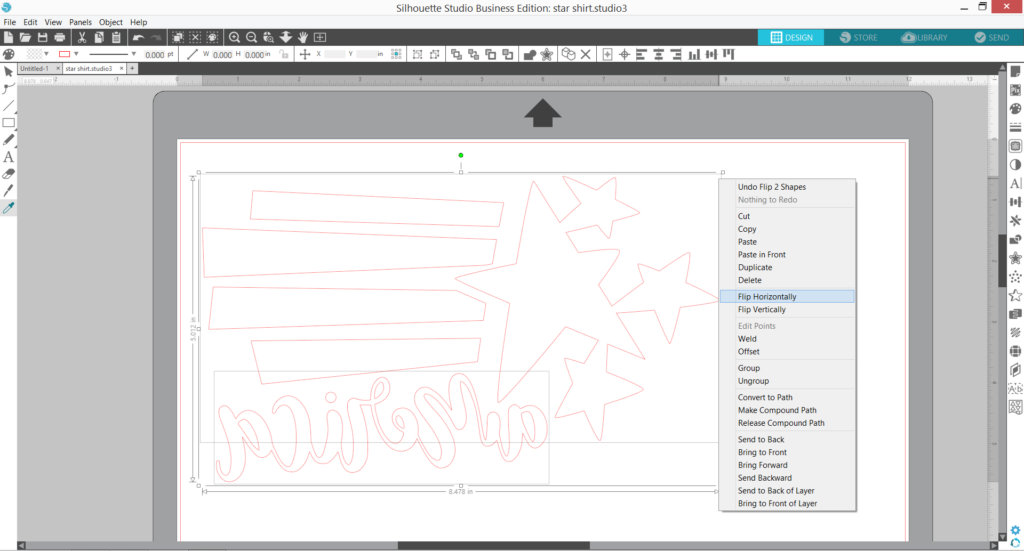
Position and line up the word with the flag design—you want to size it to fit the overall width that you are going for.

Step Two: Cut Your Design
Since we are using heat transfer vinyl. we need to mirror the image so it irons on the right way. Select all the elements, right click, and select Flip Horizontally.
I wanted to use three different heat transfer colors so I ungrouped them to cut each color individually. You can also use the “cut by line” or “cut by color” (here’s a handy tutorial for that if you are not familiar with it) to make it easier. However, I wanted to save some material, so I positioned my cuts on the upper left corner of the mat to lessen material wastage.
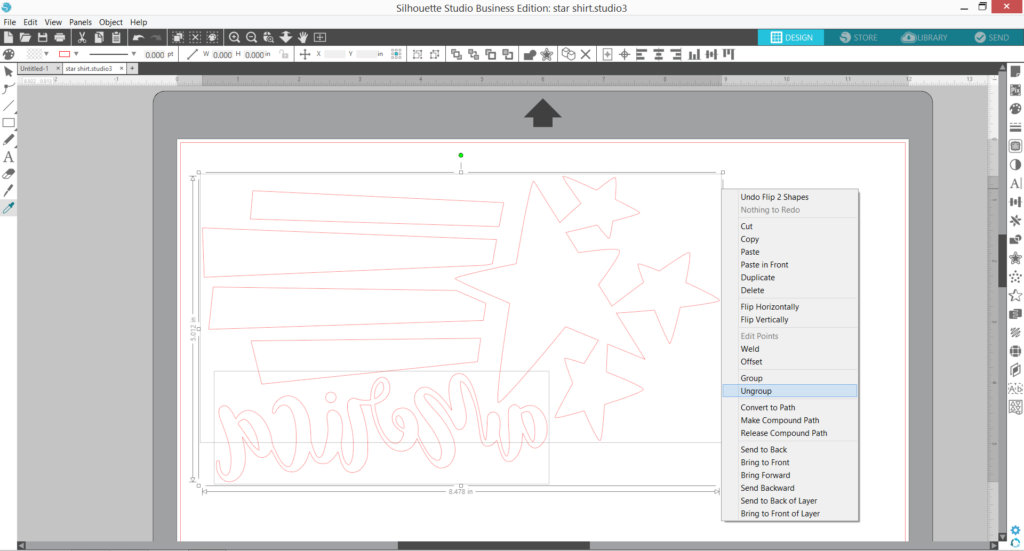
Once your design is cut, remove the outside parts and the insides of the letters using your Silhouette hook tool—trust me, the hook tool makes removing those bits and pieces much easier!
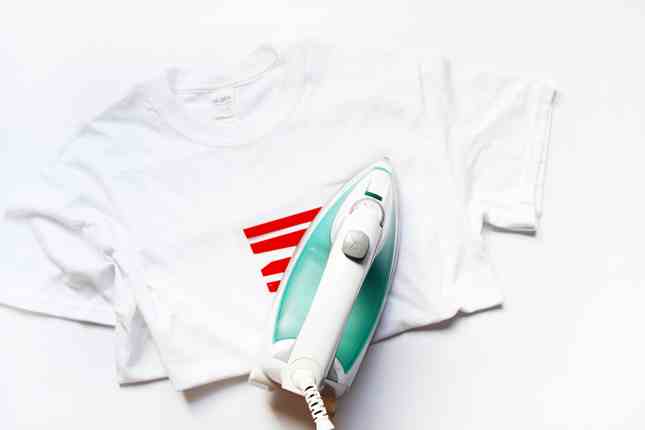
Step Three: Iron Your Design on the Shirt
Position all the elements so they are lined up with each other—typically, I position them around three inches to four inches from the collar of a shirt if I am using a unisex, round collar shirt.

Once you are happy with the placement, iron down each color individually. Iron at a medium setting with no steam, putting a good amount of pressure on the heat transfer.
Once each color is ironed on, make sure to peel off the clear carrier sheet before you proceed with the next color—use a cotton cloth or teflon sheet to cover your already ironed-on colors to prevent damaging them.
And you’re done! With the materials on hand, this literally took me less than an hour to make—less time than my mom would have spent going to the store to look for shirts and try stuff out.

Isn’t having a Silhouette CAMEO® so convenient and awesome?! What kind of shirt would you like to create?
Kelly Wayment
June 28, 2024
You can use it with vinyl as long as it is smooth and flat to allow the static charge to hold on to it. Rolled vinyl that wants to go back to its rolled shape will not necessarily work well, and it would need to be trimmed to fit the ES mat cutting area.
Kelly Wayment
June 28, 2024
Yes, you can use the heat pen while using the ES mat. 🙂
Yurii
March 2, 2024
Hello. May it be used with heat pen?
Thanks
Jerome
February 24, 2024
Hi, works this with the normal vinyl foils or only with printer papter etc?
Kelly Wayment
February 16, 2024
Once you’ve pushed the mat up against the rollers, just press the “Load” arrow button (bottom right on the display). Does a regular sticky mat load into the machine for you?
Michelle a goodall
January 24, 2024
Hello! I just got my new electrostatic mat and have watched every video i can find on it. However, what i can t find is why it wont feed into my cameo 5/ it slides right up the rollers but wont go any further. and yes- iam pushing the into button. help!