
Remember when writing a card was the original way to send a text message? Today, we’re throwing it back and doing things the good ol’ way! With this Mini Square Envelope and Card design, you can create teeny tiny cards that say all the right things. Follow along to see how easy it was to put together.
Supplies Needed:
- Silhouette CAMEO® or Silhouette Portrait® or Silhouette Curio™
- Silhouette Studio®
- Metallic Rose Gold Vinyl
- Silhouette Cutting Mat
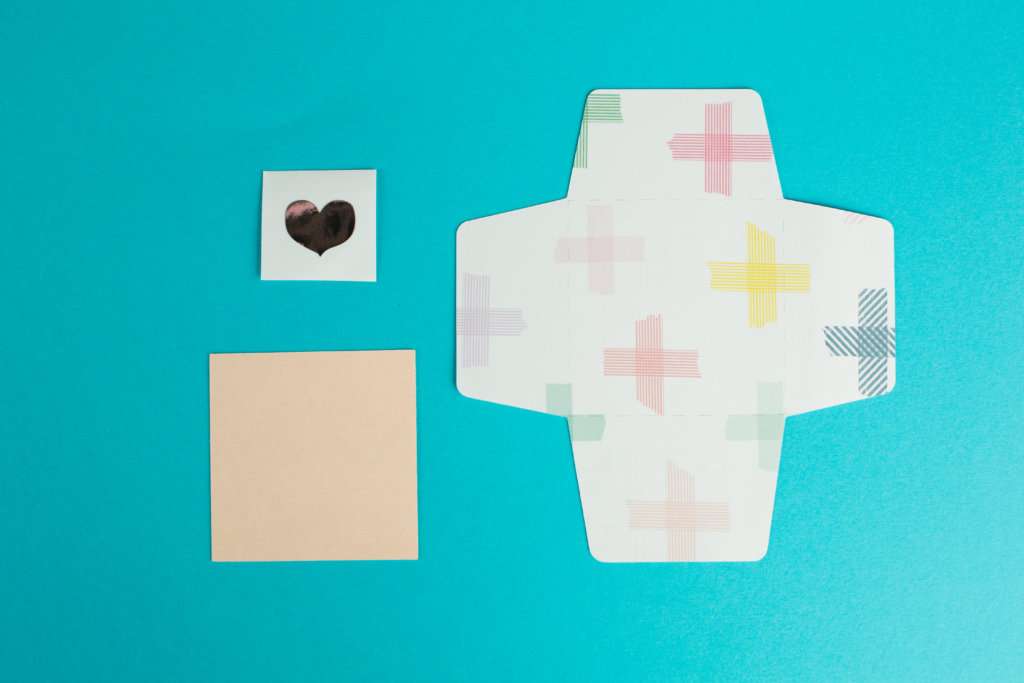
- Patterned Card Stock (For Envelope)
- Colored Card Stock (For Insert)
- Tape Runner or Glue
- Design ID #221844
Step One: Open Your Design
- Open Design ID #221844 in Silhouette Studio® by locating the design in your library. (If you are wanting to resize your design to make the envelope smaller or bigger, now would be a good time to do so. We kept the Envelope as is).
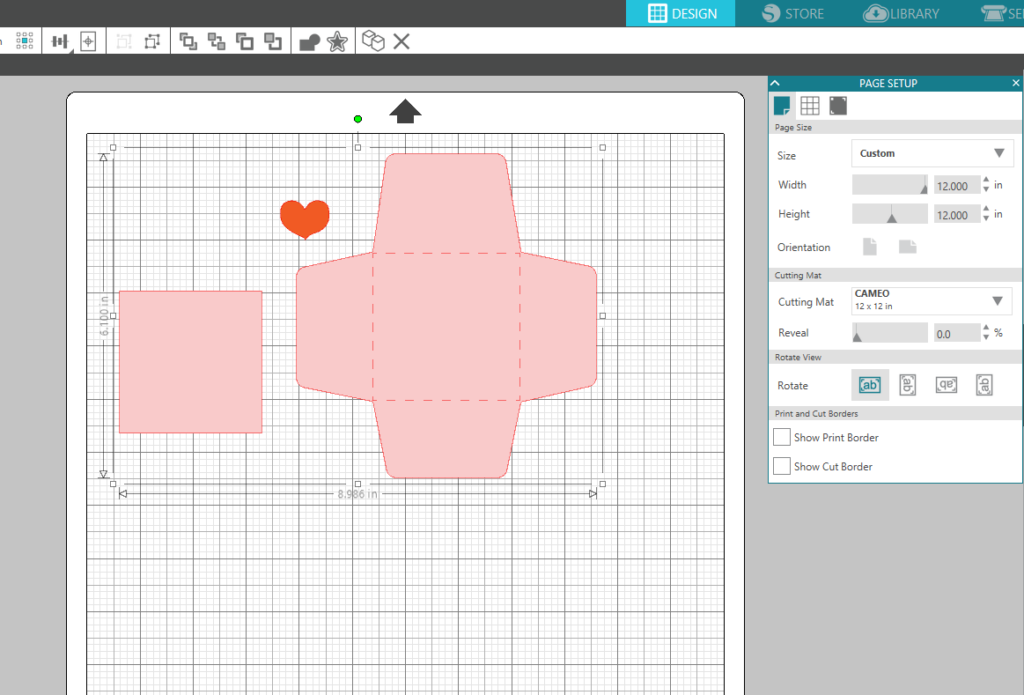
- Ungroup the design by selecting it, right-clicking, and selecting Ungroup. This will allow you to move the three shapes included in the design around separately.
- Select the heart and the card insert and drag them off of the cutting area to the gray holding area in Silhouette Studio®.
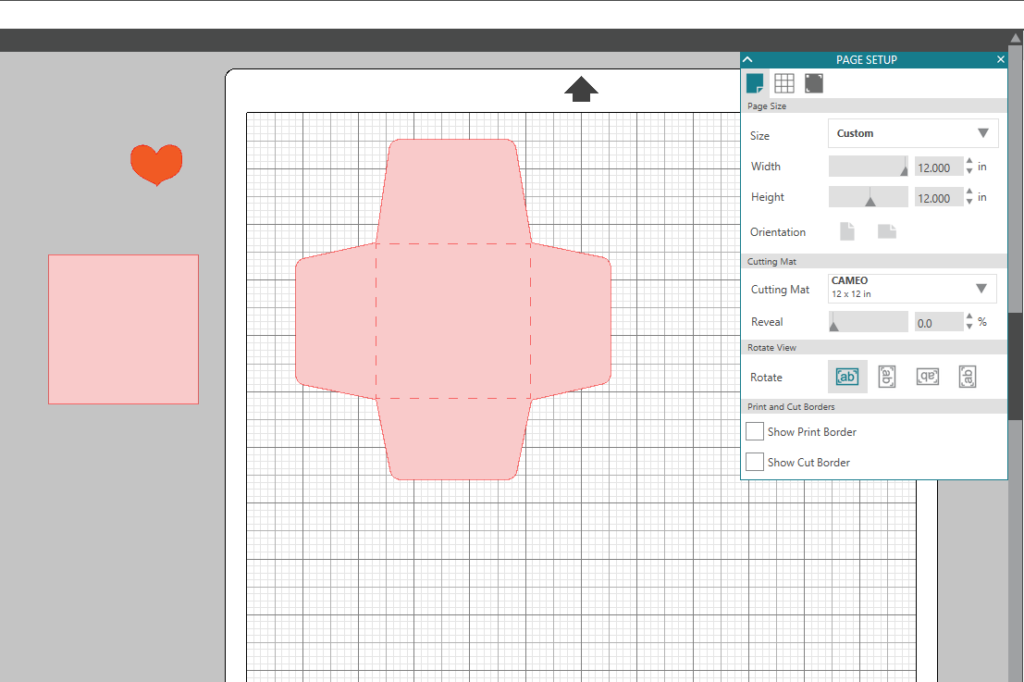
- Select your envelope design and move it to the top of the cutting area in Silhouette Studio®. (Select the Page Setup panel—this icon can be found on the toolbar on the right-hand side of your page—and adjust your page to the size of your patterned card stock.)
- Place your patterned card stock on your cutting mat, and load it into your machine.
- In Silhouette Studio®, select the Send tab in the top right-hand corner. Select the card stock cut setting and click Send. (Remember that if you don’t have an AutoBlade, you will need to adjust your blade settings.)

- Once your machine is done cutting, carefully remove your cut envelope and set it aside.
- Place your colored cardstock on your cutting mat and load it into your machine.
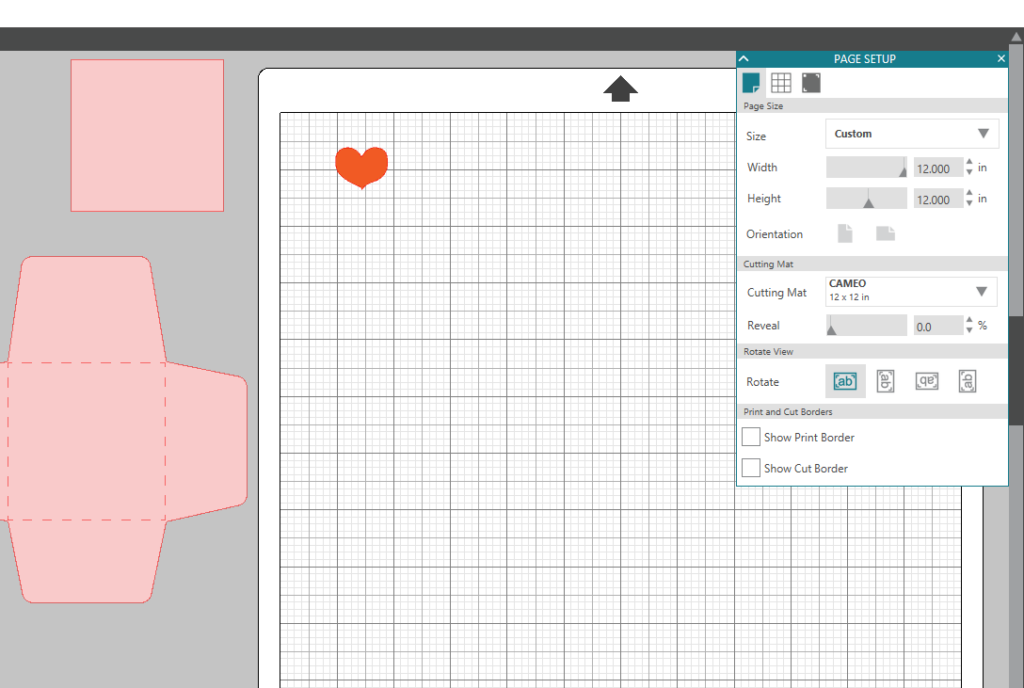
- In Silhouette Studio®, select your envelope and drag it to the gray holding area. Select the insert and drag that onto the cutting area.

- Select the Send panel in the top right-hand corner and click Send.
- Remove the insert from the cutting mat and set it aside.
- Place your rose gold vinyl on your cutting mat or load the vinyl directly into your machine.
- Drag the heart design onto the cutting area. Click Send to cut out your design with the rose gold vinyl.
Step Two: Assemble
- Gather all of your cut pieces: the envelope, the insert, and the heart seal.
- Fold the tabs in on your envelope. Place glue or use a tape runner on the bottom tab and fold up to make the envelope.
- Write a sweet little message on the insert and seal the envelope with the heart seal.
Nasze Naturalne
September 3, 2025
Your authentic voice really shines through in everything you create and share
Naszenaturalne
September 2, 2025
Really love your style
Kelly Wayment
June 28, 2024
You can use it with vinyl as long as it is smooth and flat to allow the static charge to hold on to it. Rolled vinyl that wants to go back to its rolled shape will not necessarily work well, and it would need to be trimmed to fit the ES mat cutting area.
Kelly Wayment
June 28, 2024
Yes, you can use the heat pen while using the ES mat. 🙂
Yurii
March 2, 2024
Hello. May it be used with heat pen?
Thanks
Jerome
February 24, 2024
Hi, works this with the normal vinyl foils or only with printer papter etc?