Hello friends,
Today we get to celebrate those very special women in our lives!! Our Moms!!!
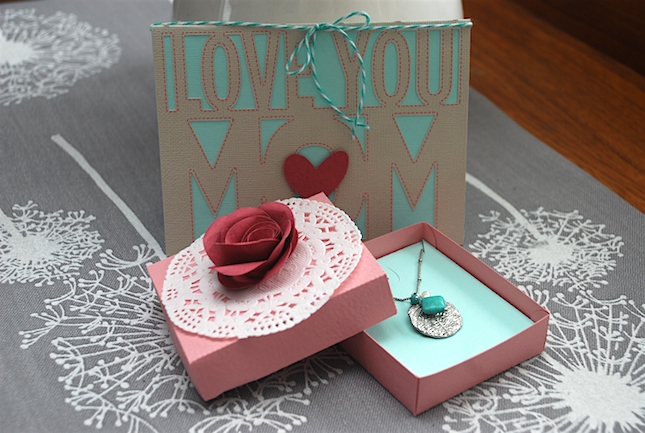
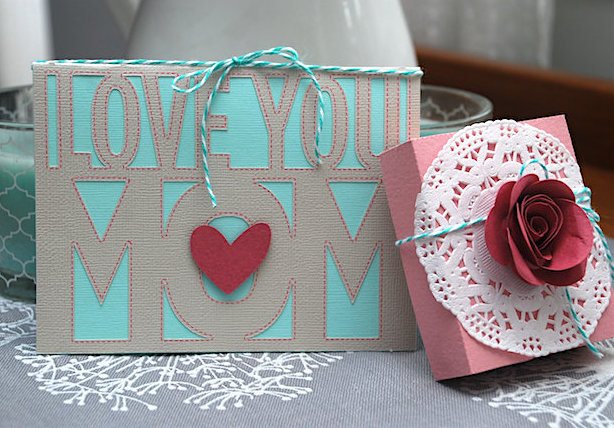
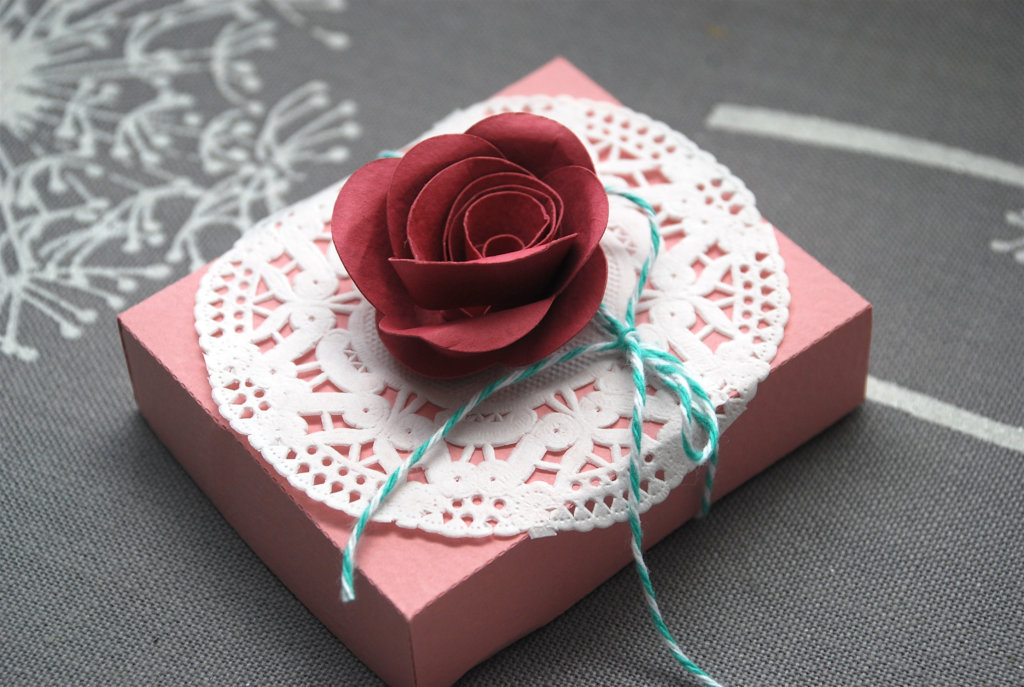
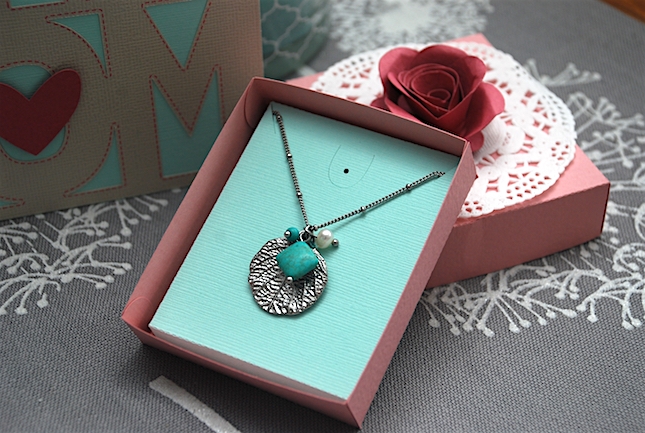
I want to share with you this card that I created and a cute little gift box to go along with it.
Supplies:
Silhouette CAMEO®
Silhouette Curio™
Silhouette Adhesive Backed Cardstock
Silhouette Sketch Pens
Love You Mom card Design ID #59090
Pendant Charm Gift Box Design ID #45888
Heart & Butterfly Design ID #185812
3D Rolled Rosebud Design ID #116427
STEP ONE: Create Sketch element
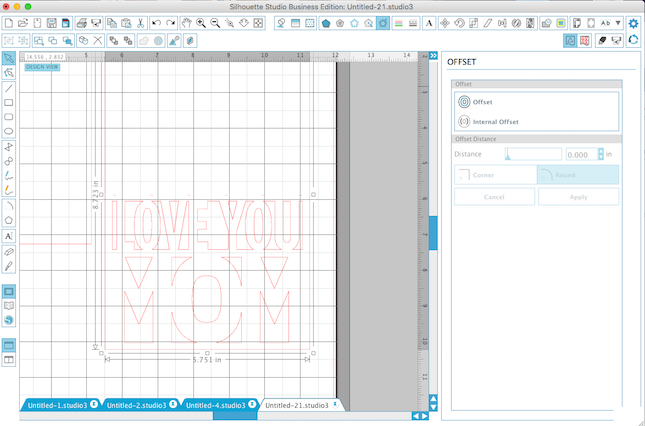
I wanted to add a sketched lined around the edges of the cut out words on the front of the card.
To do this I need to create an offset image first. I chose the Internal Offset and set the distance to 40 in. Then clicked Apply.
This will create a set of lines around the cut-out image.
STEP TWO: Color the Sketch line
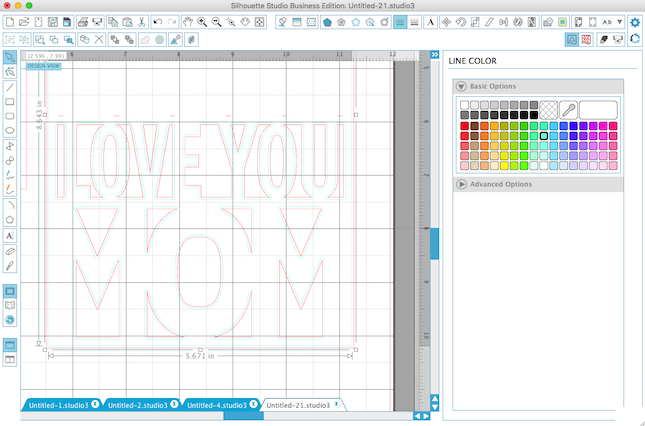
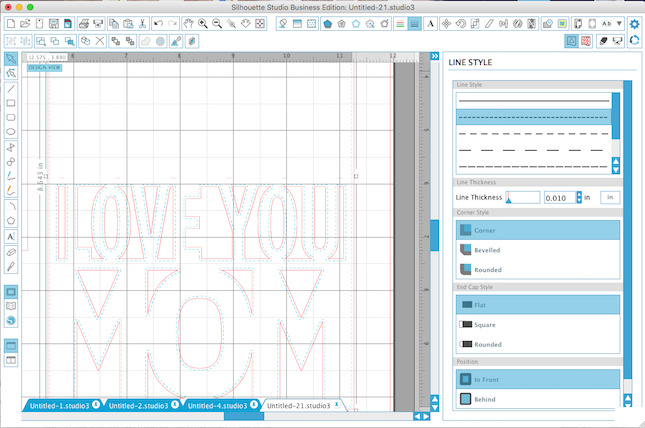
To help see the difference between the cut lines and the lines I wanted to sketch I chose to colour the offset lines.
So I simply went into the Line Colour window, clicked on the offset lines of the image, selected the colour I wanted and the lines changed color.
STEP THREE: Create a ‘faux’ stitch look with sketch pens
I wanted a stitch like look for the sketch lines so I then headed into the Line Style window, select the coloured lines of my design, select the dashed line and changed the thickness to 10 in.
I didn’t want to have the stitched line around the outer edge of the card so I took the following steps:
- Click on design
- Release Compound Path
- click on the outer stitch lines and delete
- Click on entire design and Convert to Path>Group design
STEP FOUR: Sketch & Cut
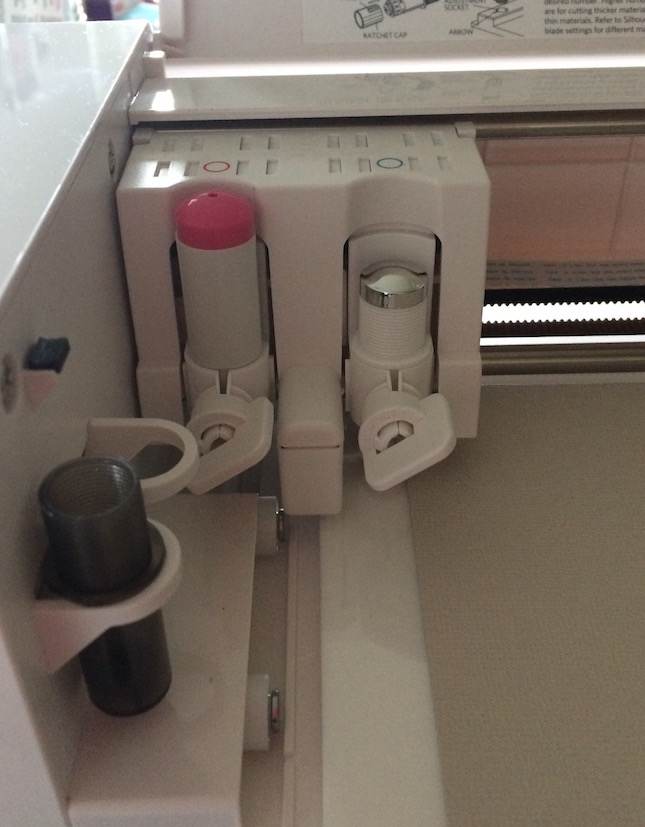
Now the fun part! Sketching & cutting!! I used my CURIO so that I could use the dual cartridges. This can also be done using the CAMEO 3.
This feature on the machines allows you to place your sketch pen into one holder and your cutting blade into another.
In the Cut window click on the Advanced option. You will have colours in a box that correspond with the lines of the design. I selected the turquoise coloured box and then scrolled down in the Materials box and choose Sketch Pens. I then selected the RED TOOL icon because this was where I placed the sketch pen.
The red coloured box I selected Adhesive Backed cardstock and clicked on the BLUE TOOL and placed the cutting blade in that cartridge.
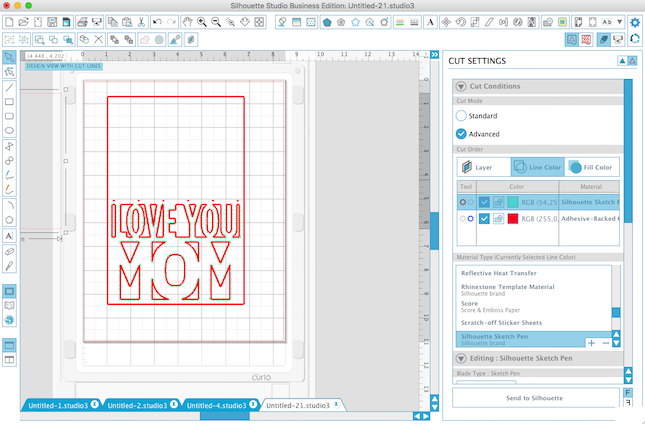
I then let the magic take place by clicking on SEND TO SILHOUETTE and voila!

I also made little gift box and rosebud to go along with the card.
I’m looking forward to giving this to a very special person!!