
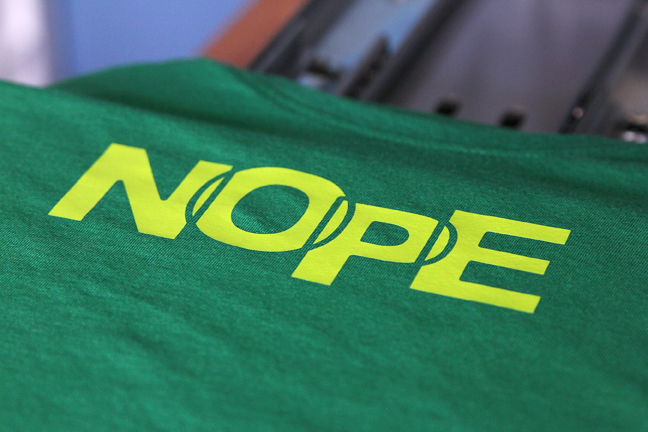
One of my favorite aspects of using my Silhouette cutting machine is the fact that I can customize anything! My daughter had a very specific idea of what she wanted for a T-shirt design, so she was able to pick out the design and two of her favorite heat transfer colors to make this shirt uniquely hers.
Kelly here to show you how to layer two colors and types of heat transfer material for a custom look. Feel free to adapt this to other designs to make it uniquely yours!
Supplies Needed:
- Silhouette CAMEO®, Portrait®, or Curio™
- Cutting Mat and Blade
- Heat transfer—I used lime green and glitter green
- Iron or heat press
- Hook tool
- T-shirt
- Design ID #288940
Step One: Create Design
1. In Silhouette Studio®, Open Design ID #288940 and resize it with a corner handle to fit appropriately on the shirt. I made mine about 6 inches wide.
2. Mirror the design so it’s ready to be cut from heat transfer. (Do this by right-clicking and choosing “Flip Horizontally” from the pop-up menu.)
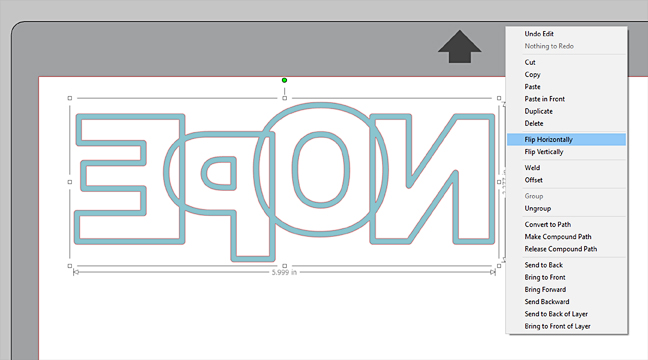
3. Set the Page Size in the Page Setup panel to about an inch wider for length and width than the design itself (7 inches wide by 3 inches high works for this design).
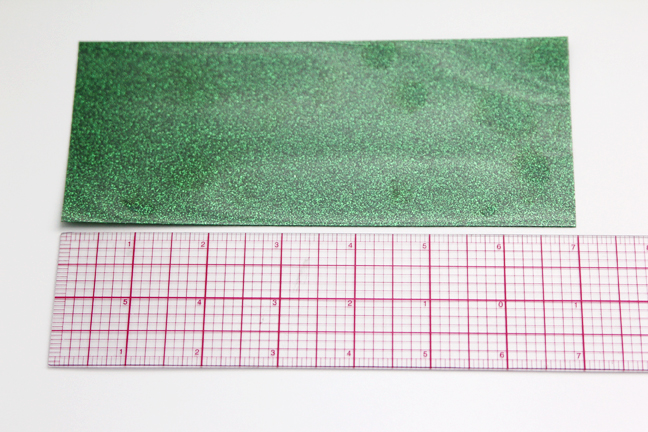
4. Trim down a piece of glitter heat transfer to the same length and width.
5. Choose the correct cutting mat size for your machine in the Page Setup panel.
Note: You can cut heat transfer material with or without a mat on the CAMEO or Portrait using the same cut settings either way, but you need to use a mat if you cut the heat transfer smaller than the minimum roller width or when using the Curio.
6. Center your design on the page using the Center to Page choice in the Quick-access Toolbar. (This may be tucked in with the Align choices on a small monitor.)

Step Two: Cut Design in First Color
1. Go to the Send Tab and set it to cut glitter heat transfer material first.
- Material = Heat Transfer, Glitter
- Action = Cut
- Tool = AutoBlade (or whichever blade you are using)
2. Place the heat transfer on your mat as shown on the software’s virtual mat, with the dull side up and glossy backing side down.
3. Load the heat transfer into your machine and then click SEND to cut. (You can ignore the heat transfer mirror message and “Send As-Is” since we already flipped the design ourselves.)
Step Three: Cut Design in Second Color
1. Once the glitter heat transfer is cut, unload it and place a piece of smooth heat transfer in the same spot, trimmed to the same 7 inches by 3 inches as before (dull side up, glossy side down).
2. Load the mat with the smooth heat transfer and adjust the cut settings in the Send Panel.
- Material = Heat Transfer, Smooth
- Action = Cut
- Tool = AutoBlade (or whichever blade you are using)
3. Send to cut.
Step Four: Weed Heat Transfer
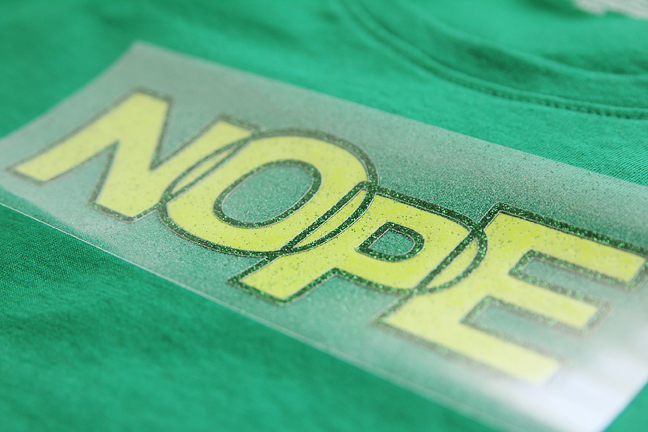
1. Once both pieces are cut, I recommend weeding the glitter heat transfer first and then the smooth heat transfer.
2. With the glitter heat transfer, you only want to keep the main design you see in the software. Weed and discard the excess glitter heat transfer outside and inside the main design.
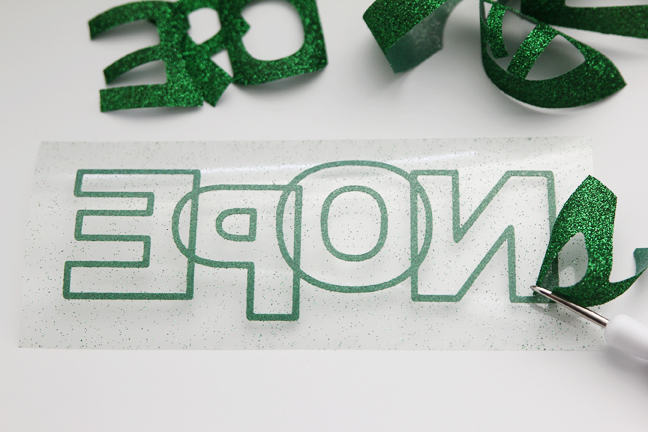
3. With the smooth heat transfer, you only want to keep the inner sections of the letters. Weed and discard both the excess heat transfer outside the design, and also discard the original design portion you kept in the glitter heat transfer. We made some extra cuts, but it’s easier this way.
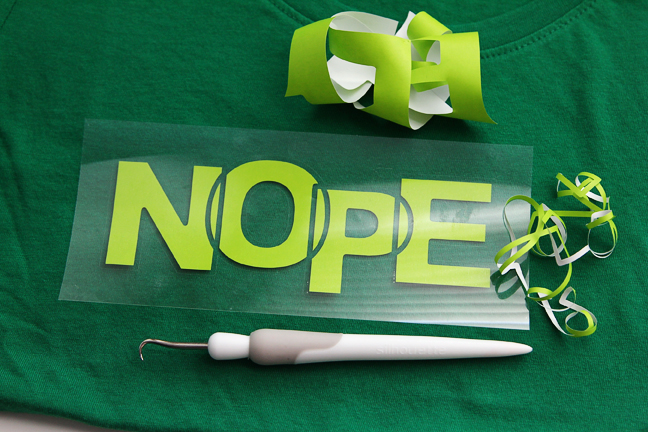
Because these cuts are identical and are on their own backing, it’s easy to line them up exactly.
Step Five: Apply Heat Transfer in Layers
1. Prepare your shirt for the heat transfer design by briefly pressing with a household iron or a heat press.
Note: For an iron, I use the cotton setting (no steam). For a heat press, I use a smooth heat transfer setting (~305 degrees Fahrenheit) for both layers of heat transfer.
2. Place the smooth heat transfer (the insides of the letters) on your shirt first, carefully placing it centered and level. The clear sticky backing helps it stay in place while testing the position.
3. Cover the design with a protective cloth or parchment paper and briefly press the smooth heat transfer with your iron or heat press just long enough to get it to stick to the shirt when removing the clear backing. This can be as few as 4 or 5 seconds with a heat press.
4. Now position the glitter heat transfer onto the shirt, lining it up with the insides of the letters you’ve already applied.
Tip: Although the layers don’t overlap in this design, it’s okay to apply glitter heat transfer directly on top of smooth heat transfer, but you cannot apply smooth heat transfer to the top of glitter heat transfer. Just keep that in mind when you work with other designs.
5. Press the glitter heat transfer longer than before (remember the protective cover). This should be long enough for both layers of heat transfer to stick to the shirt permanently. (I did about 15 seconds with my heat press.)
6. Remove the clear backing and press a little longer, if necessary. Never iron or heat press directly onto exposed heat transfer material. Either turn the shirt inside out and press from the back, or use a heat-protective cover over the applied heat transfer.
I love the layered heat transfer look, and I love that I can choose any colors I want in order to perfectly customize my project! Silhouette for the win, again.
If you’d like to learn more about the basics of heat transfer, check out my Silhouette 101 class, Heat Transfer Essentials.
What are you going to apply layered heat transfer to?
 Free Class - Father's Day Apron Set
  Free Class - Custom Graduation Tumbler