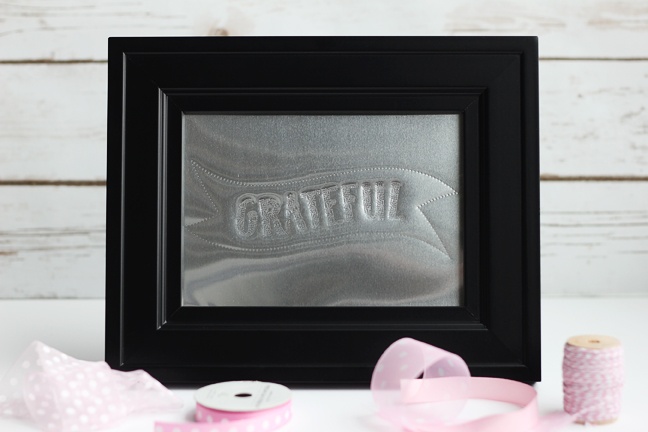
Hello, my friends! For the new year I decided to create a piece of metal word art to inspire me in 2017. The Silhouette Curio™ is an ideal machine for this because of its ability to work with special metal sheets. I love a little metal in my décor!
Here is what you’ll need for this project:
- 5 in. x 7 in. Metal Stippling Sheets
- Curio Stippling & Etching Tool
- Silhouette Curio™
- 8.5 in. x 6 in. Silhouette Curio™ Embossing Mat
- 5 in. x 7 in. frame
- LW Title font (Design ID #122249)
- Expressions Shapes (Design ID #57468)
Step One: Choose an Inspirational Word and Font
I chose “grateful” for my single word. Sometimes we don’t have the freedom to make big changes to our life’s circumstances, but we can always choose our attitude. I’m convinced that being grateful for what we do have is a big key to our happiness.
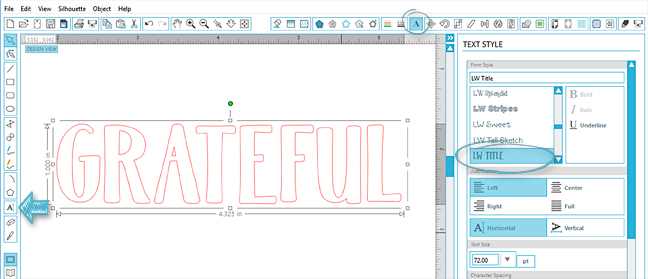
- To choose a font, I used the Text Tool in Silhouette Studio® to type out “grateful.”
- This is Title Font from the Design Store.
- Use the font list in your Text Style Window to choose the perfect font from those installed on your computer.
Step Two: Add Design Elements

I added a banner and made my word curve to the shape via Text-to-Path. Here’s how:
- Open Expressions Shapes from the Design Store.
- Ungroup and drag the banner shape over the text on the workpage.
- Use the corner bounding-box points to resize the shape appropriately so the text fits inside.
- Make a copy of the banner and set aside for later.
- Double-click the text to enter text-edit mode.
- Use the four-pointed arrow to drag the text to the lower border of the banner shape. It will “snap” to the curve. (See image above.)
- Drag the double arrow up to bring the text back up into the center of the banner, while still keeping its curved path. (See image above.)
- Fine tune the letter placement in the word with either:
- Character Spacing option in the Text Style Window, or
- Ungroup the word and use your arrow keys to nudge individual letters into a better position (see image above)
- Once you are satisfied with letter placement of your word, either Group or Convert to Path. (Right-click to expose one or both choices.)
- Move the word into the center of the banner copy we made in step 4, above. (Why? Because when we created a text-to-path curve in step 6, the banner became a path and is no longer a cuttable object.)
- Delete the original banner that turned grey as a path.
Step Three: Set Up Page Size
When using Curio, I ALWAYS set up my page size to match my media so I don’t accidentally go off the edge.
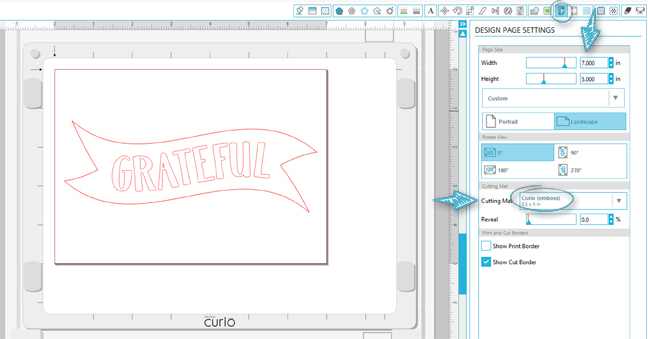
- For a 5 in. x 7 in. metal stippling sheet, go to the Design Page Settings Window and set the Page Size to 7.0 in. for Width and 5.0 in. for Height.
- Set the Cutting Mat to Curio (emboss) 8.5 x 6 in.
- Now resize the entire design to fit within the area that will show when framed. (I set mine to 6.5 in. wide.)
- Center the design on the page using the Align Window and Center to Page (bottom option).
Step Four: Convert to a Stipple Design
Now it’s time to change that word and banner into a stipple design. Be sure to connect and turn on your Curio in order to access the Stipple Window features.
Feel free to play around with any of the Stipple settings, but here are my approximate settings:
For the banner:
- Select just the banner and view the Stipple area of the Stipple Window
- Check the box for Stipple Edge
- Set Spacing to 0.083 in.
- Scroll down and click the arrow next to Stipple Size and set it to 1.7 pt or lower. (Note: This does not affect what the machine actually does, but it gives a better visual representation of the size of dots you will get on your project.)
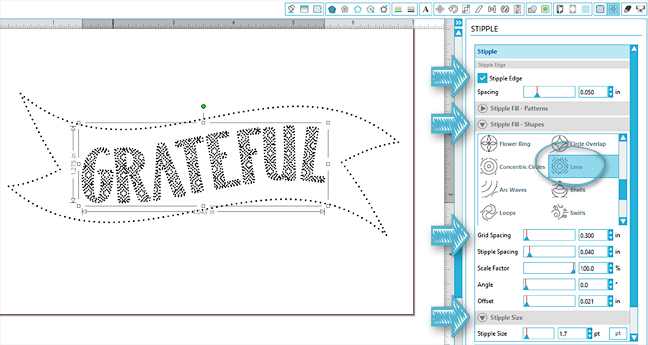
For the word:
- Select just the word
- Check the box for Stipple Edge and set Spacing to 0.050 in.
- Click the arrow for Stipple Fill – Shapes
- Scroll down and select Lens
- Grid Spacing = 0.300 in.
- Stipple Spacing = 0.040 in.
- Scale Factor = 100%
- Angle = 0 degrees
- Offset = 0.021 in.
- Again, set Stipple Size to 1.7 pt or lower
Step Five: Send to Curio for Stippling
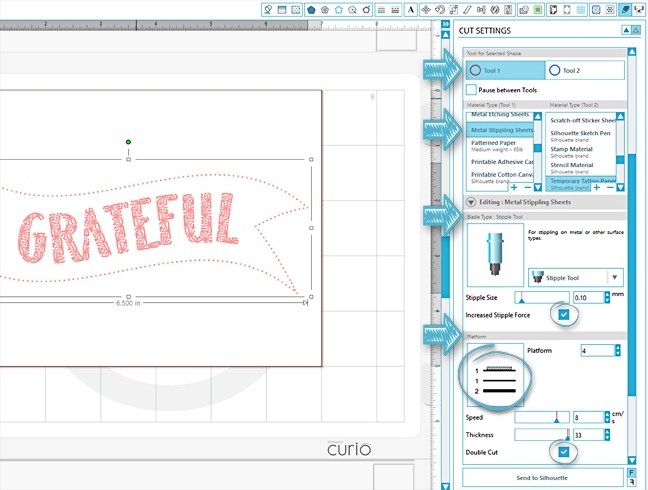
Time to stipple! For metal stippling sheets, make the following selections in your Cut Settings Window:
- To use the Stippling & Etching Tool in Tool Holder 1 (red circle), make sure Tool 1 is selected
- Choose Metal Stippling Sheets for (Tool 1) Material Type
- Check the box for Increased Stipple Force
- Note how many platforms to use (2 + 1 + Emboss Mat)
- Check the box for Double Cut
To Place the Metal Stippling Sheet on the Emboss Mat:
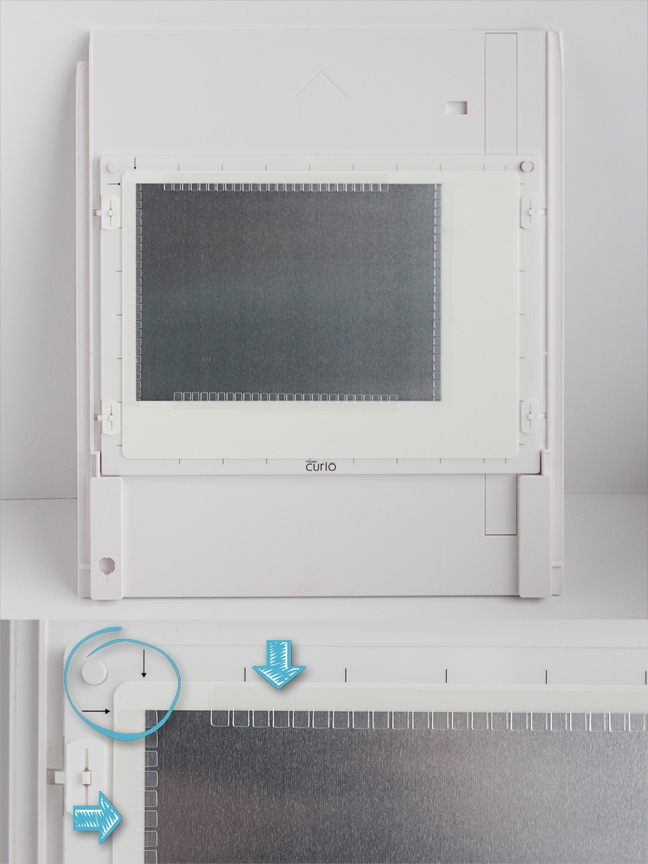
- Use platforms totaling 4, with the emboss mat on top (2 + 1 + mat).
- Leave a border around the edge of the media, as indicated by the arrows in the upper left corner. Do not place the metal sheet all the way to the sticky edge!
- Use the clear material fasteners to hold the metal sheet down as it goes through the stippling process. These fasteners come with Curio and with each new embossing mat you purchase.
- Note: Expect some curling of the stippling sheet as you CAREFULLY pull it off the mat after stippling. This is normal.

That’s it! How will you use your Curio in 2017?
Save
Save
Save
 Free Class - Father's Day Apron Set
  Free Class - Custom Graduation Tumbler