Oh, how I love using adhesive vinyl! It comes in oodles of beautiful colors, sticks to almost anything, and cuts like a dream. It’s the perfect choice for creating custom pieces. Today I’m going to show you how to use it to make a personalized luggage tag.
You Will Need:
- Silhouette CAMEO®, Silhouette Portrait®, or Silhouette Curio™
- Pineapple: Design ID #122408
- Monograms: Design ID #74923, Design ID #74922, Design ID #74921, Design ID #74920, Design ID #74917 (choose the design(s) with your initials)
- Adhesive vinyl
- Transfer paper
- Hook
- Scissors
- Scraper
- Luggage tag
STEP ONE: CREATE DESIGN
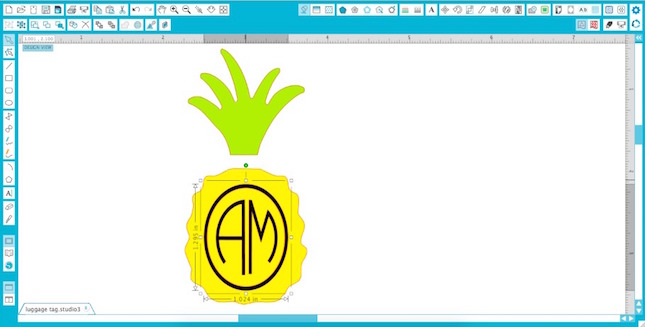
Open up the pineapple monogram and the circle monograms. Resize them to fit the luggage tag.
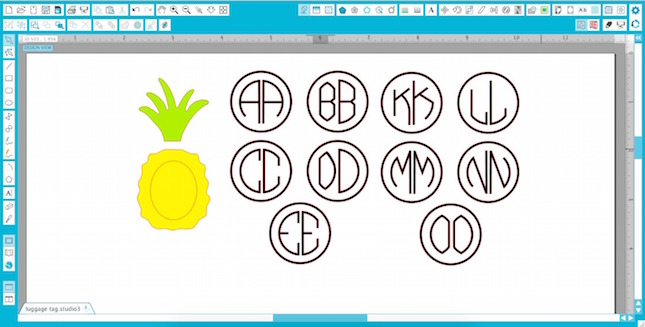
Delete the extra circle monograms, leaving only the letters you need.

Move the second initial into the circle with the first initial and group them together.
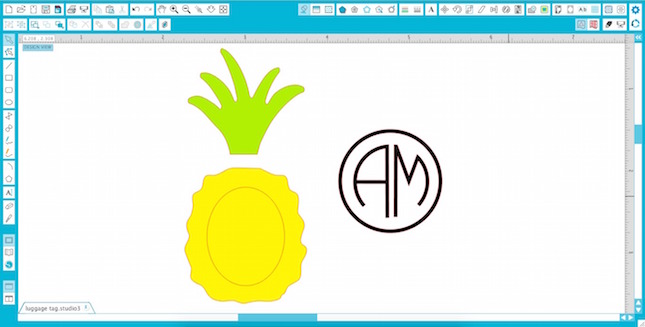
Stretch out the monogram. Use the circle that was already on the pineapple design as a guide before deleting it.
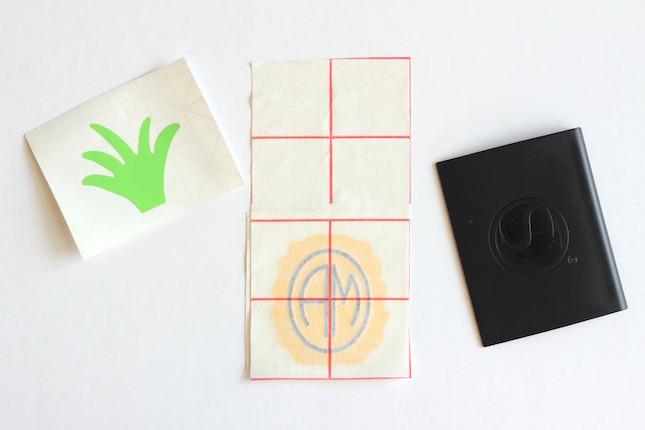
STEP TWO: CUT DESIGNS
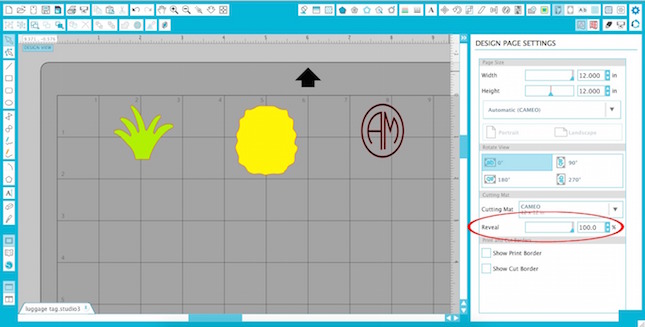
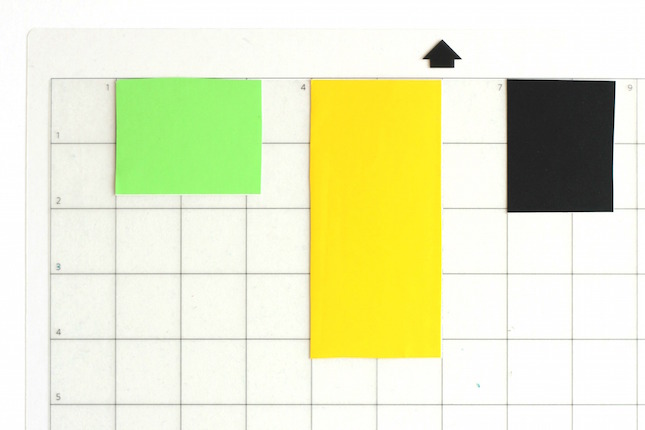
You can load adhesive vinyl directly into the CAMEO or the Portrait without a mat, but I find it easier to use a mat when I’m cutting small pieces like this. It’s also a great way to make use of any small scraps of adhesive vinyl you might have. Reveal the grid on the cutting mat and place the designs in the same spots that you place the adhesive vinyl. Load the mat into your machine and cut all the designs at once.
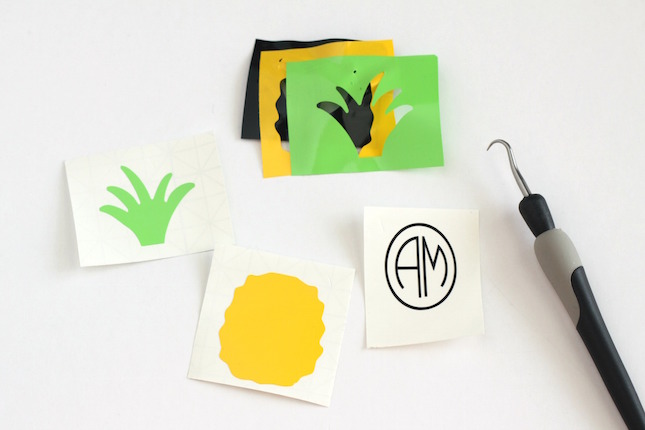
STEP THREE: SEPARATE CUT DESIGNS FROM VINYL
Remove each piece of vinyl from the cutting mat. Use the hook tool to remove the extra vinyl from the designs.
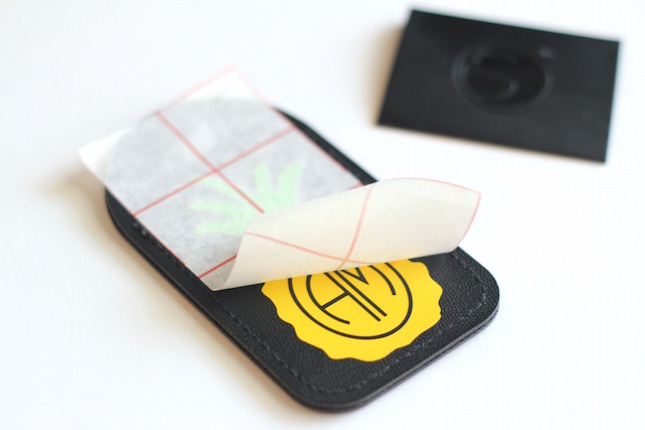
STEP FOUR: ASSEMBLE VINYL DESIGN
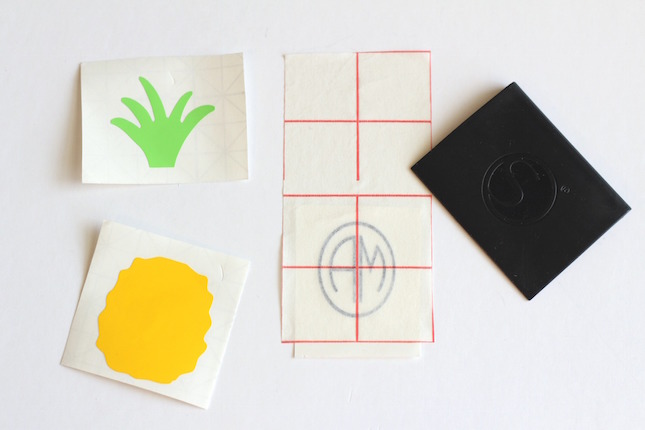
With scissors, cut a piece of transfer paper slightly larger than your finished design and peel the backing off of the transfer paper. Use the grid on the transfer paper as a guide to place the transfer paper centered over the initials design piece, sticky side down. Use a scraper to smooth out the transfer paper on the vinyl design. Then remove the backing from the vinyl initials.
Without removing the initials from the transfer paper, center them over the yellow base of the pineapple, sticky side of the initials down. Smooth the initials against the yellow base with the scraper.
Don’t remove the back of the yellow vinyl yet, but do trim the backing or fold it over so that it doesn’t reach past the top of the yellow pineapple. Attach the green top of the pineapple to the yellow base using the transfer paper, and then smooth out the design. Your assembled pineapple should look like the completed design now.

STEP FIVE: ASSEMBLE TAG
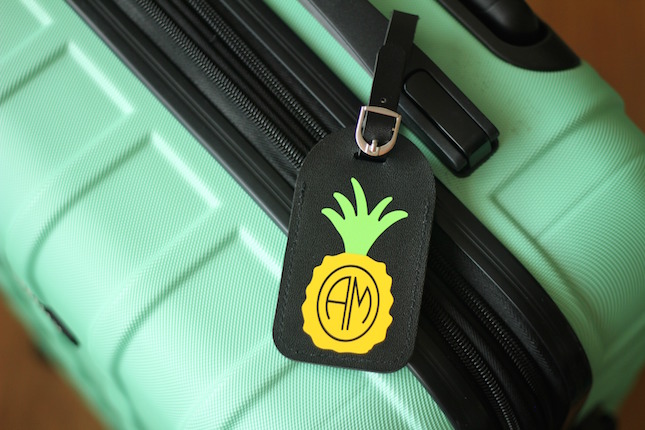
Remove the paper from the back of the yellow and green pieces of vinyl. Place the finished vinyl design on top of the luggage tag, and smooth it out with the scraper. Peel the transfer paper off to reveal your personalized luggage tag.

Your luggage should be easy to spot with its one of a kind tag. In what other ways do you personalize your luggage?

Happy travels!
Nasze Naturalne
September 3, 2025
Your authentic voice really shines through in everything you create and share
Naszenaturalne
September 2, 2025
Really love your style
Kelly Wayment
June 28, 2024
You can use it with vinyl as long as it is smooth and flat to allow the static charge to hold on to it. Rolled vinyl that wants to go back to its rolled shape will not necessarily work well, and it would need to be trimmed to fit the ES mat cutting area.
Kelly Wayment
June 28, 2024
Yes, you can use the heat pen while using the ES mat. 🙂
Yurii
March 2, 2024
Hello. May it be used with heat pen?
Thanks
Jerome
February 24, 2024
Hi, works this with the normal vinyl foils or only with printer papter etc?