My three boys are grown and are no longer living at home. Even though they have all graduated from college, they still like to come home often. And we love it! The days of being able to leave notes in their lunch bags and gym bags are way behind me. But I recently figured out a way to add a special touch when they come home to visit.
Instead of leaving notes on their beds, I thought it might be fun to leave a personal note on their pillowcases. The best way to do this is with my Silhouette machine. 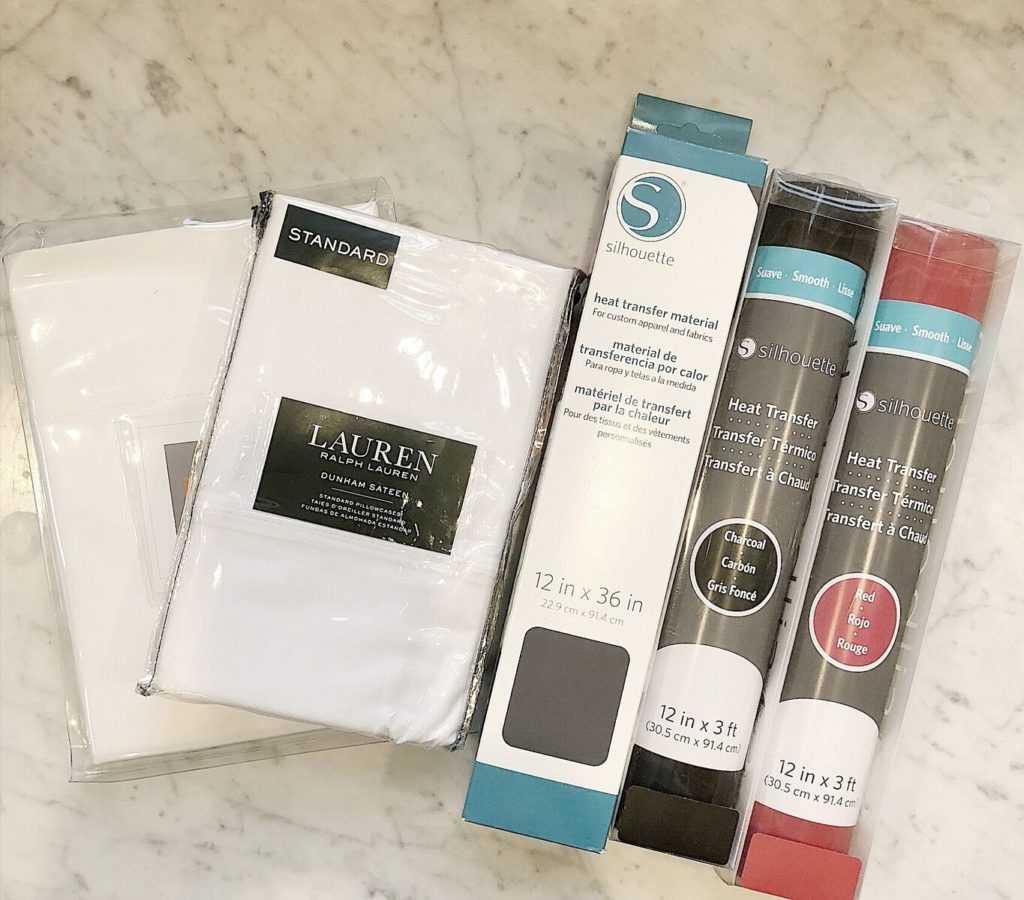
Supplies Needed:
- Silhouette CAMEO® or Silhouette Portrait®
- Silhouette Studio®
- Silhouette Cutting Mat
- Silhouette Cutting Blade
- Silhouette Heat Transfer, Assorted Colors
- Pillowcases
- Iron
Step One: Decide on Your Sayings

- The first step of this project is to come up with the sayings you want to use on the pillows. Try to make them as personal to your family as you can. The ones I came up with are:
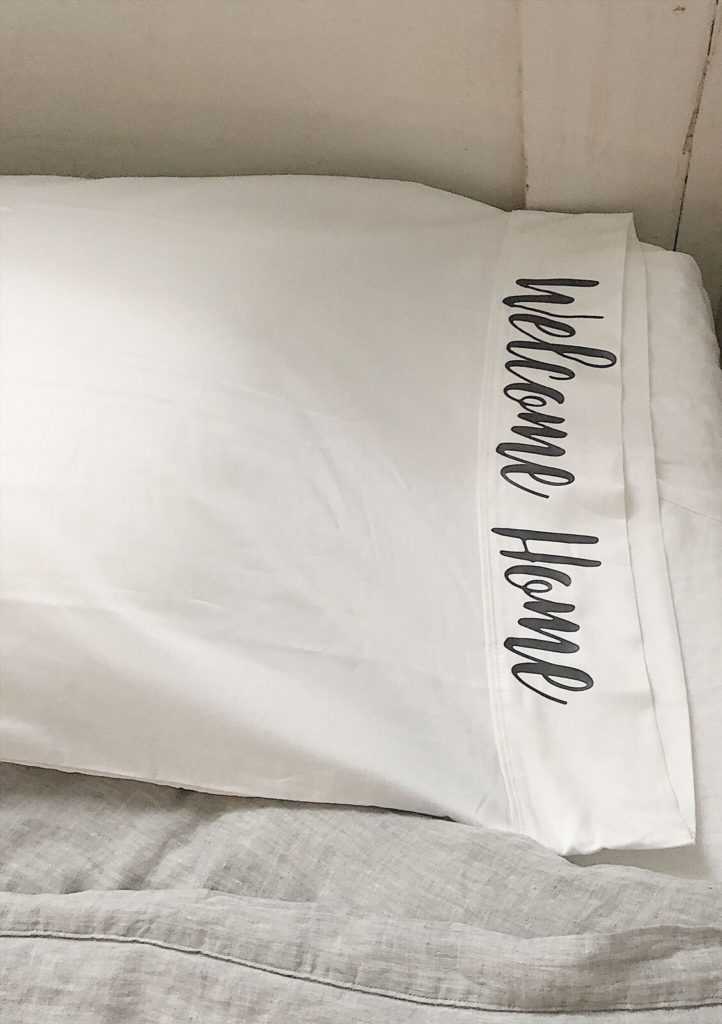
- Welcome Home
- Congratulations!
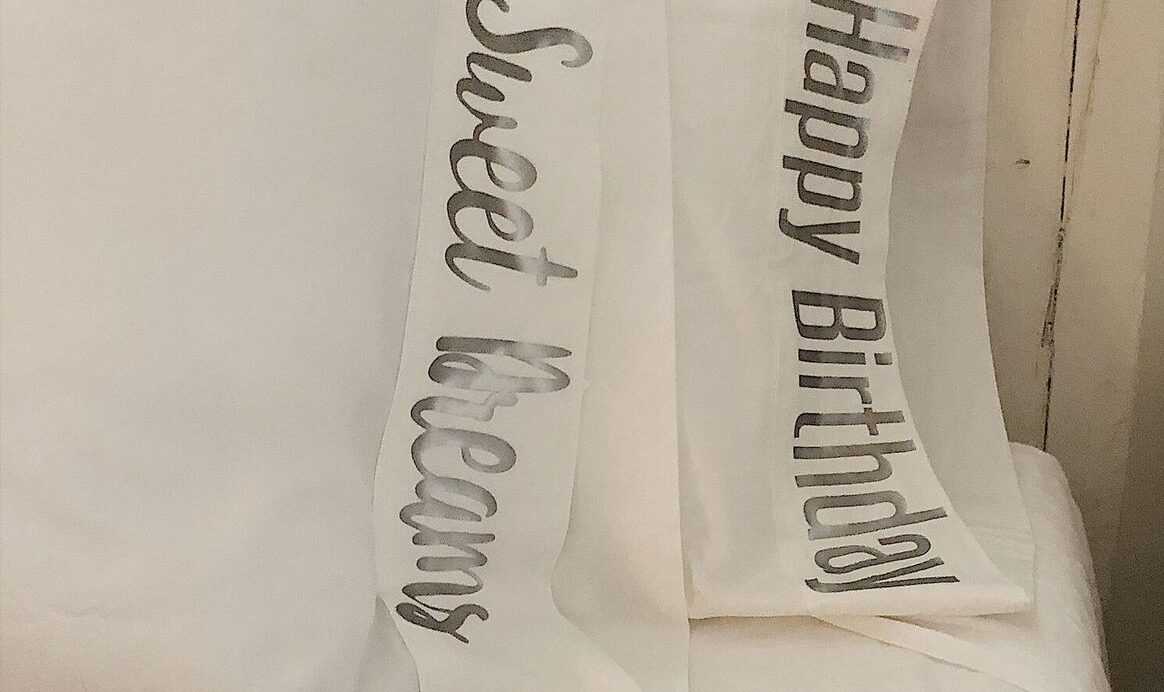
- Sweet Dreams
- Happy Birthday
- I Love You / I Love You More
Step Two: Write Out Your Phrases and Choose the Fonts
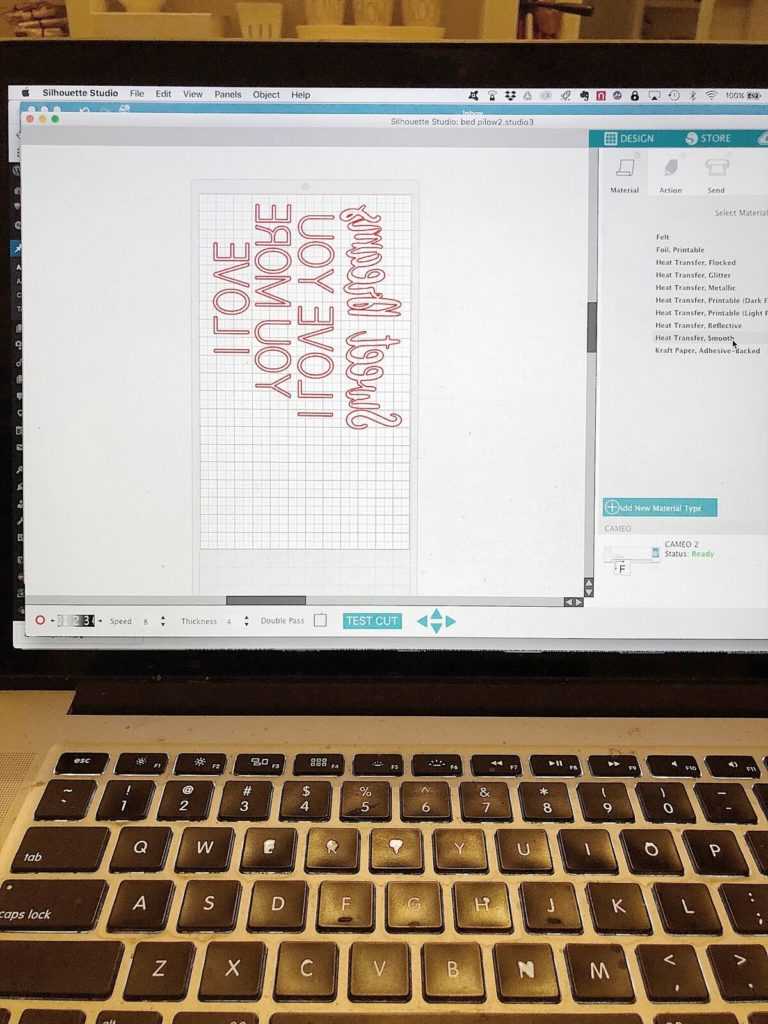
- The next step was to head to my computer and design my patterns in Silhouette Studio.
- Most pillowcases are 21” tall, so I decided to make most of my sayings about 15” long. The width varied between two and three inches.
- I used a few different fonts and designed all of the sayings.
- Welcome Home (Happy Life Font)
- Congratulations! (Passiontea Font)
- Sweet Dreams (Sensation Font)
- Happy Birthday (Steelfish Font)
- I Love You / I Love You More (Apple Gothic Font)
Step Three: Cut and Iron On the Phrases
- The most important step you need to remember when working with a heat transfer design is you need to flip the design horizontally (just go to the main menu and select Object, then Mirror, and then Flip Horizontally). You must do this step or else your designs will be backward.

- Once my designs were complete, I placed the heat transfer material (shiny side down) on my cutting mat and loaded it into the machine. Then I let my Silhouette machine do all of the work.
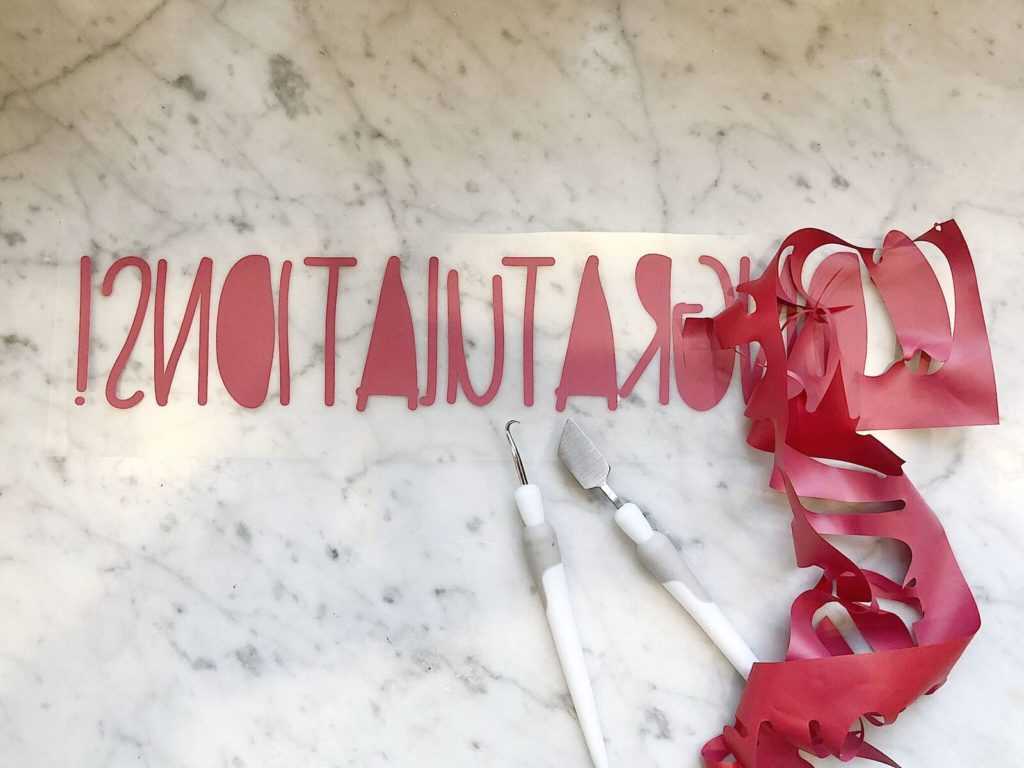
- Once the heat transfer material was cut, I weeded each one to remove the excess material.
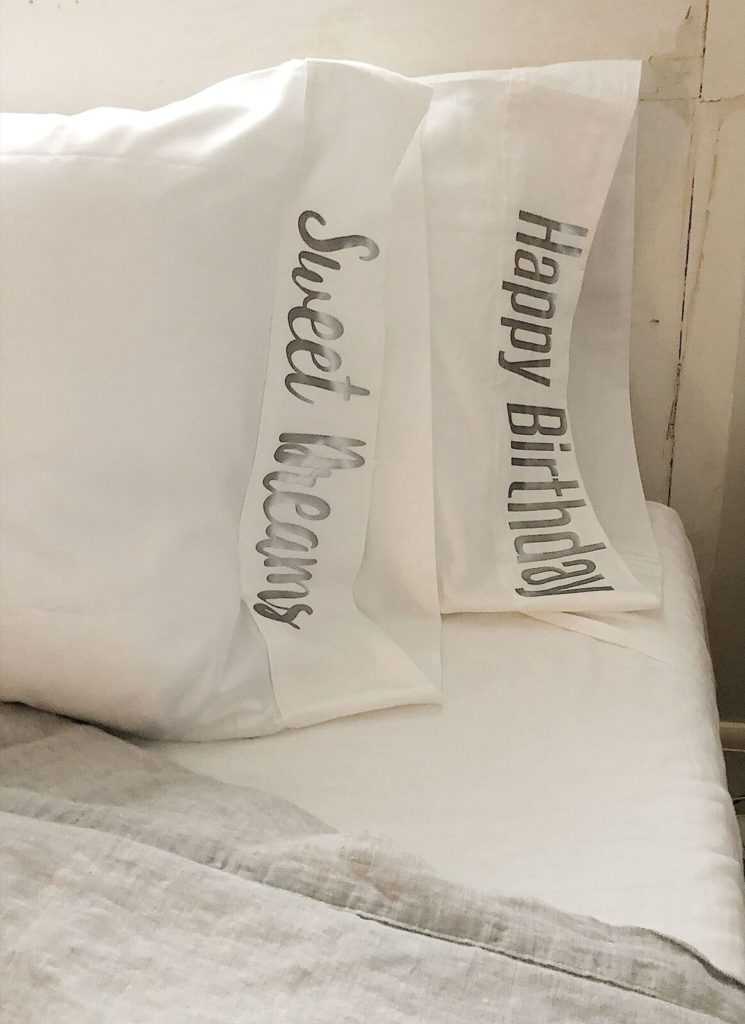
- My last step was to iron each transfer on my new pillow cases.
Kelly Wayment
June 28, 2024
You can use it with vinyl as long as it is smooth and flat to allow the static charge to hold on to it. Rolled vinyl that wants to go back to its rolled shape will not necessarily work well, and it would need to be trimmed to fit the ES mat cutting area.
Kelly Wayment
June 28, 2024
Yes, you can use the heat pen while using the ES mat. 🙂
Yurii
March 2, 2024
Hello. May it be used with heat pen?
Thanks
Jerome
February 24, 2024
Hi, works this with the normal vinyl foils or only with printer papter etc?
Kelly Wayment
February 16, 2024
Once you’ve pushed the mat up against the rollers, just press the “Load” arrow button (bottom right on the display). Does a regular sticky mat load into the machine for you?
Michelle a goodall
January 24, 2024
Hello! I just got my new electrostatic mat and have watched every video i can find on it. However, what i can t find is why it wont feed into my cameo 5/ it slides right up the rollers but wont go any further. and yes- iam pushing the into button. help!