
One easy way to spruce up your home with fall touches is by changing your decorative pillows. We’re going to show you how to create this Thanksgiving-themed pillow cover that you can easily switch out when the season is over. Just follow the instructions below!
Supplies Needed:
- Silhouette CAMEO®
- Silhouette Studio®
- Silhouette Cutting Mat
- Silhouette Cutting Blade
- Silhouette Flocked Heat Transfer – dark red, tangerine, brown, and green
- Silhouette Hook Tool
- Iron or Heat press
- Piece of cloth or parchment paper
- Cushion cover
- Design ID #276068
- Design ID #65897
Step One: Preparing the Design
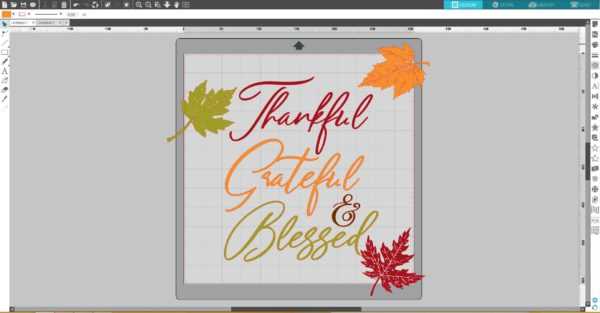
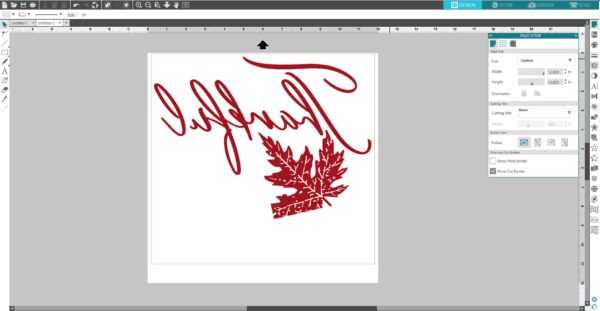
1. Open the Thankful, Grateful, and Blessed (Design ID #276068) and Autumn Leaves (Design ID #65897) designs in Silhouette Studio®. Place the leaves on or near the corners, overlapping the cushion cover edges.
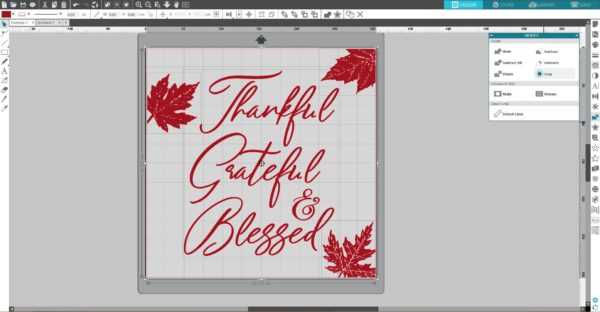
2. Draw a rectangle around the edges of the design. Go to the Modify panel on the right-hand side of the screen. Select all of the designs and click Crop.
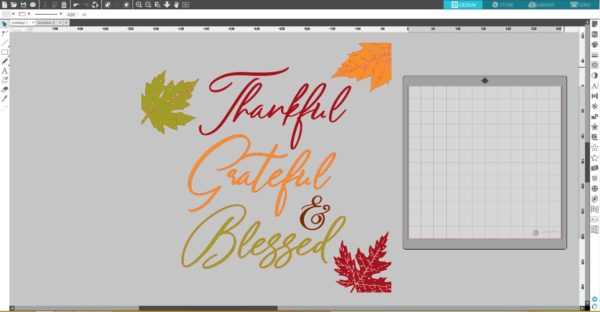
3. Resize your design according the pillowcase size you will use. We will use four different colors of the flocked heat transfer material to decorate the cushion cover.
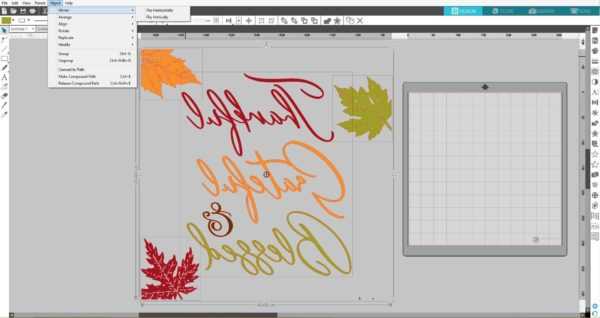
4. Before you send your design to your Silhouette, make sure to MIRROR IT. Don’t forget or else all of your text will be backward. The easiest way to mirror your design is to right-click your design and select “Flip Horizontally.”
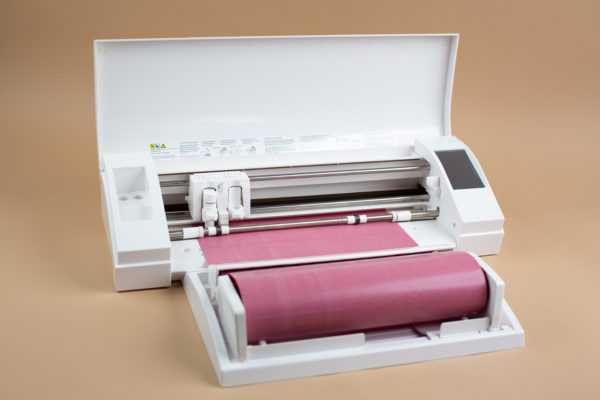
5. Place part of the design that you want to cut from dark red flocked heat transfer on the working space. Go to the Page Setup panel, choose None as your mat option, and adjust the page size.
6. Feed a dark red flocked heat transfer material roll (glossy side down) directly to the Silhouette cutting machine using the roll feeder. If you are using the CAMEO, don’t forget to adjust the rollers according the size of the heat transfer roll you are going to cut.
Step Two: Cutting the Design
1. Under the Send panel, select “Heat Transfer, Flocked” as your material type. Adjust the blade if necessary, and click Send. Silhouette Studio® will ask you if you need to mirror your design. Since we already did, we can click Send As-Is when the message pops up. Tip: If you choose to have the software mirror the design for you, it will cut the entire page in reverse (not just the designs in reverse), so it’s important to have your page size set to match your actual material size if you go with that option.
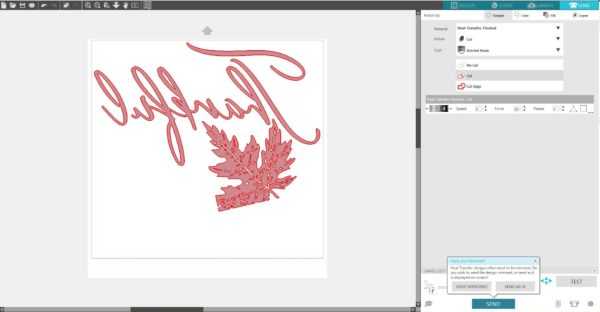
2. Once the image is cut, select Unload on your machine and remove the heat transfer from the machine.
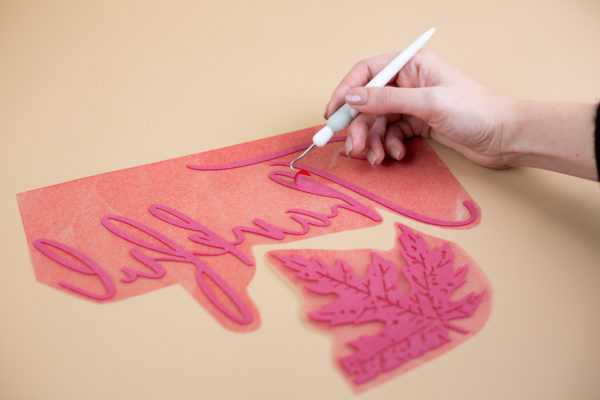
3. Weed out the excess heat transfer from your design using your Silhouette hook tool. Repeat this process for each color of the heat transfer you cut.
Step Three: Applying Heat Transfer on the Cushion Cover
1. After the design is weeded, place it on your cushion cover (plastic side up).

2. Use an iron (or a heat press) to adhere the heat transfer. The iron should be set to no steam on a cotton setting. It shouldn’t be set higher than 300 degrees Fahrenheit. We recommend using a piece of light-weight fabric between the iron and the heat transfer.
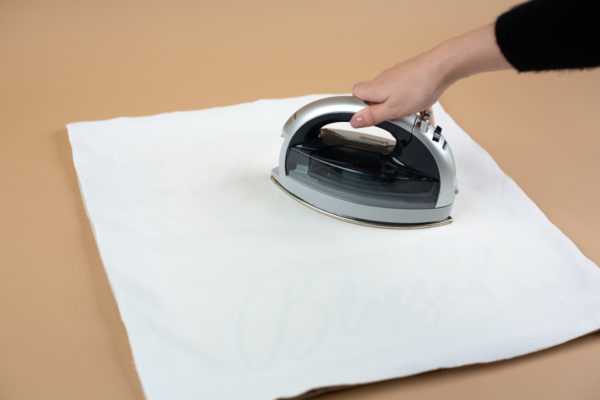
3. Once the design has cooled, peel away the clear plastic liner. If the heat transfer material continues to stick to the liner, then lay it back down, replace the protective sheet or cloth, and iron some more.
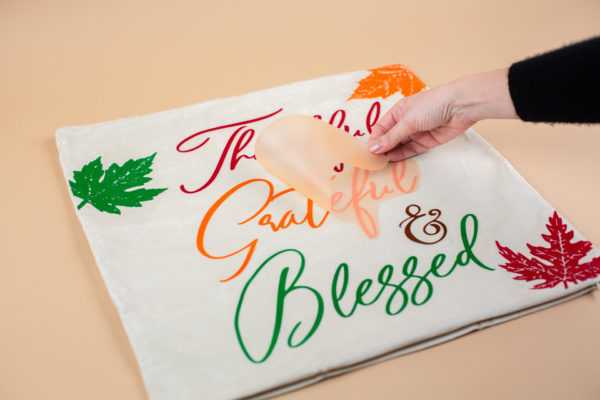
That’s it! Our cushion cover is decorated for Thanksgiving!

The flocked heat transfer has a nice fuzzy texture, so it makes a great customization option if you’re looking to dress up some pillow covers. Your guests will be very impressed!